Table of Contents
Advertisement
Operating Instructions
<Basics>
Installation Instructions provided
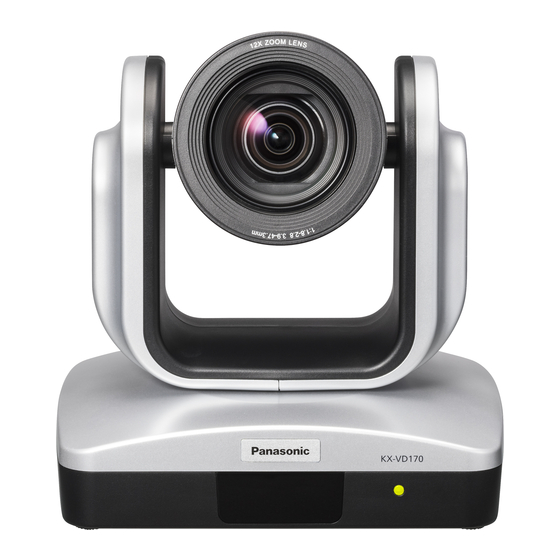
HD Communication Camera
KX‑VD170, KX‑VD170SX
Model No.
Before operating this product, please read the instructions carefully and save this manual for future use.
For instructions on how to operate this HD Communication Camera and
how to establish its settings, refer to the operating instructions of the HD
Visual Communication Unit to be connected.
Advertisement
Table of Contents

Related Manuals for Panasonic KX-VD170


Summary of Contents for Panasonic KX-VD170
- Page 1 Operating Instructions <Basics> Installation Instructions provided HD Communication Camera KX‑VD170, KX‑VD170SX Model No. Before operating this product, please read the instructions carefully and save this manual for future use. For instructions on how to operate this HD Communication Camera and how to establish its settings, refer to the operating instructions of the HD Visual Communication Unit to be connected.
-
Page 2: Safety Precautions
For use only with power supply Panasonic, PNLV6508. UL listed model No.: KX‑VD170 indicates safety information. -
Page 3: Important Safety Instructions
Safety precautions Safety precautions IMPORTANT SAFETY INSTRUCTIONS Read these operating instructions carefully before using the unit. Follow the safety instructions on the unit and the applicable safety instructions listed below. Keep these operating instructions handy for future reference. 1) Read these instructions. 10) Only use attachments/accessories specified by the manufacturer. - Page 4 A replacement fuse cover can be purchased from your local Panasonic dealer. IF THE FITTED MOULDED PLUG IS UNSUITABLE FOR THE AC OUTLET IN YOUR PREMISES, THEN THE FUSE SHOULD BE REMOVED AND THE PLUG CUT OFF AND DISPOSED OF SAFELY.
-
Page 5: Table Of Contents
Contents Safety precautions ............2 Connections ..............15 Connections to the HD Visual Communication Unit Before use ................. 6 and AC adaptor ............15 Overview ................ 6 How to turn the power on and off ......... 16 Concerning the HD Visual Communication Unit .... 6 Turning the power on ........... -
Page 6: Before Use
KX‑VC2000, KX‑VC1300A, KX‑VC1600A, Disclaimer of warranty KX‑VC1000SX, KX‑VC1300SX, KX‑VC1600SX, KX‑VC2000SX IN NO EVENT SHALL Panasonic Corporation BE LIABLE Software File Version 4.52 or later TO ANY PARTY OR ANY PERSON, EXCEPT FOR REPLACEMENT OR REASONABLE MAINTENANCE OF THE PRODUCT, FOR THE CASES, INCLUDING BUT NOT ... -
Page 7: Characteristics
Characteristics 1/2.8-type CMOS sensor and high-performance 12 zoom lens featured p p A 1/2.8‑type full HD CMOS sensor and DSP (digital signal processor) are incorporated. High‑quality pictures are obtained by video processing in many different kinds of ways. p p In addition to its optical 12 zoom lens, the unit comes with a 10... -
Page 8: Installation Precautions
Installation precautions In addition to heeding the points presented in the “Safety precautions”, observe the following precautions as well. Do not install or use the unit in the following kinds of Ensure that the installation work complies with the locations. technical standards governing electrical equipment. - Page 9 Installation precautions Use the dedicated AC adaptor and power cable provided If there is a possibility of noise interference with the unit. Either wire the cables so that the power cable (ceiling light Connect the AC adaptor and power cable to the power inlet cord) of AC 100 V or more, and the signal cable are placed securely.
-
Page 10: Operating Precautions
Operating precautions Shoot under the proper lighting conditions. Operating temperature range To produce pictures with eye‑pleasing colors, shoot under Avoid using the unit in cold locations where the temperature the proper lighting conditions. drops below 0 °C {32 °F} or hot locations where the temperature rises above 40 °C {104 °F} since these Adjust the white balance manually if necessary. - Page 11 Operating precautions Handle the unit carefully. When using the automatic functions Do not drop the unit or subject it to strong impact or p p When using the automatic white balance setting (auto vibration. Doing so may cause the unit to malfunction. tracking white adjustment) function under fluorescent lights, the white balance may vary.
-
Page 12: The Remote Control Through Function
The remote control through function This unit is provided with a remote control through function. This function is used when this unit is installed apart from the HD Visual Communication Unit so that the HD Visual Communication Unit can be operated using this unit’s remote controller signal receiver to receive signals from the remote controller. -
Page 13: Parts And Their Functions
Parts and their functions 1 Remote controller signal receiver Used when the remote control through function (page 12) is used. 2 Status display lamp This lights in the following way depending on the status of the unit. Orange: Standby mode (page 16) Green: Power ON mode (page 16) Red:... -
Page 14: Stand-Alone Installation Procedure
Stand-alone installation procedure Note p p A protective cap is attached to the camera lens. When the installation has finished, remove the protective cap. When installing the unit on a desk Place the unit flat on the surface. Notes p p Install the unit in a stable location which will not be susceptible to shaking. -
Page 15: Connections
Connections Connections to the HD Visual Communication Unit and AC adaptor This unit HD Visual Communication Unit HDMI cable (sold separately) AC adaptor Power cable* * Use the power cable that is suited to your locality. p p For details on how to operate the unit and select its settings, refer to the operating instructions of the HD Visual Communication Unit to be connected. -
Page 16: How To Turn The Power On And Off
How to turn the power on and off Turning the power on p p This unit does not have a power switch. Its power is turned on when power is supplied to the unit. Unit’s power OFF Status display lamp: Off Power is supplied. -
Page 17: Factory Setting
Factory setting Factory settings for the setting items Item Factory setting Brightness Auto White Balance Auto Focus Focus Mode: Auto Backlight Flicker Digital Zoom Pan/Tilt Position: Center Preset number 1‑9 Brightness: Auto White Balance: Auto Home Position* Fixed at preset number 5 * The camera moves to this position first when its power is turned on. -
Page 18: Troubleshooting
Troubleshooting q Operation Symptom Cause and remedial action Reference pages p p Is the power plug securely connected to the AC outlet? ––– No power p p Are the AC adaptor and the power cable connected properly? P.15 p p Is the power on? ... - Page 19 Troubleshooting q Video Symptom Cause and remedial action Reference pages p p Has the unit been connected properly to the HD Visual P.15 Communication Unit? Operating instructions No pictures are of the HD Visual displayed or the Communication Unit: pictures are disturbed p p Has the camera been selected correctly from the HD Visual [Controlling a Communication Unit?
- Page 20 Troubleshooting Symptom Cause and remedial action Reference pages Operating instructions of the HD Visual Communication Unit: The pictures are too p p Adjust the brightness manually. [Controlling a Video light or too dark Camera] > [Changing Video Camera Settings] p p If a subject has suddenly crossed in front of the camera, it may appear slightly distorted because this camera uses a CMOS –––...
-
Page 21: Appearance
Appearance Unit: mm {inch} 180 {7-3/32} 145 {5-23/32}... -
Page 22: Specifications
Specifications GENERAL [Pan-tilt head unit] Pan/tilt operation speed: Ambient operating temperature: Max. 90°/s or more 0 °C to +40 °C {+32 °F to +104 °F} Panning range: ±130° Storage temperature: –20 °C to +50 °C {–4 °F to +122 °F} Tilting range: +90°/–25°... - Page 23 Panasonic Corporation http://www.panasonic.com Panasonic Corporation Osaka, Japan Authorised Representative in EU: Panasonic Testing Centre Panasonic Marketing Europe GmbH Winsbergring 15, 22525 Hamburg, Germany FNe0817‑0 PGQP2500ZA © Panasonic Corporation 2017...