
Related Manuals for Cortelco 9225


Summary of Contents for Cortelco 9225
- Page 1 WNER’S NSTRUCTION ANUAL ID T ALLER ULTI- EATURE ELEPHONE MODEL 9225...
- Page 2 HANK URCHASING 9225 C ID T ALLER ULTI- EATURE ELEPHONE We want you to know all about your new Telephone, how to install it, the features it provides, and the services you can expect from its use. We have included this informa- tion in your Owner’s Instruction Manual.
-
Page 3: Table Of Contents
Table Of Contents IMPORTANT SAFETY INSTRUCTIONS ........ 5 TELEPHONE PART IDENTIFICATION ......... 7 INSTALLATION ................9 BOX CONTENTS ......................9 BATTERY INSTALLATION ..................... 9 DIALING MODE ....................... 9 WALL MOUNT ........................ 9 DESK MOUNT ........................ 10 ANSWERING MACHINE ....................10 RINGER VOLUME ...................... - Page 4 MESSAGE BUTTON ...................... 16 CLEAR MSG BUTTON ....................17 CONTRAST BUTTON ....................17 REPROGRAMMING NETWORK SERVICE BUTTONS ..........17 SPEAKER BUTTON ....................... 17 SPEED DIAL ................17 Entering a number .................... 17 Storing a Caller ID Record or Dialed Call ............17 DIAL A NUMBER FROM MEMORY ................
-
Page 5: Important Safety Instructions
IMPORTANT SAFETY INSTRUCTIONS Always follow basic safety precautions when using your telephone equipment to reduce the risk of fire, electrical shock, and injury. Read and understand all instructions in the Owner’s Instruction Manual. Read all warnings and follow all instructions marked on the product. Unplug this product from the wall outlet before cleaning. - Page 6 Unplug the telephone from the wall outlet and refer servicing to qualified service personnel under the following conditions: • When the line cord is frayed or plugs damaged. • If liquid has been spilled into the telephone. • If the telephone has been exposed to rain or water. •...
-
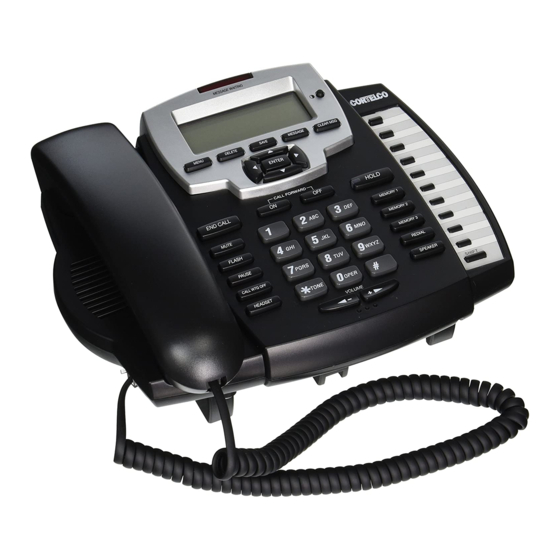
Page 7: Telephone Part Identification
TELEPHONE PART IDENTIFICATION 1 Headset Button 14 Clear M essage Button 2 Call Waiting Off Button 15 Enter Button 3 Pause Button 16 LCD Contrast Button 4 Flash Button 17 M emory Buttons 5 M ute Button 18 Hold Button 6 End Call Button 19 Line 1 Button 7 Call Forward On/Off Button... - Page 8 TELEPHONE PART IDENTIFICATION Back and Side 1 D a t a J a c k ( L in e 2 /D a t a J a c k ) 2 R in g e r 1 V o lu m e S w it c h 3 R in g e r 2 V o lu m e S w it c h 4 L in e 1 /2 J a c k 5 A C A d a p t e r J a c k...
-
Page 9: Installation
INSTALLATION BOX CONTENTS Verify that the following items are in the box. • Telephone • Handset • Handset Cord • Line Cord • 3 AA Batteries • Power Adapter • Instruction Manual BATTERY INSTALLATION The 9225 telephone requires 3 AA size 1.5 V batteries for the LCD display. To install the batteries, follow the steps below: Remove the battery cover. -
Page 10: Desk Mount
DESK MOUNT Press in the two areas shown below to release the desk stand. Rotate the desk stand into the desk mounting position as shown below. Connect the power adapter and the line cord. See Steps 2 and 3 in the DESK MOUNT instructions. -
Page 11: Unit Setup
UNIT SETUP Use MENU to enter the setup screen. Press MENU. PHONE BOOK appears on the display. The Phone Book is covered in a later section. Press . When CALL WAITING appears, press ENTER. Then use to toggle this feature ON or OFF. If this is set to OFF, Caller ID information will not be displayed for a Call Waiting call. - Page 12 Press MENU. Then press until SET CONTRAST appears. Press ENTER to set the contrast. Use to set the contrast. There are 8 choices available. Press ENTER to exit to idle screen. Press MENU. Then press until BACK LIGHT appears. Press ENTER. The display will show BACK LIGHT TIME.
-
Page 13: Basic Operation
BASIC OPERATION RECEIVING A PHONE CALL When the phone rings, lift the handset, press HEADSET or press SPEAKER to begin your conversation. You can adjust the volume of the caller’s voice by pressing the Volume Buttons on the base of the telephone. PLACING A PHONE CALL Lift the handset, press HEADSET or press SPEAKER and wait for a dial tone. -
Page 14: Feature Buttons
FEATURE BUTTONS END CALL BUTTON To end a conversation, press END CALL. In handset mode, the phone will go on-hook for 2 seconds and then go off hook again. This allows you to make another call. In speaker or headset mode, the phone will go on hook. MUTE BUTTON Press MUTE to speak without the person on the phone hearing your conversation. -
Page 15: Making A Call
Making A Call Press and release HEADSET. The 9225 selects Line 1 by default. To place a call on Line 2, press LINE2 before pressing HEADSET. When you hear a dial tone, dial the number or press a memory button. The number will appear on the display window. When your party answers, adjust the volume of the conversation by pressing the Volume Buttons on the base of the telephone. -
Page 16: Redial Button
REDIAL BUTTON To redial the last number dialed, come off hook and press REDIAL. The selected number (32 digits maximum) will be redialed. To review dialed numbers. While on hook, press REDIAL. The display will show the last number dialed. to scroll through the list of dialed numbers. -
Page 17: Clear Msg Button
CLEAR MSG BUTTON In most cases the message waiting indicators will go out shortly after you retrieve your messages. If they do not, press CLEAR MSG to clear these indicators manually. CONTRAST BUTTON Contrast can be altered when on hook by pressing the Contrast button on the display. There are 8 contrast levels. -
Page 18: Review The Contents Of A Memory Button
REVIEW THE CONTENTS OF A MEMORY BUTTON While on hook, press the memory button or press SHIFT and then press the memory button. The display will show the memory contents. To dial this number, go off hook. STORE A CALLER ID RECORD TO A MEMORY BUTTON to display the number. -
Page 19: Dialing From The Phone Book
DIALING FROM THE PHONE BOOK To dial from the phone book, first display the desired number as described above. Then come off hook and the number will be dialed. DELETING A PHONE BOOK ENTRY With the number displayed, press DELETE. The display will show “DELETE?” Press DELETE again to delete the entry. -
Page 20: Private Calls
PRIVATE CALLS The message below will display when a caller has blocked delivery of his name or number. CALLER ID ON CALL WAITING Call-waiting service alerts you to a new call by playing a tone while you are on a call. Call Waiting Caller ID not only tells you there is another call waiting, but lets you know who the caller is before the call is answered. -
Page 21: Troubleshooting
TROUBLESHOOTING If you have any problems with your telephone service, determine if the problem is with your unit or the telephone company lines BEFORE CALLING THE TELEPHONE COMPANY. Always disconnect the power adapter, telephone line and batteries and reinstall them before calling for service. The telephone company may charge you for a service call if the problem is caused by your telephone. -
Page 22: Telephone Repair
DO NOT ATTEMPT TO REPAIR THIS PRODUCT YOURSELF. Telephones manufactured by CORTELCO must be returned to us for repair. You can return your telephone to CORTELCO for repair or replacement in accordance with our LIMITED WARRANTY. CORTELCO warrants THIS PRODUCT against defects in material and workmanship in accordance with our LIMITED WARRANTY. -
Page 23: Fcc Information
FCC INFORMATION Part 68 is a Federal regulation which requires equipment to be tested and registered with the FCC prior to its connection to the network. This equipment complies with Part 68 of FCC rules. On the bottom of the telephone is a label that contains, among other information, the FCC Registration Number and the Ringer Equivalence Number (REN) for this equipment. -
Page 24: Limited Warranty
LIMITED WARRANTY If you purchased this product new in the U.S. or Puerto Rico, CORTELCO warrants it against defects in material and workmanship for a period of one (1) year from the date of original purchase. This warranty is in lieu of all other express warranties.