
Related Manuals for Dual AXXERA XDMA7800


Summary of Contents for Dual AXXERA XDMA7800
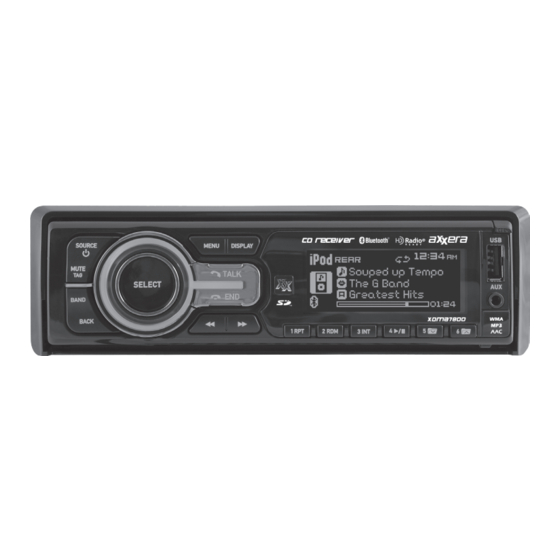
- Page 1 CD Receiver Installation & Owner's Manual 2 USB Ports iPod®/iPhone®/Flash Drive SDHC Supported XDMA7800 MP3/WMA/AAC Playback HFP/A2DP/AVRCP/PBAP CD-R/RW Compatible 3.5mm Input...
-
Page 2: Getting Started
XDMA7800 Preparation Please read entire manual before installation. Before You Start • D isconnect negative battery terminal. Consult a qualified technician for instructions. • A void installing the unit where it would be subject to high temperatures, such as from direct sunlight, or where it would be subject to dust, dirt or excessive vibration. Getting Started • Remove trim ring from unit, • Insert the supplied keys into the slots as shown, and slide the unit out of the mounting sleeve. • Install mounting sleeve into opening, bending tabs to secure. • Connect wiring harness and antenna. Consult a qualified technician if you are unsure. • Certain vehicles may require an installation kit and/or wiring harness adapter (sold separately). KEYS • Test for correct operation and slide into mounting sleeve to secure. -
Page 3: Wiring Diagram
XDMA7800 Wiring Diagram RCA Preamp Output BLACK Female USB Input Connections Rear USB Connection SUBWOOFER BLUE 10-pin Female Mini-DIN REAR HDM90 Connection (sold separately) FRONT FRONT REAR SUB/W L-CH R-CH REMOTE IN Antenna Optional USB Extension Cable Connector (Included) Steering Wheel Interface Input PAC SWI-PS connection (sold separately) 3.5mm... - Page 4 XDMA7800 Receiver - Controls Control Function Description Source/Power Changes to another mode of operation. Hold down to power off/on. Mute/Tag Mutes the audio output. Activates iTunes Tagging (HDM90 required). Select Activates music searches. Confirms menu options. Menu Accesses configuration options within the main menu. Bluetooth Talk Answers phone calls. Accesses Number Dial, Recent Calls and Redial functions. Display Cycles displayed information. Hold to set the clock. Front USB Port Connect a USB flash drive, iPod or iPhone device. Open Opens the front panel to access the reset button, CD and SD card slots. Auxiliary Input Connect a 3.5mm cable from the headphone output of an MP3 player. Preset 6/Folder Up Recall/Set preset 6. Changes to the next folder. Preset 5/Folder Down Recall/Set preset 5. Changes to the previous folder. Preset 4/Play/Pause Recall/Set preset 4. Cycle between pause/play. Preset 3/Intro Recall/Set preset 3. Intro menu (plays the first 10 seconds of each song). Preset 2/Random Recall/Set preset 2. Random menu (shuffles songs in a random playback order). Preset 1/Repeat Recall/Set preset 1. Repeat menu (repeat the current song, folder or album). Track/Tune Up Changes to the next song or radio station. Hold to fast forward or seek up. Bluetooth End Call Ends the current phone call. Hold to disconnect from Bluetooth.
- Page 5 XDMA7800 IR Remote - Controls Source / Power ( ) Key 9 / # Key Select End Call Volume Up Key 0 / Display Menu Talk Tune / Track Up Key 7 / * Key Volume Down Key 8 / Band Mute / Tag Preset 4 / Play / Pause Preset 2 / Random Preset 1 / Repeat Preset 3 / Intro Back Preset 6 / Folder Up Tune / Track Down Preset 5 / Folder Down...
-
Page 6: General Operation
XDMA7800 General Operation Faceplate Removal Press RELEASE to fold down the front panel. While pushing the front panel left, pull the right side away to remove. To reinstall, slide in bottom left side, then snap left side up and into place. Press or any other button to turn unit on. Press and hold Power On/Off to turn unit off. Source Press SOURCE to select between AM/FM, CD, auxiliary input, operation of iPod, USB, SD and Bluetooth modes. Modes of operation are indicated in the display. Note: CD mode will not appear unless a CD is inserted. Operation of iPod mode will not appear unless an iPod device has been connected. USB and SD modes will not appear unless a USB device has been connected or SD card has been inserted. Note: HD Radio mode will replace AM/FM mode when the HDM90 is connected. Note: iPod and iPhone devices may be connected to the front and/or rear USB ports. Steering Wheel The steering wheel interface input located on the back Interface Input of the head unit allows connection to the PAC (Pacific Accessory Corporation) SWI-PS interface module (sold separately). Visit www.pac-audio.com for details. -
Page 7: Setup Menu
XDMA7800 Setup Menu Press MENU to access the setup menu, then turn the volume knob to cycle through menu categories: Audio, Color, Display, Tuner, iPod, Bluetooth and General. • When desired category appears in the display, press SELECT, then rotate the volume knob left/right to cycle through the options in each category. • When desired option appears in the display, press SELECT, then rotate the volume knob left/right to adjust or activate desired function. • Press BACK to return to the previous menu, or exit the menu while the main menu is displayed. Audio Menu Press MENU, then press SELECT when Audio is highlighted to enter the Audio Menu. Rotate the volume knob to cycle through the following options. Function Options Action Level Adjust the frequency bass ouput from -6 to +6. Adjust the bass quality factor: 0.7, 1.0, 1.4, 2.0. Quality Factor Bass • Narrows/expands the bandwidth around the bass center frequency. - Page 8 XDMA7800 Setup Menu Color Menu Menu Options Function Sets the unit to rotate between all illumination colors automatically. Setting a preset or user Auto Change color will cancel the automatic color change. Adjust the color of the button and LCD illumination between 31 preset colors. • Off: sets the color to white. (default) • Day/Night: sets the color to change to different colors during the day or night. The day Set Color and night colors must be set in the Day/Night color menu below. • User: sets the color to the custom color. The custom color must be set in the menu below. • 1-31: choose from any of the 31 preset colors. Individually select the level of Red, Green and Blue from 0 - 16. Any combination of these colors Set Custom can be selected. Color Important Note: Setting each Red, Green and Blue levels to 1 will turn off set turn off the illumination for the LCD and buttons. If this color is set, pressing RESET may be required. Sets inidvidual colors for the day or night. (The clock must be set for proper function). Set Day/Night • Day Color: sets the daytime color to a preset or custom color. Color • Night Color: sets the nighttime color to a preset or custom color.
- Page 9 XDMA7800 Setup Menu HD Radio™ Tuner Menu When the optional HDM90 HD Radio tuner (sold separately) is connected, the following additional menu options will appear in the Tuner menu. Menu Function Options Limits the seek and auto station store functions to only access HD Radio channels. HD Seek • On: Seek and Auto Station Store will only access digital HD Radio channels. • Off: All analog and digital channels will be accessed. (default) Press SELECT to erase all Tags that are saved in memory. (Does not affect Tags that have Delete Tags been transferred to an iPod device.) Enables/disables the digital HD Radio channel reception. Tuner Mode • Analog: Limits the reception to standard analog channels only. • Digital: Allows both digital and analog channels to be received. (default) iPod Menu Menu Function Options Switches the control between the head unit and the iPod/iPhone device. • Full: Enables total control of the iPod device from the XDMA7800. (default) iPod Control • Manual: Releases the control of the iPod device. Music searches and track selections must be done from the device. The iPod device will continue to charge.
- Page 10 XDMA7800 Setup Menu General Menu Menu Options Function Enables/disables the clock to be displayed on the LCD when the XDMA7800 is powered Clock off using the power button. Enables/disables the 3.5mm auxiliary input on the front panel. Auxiliary • On: The auxiliary input is enabled. (default) • Off: Auxiliary input mode is removed from the list of available modes. When enabled, every button press will output a beep tone. Beep • On: Every button press will output a single beep tone. • Off: Only press-and-hold button functions will output a double beep tone. (default) Sets the XDMA7800 to power-on to the same volume level every time. Prog. Volume • Off: The unit will turn on at the last volume level that was set. (default) • 1-30: Choosing a volume level will program the unit to always turn on at that volume. Power-on Allows the "Good Morning/Afternoon/Evening" message that may be shown when the Message unit is powered on. Demo mode Enables/disables the demonstration mode for display purposes. Adjusts the time for the internal clock. Set Clock • Press to adjust the hours. • Press to adjust the minutes. AM/FM Tuner Operation Seek Tuning Press TUNE or TUNE...
- Page 11 XDMA7800 HD Radio™ Tuner Operation (HDM90) Connecting the HDM90 HD Radio operation requires connecting the HDM90 (sold separately) HD Radio tuner (sold separately). Refer to the HDM90 instructions for connection details. Display When the unit is tuned to an HD Radio station, press DISP to toggle the display between the artist/title and program type/station name. HD Radio Tuning Refer to the instructions for seek, manual and scan tuning on page 10. When HD Radio station is selected, an HD Radio logo will begin to flash on the display. After about five seconds, HD or HD1 will illuminate after the radio frequency. • If "HD" appears, the radio station is broadcasting a higher quality sound. No additional stations are available. • If "HD1" appears, additional multicast channels (HD2 and/or HD3) are available. Press TUNE to tune to other available multicast channels. Auto Station Store While in HD SEEK mode, the AUTO STORE menu option will automatically store only HD Radio stations, beginning from the lowest frequency.
- Page 12 XDMA7800 iTunes Tagging Operation (HDM90) ® Overview The iTunes Tagging feature of the XDMA7800 requires the optional HDM90 module (sold separately). Once connected, the HDM90 allows the user to "Tag" songs that are playing on HD Radio™ stations and enables them to be purchased later through iTunes. With the touch of a button the unit will remember the title and artist song information, and then transfer that information to your iPod device the next time you connect it to the XDMA7800. A new list called "Tagged" will appear in iTunes, giving you the option to purchase each song. Tagging Music Step 1 Tune to an HD Radio station. The HD logo will illuminate along with a TAG icon - indicating that a digital station is tuned and the tag is available. Step 2 Press and hold the MUTE/TAG button. The Tag information will be saved to internal memory. After tagging is completed, a confirmation will be displayed. The song information will be saved in memory until an iPod device is plugged in. Up to 64 Tags can be saved before they must be transferred or deleted.
-
Page 13: Troubleshooting
XDMA7800 iTunes Tagging Operation (HDM90) ® Troubleshooting Description Displayed Message There is a compatibility issue with the iPod device that is connected. Check the list of compatible iPod devices below. CHECK iPod VER If the attached iPod device is compatible, update the firmware to the latest version using iTunes. Tags are being sent to the iPod device. This process can take several SENDING TAGS minutes depending on the number of Tags being sent. There is not enough space on the connected iPod device to transfer the iPod FULL iTunes Tags. Free up space using iTunes. Connection error. Ensure the iPod device is powered on and reconnect the TRANSFER FAILED iPod device until a TAGS SENT confirmation is displayed. The same song has already been tagged from the same radio station, and is currently saved in memory. The same song cannot be tagged twice - ALREADY TAGGED unless the song is tagged on a different radio station, the Tags are sent to an iPod device or the tags are erased. The internal memory of the HDM90 will hold Tags. An iPod device MEMORY FULL must be connected to transfer the Tags, or the Tags must be deleted CONNECT iPod before more songs can be tagged. -
Page 14: Cd Player Operation
XDMA7800 CD Player Operation Insert CD Fold down front panel to access the CD slot. With the label facing up, insert a standard size CD into the CD slot. The CD will automatically begin playback. Eject CD Fold down front panel and press EJECT to eject the CD. The unit will change to previous mode of operation. If the disc is not removed within 10 seconds, the unit will reload the disc. The unit does not have to be turned on to eject CD. Track Select Press TRACK to skip to the beginning of the next track. Press TRACK to return to the beginning of the current track. Pressing TRACK again skips to the beginning of the previous track. Fast Forward/Reverse Press and hold TRACK or TRACK to fast forward or reverse a track. / II to temporarily stop CD playback. Pause Press / II again to resume playback. Press Intro Press INT to enter the Intro menu, then turn the volume knob to select one of the following options:... - Page 15 XDMA7800 CD Player Operation - MP3/WMA/AAC Playing an MP3/WMA/ When an MP3/WMA/AAC encoded disc is first inserted, AAC Disc “READING” will appear in the display. Depending on the number of files and folders, this may take several seconds. Folder Access Press to select the next folder. Press to select the previous folder. *Folder access is only available on discs recorded with more than one folder. Repeat Press RPT to enter the Repeat menu, then turn the volume knob to select one of the following options: • ALL SONGS - Plays all tracks on CD. • CURRENT SONG - Continuously repeats selected track. • CURRENT FOLDER - Continuously repeats all files in the folder. Random Press RDM to enter the Random menu, then turn the volume knob to select one of the following options: • OFF - Cancels the RDM function. • ALL SONGS - Plays all tracks in random order. • CURRENT FOLDER - Plays all tracks in the folder in random order.
-
Page 16: Displayed Information
XDMA7800 CD Player Operation - MP3/WMA/AAC Displayed Information Press DISPLAY to select between displayed information such as ID3 tag information and file/folder names. Display layout for MP3/WMA/AAC CD's Mode Track Number Clock Track 15/100 Song Title Song Title Artist Name File Type Artist Name Album Name Album Name Track Progress Elapsed Time File/Folder Search MP3/WMA/AAC CD mode features a file and folder search mode. This search allows navigating through folders to find a specific file for playback. To begin searching, press SELECT. "CD SEARCH" will appear on the top of the display, then a list of the files in the current folder will be displayed. The current folder name will be shown on the top of the list, as seen below. - Page 17 XDMA7800 CD Player Operation - MP3/WMA/AAC File/Folder Search (continued) Search menu navigation Root Press Press SELECT BACK Folder 1 Folder 2 File 1 File 2 File 3 File 4 File 5 File 6 SELECT Turn the volume knob Controls for File/Folder search: • Volume knob: Turn to cycle through the list of folders/files in the current folder. • SELECT: View the contents of the highlighted folder, or to play the highlighted file.
- Page 18 XDMA7800 CD Player Operation - MP3/WMA/AAC File/Folder Compatibility and Support • CD-ROM (ISO), CD-R, CD-RW • CD-DA (digital audio) Compatible File Types • MP3 data (.mp3) • WMA data (.wma) • AAC data (.m4a) • DRM protected files • WMA lossless • Apple lossless Incompatible File • WMA Pro Types • MP3 Pro • MP3 playlists • WAV lossless • ISO9660 level 1 & level 2 Recording Format • Yellow book MODE 1 & MODE 2 FORM 1 Compatibility • Multi session • MP3: 8kHz - 48kHz Sampling Frequency • WMA: 32kHz - 48kHz Rate Compatibility • AAC: 8kHz - 48kHz • MP3: 32kbps - 320kbps...
- Page 19 XDMA7800 Operation of iPod/iPhone Connecting an iPod/iPhone Device USB Connection Using the "dock connector to USB" sync cable (provided with the iPod/iPhone device), plug the USB cable into one of the XDMA7800's two USB ports. Once connected, playback will begin automatically. You may connect the iPod/iPhone device to the front USB port, rear USB port, or to both ports. A USB extension cable is included for better rear USB port access. Controlling a Device: Full Control When the control of iPod/iPhone feature is set to "FULL" in the iPod Menu, use the following functions to control the device: Song Select Press to skip to the beginning of the next song.
- Page 20 XDMA7800 Operation of iPod/iPhone Controlling a Device: Full Control - Music Search The XDMA7800 features a powerful music search that simplifies the searching process. Follow the steps below to find the desired song: Begin Searching Press SELECT to begin the search. The main search menu will appear. Select a Category Turn the volume knob to select between artist, album, song, playlist, podcast, audiobook and genre.
-
Page 21: Displaying Information
XDMA7800 Operation of iPod/iPhone Controlling a Device: Manual Control When the control of iPod/iPhone feature is set to "MANUAL" in the iPod Menu, use the following functions to control the device: Manual Control for iPod When "MANUAL" control is selected from the iPod Menu, the iPod or iPhone device can be controlled directly from the device's interface. All functions except for volume can be used from the iPod or iPhone device. Basic Head Unit Control In addition to manual control of the iPod/iPhone device, the following basic functions are still active: Song Select... - Page 22 XDMA7800 USB/SD Card Operation Connect a USB Device To play MP3/WMA/AAC files from most mass storage (sold separately) devices,connect a device to one of the XDMA7800's two USB ports (front or rear). Connect an SD Card To play MP3/WMA/AAC files from an SD Card, insert an (sold separately) SD card into the XDMA7800's SD card slot, located behind the front panel. Insert the SD card with the label facing to the left, and press the card until it clicks into place. Remove the SD card by pressing in until it clicks, then pull to remove. Playing Music When a USB or SD card device is first connected, playback will begin momentarily. Depending on the number of files and folders, it may take several seconds for the device to begin playing. If no valid MP3/WMA/AAC files are detected, “NO FILE” will be displayed and the last mode will be resumed. Track Select Press TRACK to skip to the beginning of the next track. Press TRACK to return to the beginning of the current track. Pressing TRACK again skips to the beginning of the previous track.
- Page 23 XDMA7800 USB / SD Card Operation File and Folder Search USB and SD card modes features a file and folder search mode. This search allows navigating through folders to find a specific file for playback. Press SELECT to begin searching. A list of the files in the current folder will be displayed. The current folder name will be shown on the top of the list, as seen below. Current Folder Subfolder 1 File 1 File 2 Search menu navigation Root Press Press SELECT BACK Folder 1 Folder 2 File 1 File 2 File 3 File 4 File 5 File 6...
- Page 24 XDMA7800 USB / SD Card Operation Displayed Information Press DISPLAY to select between displayed information such as ID3 tag information and file/folder names. Display layout for MP3/WMA/AAC USB and SD Card Devices Mode Track Number Clock Track 15/100 Song Title Song Title Artist Name Artist Name Album Name Album Name Track Progress Elapsed Time...
- Page 25 XDMA7800 USB / SD Card Operation File/Folder Compatibility and Support • CD-ROM (ISO), CD-R, CD-RW • CD-DA (digital audio) • MP3 data (.mp3) Compatible File Types • WMA data (.wma) • AAC data (.m4a) • WAV lossless • DRM protected files • WMA lossless Incompatible File • Apple lossless Types • WMA Pro • MP3 Pro • MP3 playlists • ISO9660 level 1 & level 2 Recording Format • Yellow book MODE 1 & MODE 2 FORM 1 Compatibility • Multi session • MP3: 8kHz - 48kHz Sampling Frequency • WMA: 32kHz - 48kHz Rate Compatibility • AAC: 8kHz - 48kHz • MP3: 32kbps - 320kbps...
-
Page 26: Bluetooth Operation
XDMA7800 Bluetooth Operation ® Pairing a Device Before you can use a Bluetooth device, it must be paired and Preparation connected. Make sure that Bluetooth is activated on your device before you begin the pairing process. The XDMA7800 broadcasts the pairing signal constantly Pairing a New Device when no devices are currently connected. Complete the pairing sequence from your Bluetooth device. Refer to the owner's manual for your device for more details. The device name is "XDMA7800" The Bluetooth passcode "1234" Note: The XDMA7800 can be in any mode of operation when pairing is performed. If a device is currently connected, press and hold Pairing Additional Devices disconnect the current device before a new device can be paired. Then begin the pairing sequence from the new Bluetooth device. Connecting a Paired Device Most Bluetooth devices support the auto-connect feature, and will connect automatically if the device is in range when the XDMA7800 is powered-on. If your device was previously paired but does not connect, use these instructions below. -
Page 27: Making A Phone Call
XDMA7800 Bluetooth Operation ® Making a Phone Call Manual Dialing • Press once. "Enter Number" will be shown, then an "_" will appear on the display. • Using the remote control, enter the phone number using the 0-9 buttons. Press on the remote control or XDMA7800 front panel to begin dialing. Note: Placing a phone call from your cell phone will also use the Bluetooth function of the XDMA7800. Recent Calls List • Press twice from Bluetooth mode to view the 10 most recent phone calls that were dialed, received or missed while connected to the XDMA7800. • Turn the volume knob to cycle through the recent phone numbers. Press SELECT or to dial the phone number. Redialing the last To redial the last phone number, press three times from number Bluetooth mode. Dialing will begin automatically. Phonebook Menu* The XDMA7800 supports the PBAP Bluetooth profile to temporarily download the phonebook of the cell phone. Note: The contents of the phonebook are deleted each time a cell phone is disconnected, and not permamently saved. - Page 28 XDMA7800 Bluetooth Operation ® Receiving and Ending Phone Calls Receiving a Phone Call Incoming phone calls will automatically appear on the display and a ring tone will be heard. Note: The volume of the ring tone depends on the volume level of the XDMA7800. The incoming ring tone may not be heard if the volume is set to a low level or mute is activated. • Press to receive the incoming phone call. • Press to refuse the incoming phone call. Note: If Auto Answer is set to ON in the setup menu, all phone calls will be received automatically. Ending a Phone Call During an active phone call, press to end a phone call. If the phone call was received when listening to music in another mode, the XDMA7800 will resume the previous mode. During a Phone Call Volume Turn the volume knob to adjust the volume level during a...
-
Page 29: Bluetooth Reset
XDMA7800 Bluetooth Operation ® Streaming Audio Operation The XDMA7800 supports A2DP (advanced audio distribution profile) wireless streaming audio from your Bluetooth mobile device directly to your head unit. You can also control your music from the front panel of the head unit using AVRCP (audio video remote control profile). Notes: • To stream music to your head unit, your mobile device must support the A2DP and AVRCP Bluetooth profiles. Check the owner's manual of your mobile device for details. • Streaming audio must be enabled from your mobile device. This option will vary depending on the device. Some devices allow streaming audio to be disabled. After pairing, connecting and enabling streaming audio from a compatible mobile device, begin playing music using the music player on your mobile device. Once the music is playing, the following functions can be used to control the music: • The button will skip to the next available audio track. • The button will skip to the previous audio track. / II button will toggle between play and pause during playback. • The • The button will stop the audio playback. Note: Some Bluetooth devices may not fully support these commands. Bluetooth Reset Resetting the Bluetooth module will remove the list of paired phones and delete the list of recent calls from memory. To reset Bluetooth, perform the following steps: 1) Press SOURCE until the head unit is in Bluetooth mode. 2) Press and hold MENU for 3 seconds to reset the Bluetooth settings back to the factory default. Compatibility Note: Due to the differences in Bluetooth technology, some mobile devices may be incompatible, function improperly or may not support all features when used with the XDMA7800. - Page 30 XDMA7800 Limited One Year Warranty This warranty gives you specific legal rights. What to do? You may also have other rights which vary 1. Before you call for service, check the from state to state. troubleshooting guide in your owner’s manual. A slight adjustment of any Dual Electronics Corp. warrants this custom controls may save you a service product to the original purchaser to call. be free from defects in material and workmanship for a period of one year from 2. If you require service during the the date of the original purchase. warranty period, you must carefully pack the product (preferably in the Dual Electronics Corp. agrees, at our original package) and ship it by prepaid option, during the warranty period, transportation with a copy of the original to repair any defect in material or receipt from the retailer to an workmanship or to furnish an equal authorized service center.
-
Page 31: Troubleshooting
XDMA7800 Troubleshooting - General Problem Cause Action Yellow wire not connected or incorrect Check connections for proper voltage Red wire not connected or Unit will not turn on voltage (11-16VDC) incorrect voltage (no power) Black wire not connected Check connection to ground Fuse blown Replace fuse Speaker wires not connected Check connections at speakers Unit has power Insulate all bare speaker wires One or more speaker wires touching (but no sound) from each other and chassis each other or touching chassis ground ground Yellow or red wire touching chassis... -
Page 32: Specifications
XDMA7800 Specifications FM Tuner Tuning range: 87.5MHz - 107.9MHz Usable sensitivity: 8.5dBf 50dB quieting sensitivity: 10dBf Stereo separation @ 1kHz: 40dB Frequency response: 30Hz - 13kHz AM Tuner Tuning range: 530kHz - 1710kHz Usable sensitivity: 22uV Frequency response: 30Hz - 2.2kHz General Speaker output impedance: 4 to 8 ohms Line output voltage: 2 Volts RMS Dimensions: 7" x 7" x 2" (178 x 178 x 51 mm) USB/SD Card File system: FAT, FAT32... -
Page 33: Fcc Compliance
XDMA7800 FCC Compliance This device complies with Part 15 of the FCC Rules. Operation is subject to the following two conditions: (1) this device may not cause harmful interference, and (2) this device must accept any interference received, including interference that may cause undesired operation. Warning: Changes or modifications to this unit not expressly approved by the party responsible for compliance could void the user’s authority to operate the equipment. Note: This equipment has been tested and found to comply with the limits for a Class B digital device, pursuant to Part 15 of the FCC Rules. These limits are designed to provide reasonable protection against harmful interference in a residential installation. This equipment generates, uses and can radiate radio frequency energy and, if not installed and used in accordance with the instructions, may cause harmful interference to radio communications. However, there is no guarantee that interference will not occur in a particular installation. If this equipment does cause harmful interference to radio or television reception, which can be determined by turning the equipment off and on, the user is encouraged to try to correct the interference by one or more of the following measures: • Reorient or relocate the receiving antenna. • Increase the separation between the equipment and receiver. • Connect the equipment into an outlet on a circuit different from that to which the receiver is connected. • Consult the dealer or an experienced radio/TV technician for help. - Page 34 XDMA7800 Notes...
- Page 35 XDMA7800 Notes...
- Page 36 Dual Electronics Corp. Toll Free: 1-866-382-5476 axxera.dualav.com ©2011 Dual Electronics Corp. All rights reserved. iPhone, iPod, iPod classic, iPod nano, and iPod touch are trademarks of Apple Inc., registered in the U.S. and other countries. “Made for iPod” and “Made for iPhone” mean that an electronic accessory has been designed to connect specifically to iPod or iPhone, respectively, and has been certified by the developer to meet Apple performance standards. Apple is not responsible for the operation of this device or its compliance with safety and regulatory standards. Please note that the use of this accessory with iPod or iPhone may affect wireless performance. The Bluetooth® word mark and logos are owned by the Bluetooth SIG, Inc. and any use of such marks by Namsung is under license. HD Radio™, HD Radio Ready™, and the HD Radio Ready logo are proprietary trademarks of iBiquity Digital Corporation. The SD logo is a trademark of the SD Card Association. Other trademarks and trade names are those of their respective owners. NSA0411-V01...