Table of Contents
Advertisement
Advertisement
Table of Contents

Related Manuals for AEG L 60060 TL


Summary of Contents for AEG L 60060 TL
- Page 1 L 60260 TL EN WASHING MACHINE USER MANUAL L 60060 TL...
-
Page 2: Table Of Contents
CONTENTS 4 SAFETY INFORMATION 6 PRODUCT DESCRIPTION 6 ACCESSORIES 7 CONTROL PANEL 10 WASHING PROGRAMMES 12 BEFORE FIRST USE 12 USING THE APPLIANCE 13 LOADING THE LAUNDRY 13 FILLING THE DETERGENT AND ADDITIVES 14 SETTING AND STARTING A PROGRAMME... - Page 3 ENGLISH FOR PERFECT RESULTS Thank you for choosing this AEG product. We have created it to give you impeccable performance for many years, with innovative technologies that help make life simpler – features you might not find on ordinary appliances. Please spend a few minutes reading to get the very best from it.
-
Page 4: Safety Information
SAFETY INFORMATION Before the installation and use, read this sharp material can cause damage to manual carefully: the appliance. • For your safety and the safety of your • Do not touch the glass of the door property while a programme operates. The glass can be hot (only for front-loading appli- •... -
Page 5: Electrical Connection
ENGLISH • Make sure not to cause damage to the water hoses. • Do not connect the appliance to new pipes or pipes not used for a long time. Let the water flow for some minutes, then connect the inlet hose. •... -
Page 6: Product Description
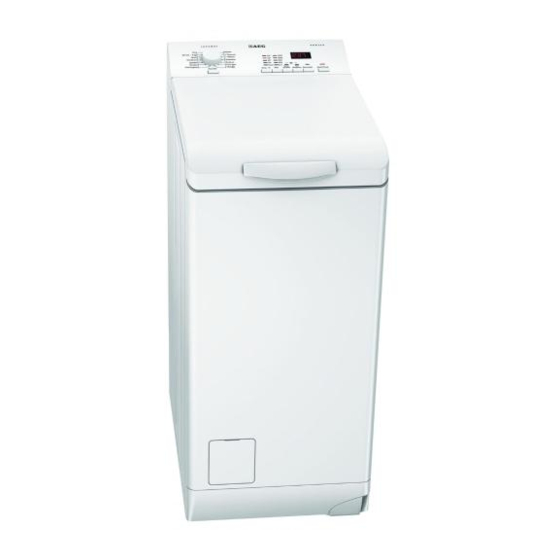
PRODUCT DESCRIPTION Control panel Rating plate Mains cable Lid handle Water inlet valve Filter access door Water drain hose Lever to move the appliance Transit bolts Adjustable feet Feet for the appliance level ACCESSORIES Plastic cap To close the hole on the rear side of the cabinet, after the removal of the transit bolt. -
Page 7: Control Panel
ENGLISH CONTROL PANEL On/Off button Time saving button Programme knob Extra rinse button Display Spin button Start/Pause button Temperature button Delay start button – Press button to activate the appli- ON OFF BUTTON ance again. Press this button to activate or deactivate –... -
Page 8: Extra Rinse Button
The display shows: • The programme time When the programme starts, the time decreases with steps of 1 minute. • The delay start When you press the delay start button, the display shows the delay start time. • Alarm codes If the appliance has a malfunction, the display shows alarm codes. -
Page 9: Permanent Extra Rinse
ENGLISH TEMPERATURE BUTTON Press button to change the default temperature. CHILD LOCK FUNCTION This function prevents children to play with the control panel. • To activate the function, press button and button at the same time un- til the display shows the symbol •... -
Page 10: Washing Programmes
10 www.aeg.com WASHING PROGRAMMES Programme Type of load Cycle Functions Temperature max. weight of load description White and coloured Wash SPIN REDUCTION cotton with normal Rinses RINSE HOLD Cottons soil. Long spin EXTRA RINSE 95° - Cold max. 6 kg... -
Page 11: Consumption Values
ENGLISH Programme Type of load Cycle Functions Temperature max. weight of load description Set this programme Prewash SPIN REDUCTION to wash curtains. It Wash RINSE HOLD Curtains adds automatically Rinses EXTRA RINSE 40° - Cold the prewash phase to Short spin clean the dust from the curtains. -
Page 12: Before First Use
12 www.aeg.com Energy consump- Water consump- Programme tion (KWh) tion (litre) Spin 0.05 Drain 0.01 Rinse 0.10 Curtains 40°C 0.60 Jeans 60°C 0.90 20 min. 3 kg 30°C 0.35 Economy 90°C 1.80 Programmes for energy saving 1.02 Economy 60°C 0.70 Economy 40°C... -
Page 13: Loading The Laundry
ENGLISH LOADING THE LAUNDRY Push the button A (depending on model). The drum opens automatical- Put the laundry. Make sure to not put too much laundry into the drum. Close the drum and the lid of your washing machine. Before you close the lid of your appliance, make sure that you close the drum correctly. -
Page 14: Setting And Starting A Programme
14 www.aeg.com SETTING AND STARTING A PROGRAMME Turn the programme knob. When the countdown is completed, the programme starts automatically. The indicator of button flashes with red colour. Before you press button The indicators of the default tempera- start the appliance, you can cancel ture and spin speed come on. -
Page 15: At The End Of Programme
ENGLISH AT THE END OF PROGRAMME • The appliance stops automatically. • Close the water tap. The washing programme is completed, • The acoustic signals operate. but the 'Rinse Hold' function is on: • In the display comes on. – The drum turns regularly to prevent the •... -
Page 16: Water Hardness
16 www.aeg.com • Do not mix different types of deter- • If necessary, use a stain remover when gents. you set a programme with a low tem- perature. • To help the environment, do not use more than the correct quantity of deter- •... -
Page 17: Care And Cleaning
ENGLISH CARE AND CLEANING WARNING! CAUTION! Do not use alcohol, solvents or chemical products. Disconnect the appliance from the mains supply before you clean it. MAINTENANCE WASH DESCALING With the low temperature programmes it is possible that some detergent stays in The water we use contains limescale. - Page 18 18 www.aeg.com Open the drain filter door. Put a container below the recess of the drain filter to collect the water that flows out. Turn the filter until it is vertical. Turn the filter fully and remove it. Remove fluff and objects.
-
Page 19: Emergency Drain
ENGLISH Remove the inlet hose behind the appliance. Clean the filter in the valve with a stiff brush or a towel. Install again the inlet hose. Make sure that the couplings are tight to pre- vent leakages. Open the water tap. 90˚... -
Page 20: Troubleshooting
20 www.aeg.com TROUBLESHOOTING The start of the appliance does not occur • - The appliance does not drain or it stops during operation. the water. First try to find a solution to the problem • - The appliance door is open or (refer to the table). - Page 21 ENGLISH Problem Possible cause Possible solution The anti-flood de- • Disconnect the appliance. vice is on. • Close the water tap. • Contact the service centre. The spin phase The spin phase is off. Set the spin programme. does not operate. The filter of the drain Clean the filter of the drain pump is blocked.
-
Page 22: Technical Information
22 www.aeg.com Problem Possible cause Possible solution The appliance fills The end of the drain Make sure that the drain hose is with water and hose is too low. in the correct position. drain immediately. The washing re- The detergent you used... -
Page 23: Installation
ENGLISH INSTALLATION UNPACKING Remove the external film. If necessa- ry, use a cutter. Remove the polystyrene packaging materials. Tilt the appliance backwards. Turn the appliance on one of the cor- ners to remove the protection from the bottom. Open the lid. Remove the polystyrene piece. - Page 24 24 www.aeg.com Remove the power supply cable and the drain hose from the hose holders. Remove the three bolts. Remove the plastic piece. Replace the plastic spacer with the plastic cap. You can find this cap in the user manual bag.
-
Page 25: Positioning And Levelling
ENGLISH WARNING! We recommend that you keep the Remove all the packaging and the packaging and the transit bolts for transit bolts before you install the when you move the appliance. appliance. POSITIONING AND LEVELLING Pull the lever from right to left. When the position of the appliance is right, put back the lever. -
Page 26: Water Drainage
26 www.aeg.com THE INLET HOSE Connect the hose to the appliance. Loose the ring nut to set it in the cor- rect position. 90˚ Connect the water inlet hose to the cold water tap with 3/4 thread. CAUTION! Make sure that there are no leaks from the couplings. - Page 27 ENGLISH With the plastic hose guide. • On the edge of a sink. • Make sure that the plastic guide cannot move when the appliance drains. At- tach the guide to the water tap or the wall. • To a stand pipe with vent-hole. Refer to the illustration.
- Page 28 28 www.aeg.com • Directly to a built-in drain pipe in the room wall and tighten it with a clip. You can extend the drain hose to maximum 400 cm. Contact the service centre for the other drain hose and the extension.
- Page 29 ENGLISH...
- Page 30 30 www.aeg.com...
- Page 31 ENGLISH...
- Page 32 108616700-B-472011...