Viking VMOS201SS Use & Care Manual
Use and care manual
Hide thumbs
Also See for VMOS201SS:
- Service manual (40 pages) ,
- Installation notes (4 pages) ,
- Installation instructions (2 pages)

Related Manuals for Viking VMOS201SS


Summary of Contents for Viking VMOS201SS
- Page 1 Viking Range Corporation installation / use & care manual built-in / freestanding microwave ovens...
-
Page 2: Service Information
3. Clearly describe the problem that you are having. If you are unable to obtain the name of an authorized service agency, or if you continue to have service problem, contact Viking Range Corporation at (888) 845-4641 or write to:... -
Page 3: Table Of Contents
Table of Contents 2 Service Information 19-23 Sensor Options 3 Table of Contents 20-22 Sensor Options Chart 4-5 Important Safety 23 Frozen Foods Chart Instructions 24-36 Cooking 5 Precautions to Avoid 24 Breakfast and Lunch Possible Exposure to 25-26 Breakfast Chart Excessive Microwave 26 Lunch Chart Energy... -
Page 4: Important Safety Instructions
9. This appliance should be serviced only by qualified service personnel. Contact nearest Viking Authorized Servicer for examination, repair or adjustment. 10. Do not cover or block any openings on the appliance. -
Page 5: Precautions To Avoid Possible Exposure To Excessive Microwave Energy
Do not mount over a sink. b. Do not store anything directly on top of the appliance surface when the appliance is in operation. 19. If the microwave oven light fails, consult a VIKING AUTHORIZED SERVICER. SAVE THESE INSTRUCTIONS PRECAUTIONS TO AVOID POSSIBLE... -
Page 6: Installation Instructions
If there is any damage, do not operate the microwave oven and contact your dealer or VIKING AUTHORIZED SERVICER. Choosing a Location for Your Microwave Oven on the Counter You will use the microwave oven frequently so plan its location for ease of use. - Page 7 See built-in trim kit installation instructions Over Oven Installation for proper location when building in above the specified ovens. Carefully follow both the oven installation instruc- tions and built-in trim kit instructions. The opening in the wall or cabinet must be within the following dimensions: A HEIGHT : 16 "...
-
Page 8: Grounding Instructions
1. If you have any questions about the grounding or electrical instructions, consult a qualified electrician or service person. 2. Neither Viking nor the dealer can accept any liability for damage to the microwave oven or personal injury resulting from failure to observe the cor- rect electrical connection procedures. -
Page 9: Information You Need To Know
Information You Need To Know About Your Microwave Oven This Installation/Use and Care Manual is valuable: read it carefully and always save it for reference. A good microwave cookbook is a valuable asset. Check it for microwave cook- ing principles, techniques, hints and recipes. NEVER use the microwave oven without the turntable and support nor turn the turntable over so that a large dish could be placed in the microwave oven. -
Page 10: About Food
About Food DON'T FOOD Eggs, • Puncture egg yolks • Cook eggs in shells. sausages, before cooking to • Reheat whole eggs. nuts, seeds, prevent “explosion”. • Dry nuts or seeds in fruits & • Pierce skins of potatoes, shells. vegetables apples, squash, hot dogs and sausages so that... -
Page 11: About Utensils And Coverings
About Utensils and Coverings It is not necessary to buy all new cookware. Many pieces already in your kitchen can be used successfully in your new microwave oven. Make sure the utensil does not touch the interior walls during cooking. Use these utensils for safe microwave cooking and reheating: •... -
Page 12: About Microwave Cooking
Evaluate carefully before you purchase so that they meet your needs. A micro- wave-safe thermometer will assist you in determining correct doneness and assure you that foods have been cooked to safe temperatures. Viking is not responsible for any damage to the microwave oven when accessories are used. -
Page 13: About Safety
About Safety • Check foods to see that they are cooked to the United States Department of Agriculture's recommended temperatures. To test for doneness, insert a meat thermometer in a thick or dense area away from fat or bone. NEVER leave the thermometer in the food during cooking, unless it is approved for microwave oven use. -
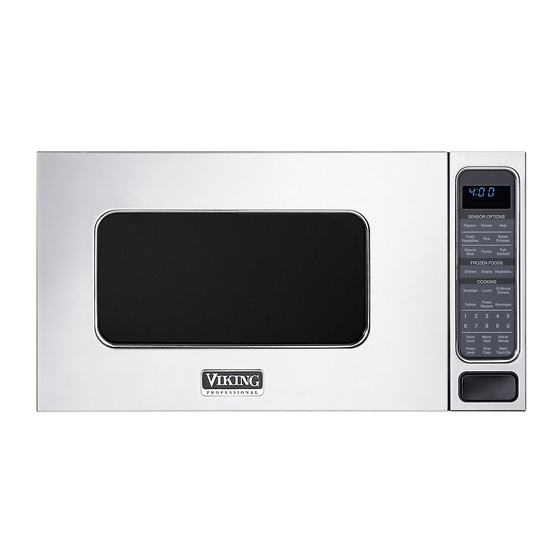
Page 14: Part Names
Part Names Microwave Oven Parts 1 One touch door open button 8 Removable turntable Push to open door. Place the turntable on the turntable support securely. 2 Microwave oven door with see- The turntable will rotate clockwise through window or counterclockwise. Only remove 3 Safety door latches for cleaning. -
Page 15: Control Panel
Control Panel The two-line, Interactive Display spells out operating steps and shows cooking hints. When HELP is lighted in the display, touch the Help pad to read a specific hint which may assist you. Indicators 19-22 38-39 24-36 Number next to the control panel illustration indicates pages on which there are feature descriptions and usage information. -
Page 16: Before Operating
Before Operating Before operating your new microwave oven make sure you read and under- stand this Installation/Use and Care Manual completely. Before the microwave oven can be used, follow these procedures: 1.Plug in the microwave oven. Close the door. The microwave oven display will show WELCOME PRESS CLEAR AND PRESS CLOCK 2.Touch the Stop/Clear pad. -
Page 17: Manual Operation
Manual Operation Time Cooking Your microwave oven can be programmed for 99 minutes and 99 seconds (99.99). Always enter the seconds after the minutes, even if they are both zeros. PROCEDURE DISPLAY 5.00 1. Enter cooking time. 2. Touch Start/Touch On pad. 5.00 COOK To Set Power Level... -
Page 18: Manual Defrost
Suppose you want to defrost for 5 minutes at 30%. PROCEDURE DISPLAY 5.00 1. Enter defrost time. 2. Touch Power Level pad eight times or hold PERCENT down until the desired power appears. 5.00 3. Touch Start/Touch On pad. COOK 4. -
Page 19: Sensor Options
SENSOR OPTIONS The Viking Sensor is a semi-conductor device that detects the vapor (moisture and humidity) emitted from the food as it heats. The sensor adjusts the cook- ing times and power level for various foods and quantities. Using Sensor Settings: 1. -
Page 20: Sensor Options Chart
allow steam to escape. Plastic wrap should not touch food. 3. Wax paper: Cover dish completely; fold excess wrap under dish to secure. If dish is wider than paper, overlap two pieces at least one inch to cover. Be careful when removing any covering to allow steam to escape away from you. - Page 21 Sensor Options Chart Sensor Options Chart (continued) (continued) FOOD AMOUNT PROCEDURE Fresh Vegetables: Soft Wash and place in casserole. Add no Broccoli .25 - 2.0 lb water if vegetables have just been Brussels sprouts .25 - 2.0 lb washed. Cover with lid for tender Cabbage .25 - 2.0 lb vegetables.
- Page 22 Sensor Options Chart (continued) FOOD AMOUNT PROCEDURE Ground Meat .25 - 2.0 lb Use this setting to cook ground beef or turkey as patties or in a casserole to be added to other ingredients. Place patties on a microwave-safe rack and cover with wax paper.
-
Page 23: Frozen Foods Chart
Frozen Foods Chart Entrees 6 - 17 oz Use this pad for frozen convenience foods. It will give satisfactory results for most brands. You may wish to try several and choose your favor- ite. Remove package from outer wrapping and follow package directions for covering. -
Page 24: Cooking
COOKING Your microwave oven has 6 convenience pads to assist with meal preparation. There are some foods in the Breakfast, Lunch, 15 Minute Dinners and Preset Recipes that use the sensor. See the sensor cooking information on page 19. For foods not using the sensor, follow the directions in the Interactive Display to enter quantity. -
Page 25: Breakfast Chart
Breakfast Chart FOOD AMOUNT PROCEDURE 1. Scrambled 1 - 9 eggs For each egg, use 1 teaspoon of butter or mar- Eggs garine and 1 tablespoon of milk. Place butter or margarine in dish, measuring cup or casserole large enough for the egg to expand. Mix egg and milk together. -
Page 26: Lunch Chart
Breakfast Chart (continued) *It is not necessary to enter amount. FOOD AMOUNT PROCEDURE Frozen 1 - 10 pieces For frozen rolls and muffins, touch Breakfast pad and touch number 4 pad, then number 2 pad. Then enter desired quantity and touch Start/Touch On pad. -
Page 27: 15 Minute Dinners And Preset Recipes
15 Minute Dinners and Preset Recipes 15 Minute Dinners and Preset Recipes each offer five simple-to-prepare but great tasting meals. Follow the specific directions on the Recipe Card and in the Interactive Display. • Suppose you want to use 15 Minute Dinners to cook Saucy Chicken. PROCEDURE DISPLAY SELECT... -
Page 28: Minute Dinners
15 Minute Dinners (Recipes serve 6) 1. SAUCY CHICKEN 1 Place in a 3-quart casserole: tablespoon oil pound mushrooms, sliced onion, chopped tablespoon minced garlic Stir well and cover. Touch 15 Minute Dinners, number 1 to select SAUCY CHICKEN and then touch Start/Touch On. 2 Blend together: ounces reduced fat cream cheese, softened cup milk... - Page 29 3. FIESTA CHILI 1 Place in 3-quart casserole: pounds ground turkey cup diced onions cup diced red pepper Break up turkey and stir in onions and red pepper. Cover. Touch 15 Minute Dinners, number 3 to select FIESTA CHILI and then touch Start/Touch On. 2 At pause, drain and add to the casserole: ounces chunky salsa 11-ounce can of Mexican corn, drained...
-
Page 30: Preset Recipes
5. HEALTHY FRITTATA 1 Grease 9" pie plate. Place in it: 1 /2 pound mushrooms, sliced 3 /4 cup chopped onion tablespoon minced garlic 1 /4 pound chopped low-fat smoked sausage Cover with plastic wrap. Touch 15 Minute Dinners, number 5 to select HEALTHY FRITTATA and then touch Start/Touch On. - Page 31 2. MEXICAN CHICKEN 1 Place in layers in a 3-quart casserole: cups instant rice cup prepared fajita sauce mixed with cup chicken broth or bouillon 10-ounce packages frozen seasoning mix (onion, peppers, parsley and celery) pound boneless chicken breast, cut into 1-inch thin strips Cover.
- Page 32 4. TUNA MACARONI 1 To cook macaroni: Place in 3-quart casserole: cups very hot tap water Cover. Touch Preset Recipes, number 4 to select TUNA MACARONI and then touch Start/Touch On. 2 At pause, add: cups elbow macaroni teaspoon salad oil Do not cover.
-
Page 33: Defrost
DEFROST Defrost automatically defrosts all the foods found in the Super Defrost and Auto Defrost Charts. Super Defrost Super Defrost rapidly defrosts specific foods and weights found in the Super Defrost Chart (number 1-3). For these choices, it is not necessary to enter weight. -
Page 34: Super Defrost Chart
Super Defrost Chart *It is not necessary to enter amount. FOOD AMOUNT PROCEDURE 1. Ground Meat* 1.0 lb At pause, turn over, removed any thawed pieces and break remainder apart. At end, let stand, covered, for 3 to 5 minutes. 2. -
Page 35: Auto Defrost Chart
Auto Defrost Chart FOOD AMOUNT PROCEDURE 4. Ground .5 - 3.0 lb Remove any thawed pieces after each stage. Meat Let stand, covered, for 5 to 10 minutes. 5. Steaks, .5 - 4.0 lb After each stage, rearrange and if there are Chops warm or thawed portions, shield with small or fish... -
Page 36: Beverages
Beverages Beverages enables you to reheat coffee or tea to a more suitable drinking temperature or to make instant coffee or tea. Suppose you want to reheat 2 cups of coffee. PROCEDURE DISPLAY SELECT NUMBER 1. Touch Beverages pad. LABEL FOOD 2. -
Page 37: Other Convenient Features
Other Convenient Features Warm / Hold Warm/Hold allows you to keep food warm up to 30 minutes. To use, simply touch the Warm/Hold pad and enter the appropriate time (up to 30 minutes). You can also program Warm/Hold with manual cooking to keep food warm continuously after cooking. -
Page 38: More Or Less Time Adjustment
Note: 1. If 100% is selected as the final sequence, it is not necessary to touch the Power Level pad. 2. If you wish to know power level, simply touch the Power Level pad. As long as your finger is touching the Power Level pad, the power level will be displayed. - Page 39 3. To enter the start time at 4:30, touch numbers 4, 3 and 0. 4. Touch Timer/Clock pad. 5. To enter cooking program, touch numbers 2, 0, 0, and 0 for cooking time and then touch Power Level pad 6 times. 6.
-
Page 40: Touch On
Touch On Touch On allows you to cook at 100% power by touching the Start/Touch On pad continuously. Touch On is ideal for melting cheese, bringing milk to just below boiling etc. The maximum cooking time is 3 minutes. • Suppose you want to melt cheese on a piece of toast. 1. -
Page 41: Demonstration Mode
Demonstration Mode To demonstrate, touch Timer/Clock, the number 0 and then touch Start/ Touch On pad and hold for 3 seconds. will appear DEMO ON DURING DEMO NO OVEN POWER in the display. Cooking operations and specific special features can now be demonstrated with no power in the microwave oven. - Page 42 not scrub or use any sort of chemical cleaners. Close door and touch Stop/ Clear pad. Interior Cleaning is easy because little heat is generated to the interior surfaces; there- fore, there is no baking and setting of spills or spattering. To clean the interior surfaces, wipe with a soft cloth and warm water.
-
Page 43: Specifications
Specifications VMOS200 / CVMOS200 AC Line Voltage: Single phase 120V, 60Hz, AC only AC Power Required: 1500 watts, 13.0 amps. Output Power: 1100 watts* Frequency: 2450 MHz Outside Dimensions: 24"(W) x 13 "(H) x 19 "(D) Cavity Dimensions: "(W) x 10 "(H) x 18 "(D) Microwave oven Capacity:... -
Page 44: Service Call Check
If “NO” is the answer to any of the above questions, please check electrical outlet, fuse and/or circuit breaker. If they are functioning properly, CONTACT YOUR NEAREST VIKING AUTHORIZED SERVICER. A microwave oven should never be serviced by a “do-it-yourself” repair person. -
Page 45: Warranty
(3) years from the date of original retail purchase or closing date for new construction, whichever period is longer. Viking Range Corporation, warrantor, agrees to repair or replace, at its option, any part which fails or is found to be defective during the warranty period. - Page 46 WARRANTY SERVICE To obtain warranty service, contact an authorized Viking Range Corporation service agent, or Viking Range Corporation, 111 Front Street, Greenwood, Mississippi 38930, (888) 845-4641. Provide model and serial number and date of original purchase or closing date for a new construction.