Samsung SF-5100P User Manual
Laser facsimile
Hide thumbs
Also See for SF-5100P:
- User manual (156 pages) ,
- Service manual (192 pages) ,
- Manual del usuario (101 pages)
Table of Contents
Advertisement
Quick Links
Advertisement
Table of Contents

Related Manuals for Samsung SF-5100P


Summary of Contents for Samsung SF-5100P
- Page 1 Laser Facsimile User’s Guide SF-5100/SF-5100P...
- Page 2 Trademark Notices...
- Page 3 Contents Installation Chapter 1 Getting started Chapter 2 Basic operation Chapter 3 Sending a fax...
-
Page 4: Advanced Fax
Receiving a fax Making a copy Other functions Automatic dialling Advanced fax Chapter 4... -
Page 5: Additional Features
Additional features Chapter 5 Troubleshooting Chapter 6 Troubleshooting Maintenance Appendix... -
Page 6: Important Safety Information
Important safety information Stability Power supply Grounding. Overload Cleaning. Thunderstorms. Gas leaks. Ozone. - Page 7 Precautions...
-
Page 8: Safety Notes
Safety notes Symbology WARNING: Use of the controls, adjustments or performance of procedures other than those specified herein may result in a hazardous radiation exposure. - Page 9 Installation...
- Page 10 Unpacking * These parts may look different. The appearance varies accord- ing to country. Installation...
-
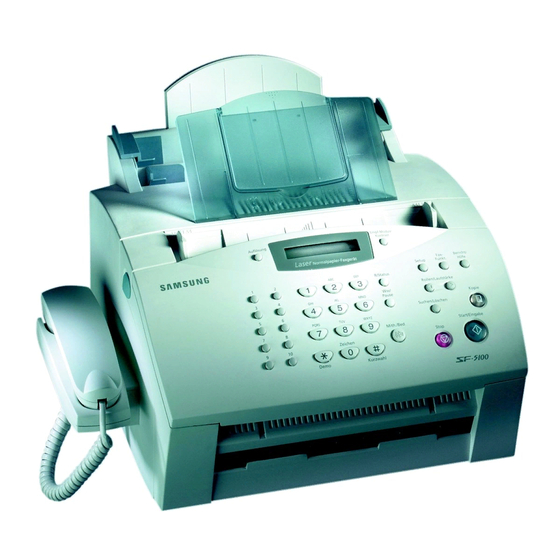
Page 11: Control Locations And Functions
Control locations and functions Front view Note: Your machine may look slightly different than the illustration. Installation... - Page 12 Rear view Inside Installation...
-
Page 13: Choosing A Location
Choosing a location Setting up your machine Document tray Paper exit tray Installation... -
Page 14: Document Exit Tray
Document exit tray Insert one end first, then the other end by squeezing this leg inward to make the tray easy to insert. Handset and handset cradle Installation... - Page 15 Note: • There is a one-touch plate built under the handset cradle. You can use this plate with the supplied one-touch label. Write information on the label to remind you which number is stored in each position and attach the label on the plate. To find the desired number, rotate the plate facing you and slide it under the cradle when you are using the plate.
-
Page 16: Telephone Line
Telephone line To a standard phone wall jack Note: You must use the telephone line cord which is supplied with your machine. Extension phone (optional) To a regular phone TAM lead Note: You must use the TAM lead which is supplied with your machine. Installation... - Page 17 AC power cord To AC outlet Printer cable (SF-5100P only) Note: There is a parallel port on SF-5100, but it does not work. Installation...
- Page 18 Installing the toner cartridge Installation...
- Page 19 1.10 Installation...
-
Page 20: Loading Paper
Loading paper Note: SF-5100P contains a manual paper feeder which allows you to feed print material one sheet at a time. For information on using the manual feeder and loading special print material such as envelopes or transparencies, refer to the SF-5100P exclusive user’s guide. Paper tray Automatic paper feeder Manual paper feeder... - Page 21 Place the print side facing you. Paper guide 1.12 Installation...
-
Page 22: Paper Type And Size
Paper type and size 1.13 Installation... -
Page 23: Printing A Demo Page
Printing a demo page Demo 1.14 Installation... - Page 24 Getting started...
- Page 25 Using the control panel Resolution PQRS Symbols Demo Getting started...
- Page 26 (Receiving mode) Rcv.Mode/ Contrast Report/ Advanced Setup Help ➛¤ ❿ Recall/ Status Scroll/Volume Redial/ Pause Copy Search/Delete WXYZ Start/Enter OHD/V.Req Stop Speed (On-hook dial) (Voice request) Getting started...
-
Page 27: Using The Number Keypad
Using the number keypad NAME: Entering alphanumeric characters PQRS WXYZ Symbols Speed Demo NAME:O Getting started... - Page 28 ❿ ❿ NAME:OP Start/Enter ➝ ➝ ➝ ➝ ➝ ➝ ➝ ➝ ➝ ➝ ➝ ➝ ➝ ➝ ➝ ➝ ➝ ➝ ➝ ➝ ➝ ➝ ➝ ➝ ➝ ➝ ➝ ➝ ➝ ➝ ➝ ➝ ➝ ➝ ➝ ➝ Getting started...
- Page 29 Entering numbers TEL:95551212_ Editing numbers or name ➛ ➛ ❿ ❿ Search/Delete Inserting pause Redial/Pause Redial/Pause Redial/Pause Getting started...
-
Page 30: Setting Up Your Fax Number And Name
Setting up your fax number and name Setup Start/Enter to Start/Enter. ➛ ➛ ❿ ❿ Search/Delete Start/Enter ❿ ❿ ¤ ¤ ❿ ❿ Start/Enter Getting started... -
Page 31: Setting The Time And Date
Setting the time and date Note: If power to the machine is cut off for over 30 minutes, when power is restored, the machine prompts you to reset the time and date. Setup. ➛ ➛ ¤ ¤ ❿ ❿ Start/Enter Start/Enter. -
Page 32: Adjusting Volume
Adjusting volume Ringer volume ➛ ➛ ¤ ¤ ❿ ❿ ➛ ➛ ¤ ¤ ❿ ❿ ¤ ¤ Speaker volume OHD/V.Req ➛ ➛ ¤ ¤ ❿ ❿ Alarm volume/Key volume ➛ ➛ ❿ ❿ Setup Start/Enter. Start/Enter ➛ ➛ ❿ ❿ Start/Enter. - Page 33 Basic operation...
-
Page 34: Sending A Fax
Sending a fax Preparing documents for faxing or copying Single sheet 2 or more sheets Basic operation... -
Page 35: Setting Document Resolution And Contrast
Setting document resolution and contrast Resolution Resolution Resolution Contrast Rcv. Mode/Contrast Rcv. Mode/Contrast Basic operation... -
Page 36: Loading Document
Loading document Document guide Resolution Rcv. Mode/Contrast Basic operation... -
Page 37: Sending A Fax Automatically
Sending a fax automatically ➛ ➛ ❿ ❿ Search/Delete Start/Enter Sending a fax after talking Start/Enter Cancelling transmission Stop Stop Confirming transmission Stop Basic operation... -
Page 38: Voice Request
Automatic redial Start/Enter Stop Voice request Sending a voice request OHD/V.Req OHD/V.Req Answering a voice request Basic operation... -
Page 39: Receiving A Fax
Receiving a fax Receiving a fax Receiving modes Start/Enter 25-JUN 15:30 FAX Basic operation... -
Page 40: Receiving Automatically In Fax Mode
Distinctive ring pattern detection (DRPD) Receiving automatically in FAX mode Rcv.Mode/Contrast Receiving manually in TEL mode Rcv.Mode/Contrast Start/Enter. Basic operation... -
Page 41: Receiving In Auto Mode
Receiving in AUTO mode Rcv.Mode/Contrast Receiving automatically in ANS/FAX mode Rcv.Mode/Contrast Notes: Basic Operation... - Page 42 Receiving manually using an extension telephone Basic operation...
-
Page 43: Making A Copy
Making a copy Copying overview Making a simple copy Rcv.Mode/Contrast Copy 3.10 Basic operation... -
Page 44: Advanced Copy Features
Advanced copy features Rcv.Mode/Contrast Copy Start/Enter Start/Enter Start/Enter. ➛ ➛ ❿ ❿ ON (Sort) OFF (Group) Copy Start/Enter Note: Copy 3.11 Basic operation... -
Page 45: Other Functions
Other functions Redial To redial the number last called Redial/Pause To search through redial memory Redial/Pause ➛ ➛ ¤ ¤ ❿ ❿ Start/Enter 3.12 Basic operation... -
Page 46: Monitoring A Dual Job Status
Sending a recall Recall/Status Recall/Status Recall/Status Note: Recall/Status Monitoring a dual job status Recall/Status Recall/Status 3.13 Basic operation... -
Page 47: Automatic Dialling
Automatic dialling One-touch dialling Storing a number for one-touch dialling Txx:_ Start/Enter Redial/Pause; ➛ ➛ ❿ ❿ Search/Delete. 3.14 Basic operation... - Page 48 Start/Enter Stop Editing a number for one-touch dialling TEL:025413000 ➛ ➛ ¤ ¤ ❿ ❿ Start/Enter. Note: Sending a fax using a one-touch number 3.15 Basic operation...
-
Page 49: Speed Dialling
Speed dialling Storing a number for speed dialling Speed LOC. [01-80]❿ ❿ ## Start/Enter Start/Enter. Sxx:025413000 Start/Enter Stop 3.16 Basic operation... - Page 50 Editing a number for speed dialling Speed Start/Enter TEL:025413000 ➛ ➛ ¤ ¤ ❿ ❿ Start/Enter. Note: Sending a fax using a speed number Speed Start/Enter 3.17 Basic operation...
-
Page 51: Searching For A Number In The Memory
Searching for a number in the memory Searching sequentially through the memory ❿ ❿ Search/Delete ➛ ➛ ❿ ❿ ➛ ➛ ➛ ➛ ❿ ❿ Start/Enter Searching with a particular first letter Search/Delete ❿ ❿ ➛ ➛ Start/Enter 3.18 Basic operation... - Page 52 Using the phonebook on your computer (SF-5100P only) Start Programs Start Samsung SF-5100P Programs Phonebook 3.19 Basic operation...
- Page 53 Displays information about the Phonebook. Gets the Phonebook Downloads the Phonebook Samsung Web Link button allows you to be numbers stored in the numbers to the SF-5100P linked to Samsung Electronics Web site. SF-5100P machine. machine. Loads the Phonebook file Selects the type of previously stored.
- Page 54 Send Phonebook Exit NOTE : One-touch key and speed dial which are assigned in group dial are not deleted. 3.21 Basic operation...
- Page 55 Advanced...
- Page 56 Broadcasting Resolution Contrast Advanced FAX Start/Enter Speed Start/Enter Start/Enter Start/Enter Start/Enter Advanced fax...
-
Page 57: Delayed Fax
Note: If ‘MEMORY FULL’ occurs while scanning into the memory, the display will show: JOB ❿ ❿ CANCEL ❿ ❿ DONE Press ➛ or ❿ to select the option you want. If you select CANCEL, broadcasting is cancelled. If you select DONE, your machine performs broadcasting only with the pages already scanned. - Page 58 Start/Enter Start/Enter Start/Enter TIME(13:30)=13:30 Start/Enter Note: If you want to cancel the delayed fax, see ‘Cancelling a scheduled operation’ on page 4.7. Advanced fax...
-
Page 59: Priority Fax
Priority fax Resolution Contrast Advanced FAX ➛ ➛ ❿ ❿ Start/Enter Start/Enter. Speed, Start/Enter Start/Enter Start/Enter Advanced fax... - Page 60 Polling What is polling? Send polling Resolution Contrast Advanced FAX ➛ ➛ ❿ ❿ Start/Enter POLLCODE [0000] Start/Enter. Start/Enter ➛ ➛ ❿ ❿ Advanced fax...
- Page 61 Receive polling Note: The remote machine must be ready for polling. Advanced FAX. Start/Enter POLLCODE [0000] Start/Enter. Start/Enter Note: • If you want to cancel the operation, press Stop at any time. • Not all fax machines have polling capability, and polling incompatibility sometimes occurs between fax machines from different manufacturers.
-
Page 62: Adding Documents To A Scheduled Operation
Adding documents to a scheduled operation Resolution Contrast Advanced FAX ➛ ➛ ❿ ❿ Start/Enter ➛ ➛ ❿ ❿ Start/Enter Cancelling a scheduled operation Advanced FAX ➛ ➛ ❿ ❿ Start/Enter ➛ ➛ ❿ ❿ Start/Enter. Start/Enter Advanced fax... - Page 63 Additional features...
-
Page 64: Printing Reports
Printing reports Help List Sent Journal Received Journal Phonebook List Sending Confirmation Schedule Information System Data List Multi-Communication Report Call Back Message Power Failure Report Additional features... -
Page 65: System Setup
Note: The list you have set to print out automatically will not print out when there is no paper loaded or a paper jam has occurred. Report/Help ➛ ➛ ❿ ❿ Start/Enter System setup Setting an option Setup ➛ ➛ ❿... - Page 66 Selectable options Additional features...
- Page 67 Start/Enter Additional features...
- Page 68 Additional features...
- Page 69 distinctive ring pattern detection distinctive ring pattern detection distinctive ring pattern detection distinctive ring pattern detection Notes: • Distinctive ring pattern detection must be set up again if you re-assign your fax number, or connect the machine to another telephone line. •...
- Page 70 Group dialling (for multi-address transmission) Storing one-touch or speed dial numbers for group dialling Setup ➛ ➛ ❿ ❿ Start/Enter Start/Enter. Note: If a number has already been stored in the location you chose, the dis- play shows ‘Txx USED!’. Then you are allowed to select ‘OTHER’ or ‘RENEW’...
-
Page 71: Editing Group Dial Numbers
Stop Note: You cannot include one group dial number in another group dial number. Editing group dial numbers Setup ➛ ➛ ❿ ❿ Start/Enter. ➛ ➛ ❿ ❿ Start/Enter. ❿ ❿ ¤ ¤ Stop ❿ ❿ ¤ ¤ Start/Enter Stop Sending a fax using group dialling (Multi-address transmission) Additional features... -
Page 72: Clearing Memory
Clearing memory Setup ➛ ➛ ❿ ❿ Start/Enter ➛ ➛ ❿ ❿ Start/Enter Start/Enter Stop. Additional features... - Page 73 Troubleshooting...
-
Page 74: Troubleshooting
Troubleshooting Clearing jams Document jams while sending a fax Do not pull the document out of the slot. If you do this, it could harm your machine. 1. Open the control panel using your hand. 2. Carefully remove the jammed document. Troubleshooting... - Page 75 Paper jams while the machine is printing 1. Remove the jammed paper as shown below. 2. After you have removed the jammed paper, load the paper with the print side facing you. Troubleshooting...
- Page 76 1. If the paper jams as it exits to the paper exit tray and a long portion of the paper is visible, pull the paper straight out. 1. Pulling the cover release buttons toward you, open the cover. 2. Remove the toner cartridge. Troubleshooting...
- Page 77 3. Gently pull the paper toward you. 4. Check that there is no other paper in the printer. 5. Reinstall the cartridge, then close the cover. Tips for avoiding paper jams Troubleshooting...
-
Page 78: Lcd Error Messages
LCD error messages Display Meaning Solution DOCUMENT JAM DOOR OPEN FUSER ERROR JAM/NO CARTRIDGE LINE ERROR LOAD DOCUMENT ! LSU ERROR MEMORY FULL NO ANSWER NO. NOT ASSIGNED NO PAPER OVER HEAT Troubleshooting... - Page 79 Display Meaning Solution Stop PAPER JAM 0 PAPER JAM 2 POLLING ERROR POWER FAILURE RECEIVE ERROR Start/Enter Stop RETRY REDIAL ? SEND ERROR TONER EMPTY TONER LOW WARMING UP Troubleshooting...
-
Page 80: Fixing Problems
Fixing problems Symptom Cause and Solution Start/Enter Start/Enter Troubleshooting... - Page 81 Symptom Cause and Solution Troubleshooting...
- Page 82 Maintenance Cleaning the OPC drum Setup ➛ ➛ ❿ ❿ Start/Enter ➛ ➛ ❿ ❿ Start/Enter Stop Troubleshooting...
-
Page 83: Adjusting Shading
Adjusting shading Setup ➛ ➛ ❿ ❿ Start/Enter ➛ ➛ ❿ ❿ Start/Enter Setting the machine to be checked by phone Setup ➛ ➛ ❿ ❿ Start/Enter ➛ ➛ ❿ ❿ Start/Enter ➛ ➛ ❿ ❿ Start/Enter Stop 6.10 Troubleshooting... -
Page 84: Cleaning The Document Scanner
Sending toner low information to the service company notify toner low ➛ ➛ ❿ ❿ Setup Start/Enter ➛ ➛ ❿ ❿ Start/Enter ➛ ➛ ❿ ❿ Start/Enter Stop Cleaning the document scanner Note: Do not turn the power off to clean the scanner, as documents stored in the memory will be lost. - Page 85 bushing 6.12 Troubleshooting...
- Page 86 6.13 Troubleshooting...
-
Page 87: Managing The Toner Cartridge
Managing the toner cartridge Expected cartridge life Replacing the toner cartridge 6.14 Troubleshooting... - Page 88 6.15 Troubleshooting...
- Page 89 6.16 Troubleshooting...
- Page 90 MEMO 6.17 Troubleshooting...
- Page 91 Appendix...
- Page 92 FCC regulations Canadian radio interference regulations Appendix...
- Page 93 EC declaration of conformity Appendix...
-
Page 94: Laser Safety Statement
Laser safety statement WARNING CAUTION - INVISIBLE LASER RADIATION WHEN THIS COVER IS OPEN. DO NOT OPEN THIS COVER. VORSICHT - UNSICHTBARE LASERSTRAHLUNG, WENN ABDECKUNG GEÖFFENT. NICHT DEM STRAHL AUSSETZEN. ATTENTION - RAYONNEMENT LASER INVISIBLE EN CAS D’OUVERTURE. EXPOSITION DANGEREUSE AU FAISCEAU. ATTENZIONE - RADIAZIONE LASER INVISIBLE IN CASO DI APERTURA. -
Page 95: Safety Information
Laser product labels are located above the print cartridge. CLASS 1 LASER PRODUCT LASER KLASSE 1 LUOKAN 1 LASERLAITE APPAREILÀ LASER DE CLASSE 1 TO IEC 825 Safety information Appendix... -
Page 96: Power Saver
Power saver The equipment has been approved to [Commission Decision “CTR 21”] for pan-European single terminal connection to the Public Switched Telephone Network (PSTN). However, due to differences between the individual PSTNs provided in different countries the approval does not, of itself, give an unconditional assurance of successful operation on every PSTN network termination point. - Page 97 Replacing the fitted plug Important Important warning: You must earth this machine. Appendix...
- Page 98 Guarantee Limited guarantee Exclusions Appendix...
- Page 99 Specifications ✕ ✕ ✕ ✕ ✕ ✕ ✕ ✕ ✕ ✕ ✕ ✕ ✕ Appendix...
- Page 100 Index Appendix...
- Page 101 7.10 Appendix...
- Page 102 7.11 Appendix...
- Page 103 ELECTRONICS Internet Home page: http://www.samsungprinter.com P/N: JC68-00251A Rev.3.00...