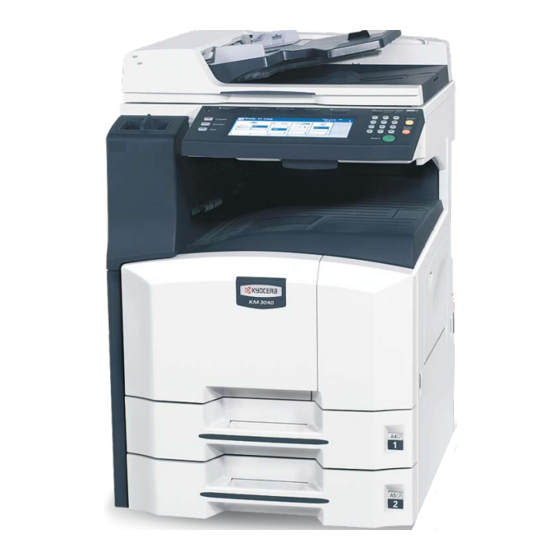
Kyocera KM-2540 Operation Manual
2540/3040 operation guide rev-1 (basic)
Hide thumbs
Also See for KM-2540:
- Service manual (365 pages) ,
- Operation manual (208 pages) ,
- Advanced operation manual (136 pages)

Related Manuals for Kyocera KM-2540


Summary of Contents for Kyocera KM-2540
-
Page 1: Operation Guide
2540 3040 Operation Guide Please read the Operation Guide before using this machine. Keep it close to the machine for easy reference. - Page 2 This Operation Guide is for models 2540 and 3040. In this guide, 2540 refers to the 25 cpm (copies per minute) model and 3040 to the 30 cpm model. Note This Operation Guide contains information that corresponds to using both the inch and metric versions of these machines. The inch versions of these machines are shown in the screens in this guide.
-
Page 3: Safety Conventions In This Guide
Safety Conventions in This Guide Please read this Operation Guide before using the machine. Keep it close to the machine for easy reference. The sections of this guide and parts of the machine marked with symbols are safety warnings meant to protect the user, other individuals and surrounding objects, and ensure correct and safe usage of the machine. -
Page 4: Table Of Contents
Contents Legal Information and Conventions ........... ix Part Names .................. 1-1 Body ..................... 1-2 Operation Panel ................1-5 Touch Panel ................1-6 Preparation for Usage ..............2-1 Loading Paper ................2-2 Setting Media Type and Paper Size for the Cassettes and MP Tray .................... - Page 5 Caution/Warning Labels Caution labels have been attached to the machine at the following locations for safety purposes. Be sufficiently careful to avoid fire or electric shock when removing a paper jam or when replacing toner. High temperature inside. Do not High temperature inside.
-
Page 6: Installation Precautions
Installation Precautions Environment Caution Avoid placing the machine on or in locations which are unstable or not level. Such locations may cause the machine to fall down or fall over. This type of situation presents a danger of personal injury or damage to the machine. Avoid locations with humidity or dust and dirt. - Page 7 Small amounts of ozone and other chemicals are released during copying, but the quantities do not present any health risk to humans. If, however, the machine is used over a long period of time in a poorly ventilated room or when making an extremely large number of copies, the smell may become unpleasant.
-
Page 8: Maintenance
Precautions for Use Cautions when using the machine Warning Do not place metallic objects or containers with water (flower vases, flower pots, cups, etc.) on or near the machine. This of situation presents a danger of fire or electrical shock should they fall inside. -
Page 9: Cleaning
If dust accumulates within the machine, there is a danger of fire or other trouble. It is therefore recommended that you consult with your service representative in regard to cleaning of internal parts. This is particularly effective if accomplished prior to seasons of high humidity. - Page 10 If the machine will not be used for an extended period of time, remove the paper from the cassette and the MP tray (multi-purpose tray), return it to its original package and reseal it. Don’t store the unit in a place exposed to: •...
-
Page 11: Legal Information And Conventions
Legal Information and Conventions Please read this information before using your machine. This chapter provides information on the following topics: Legal Information Regarding Tradenames Energy Saving Control Function Automatic 2-Sided Copy Function Recycled Paper ® Energy Star (ENERGY STAR ) Program About this Operation Guide xvii Conventions in This Guide... -
Page 12: Legal Information
Copying or other reproduction of all or part of this guide, any copyrightable subject matter without the prior written consent of Kyocera Mita Corporation is prohibited. Any copies made of all or part of this guide, any copyrightable subject must contain the same copyright notice as the material from which the copying is done. -
Page 13: Energy Saving Control Function
Energy Saving Control Function The device comes equipped with a Low Power Mode where energy consumption is reduced after a certain amount of time elapses since the device was last used, as well as an Off Mode where the device automatically turns itself off after there is no activity within a set amount of time. - Page 14 Laser Safety (Europe) Laser radiation could be hazardous to the human body. For this reason, laser radiation emitted inside this machine is hermetically sealed within the protective housing and external cover. In the normal operation of the product by user, no radiation can leak from the machine. This machine is classified as Class 1 laser product under IEC 60825.
- Page 15 Safety Instructions Regarding the Disconnection of Power Caution: The power plug is the main isolation device! Other switches on the equipment are only functional switches and are not suitable for isolating the equipment from the power source. VORSICHT: Der Netzstecker ist die Hauptisoliervorrichtung! Die anderen Schalter auf dem Gerät sind nur Funktionsschalter und können nicht verwendet werden, um den Stromfluß...
- Page 16 SAFETY OF LASER BEAM (USA) 1. Safety of laser beam This machine has been certified by the manufacturer to Class 1 level under the radiation performance standards established by the U.S.DHHS (Department of Health and Human Services) in 1968. This indicates that the product is safe to use during normal operation and maintenance.
- Page 17 Safety Instructions Regarding the Disconnection of Power Caution: The power plug is the main isolation device! Other switches on the equipment are only functional switches and are not suitable for isolating the equipment from the power source. Attention: Le débranchement de la fiche secteur est le seul moyen de mettre l’appareil hors tension.
- Page 18 Authorized Kyocera Dealer from whom the product was purchased. If the Kyocera Dealer is not able to provide service, write to Kyocera at the address below for the name and address of the Authorized Kyocera Dealer in your area or check Kyocera’s Website at www.kyoceramita.com.
- Page 19 About this Operation Guide This Operation Guide contains the following chapters: 1 Part Names Identifies machine parts and operation panel keys. 2 Preparation for Usage Explains adding paper, placing original, connecting the machine, and necessary configurations before first use. 3 Basic Operation Describes the procedures for basic copying.
-
Page 20: Originals And Paper Sizes
Originals and Paper Sizes This section explains the notation used in this guide when referring to sizes of originals or paper sizes. As in A4 and B5, which may be used either in the horizontal or vertical direction, in order to indicate the orientation of the original/paper, horizontal orientation is indicated by an additional R character. -
Page 21: Part Names
Part Names This chapter identifies machine parts and operation panel keys. Body Operation Panel Touch Panel Part Names... -
Page 22: Body
Body Original Cover (Option) Platen Original Size Indicator Plates Left Cover 1 Left Cover 1 Lever Left Cover 2 Clip Holder Operation Panel Cassette 1 10 Cassette 2 Part Names... -
Page 23: Paper
11 Toner Container 12 Toner Container Stopper 13 Main Charger 14 Waste Toner Box 15 Cleaning Brush 16 Green Knob (A1) 17 Paper Feed Unit (A2) 18 Paper Feed Unit Cover (A3) Part Names... - Page 24 19 Front Cover 20 Paper Width Guide 21 Paper Width Adjusting Tab 22 Paper Length Guide 23 Carrying Handles 24 Top Tray 25 Output Stopper 26 Paper Width Guide 27 Main Power Switch 28 MP Tray (multi-purpose tray) Part Names...
-
Page 25: Operation Panel
Operation Panel 11 12 Paper Size Ready to copy. 11×8½" 100% 4 in 1 11×8½" Plain Margin Left 11×17" Auto % Color Bord Erase 11×8½" MP Tray Auto Staple Sheet 100% Plain Plain Density Left Top 8½×11" Plain Zoom Density Staple Basic User choice... -
Page 26: Touch Panel
Touch Panel Displayed by pressing the Copy key. Screen changes when 1, 2, 3 and 4 are pressed. [Basic] screen Paper Size Ready to copy. 11×8½" 100% 4 in 1 11×8½" Plain Margin Left 11×17" Auto % Color Bord Erase 11×8½"... -
Page 27: Preparation For Usage
Preparation for Usage This chapter explains the preparations required before using the machine. Loading Paper Before Loading Paper.............. 2-2 Loading Paper into Cassette 1, 2 ..........2-2 Loading Paper in the MP Tray..........2-4 Loading Envelopes ..............2-6 Setting Media Type and Paper Size for the Cassettes and MP Tray Specifying Paper Size for the Cassettes ......... -
Page 28: Loading Paper
Loading Paper Paper can be loaded standardly in the two cassettes and the MP tray. An optional paper feeder is also available. (Refer to Chapter 4 Optional Equipment.) Before Loading Paper When you open a new package of paper, fan the sheets to separate them slightly prior to loading by the following steps. - Page 29 IMPORTANT When using media types other than plain paper (such as recycled or colored paper), always specify the media type setting. (Refer to Specifying the Media Type for the Cassettes on page 2-8.) The cassettes can hold 60 to 120 g/m² paper. When using 120 g/m² paper, specify [Thick paper] for Specifying the Media Type for the Cassettes on page 2-8.
-
Page 30: Loading Paper In The Mp Tray
Align the paper flush against the left side of the cassette. IMPORTANT Before loading the paper, be sure that it is not curled or folded. Paper that is curled or folded may cause paper jams. Ensure that the loaded paper does not exceed the level indicator (see the figure). - Page 31 Note When you load custom size paper, enter the paper size by referring to Specifying the Paper Size for the MP Tray on page 2-9. When you use special paper such as transparencies or thick paper, select the media type by referring to Specifying the Media Type for the MP Tray on page 2-13.
-
Page 32: Loading Envelopes
Loading Envelopes Up to 20 envelopes may be loaded in the MP tray. Acceptable envelope sizes are as follows. Acceptable Envelope Size Monarch 3 7/8 × 7 1/2" Comm. #10 4 1/8 × 9 1/2" Envelope DL 110 × 220 mm Envelope C5 162 ×... -
Page 33: Setting Media Type And Paper Size For The Cassettes And Mp Tray
Setting Media Type and Paper Size for the Cassettes and MP Tray The default paper size setting for cassettes 1 and 2 and for the optional paper feeder (cassettes 3 and 4) is [Auto Detection] and the default media type setting is [Plain]. To fix the type of paper to be used, specify the paper size and media type settings. -
Page 34: Specifying The Media Type For The Cassettes
If [Auto Detection] is selected, choose the unit type. If [Standard Back Close Paper size (Cassette 1) sizes] is selected, choose the paper size. Select paper size. Press [Close]. 5½×8½" Auto 8½×13½" Detection Description Standard 8½×13" sizes [Close] Keeps the settings and returns to the previous page. -
Page 35: Specifying The Paper Size For The Mp Tray
Select the media type and press [Close]. Media Type (Cassette 1) Press [Close]. Select and display paper type. Press [End]. The display returns to the [Basic] screen. Thick Custom 1 Plain paper Recycled Color Custom 2 Rough Preprinted Prepunched Custom 3 High Vellum Bond... -
Page 36: Preparation For Usage
Press [MP Tray Setting]. System Menu / Counter System Menu Copy Language Default Accoun MP Tray Setting Machine Register Print Default Orig. Size Report Press [Auto Detection]. System Menu / Counter Select [Centimeter] ([Centimetre]) or [Inch]. MP Tray Setting Press [Close]. The display returns to the [Basic] screen. Paper Size Unit Media... -
Page 37: Custom Size
Size Entry Specify the required paper size. Press the System Menu/Counter key. Press [MP Tray Setting]. System Menu / Counter System Menu Copy Language Default Accoun MP Tray Setting Machine Register Print Default Orig. Size Report Press [Size Entry]. System Menu / Counter Press [+] and [–] to set the Y (height) and X (width) sizes. -
Page 38: Setting Method
Press [ ] or [ ], select the number to register from Paper size Store Paper Size for MPT (User reg. 1 - 4) and press [Change #]. Stores Paper Size for Multi Purpose Tray. Default menu Setting mode Paper size (User reg. 1) ×16 "... -
Page 39: Specifying The Media Type For The Mp Tray
Specifying the Media Type for the MP Tray To use a media type other than plain paper in the MP tray, specify the media type setting. The following media types are available. Plain, Transparency, Rough, Vellum, Labels, Recycled, Preprinted, Bond, Cardstock, Color (Colour), Prepunched, Letterhead, Thick paper, Envelope, High Quality, Custom 1 - 8 IMPORTANT If the optional fax kit is installed and you are using the MP tray to print received faxes (refer to Turning Manual Paper Feed... -
Page 40: Loading Originals
Loading Originals Follow the steps below to load originals for copying. Loading Originals on the Platen You may place books or magazines on the platen in addition to ordinary sheet originals. Open the original cover. Note Open the optional document processor instead if installed. -
Page 41: Loading Originals In The Document Processor (Option)
(Metric models) Close the original cover. IMPORTANT Do not push the original cover forcefully when you close it. Excessive pressure may crack the platen glass. Note Shadows may be produced around the edges and in the middle of open-faced originals. CAUTION Do not leave the document processor open as there is a danger of personal injury. -
Page 42: Specifications
Original eject table Original stopper Opening handle Originals Supported by the Document Processor The document processor supports the following types of originals. Item Specifications Weight 45 g/m² to 160 g/m² Size Maximum 11 × 17" to Minimum 5 1/2 × 8 1/2" Maximum A3 to Minimum A5R Capacity Plain paper (80 g/m²), Colored paper, Recycled... -
Page 43: Original Placement Indicator
Place the originals. Put the side to be scanned (or the first side of two-sided originals) face-up. Slide the leading edge into the document processor as far as it will go. The original placement indicator will be lit. IMPORTANT Confirm that the original width guides exactly fit the originals. -
Page 44: Language
Language Select the language displayed on the touch panel. The following languages are available. Model Type Language Inch models English, French (Français), Spanish (Español), Japanese ( ), Portuguese (Português) Metric models English, German (Deutsch), French (Français), Spanish (Español), Italian (Italiano), Russian Press the System Menu/Counter key. -
Page 45: Basic Operation
Basic Operation This chapter explains the following operations. Basic Copying Procedures Turning off the main power switch ........... 3-3 Selecting Image Quality Adjusting Density Zoom Auto Zoom ................3-6 Manual Zoom................3-7 Preset Zoom ................3-7 XY Zoom.................. 3-8 Duplex Mode 3-10 One-sided to Two-sided............ -
Page 46: Basic Copying Procedures
Basic Copying Procedures Follow the steps as below for basic copying. Open the main power switch cover and move the main power switch to on ( | position). After warm-up is complete, the Start key’s Start indicator will glow green. Place the original. -
Page 47: Turning Off The Main Power Switch
Note Adjust the angle of the operation panel by pulling the operation panel lower lever. Remove the finished copies from the top tray. The top tray can hold up to 250 sheets of standard paper (80 g/m²). However, the actual capacity varies depending on the type and condition of the paper. -
Page 48: Selecting Image Quality
Selecting Image Quality Choose the image quality suited to the type of original. Image Quality Description Text+Photo Appropriate for mixed text and photo originals. Photo Appropriate for photo originals. Text Appropriate for document originals with large amounts of text. Place the original. Press [Function]. -
Page 49: Adjusting Density
Adjusting Density Adjust the density automatically or manually. The default setting is [Manual]. Follow the steps as below for Manual mode. Place the original. Press the density adjustment key ( ) to adjust the density. Ready to copy. Press [Auto Density] to use Auto Density. The machine determines a suitable density for copying. -
Page 50: Zoom
Zoom Adjust the magnification to reduce or enlarge the original image. The following zoom modes are available. • Auto Zoom – Automatically reduces or enlarges the original image suited to the selected paper size. • Manual Zoom – Reduces or enlarges the original image in 1 % increments between 25 - 400 %. -
Page 51: Manual Zoom
Manual Zoom Reduces or enlarges the original image in 1 % increments between 25 - 25 % 400 %. Follow the steps as below to use manual zoom. 400 % Place the original and press [Zoom]. Ready to copy. 11×8½" Plain 11×17"... -
Page 52: Xy Zoom
Model Type Zoom Level Metric models (Asia 200 % (A5 A3) Pacific) 141 % (A4 A3, B5 B4) 122 % (A4 B4, A5 B5) 115 % (B4 A3, B5 A4) 86 % (A3 B4, A4 B5) 81 % (B4 A4, B5 A5) 70 % (A3 A4, B4 B5) Follow the steps as below to use preset zoom. - Page 53 Press [+] and [–] to set the X and Y zoom ratios. Ready to copy. Press [# keys] ([#-Keys]) to enter with numeric keys. Shortcut Zoom Sele Orie Standard Zoom XY Zoom # keys # keys Under Select Original Orientation, select [Top Edge Top] or [Top Paper Size 11×8½"...
-
Page 54: Duplex Mode
Duplex Mode Use Duplex mode to create two-sided copies from a variety of originals, including facing pages (such as books or magazines) and two-sided originals. One-sided to Two-sided Produces two-sided copies from one-sided originals. The back side of the last copied page will be blank for originals with an odd number of pages. - Page 55 Follow the steps as below to use duplex copying. Press [Function]. Ready to copy. 11×8½" Plain 11×17" Auto % Color 11×8½" MP Tray Auto Stap 100% Plain Plain Density Left 8½×11" Plain Zoom Density Stap Basic User choice Function Program Press [Duplex].
- Page 56 For [1 sided 2 sided] ([1-sided 2-sided]) or [2 sided 2 sided] Paper Size 11×8½" ([2-sided 2-sided]), set [Top Edge Top] or [Top Edge Left] from 100% Select Original Orientation. Shortcut Back Close Original Finishing Select Original Orientation. Binding Binding Left/Right Left/Right Binding...
-
Page 57: Split Mode
Split Mode Use Split mode to create single-sided copies from two-sided originals or originals with facing pages (such as books or magazines) as follows. Two-sided to One-sided Copies each side of a two-sided original onto two individual sheets. Note This operation requires the optional document processor. Original Copy The following binding options are available. - Page 58 Select the desired Split mode. Ready to copy. Shortcut Duplex Original Sele Orie 1 sided 1 sided Binding 1 sided 2 sided Left/Right 2 sided Binding 2 sided 2 sided 1 sided Book Book 1 sided 2 sided Specify the binding in the Original section. Ready to copy.
-
Page 59: Collate Mode
Collate Mode Scans multiple originals to deliver complete sets of copies as required according to page number. Follow the steps as below to use Collate mode. Original Copy Press [Function]. Ready to copy. 11×8½" Plain 11×17" Auto % Color 11×8½" MP Tray Auto Stap... -
Page 60: Interrupt Copy
Interrupt Copy Interrupt copying is useful to pause one copy job and copy other originals with different copy settings. After completing the urgent job, you can resume the interrupted jobs according to their original settings. You can also pause copy jobs that are being printed when you need to make urgent copies. -
Page 61: Low-Power Mode
Low-Power Mode To activate Low-Power mode, press the Energy Saver key. On the operation panel, only the Energy Saver, Power, and main power indicators will remain lit. To resume copying, perform one of the following actions. The machine returns to a copy-ready condition. •... - Page 62 3-18 Basic Operation...
-
Page 63: Optional Equipment
Optional Equipment This chapter introduces the optional equipment available for the machine. Overview of Optional Equipment Document Processor Paper Feeder Built-in Finisher Adding Staples................. 4-4 Clearing Staple Jams............... 4-5 Document Finisher Job Separator Key Counter Inserting the Key Counter............4-7 Printer Kit Fax Kit Optional Equipment... -
Page 64: Overview Of Optional Equipment
Overview of Optional Equipment The following optional equipment is available for the machine. Document Processor Key Counter Job Separator Document Finisher Printer Kit Built-in Finisher Paper Feeder Fax Kit Optional Equipment... -
Page 65: Document Processor
Document Processor Automatically scans originals. Also you can perform duplex copying and split copying. For document processor operation, refer to Loading Originals in the Document Processor (option) on page 2-15. Paper Feeder Two additional cassettes identical to the machine’s double cassettes can be installed in the machine. -
Page 66: Adding Staples
Note Sorted copies are delivered onto the finisher tray. Adjust the ejected paper guide extension to the size of the paper. The paper sizes are marked on the ejected paper guide extension. Open ejected paper guides 1 and 2 as necessary to accommodate the size of the paper. -
Page 67: Clearing Staple Jams
Pull out the staple holder. Remove the empty staple case from the staple holder. Holding the staple holder in your left hand, insert a new staple case with your right hand in the direction of the arrow. Insert the staple case as far as it will go. Pull of the paper tape wound around the staple case. -
Page 68: Document Finisher
Lift the face plate up by tab A. Remove the jammed staple from the end of the cartridge (staple- loaded side). Lower the face plate back. Insert the face plate back in place. The face plate clicks locked when fully inserted. Lift the staple unit slightly, then lower it and insert it again into its place. -
Page 69: Key Counter
Note To ensure that paper is delivered to the job separator, select the output destination or change the default setting. (For details, refer to Chapter 1 Selecting Output Destination and Chapter 3 Machine Default in the Advanced Operation Guide.) When removing paper from the job separator, pull it out at an angle to avoid catching the corners of the paper. -
Page 70: Fax Kit
Fax Kit Install the fax kit to use the machine as a fax as well. For further details, refer to the Fax Kit Operation Guide. Optional Equipment... -
Page 71: Maintenance
Maintenance This chapter describes cleaning and toner replacement. Cleaning Original Cover, Document Processor and Platen ....5-2 Slit Glass ................. 5-2 Separator................. 5-3 Transfer Roller................. 5-4 Main Charger................5-5 Toner Container and Waste Toner Box Replacement Maintenance... -
Page 72: Cleaning
Cleaning Clean the machine regularly to ensure optimum copy quality. CAUTION For safety, always unplug the power cord before cleaning the machine. Original Cover, Document Processor and Platen Wipe the rear side of the optional document processor or original cover and the platen with a soft cloth dampened with alcohol or diluted mild detergent. -
Page 73: Separator
Wipe white guide B in the document processor. Press [End]. Separator To maintain the best possible print quality, clean the machine as described below on a regular basis (once a month). Open the front cover. Remove cleaning brush (blue colored). Pull up left cover 1 lever and open left cover 1. -
Page 74: Transfer Roller
Replace the cleaning brush and close the front cover and left cover IMPORTANT Push in the position indicated to ensure that left cover 1 is securely closed. Transfer Roller To maintain the best possible print quality, clean the machine as described below on a regular basis (once a month). -
Page 75: Main Charger
Replace the cleaning brush and close the front cover and left cover IMPORTANT Push in the position indicated to ensure that left cover 1 is securely closed. Main Charger If black or white vertical streaks appear on copies, clean the main charger. - Page 76 Press [User Adjustment]. / Counter Language Accounting Check the MP Tray counter Setting Register Print User Orig. Size Report Adjustment Press [Charger Cleaning]. System Menu / Counter User adjustment Drum refresh Charger Cleaning System Menu Press [End]. Adjustment begins. Wait 5 minutes. in charger.
-
Page 77: Toner Container And Waste Toner Box Replacement
Toner Container and Waste Toner Box Replacement When the touch panel displays Add toner, replace the toner without delay even if several more copies are still possible. When replacing the toner container, replace the waste toner box as well. Each time you replace the toner container, be sure to clean the parts as instructed below. - Page 78 Fit the cap into the opening in the waste toner box and attach the sticker over the cap. Place the used waste toner box in the provided plastic disposal bag. CAUTION Do not attempt to incinerate the toner container or the waste toner box. Dangerous sparks may cause burns.
- Page 79 Align the grid cleaner with the notch and attach it to the machine. While gently holding the grid cleaner in place with your left hand, pull the main charger out fully and then push it back to a position where the roller A does not quite reach the white pad on the grid cleaner.
- Page 80 Pull up left cover 1 lever and open left cover 1. Run the brush from side to side along the separator as shown to remove any soiling. Run the brush from side to side along the transfer roller as shown, rotating by the gear at the end, to remove any soiling.
- Page 81 Hold the toner container in both hands and remove slowly. Place the used toner container in the provided plastic disposal bag. Hold the new toner container upright and tap the top of the container 5 or more times. Then turn the container the other way up and again tap the top of the container 5 or more times.
- Page 82 Hold the new toner container in both hands and gently push it into the machine. Using both hands, push the toner container in until it locks. Open the MP tray. Remove the filter. Remove dust from the filter using a vacuum cleaner or dry cloth. IMPORTANT Do not wash the filter with water.
-
Page 83: Troubleshooting
Troubleshooting This chapter explains how to solve problems with the machine. Solving Malfunctions Responding to Error Messages Clearing Paper Jams Jam Location Indicators............6-8 Paper Jam Precautions ............6-9 Cassette 1 ................6-9 Cassette 2 ................6-10 Optional Cassettes 3 and 4 ............6-11 MP Tray ................. -
Page 84: Solving Malfunctions
Solving Malfunctions The table below provides general guidelines for problem solving. If a problem occurs with your machine, check the checkpoints and perform procedures indicated on the following pages. If the problem persists, contact your Service Representative. Reference Symptom Checkpoints Corrective Actions Page The operation panel does... - Page 85 Reference Symptom Checkpoints Corrective Actions Page Copies are skewed. Are the originals loaded correctly? When placing originals on the platen, page 2-14 place them face-down and flush against the original size indicator plates. When placing originals in the page 2-15 document processor, align the original width guides securely before placing the originals.
-
Page 86: Responding To Error Messages
Responding to Error Messages If the touch panel displays any of these messages, follow the corresponding procedure. Error Messages Checkpoints Corrective Actions Reference Page Close ### cover. Is the indicated cover open? Close all covers securely. — Check the cover. Are any covers open? Close all covers securely. - Page 87 Error Messages Checkpoints Corrective Actions Reference Page Check paper size. Copy paper is Is the specified paper loaded? Load the specified paper. Adjust — not the same size as original. Or are the settings incorrect? any settings that are incorrect. (Paper size in cassette differs from actual size.
- Page 88 Error Messages Checkpoints Corrective Actions Reference Page Remove paper. Finisher tray. Is the maximum capacity of the Remove some pages from the — optional document finisher optional document finisher. output tray exceeded? These functions cannot be Have you selected functions Check the settings.
- Page 89 Error Messages Checkpoints Corrective Actions Reference Page Time for maintenance. — Periodic maintenance is — required to keep your machine in good condition. Contact your Service Representative or Authorized Service Center promptly. Paper misfeed. — If a paper jam occurs, the page 6-8 location of the jam will be indicated on the touch panel and...
-
Page 90: Clearing Paper Jams
Clearing Paper Jams If a paper jam occurs, the touch panel will display Paper misfeed and the Paper misfeed. copying will stop. Refer to these procedures to remove the jammed paper. 1.Open left cover 1 of the m and remove any paper that 2.Open cassette 1. -
Page 91: Paper Jam Precautions
Paper Jam Precautions • Do not reuse paper cleared from a jam. • If the paper was torn during removal, be sure to remove any loose scraps of paper from the machine inside. Scraps of paper left in the machine may cause subsequent jamming. •... -
Page 92: Cassette 2
Remove the jammed paper. If the paper tears, remove every loose scrap from inside the machine. Push cassette 1 securely back in place. Press the indicated position to close left cover 1. Cassette 2 Follow the steps below to clear paper jams in cassette 2. Open left cover 2. -
Page 93: Optional Cassettes 3 And
Remove the jammed paper. If the paper tears, remove every loose scrap from inside the machine. Push cassette 2 securely back in place. Close left cover 2. Optional Cassettes 3 and 4 Follow the steps below to clear paper jams in cassettes 3 or 4 when using the optional paper feeder. -
Page 94: Mp Tray
MP Tray Follow the steps below to clear paper jams in the MP tray. Remove all papers from the MP tray. If paper is jammed inside, pull the paper toward you to remove. Inside the Left Covers 1, 2 and 3 Follow the steps below to clear paper jams inside left cover 1, 2 or 3 (option). -
Page 95: Duplex Unit
Duplex Unit Follow the steps below to clear paper jams in the duplex unit. Pull up left cover 1 lever and open left cover 1. Remove the jammed paper. Lift up the duplex unit and remove the jammed paper. Press the indicated position to close left cover 1. Duplex Unit and Cassette 1 Follow the steps below to clear paper jams in duplex unit and cassette 1. -
Page 96: Paper Feed Unit
Remove the jammed paper. Lift up the duplex unit and remove the jammed paper. Pull out cassette 1 and remove the jammed paper. If the paper tears, remove every loose scrap from inside the machine. Push cassette 1 securely back in place. Press the indicated position to close left cover 1. - Page 97 Remove the jammed paper. If the paper tears, remove every loose scrap from inside the machine. Open the front cover. Turn the lower green knob (A1) clockwise. Remove the jammed paper. If you cannot remove the paper, proceed with the next step. Pull out the paper feed unit (A2).
-
Page 98: Optional Built-In Finisher
Open the paper feed unit cover (A3) and remove the jammed paper. Push the paper feed unit (A2) back in place, and close the front cover. Press the indicated position to close left cover 1. Optional Built-in Finisher Follow the steps below to clear paper jams in the optional built-in finisher. - Page 99 Press the indicated position to close left cover 1. Reattach the output tray. Turn the dial to lower the finisher process tray. Remove any paper from the tray. Push the tray upward back into place. Troubleshooting 6-17...
-
Page 100: Optional Document Processor
Optional Document Processor Follow the steps below to clear paper jams in the optional document processor. Remove the original from the original tray. Open the document processor top cover. Remove the jammed original. Lift up the paper feed unit A. Remove the jammed original. -
Page 101: Optional Document Finisher
Optional Document Finisher If a misfeed occurs in the optional document finisher, refer to the Document Finisher Operation Guide to clear the jam. Optional Job Separator Follow the steps below to clear paper jams in the optional job separator. If jammed paper can be seen through the paper output slot, pull it out toward you. - Page 102 6-20 Troubleshooting...
-
Page 103: Appendix
Appendix This chapter explains how to enter text, describes the paper types that can be used with the machine and lists the machine specifications. Entering Characters on Touch Panel Paper Specifications Body ..................7-6 Document Processor (option)..........7-8 Paper Feeder (option) ............. 7-8 Document Finisher (option) ............. -
Page 104: Entering Characters On Touch Panel
Entering Characters on Touch Panel To enter characters on the touch panel such as department names (for job accounting) or copying programs, etc., use the following procedures. Input Screen Inch models Keyboard Stop Name to display Char.Limit:32 including # AllDel. Del. - Page 105 Numeral/Symbol keyboard Stop Name to display Char.Limit:32 including # AllDel. Del. prev Capital Letter Num./Sym. Space Metric Models Keyboard Stop Name to display Char.Limit:32 including # AllDel. Del. prev Space Capital Letter Symbol 1 Symbol 2 Character display: Displays the characters entered. [Capital]: Press this key to enter capital letters.
-
Page 106: Entering Characters
Symbol 1 keyboard Stop Name to display Char.Limit:32 including # AllDel. Del. prev Space Capital Letter Symbol 1 Symbol 2 Symbol 2 keyboard Stop Name to display Char.Limit:32 including # AllDel. Del. prev Space Capital Letter Symbol 1 Symbol 2 Entering Characters The following is an example of how to enter ‘Abcde’... -
Page 107: Paper
Paper This section explains the paper sizes and types that can be used in the paper source. Cassettes 1 and 2 and the optional paper feeder Supported types Supported paper sizes No. of sheets Plain paper (60 to 120 g/m²) 11 ×... -
Page 108: Specifications
Specifications Note These specifications are subject to change without notice. Body Description Item 25 cpm model 30 cpm model Type Desktop Copying Method Electrophotography by semiconductor laser Supported Original Types Sheet, Book, 3-dimensional objects (maximum original size: 11 × 17"/A3) Original Feed System Fixed Paper Weight... - Page 109 Description Item 25 cpm model 30 cpm model Paper Capacity Cassette 1, 2 500 sheets (80 g/m²) MP Tray 200 sheets (80 g/m²) Output Tray Top tray 250 sheets (80 g/m²) Capacity with optional built- 100 sheets (80 g/m²) in finisher with optional job 150 sheets (80 g/m²) separator...
-
Page 110: Document Processor (Option)
Document Processor (option) Item Description Original Feed Method Automatic feed Paper Weight 45 to 160 g/m² Supported Original Types Sheet originals Paper Size Maximum: 11 × 17"/A3 Minimum: 5 1/2 × 8 1/2"/A5R Original No. of Sheets 75 sheets or less (50 to 80 g/m²) Mixed original sizes: 30 sheets or less (50 to 80 g/m²) Device Dimensions (W ×... -
Page 111: Document Finisher (Option)
Document Finisher (option) Item Description Number of Trays 1 tray Paper Weight Stapling: 80 g/m² or less Paper Size and Maximum Sheets (Non- 11 × 17", 8 1/2 × 14", 8 1/2 × 13" (Oficio II), 8 1/2 × 13 1/2", A3, B4, stapling) Folio, 8K: 500 sheets 11 ×... -
Page 112: Job Separator (Option)
Job Separator (option) Item Description Number of Trays 1 tray Paper Weight 45 to 160 g/m² Media Type Plain, Rough, Vellum, Recycled, Bond, Color (Colour), Thick paper Paper Size 11 × 17", 8 1/2 × 14", 11 × 8 1/2", 8 1/2 × 11", 7 1/4 × 10 1/2", 5 1/2 ×... -
Page 113: Index
Index Part names .............2-15 Specifications ............7-8 Duplex mode ..............3-10 Adjusting density .............. 3-5 Duplex unit Auto Low-Power mode ..........3-17 Paper jams ..............6-13 Auto Sleep mode ............3-17 Energy saving control function ........... xi Built-in finisher ..............4-3 Energy Star program ............xi Adding staples ............4-4 Entering characters on touch panel .........7-2 Clearing staple jams ..........4-5... - Page 114 Energy Star program ........... xi Loading paper ............2-2 Legal information ............x Paper jams ............. 6-11 Originals and paper sizes ........xviii Specifications ............7-8 Recycled paper ............xi Specifying the media type ........2-8 Regarding tradenames ..........x Specifying the paper size ......... 2-7 Low-Power mode ............
- Page 115 Transfer roller Cleaning ..............5-4 Warm-up ................3-2 Waste toner box ...............1-3 Replacement ............5-7 Zoom Auto zoom ..............3-6 Manual zoom .............3-6, 3-7 Preset zoom ............3-6, 3-7 XY zoom ............3-6, 3-8 Index-3...
- Page 116 Index-4...
- Page 117 We recommend the use of our own brand supplies. We will not be liable for any damage caused by the use of third party supplies in this machine.
- Page 119 ©2007 is a trademark of Kyocera Corporation...
- Page 120 2007.8 302JB56031...