Table of Contents
Advertisement
Quick Links
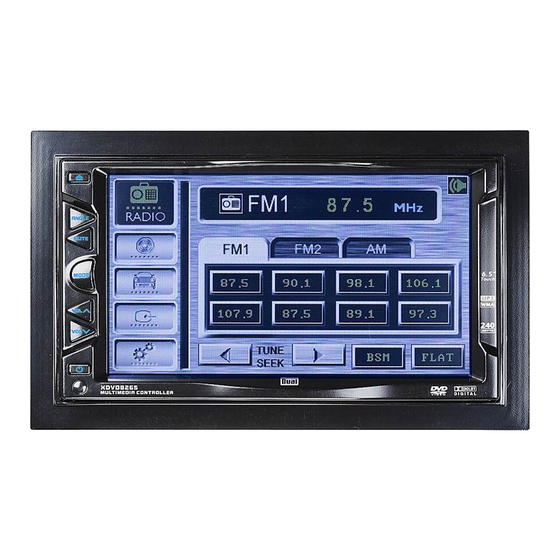
XDVD8265
INSTALLATION/OWNER'S MANUAL
DVD Multimedia Receiver with 6.5" Touch Screen Display
Safety Note:
The DVD video display of the in-dash unit will not operate while the vehicle is moving. This is a safety feature to
prevent driver distraction. In-dash DVD video functions will only operate when vehicle is in Park and the parking
brake is engaged. It is illegal in most states for the driver to view video while the vehicle is in motion.
Advertisement
Table of Contents

Related Manuals for Dual XDVD8265


Summary of Contents for Dual XDVD8265
- Page 1 XDVD8265 INSTALLATION/OWNER’S MANUAL DVD Multimedia Receiver with 6.5” Touch Screen Display Safety Note: The DVD video display of the in-dash unit will not operate while the vehicle is moving. This is a safety feature to prevent driver distraction. In-dash DVD video functions will only operate when vehicle is in Park and the parking...
-
Page 2: Table Of Contents
Some DVD discs can be played only in certain playback modes according to the intentions of the software. As the XDVD8265 plays discs according to their intentions, some functions may not work as intended. Please be sure to read the instructions provided with each disc. This player has been designed to play back DVD software that has been encoded for specific region areas. -
Page 3: Safety Information/Precautions
Please read all instructions carefully before attempting to install or operate. Due to its technical nature, it is highly recommended that your DUAL XDVD8265 is installed by a professional installer or an authorized dealer. This product is only for use in vehicles with 12VDC negative ground only. -
Page 4: Mounting/Wiring
Mounting Options 1. Rear ISO-DIN (using OEM factory radio mounting brackets): • Remove factory radio mounting brackets and attach to the left and right sides of the XDVD8265 chassis. • See diagram on page 5. 2. Rear ISO-DIN (using included universal mounting brackets): •... -
Page 5: Mounting Options
TYPICAL REAR-LOAD ISO-DIN MOUNTING TYPICAL REAR-LOAD MOUNTING USING UNIVERSAL MOUNTING BRACKETS TYPICAL FRONT-LOAD MOUNTING USING MOUNTING SLEEVE AND TRIM RING XDVD8265 INSTALLATION Mounting Options Mount factory radio brackets to the chassis using the supplied M5 x 6 mm screws. - Page 6 XDVD8265 INSTALLATION Wiring Diagram - Inputs/Outputs Wiring Notes: Center channel output The center channel audio output (Blue RCA) must be connected to an external amplifier (not included) to hear center channel audio. Subwoofer output The subwoofer audio output (Black RCA) is active in all audio modes.
- Page 7 XDVD8265 Wiring Diagram - Power/Speakers Connecting the parking brake lead (Yellow/Blue - ) The Yellow/Blue lead MUST be connected for the in-dash monitor to operate properly. The DVD video display of the in-dash unit will not operate while the vehicle is moving. This is a safety feature to prevent driver distraction.
- Page 8 OPERATION Wiring Diagram - Optional A/V Connections The diagram above illustrates the connection capabilities of the XDVD8265. Two separate Audio/Video inputs allow the connection of a DVD player or game console. A dedicated video output provides video signal for external monitors while a rear view camera can be connected to provide assistance when backing up your vehicle.
-
Page 9: Control Locations -Receiver
Caution • Due to its highly technological design, the XDVD8265 faceplate is NOT removable. Do not attempt to remove the faceplate. • This model incorporates a motorized moving monitor. Before final installation, make sure the monitor will not obstruct the dash or shifter. -
Page 10: Control Locations - Remote
XDVD8265 OPERATION Control Locations - Remote Power Preset #3 Preset #4 Preset #7 Preset #8 Key #0 BSM (Best Station Memory) 4-Way - Up Stop OK/Enter 4-Way - Right 4-way - Down Fast Forward/Manual Tune Up * The remote control uses one 3 volt Lithium CR2025 battery. For best performance, replace only with CR2025 or equivalent. -
Page 11: General Operation
Using the touch screen: Press the screen to display the OSD menu bar and press volume level bar. Press or to adjust the volume. XDVD8265 General Operation to turn the unit on/off. Due to its use of advanced microprocessors, to allow the front panel to slide down and access the disc slot. - Page 12 XDVD8265 OPERATION OSD Menu/General Setup Menu Radio Mode DVD/CD Mode Navigation Mode Auxiliary Mode Setup Mode Setup Menu Back General Setup Menu OSD (On Screen Display) Menu Bar Volume Level Bar Gently press the upper right corner of the screen to display the OSD menu bar.
-
Page 13: General Setup Menu
Contrast Sub-Red (Color) Sub-Blue (Color) Default Settings Default Settings Back XDVD8265 Press SCREEN to access screen menu page and adjust the following screen settings. Press to adjust settings and levels. When selected, the menu item will be highlighted in blue. The current level setting is indicated by a red bar. - Page 14 XDVD8265 OPERATION General Setup Menu Audio Menu Page Bass Treble Audio Menu Page Bass/Treble Adjustment Page Press AUDIO to access audio menu page and press BASS/TREBLE to access bass/treble adjustment page. Press When selected, the menu item will be highlighted in blue.
- Page 15 XDVD8265 OPERATION General Setup Menu Balance/Fader Press BAL/FAD to access balance/fader adjustment page. Press F-L to hear Front Left output only. Press F-R to hear Front Right output only. Press R-L to hear Rear Left output only. Press R-R to hear Rear Right output only.
-
Page 16: General Setup Menu
XDVD8265 OPERATION General Setup Menu Equalizer Confirmation Beep Loudness Equalizer Adjustment Page Confirmation Beep Adjustment Page Loudness Adjustment Page Press EQUALIZER to access equalizer adjustment page. Press desired preset EQ curve - POP, JAZZ, CLASSIC, ROCK or FLAT. Press BEEP to access the beep adjustment page. -
Page 17: Dvd Setup Menu
XDVD8265 OPERATION DVD Setup Menu DVD Menu Page Press DVD to access DVD menu page. Press DVD AUDIO to access DVD audio adjustment page. DVD Audio Press DOWNMIX to access audio downmix adjustment page. Press Downmix adjustment bar to select between LO/RO, LT/RT, 3D SURROUND and OFF. - Page 18 Notes: Some DVD discs can be played only in certain playback modes according to the intentions of the software. As the XDVD8265 plays discs according to their intentions, some functions may not work as intended. Please be sure to read...
-
Page 19: Dvd Setup Menu
XDVD8265 OPERATION DVD Setup Menu Parental Control Press PARENTAL and enter the 4-digit password to access the parental control settings. Press desired parental control level - Kid Safe, G, PG, PGB, PGR, R, NC17 or ADULT. The default password is 1234. -
Page 20: System Setup Menu
XDVD8265 OPERATION System Setup Menu System Menu Page Rear View Camera Mirror Image (Rear View Camera Input) Revision Page System Reset (Load default DVD settings) Dimmer Navigation (XNAV9525 integration) Grid (OSD) System Menu Page Rear View Camera Adjustment Page Press SYSTEM to access system preferences page. - Page 21 XDVD8265 OPERATION System Setup Menu Mirror Image Adjustment Page Revision Page System Reset Page Dimmer Adjustment Page Navigation Operation Page Grid OSD Adjustment Page...
-
Page 22: Am/Fm Tuner Operation
XDVD8265 OPERATION AM/FM Tuner Operation Tuner Mode Seek Tuning Manual Tuning Band Tuner Mode Current Band Tune Down The default mode is AM/FM tuner when the unit is first initialized or reset. Press RADIO icon to select AM/FM tuner mode. - Page 23 Preset EQ Curves Tuner Mode Current Band XDVD8265 AM/FM Tuner Operation Up to 16 FM stations and 8 AM stations can be stored. To store a station, select the desired band and station. Press and hold the desired station button in the OSD for more than 2 seconds.
- Page 24 XDVD8265 OPERATION DVD Operation - OSD Menu Insert Disc Eject Disc OSD Menu OSD Grid Menu Playback Start Playback Stop DVD Mode Fast Reverse Chapter Down Press to allow the front panel to slide down. With the label facing up, insert a disc.
-
Page 25: Osd Menu
1/16 in reverse. Press / II to resume playback. There is no audio output during slow mode. Navigate Up or Fast Forward FORWARD ENTER LEFT PLAY PAUSE DOWN REVERSE Navigate Down or Fast Reverse XDVD8265 OPERATION OSD MENU Display OSD Menu NEXT Navigate Right or RIGHT Next Chapter Enter/Play/Pause... -
Page 26: Dvd Operation
XDVD8265 OPERATION DVD Operation Root Menu (Main Menu) Title Menu Repeat Selecting DVD Subtitle Language Selecting DVD View Angles Selecting DVD Audio Languages DVD Mode Title Menu Press ROOT to select main menu. Press /// to select between menu settings and OK/ENTER to select/confirm. -
Page 27: Dvd Operation
XDVD8265 OPERATION DVD Operation Display Status Press DISP to select between the following: TT --/-- CH ---/--- with elapsed title time TT --/-- CH ---/--- with remaining title time TT --/-- CH ---/--- with elapsed chapter time TT --/-- CH ---/--- with remaining chapter time... -
Page 28: Cd Operation
XDVD8265 OPERATION CD Operation Play Stop Pause Track Select Direct Track Access CD Mode Play/Pause Insert a standard size CD into the disc slot. The CD will automatically begin playback when inserted. The currently playing track is shown in green and highlighted in blue. -
Page 29: Cd Operation
Track Random Optional Navigation Method CD-R/RW Compatibility CD Mode XDVD8265 Press or fast forward or fast reverse in 2x, 4x, 8x, 16x and 32x / II to cancel fast forward or fast reverse. modes. Press Press NORM (default) or current playback mode to select between NORM, RPT, or RAND playback modes. -
Page 30: Mp3/Wma Operation
XDVD8265 OPERATION MP3/WMA Operation Playing an MP3/WMA disc Navigation Method Repeat/Random Track Repeat Track Random MP3/WMA Mode When an MP3/WMA encoded disc is first inserted, playback will automatically begin with the first file in the root folder. A file must be selected first if there are no files in the root folder. -
Page 31: Dvd/Mp3/Wma Information
• This device can play back discs in Joliet and other standards that conform to ISO9660. MP3/WMA written in the formats other than the above may not play and/or their file names or folder names may not be displayed properly. XDVD8265 OPERATION DVD/MP3/WMA Information... -
Page 32: Dvd/Mp3/Wma Information
XDVD8265 OPERATION DVD/MP3/WMA Information Additional MP3/WMA Information Sampling Frequency Rates Transfer Bit rates MP3/WMA Tag Display Recommended Settings An internal buffer provides ESP (Electronic Skip Protection) to virtually eliminate skipping. When playing a disc recorded with regular audio files (CD-DA or .WAV) and MP3/WMA files, the unit will play the MP3/WMA files only. -
Page 33: Navigation/Auxiliary Modes
XDVD8265 OPERATION Navigation Mode NAVI Mode Press NAVI icon to select navigation mode. The audio will mute when commands are received from the XNAV9525 navigation system (sold separately). Refer to the XNAV9525 owner's manual for more information. XNAV9525 operation can be set to integrated or separate. See page 20 for details. -
Page 34: Warranty
This warranty gives you specific legal rights. You may also have other rights which vary from state to state. Dual Electronics Corp. warrants this product to the original purchaser to be free from defects in material and workmanship for a period of one year from the date of the original purchase. -
Page 35: Troubleshooting
Confidential unpublished works. ©1992-1997 Dolby Laboratories, Inc. All rights reserved. Windows Media and the Windows logo are trademarks, or registered trademarks of Microsoft Corporation in the United States and or other countries. XDVD8265 Cause Check connections for proper voltage (11~16VDC) -
Page 36: Specifications
6.85" x .67" x 3.85" (174 x 17 x 97.5 mm) Design and specifications subject to change without notice. CEA-2006 Power Standard Specifications (reference: 14.4VDC +/- 0.2V, 20Hz~20kHz) Dual Electronics Corp. Toll Free: 1-866-382-5476 www.dualav.com ©2006 Dual Electronics Corp. All rights reserved. NSA0206-V01 40/55/60/60...