Table of Contents
Advertisement
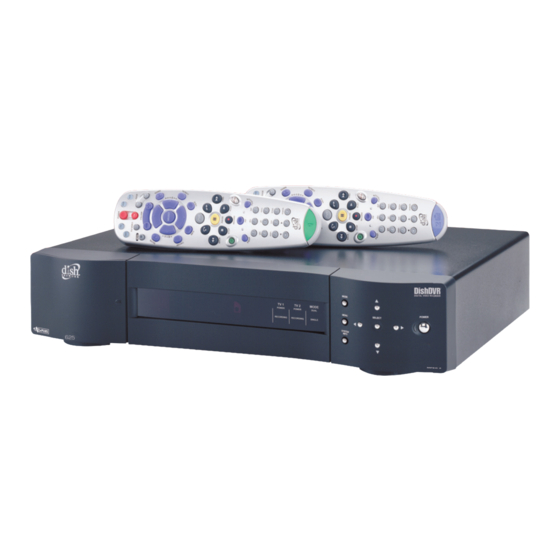
Chapter 2
Receiver Description and Installation
Receiver Front Panel
Smart Card Door
Behind this door is a slot for a future smart card. No smart card is included with
this receiver.
Indicators
•
- The green light indicates that the receiver is providing
TV1 Power
programming to the nearby TV through the
•
- The blue light indicates that the receiver is providing
TV2 Power
programming to the remote TVs through the
•
- Indicates that the receiver is recording.
Recording
have recording indicators.
•
- Indicates if the receiver is in
Mode
details).
Buttons
The buttons on the receiver give you some control of the receiver. Most of the
time you will want to use the remote controls that came with your receiver.
- Press the receiver MODE button to switch between
•
Mode
mode (see page 49 for details).
Dual
•
- Displays the
System Info
•
- Displays the
Menu
ARROWS and SELECT buttons to navigate through
•
Arrows/Select
ARROW and SELECT buttons on Remote Control 1.
•
- Press the POWER button to turn the
Power
to the nearby TV.
IR Sensor
The INFRARED (IR) SENSOR receives IR signals from Remote Control 1.
Single
System Info
. After you press this button, use the
Main Menu
- Use the ARROWS and SELECT the same way as the
output connections.
TV1
output connections.
TV2
and
TV1
TV2
or
mode (see page 49 for
Dual
Single
screen on the nearby TV.
's menus.
TV1
programming on or off
TV1
each
and
Page 23
Advertisement
Table of Contents

Related Manuals for Dish Network DISH 625


Summary of Contents for Dish Network DISH 625
- Page 1 Chapter 2 Receiver Description and Installation Receiver Front Panel Smart Card Door Behind this door is a slot for a future smart card. No smart card is included with this receiver. Indicators • - The green light indicates that the receiver is providing TV1 Power programming to the nearby TV through the •...
-
Page 2: Receiver Back Panel
Chapter 2 Receiver Description and Installation Receiver Back Panel Tip: The six coaxial connections on the back of your receiver are color coded to make the The receiver connections on the back panel are placed in three groups: connectors easy to •... -
Page 3: Digital Audio Out
Digital Audio Out is for use with high-quality digital IGITAL UDIO UTPUT sound decoding systems. Connect the with a Digital Audio Optical cable (available at consumer electronics stores). TV Antenna/Cable In is used if you want the satellite TV A NTENNA ABLE receiver to connect the tuner of the nearby TV to an off-air... -
Page 4: Remote Controls
Otherwise, you may not be able to order pay per view programs, use all of the DISH Interactive features, or other services from DISH Network. Remote Controls The two remote controls give you easy access to all the features of your satellite receiver. -
Page 5: Types Of Remote Controls
Types of Remote Controls uses infrared (IR) Remote Control 1 light signals to: • Control menus for the TV 1 nearby TV in Dual Mode • Control the satellite receiver in Single Mode IR signals travel only short distances (40 feet or less), and cannot go through walls or other solid objects. -
Page 6: Installing Or Changing The Batteries
Chapter 2 Receiver Description and Installation Batteries The remote controls come with AAA batteries, which need to be installed when you first receive your system. When you replace old batteries, you should replace all of the batteries. Use batteries of the same kind, for example alkaline or carbon zinc, and don’t mix batteries of different kinds. -
Page 7: Connecting The Receiver To A Nearby Tv
Connecting the Receiver to a Nearby TV This section describes how to connect receiver The easiest way to connect the receiver to the TV is using coaxial cable connections, but you may also use Coaxial Cable Connections 1. Connect a coaxial cable from the nearby TV’s tuner port. - Page 8 Chapter 2 Receiver Description and Installation RCA and S-Video Connections (TV1) 1. Connect one of the following video cables: • • 2. Connect the outputs to the nearby TV’s audio inputs. If the TV has only one input for this type of audio, connect it to the right (R) phono (RCA) audio output on the receiver.
-
Page 9: Connecting The Receiver To The Tv(S) In Another Room(S)
TV. Due to the difficulty of this installation, you should consider having this professionally installed. Call DISH Network at 1-800-333-DISH (3474). : When connecting to the home distribution ( Note you must meet the FCC requirements in the Appendix. - Page 10 Chapter 2 Receiver Description and Installation Tip: Using cable labels makes it easy to tell which cables connect to 1. Connect the tuner input of the remote TV(s) in other rooms to an existing the receiver ports. wall cable outlet using a coaxial cable. Inside the front cover of this guide 2.
- Page 11 8. Connect on the receiver to your existing wall cable outlet CH 21-69 O using a coaxial cable. : If you do not have an existing in-home cable system, you will need to Note run coaxial cable to each TV in other rooms. If this is too difficult, you may want to contact a professional to do this installation.
- Page 12 Chapter 2 Receiver Description and Installation 16. You may need to change the cable connection on the splitter that sends the TV signal throughout your house. The change that needs to be made is move the cable coming from the receiver the splitter to the input of the splitter using the instructions that follow.
- Page 13 23. If desired to remind you of which TV channel your satellite programming is on, write the channel number you wrote in step 4 on a blank channel sticker and place it on or near your remote TV(s). The stickers are inside the front cover of this guide.
-
Page 14: Programming The Recover Button
Chapter 2 Receiver Description and Installation Programming the Recover Button Your remote controls come equipped with a RECOVER button that helps you if you accidentally change the channel or video input on your remote TV and cannot get the picture back from your satellite receiver. When you press the RECOVER button as described on page 56, the remote control sends commands to your remote TV to change channels or video inputs to try to get you back to watching satellite programming. -
Page 15: Changing The Tv1 And Tv2 Output Channels
Changing the TV1 and TV2 Output Channels The receiver comes preset to use channel 3 for . If you are experiencing interference on the channels you are using, follow these instructions to change the channel that Make sure you are familiar with how to change channels on your TV and if necessary how to switch your TV between off-air and cable channels. -
Page 16: Connecting The Receiver To The Phone Line
: If you have a Digital Subscriber Line (DSL), you may have to install a Note DSL filter between the receiver’s back panel PHONE JACK and the telephone wall jack to successfully connect with DISH Network. You can obtain a filter from your DSL provider. Phone Line Connection Run a telephone cable with a standard RJ-11 connector from the receiver’s back... -
Page 17: Connecting Receiver To Dish Antenna System
Connecting the Receiver to a Dish Antenna System : Before you can begin connecting your receiver to your dish antenna, you Note must first complete the preceding sections on connecting your TVs to the receiver. Then if you are installing a dish antenna system for the first time, see Chapter 4 - Dish Antenna Installation. - Page 18 Chapter 2 Receiver Description and Installation 3. On Remote Control 1, press MENU-6-1-1 to display the screen on the nearby TV. 4. Select 5. The receiver begins performing the finished, the 6. Make sure that the information on the identifies your system correctly and shows all transponders for all satellites in your system.
-
Page 19: Optional - Connecting Vcrs To The System
Optional - Connecting VCRs to the System The diagram below provide example of how to connect VCRs to your satellite TV system. Your installation may be different. Connecting a VCR to the Nearby TV 1. Connect a coaxial cable from the nearby VCR’s tuner port. -
Page 20: Optional - Connecting To An Off-Air Antenna Or Cable
FCC requires that your install appropriate equipment between the off-air antenna/cable and the satellite TV receiver to prevent you from accidentally retransmitting DISH Network programming (see FCC Compliance in the Appendix). TV distribution equipment devices include coax panels, amplifiers or super home nodes, and are available through many companies. -
Page 21: Optimize Your Remote Controls
Optimize Your Remote Controls Change the Address When you receive your system, both remote controls and the receiver have been set to communicate on address 1. However, because UHF signals travel long distances and go through walls, a neighbor’s UHF Pro remote could control your receiver by mistake if they are on the same address. -
Page 22: Attach A Uhf Attenuator
Chapter 2 Receiver Description and Installation 6. Press the RECORD button. 7. Make sure the System Info it isn’t, the remote cannot control the receiver. 8. Press the SELECT button to close the Information Checking the Remote Control Address 1. Press and hold the SAT mode button for three seconds, until all of the mode buttons light up, and then let go of the SAT button. - Page 23 1. Take the UHF antenna off of the receiver’s back panel UHF Remote Antenna input 2. Put the attenuator onto the UHF Remote Antenna input. 3. Put the UHF antenna onto the attenuator. Page 45...
-
Page 24: Setting Up Tv1 To Operate In Uhf Pro
Chapter 2 Receiver Description and Installation Setting Up TV1 to Operate in UHF Pro You can set your receiver to operate your TV1 using another UHF Pro remote control (sold separately) by completing the following instructions: 1. Perform the following using an existing remote control: a. -
Page 25: Setting Up Tv1 To Operate In Ir
Setting Up TV1 to Operate in IR The following instructions describe how to set up TV1 to operate in IR only. 1. Perform the following with an existing remote control: a. Open the TV1 UHF Pro Setup remote control. b. Select from the Disable c. - Page 26 Chapter 2 Receiver Description and Installation Notes Page 48...