Table of Contents
Advertisement
Quick Links
Download this manual
See also:
Quick Manual
Advertisement
Table of Contents

Related Manuals for Gigabyte GSmart G1355


Summary of Contents for Gigabyte GSmart G1355
- Page 1 G1355...
- Page 2 Copyright All mobile products by GIGA-BYTE COMMUNICATIONS INC. mentioned in this document, including the device, accessories, software, text, music, and pictures, are owned by, or authorized by original manufacturers to GIGA-BYTE COMMUNICATIONS INC. Reproduction, transfer, distribution, or storage of part or all of the contents in this document in any form without the prior written permission of GIGA-BYTE COMMUNICATIONS INC.
-
Page 3: Safety Information
Safety Information This section contains important information on safe and efficient operation. Please read this information before using the device. • Use only the batteries and power adapter provided by the manufacturer. Use of unauthorized accessories may void your warranty. •... - Page 4 SAFETY IN AIRCRAFT Do not use the phone on board an aircraft. The phone’s network signals may cause interference to the navigation system. As a safety measurement, it is against the law in most countries to use the phone on board an aircraft.
- Page 5 RoHS Compliance This product is in compliance with Directive 2002/95/EC of the European Parliament and of the Council of 27 January 2003, on the restriction of the use of certain hazardous substances in electrical and electronic equipment (RoHS) and its amendments. European Union Regulatory Conformance The equipment complies with the RF Exposure Requirement 1999/519/EC, Council Recommendation of 12 July 1999 on the limitation of exposure of the general public to electromagnetic fields (0–300 GHz).
-
Page 6: General Information
General Information This section contains important information on safe and efficient operation. Please read this information before using the device. Ignorance of the following notices may lead to violations of the law. • Before using the device, please make sure you have fully charged the battery. •... -
Page 7: Table Of Contents
Table of Contents Copyright ..............................0-1 Safety Information ............................0-2 General Information ............................ 0-5 Chapter 1 Getting Started ........................1-1 1.1 Your Phone ............................1-1 1.2 Installing or uninstalling the SIM Card, Battery, and Memory Card ............1-3 1.3 Charging the Battery..........................1-5 1.4 Turning the Phone On or Off ........................ - Page 8 6.2 Calculator ............................. 6-5 6.3 Calendar ............................... 6-5 6.4 Gmail…………………………………………………………………………………………………………… .6-6 6.5 Maps..............................6-6 6.6 Latitude..............................6-6 6.7 Places..............................6-7 6.8 Navigation ............................6-7 6.9 Google Search ............................ 6-7 6.10 Voice Search ............................6-7 6.11 Talk..............................6-8 6.12 YouTube ............................. 6-8 6.13 Market ..............................
-
Page 9: G1355│
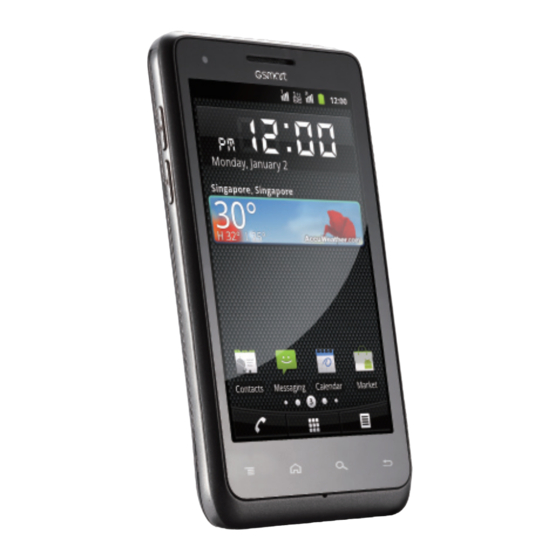
1. Getting Started 1.1 Your Phone • To set your phone to the sleep mode, press the This section introduces you to the hardware of the power button briefly. Press device. again to turn on the display. Receiver The source of voice. Touch screen Display screen. - Page 10 mass storage. • Connect USB cable and the AC adapter to charge the battery. Flash LED Help photo shooting. Items Functions The camera on the back of 5Megapixels the device supports Camera 5-mega-pixel photo and high-quality video. You need to open the cover Back cover to install or uninstall the battery and the SIM card.
-
Page 11: Installing Or Uninstalling The Sim Card, Battery, And Memory Card
3. Pull the back cover with your fingertip and 1.2 Installing or uninstalling the remove it. SIM Card, Battery, and Memory Card To remove the back cover 1. Please turn over your phone with the back cover facing up. SIM card The SIM card contains your phone number, memory storage, and details of network service. - Page 12 To remove the SIM card To replace the back cover 1. First, remove battery. 1. Please insert the hook on the bottom of back 2. Use your finger to slide the SIM card out of card cover into the slot. slot.
-
Page 13: Charging The Battery
NOTE: • The battery can also be charged when you connect your phone to the computer. • To ensure safety, do not remove the battery from the phone while the AC adapter is connected or while it is being charged. To remove the memory card 1. -
Page 14: Lock/Unlock
To set your phone to the sleep mode To set your phone to the sleep mode, press the power button briefly. It will turn the display off. To turn the display on, press the power button briefly again. 1.5 Lock/Unlock There are four functions you may use when you just turning it on or coming back from sleep mode. -
Page 15: Notification Led
Muting the phone Drag the G icon to Mute icon to make your device mute. 1.6 Notification LED Types Descriptions Solid red light Battery is charging. Solid green light Battery is full. Taking pictures Flashing red light Battery is low. Drag the G icon to Camera icon to taking some Notification ( New pictures. -
Page 16: Using Headset
internet expense by your carrier. You can tap The following instructions are only provided with “Change language” to change the default the original headset of the original manufacturer: language,” or tap “Done” to finish the setting. Types Descriptions 2. Tap the Android Robot icon to begin. In this •... -
Page 17: Contacts
your settings. b. Tap Application Drawer > Settings > Sound > Silent mode to set the phone to the silent mode. NOTE: When the phone is set to the silent mode, all sounds are turned off except media and alarm. 1.10 Contacts “Contacts”... - Page 18 Import Contacts to SIM card. 1. Tap Application Drawer > Contacts. 2. On Contacts tab, tap Menu > Import/Export > SIM Manager. 3. Tap Menu > Import to SIM. You can select SIM1 or SIM2 (If SIM card inserted). Then tap 4.
-
Page 19: The Home Screen
Remove from Favorites Default Home Screen: Main functions. 1. Tap Application Drawer > Contacts. 2. Tap Favorites tab, the favorite contacts are displayed. 3. Tap and hold the desired contact to pop-up a submenu. 4. Tap Remove from favorites. The contact will be removed from the list. - Page 20 Settings Home Screen: Shortcuts for settings. Tap to turn on/off network. Multimedia Home Screen: Multimedia settings. Icons Functions Enable/disable Wi-Fi. Enable/disable Bluetooth. Self-defined Home Screen: You can add the shortcuts and widgets. Enable/disable GPS. Enable/disable Data Synchronization. Tap to adjust the brightness. Tap to switch SIM1/SIM2.
- Page 21 Status Icons The icons of the status bar indicate different types of information. Tap the status bar and scroll down to view notifications or view system information. Types Icons Descriptions Mute the call. Vibration is on. Wired headset Volume connected. Wired microphone headset connected.
- Page 22 GPRS is in Missed call. progress. EDGE is in USB debugging is progress. connected. 3G is in progress. Data is Syncing. HSDPA is in General progress. notification. Airplane mode. FM radio is on. Call is in progress. Playing a song. Your call is on hold.
- Page 23 1. On Home Screen, tap Menu > Add > Folders. 2. Tap to select the desired folder you want to appear on Home Screen. 3. Tap and hold the desired folder ,the icon enlarges, and the Trash Can Icon appears at the bottom of the Home Screen.
- Page 24 Set wallpaper from Pictures 1. Long press any places on the home screens. There is a menu will pop up. 2. Tap “Wallpapers”. Then select “Gallery”. You could choose you want a picture from File Manager or Gallery. 3. You will see all pictures. Tap to select the picture you want to use.
-
Page 25: Chapter 2 Phone Functions & Input
2. Phone Functions & Input Phone Functions To make a call from Contacts Tap Application Drawer > Phone. 1. Tap Application Drawer > Contacts. 2. Tap a contact. 3. Tap “Call mobile”, “Call work”, or “Call home”. 2.1 Voice Calls 4. -
Page 26: Using On-Screen Keyboard
Using on-screen keyboard the first call on hold and answer the second call. • Use the keys on the on-screen keyboard. To switch between calls • Tap the keys to enter the characters. If you are having a call conversation, and there is Setting the Input Method another incoming call, slide the Talk icon to put the first call on hold and answer the second call. - Page 27 TouchPal keyboard Set portrait or landscape layout and some other functions. User dictionary • Smart input: Tap Menu > Add to add the self-defined words in Keyboard intelligence for western languages. the user dictionary. When you compose, you can use them.
- Page 28 • Voice Input: Voice input on main keyboard, on Tap to delete words. symbols keyboard, and off. Tap to activate smart English • Input languages: You can change input input method language. Switch different language • Quick fixes: Corrects commonly typed inputs and methods mistakes.
-
Page 29: Chapter 3 Email & Messaging
3. Email & Messaging NOTE: Use Messaging to access text and MMS messages. Use Email to send and receive e-mail If you exit Messaging before sending, unsent messages via your Internet e-mail accounts. message will be saved as a draft automatically. -
Page 30: Multimedia Message
2. Tap the contact sends message to you. then, enter your message with the on-screen 3. Tap and hold the message you want to delete. keyboard. 4. Tap Delete message. 8. Tap Send MMS to send your message. To copy a message text From Contacts You can use this function to copy the text from a 1. -
Page 31: E-Mail Accounts
NOTE: 3. Tap Menu > Attach > Record audio. The Account name is the name shown on the 4. Tap to record an audio file. Email screen. 5. Tap to stop recording. To open Email 6. Tap to listen to your recording. Tap Application Drawer >... - Page 32 To move between messaging accounts 2. Tap a contact name. 3. Tap Email home. Tap Email or tap Compose in If you are viewing the messaging list screen of the submenu (You need to create or log in one account and you want to view the list of Gmail).
-
Page 33: Chapter 4 Using The Internet
4. Using the Internet 4.1 Connecting to the Internet Your phone connects to the Internet via: Wi-Fi GPRS / EDGE / 3G / 3.5G NOTE: If you connect to the Internet, you may be charged. If you want to stop the connection, you need to tap Application Drawer >... -
Page 34: Bluetooth Modes
settings. VPN settings Set up & manage Virtual Private Networks (VPNs.) 1. Tap Application Drawer > Settings > Wireless & networks. 2. Tap VPN settings > Add VPN to add VPNs. To start a data connection If you set up multiple data connections, select the connection you want to use. - Page 35 Connecting to Bluetooth Devices A connection to a Bluetooth device is called a partnership. You need to pair and create a partnership with a Bluetooth device to exchange information. 1. Tap Application Drawer > Settings > Wireless & networks. 2. Tap Bluetooth settings to view the menu options.
-
Page 36: Chapter 5 Multimedia Applications
5. Multimedia Applications 5.1 Photos and Videos Tap to set flash mode. Your phone is equipped with a 5.0 megapixels camera to take photos and videos. Tap to zoom the image in or out. Taking a photo 1. Tap Application Drawer > Camera. The screen switches to landscape view automatically. - Page 37 Icon Function Press to record video. Tap to delete pictures. Configuring Camcorder settings. Tap Share to share the picture. Tap to set white balance. Tap to see more options. Tap to set flash mode. Reviewing a video Tap to set video quality. After recording video, the function of reviewing video: 1.
-
Page 38: Viewing Photos And Videos
Mode Setting Available options Flash mode On and Off +2、+1、0、-1、-2 High(30m), Exposure Low(30m), MMS 5M Pixels, 3M Video Limitation (Low), Picture size Pixels, 2M Pixels, Quality YouTube(High, 1M Pixels, VGA 10m), and custom Picture Super fine, Fine, quality and Normal None, Sepia, 5.2 Viewing Photos and Videos Color effect... -
Page 39: Music
To edit an image While viewing the image, to edit an image: To rotate image, tap Menu > More > Rotate Left or Rotate Right. To crop, tap Menu > More > Crop. 1. Drag your finger to select the crop area. 2. - Page 40 Tap to enable or Now playing screen: Tap to go to disable the repeat Now playing list. Tap and hold the icons on the function. left of each media file to arrange the sequence of play list. Library screen: Displays folder categories which make searching for media files quickly and easily.
- Page 41 Tap Delete to delete the song you playing. Creating a Playlist Add songs to a specific playlist or create a playlist. 1. Tap Application Drawer > Music. 2. In Songs tab, tap and hold a song you want to add.
-
Page 42: Chapter 6 Programs
6. Programs Pre-installed programs Listen to Icons Programs Description FM Radio music/news on the FM Radio. Allows you to use the phone more Google’s Gmail easily, we web-based e-mail Best Choice recommend and service. provide you the Creates and best software and Calendar tracks schedule or functionality. - Page 43 File Help you get the Manages all files. Navigation Manager destination. Google’s instant Views and edits Talk messaging Gallery photos and program. videos. It is online video Sends and streaming service receives all types YouTube that allows you to of messages, view, search, and Messaging such as text...
-
Page 44: Browser
2. While viewing Bookmarks, tap Menu to add the 6.1 Browser last-viewed page into the bookmark or to switch Open the Browser to view web pages. to the list view. 1. Tap Application Drawer > Browser. 2. An address bar appears on screen at the upper Managing a Web Page side, and you can type the URL there. - Page 45 Default zoom: Set up pages in inverted zooming functions. color. Open pages in Tap to configure privacy overview: Show the settings: overview of newly Clear cache: Clear opened pages. locally cached content Text encoding: Sets and databases. up text encoding.
-
Page 46: Calculator
problem with a site’s security. Set search engine: Select a search engine. Website settings: Advance settings Advanced settings for individual websites. Reset to default: Restore default settings. 6.2 Calculator With Calculator, you can perform basic arithmetic functions on your phone. 1. -
Page 47: Gmail
destination. You can select Car, Bus, or Walk 6.4 Gmail Mode. Gmail is Google's web-based email service. Gmail Joint Latitude: Tap Menu > Latitude to share my can be configured when you set up your phone at location with my friends and Google. the first time. -
Page 48: Places
Log in Latitude 6.8 Navigation 1. Tap Application Drawer > Latitude. Navigation is an Internet-connected GPS 2. If you do not log in your Google Account, tap navigation system with voice guidance. Help you Next in the screen of Add a Google Account. get the destination. -
Page 49: Talk
6.11 Talk 3. Tap to record video. Tap to stop. Input the title and details for the video, and then, tap Talk is Google's instant messaging program. Upload to upload the video. To sign in Talk NOTE: Before you upload the video, please 1. -
Page 50: News And Weather
You can select Celsius and Fahrenheit. 7. More information: Tap Menu > More. It includes Update Frequency, Update Notification , Demo, and About . 6.16 People This application could perfectly integrate your friends’ social networking services. 1. Tap Application Drawer > People. 2. -
Page 51: Best Choice
5. Tap or slide to search the FM stations,tap to go to the available FM stations or tap to fine tune the radio frequency. 6. Tap to play the radio, or tap to stop the radio. 6.17 Best Choice For easy to use, we recommend you the best software and functionality. -
Page 52: File Manager
To play a voice note device is disconnected. After recorded, the recording is stored in the Use Android Manager on your PC memory card. Please use Music to play it. Contacts: Allows you to back up contacts, as well 1. Tap Application Drawer > Music > Playlist > My recordings. -
Page 53: Install Usb Driver
2. Tap Menu to Sort by size or Sort by time. 6.25 Screen Capture You could use this function to capture any screen from the device. Please press Volume Key down while holding down the Power Key. The screen captures will be saved in /sdcard/media/images/screencapture and you may view screen captures in Gallery. -
Page 54: Chapter 7 Managing Your Phone
7. Managing Your Phone 7.1 Phone Settings Set up & manage Virtual VPN settings Private Networks Tap Application Drawer > Settings to view and adjust (VPNs). the settings of your phone. Set options for Mobile networks roaming,networks,APNs. Dual SIM Settings Application Description Call settings... - Page 55 Location & security Set up your default Phone ringtone ringtone of incoming Application Description (SIM2) calls. Location determined Use wireless Set up your default by Wi-Fi and/or mobile networks Notification ringtone ringtone of networks. notifications. When locating, Use GPS Enable/disable sounds accurate to street satellites Audible touch tones...
- Page 56 Storage applications. Application Description Change the preferred Preferred install installation location for To show the total location Total space new applications. space of the SD card. Manage and remove To show the available Available space Manage applications the installed space of the SD card. applications.
-
Page 57: Managing Basic Settings
Accessibility version of the Application Description software, etc. USB Manager Default 7.2 Managing Basic Settings Connect to PC Action Settings Enable/disable the Date and Time Accessibility accessibility. You can set up the date and the time on your phone. During a call, pressing To set up the date and time Power button ends Power ends the call... -
Page 58: Protecting Your Phone
when your alarm sounds. Tap OK to save the or SIM2) settings. 3. Select a ringtone from the list. 6. Tap Vibrate to enable/disable the vibration when 4. Tap OK to finish. the alarm sounds. To change ringtones of events 7. -
Page 59: Resetting Your Phone
tap Application Drawer > Settings > Location & 7.5 Specifications security > Change screen lock. Confirm your System Information password, and then, tap Continue. Tap None to Platform Android 2.3 disable it. Qualcomm Processor 7227-T at 800 MHz Set up unlock pattern ROM 1 GB You can further secure your data by locking the Memory... - Page 60 Micro USB 3.5 mm stereo audio Audio Jack jack Digital Camera 5.0 Megapixel Color Digital Camera Camera with AF and Video Recording External Memory microSD supports up to Memory Card 32GB Temperature Operating -15°C to 55°C SIM Card Slot Dual SIM card slot. NOTE: Specifications are subject to change without the prior notice.