Table of Contents
Advertisement
Advertisement
Table of Contents

Related Manuals for Audiovox KLV3913 - 12" 720p LCD TV/DVD Combo


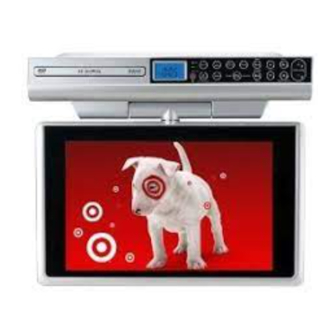
Summary of Contents for Audiovox KLV3913 - 12" 720p LCD TV/DVD Combo
-
Page 2: Safety Precautions
SAFETY PRECAUTIONS The following marks and symbols are located on The lightning flash with an arrowhead symbol, within the equilateral triangle, is back of the unit. intended to alert the user to the presence of uninsulated "dangerous voltage" within the product's enclosure that may be of sufficient magnitude to constitute a risk of electric shock to persons. -
Page 3: Safety Precautions .............................................. 1
SAFETY PRECAUTIONS FCC Information This device complies with Part 15 of the FCC rules. Operation is subject to the following two conditions: (1) This device may not cause harmful interference, and (2) This device must accept any interference received, including interference that may cause undesired operation. -
Page 4: Important Safety Instructions
IMPORTANT SAFETY INSTRUCTIONS Read these instructions. Keep these instructions. Heed all warnings. Follow all instructions. Do not use this apparatus near water. Clean only with a dry cloth. Do not block any of the ventilation openings. Install in accordance with the manufacturer's instructions. Do not install near any heat sources such as radiators, heat registers, stoves, or other apparatus (including amplifiers) that produce heat. -
Page 5: Table Of Contents
TABLE OF CONTENTS Safety Precautions ..........1 - 2 Repeat Playback ............ 19 Important Safety Instructions ......... 3 DVD Programmable Memory ........ 20 Table of Contents ............. 4 DVD Programmable Memory ......20 Disc Formats ............5 Viewing JPEG FILes ..........20 Accessories ............. -
Page 6: Disc Formats
DISC FORMATS The unit can play DVDs [8cm/12cm disc] Compatible Audio CDs [8cm/12cm disc] Region Management Information Region Management Information: This unit is designed and manufactured to respond to the Region Management Information that is encoded on DVDs. If the region number printed on the DVD does not correspond to the region number of this unit, this unit cannot play that disc. -
Page 7: Accessories
ACCESSORIES Please Check and Identify the Included Accessories. Remote control ..........................x 1 AAA 1.5V battery .......................... x 2 Mounting template ......................... x 1 1.06" (27mm) spacers ........................x 4 .57" (14.4mm) spacers ......................... x 4 .32" (8.2mm) spacers ........................x 4 #M 5 x 69 mm screws ........................ -
Page 8: Control Reference Guide
CONTROL REFERENCE GUIDE Remote Control FUNCTION Button Use to select DVD, TV or RADIO mode. PICTURE Button Selects from preset screen display PICTURE settings to match the type of show you are watching. MEMORY Button Sets title/chapter in a favorite order. Enter the number of a selected station. - Page 9 CONTROL REFERENCE GUIDE Remote Control STANDBY/ON Button Turns on the unit and puts it in standby mode. Number (0-9) Buttons LAST CH Button Press to switch repeatedly between the PICTURE last two channels displayed. TV MENU Button Press to display the on-screen TV menu.
-
Page 10: Control Reference Guide ..................................... 7
CONTROL REFERENCE GUIDE Unit 3 4 5 6 7 8 14 15 16 Disc Tray 10) DVD/TV/RADIO Button Opens or closes the tray by pressing OPEN/ Use to select DVD, TV or RADIO mode. CLOSE button. 11) TIMER Button Use to set the cooking timer. Place a disc on the disc tray, label side up. -
Page 11: Mounting Instructions
MOUNTING INSTRUCTIONS TOOLS NEEDED: 1) Electric drill with 1/4” bit; 2) Phillips-head (cross style) screwdriver. STEP 1 STEP 3 If your cabinet does NOT have an overhang: If your cabinet does NOT have an overhang: a) Place the Mounting Template in the desired a) Eight screws are included with this unit, but location inside or underneath the cabinet you will only need four of them. - Page 12 MOUNTING INSTRUCTIONS (Continued from previous page) e) Partially tighten each screw, but do not fully tighten the screws until all of them have been c) Insert the four selected screws through each started (see Figure 6). hole from the inside of the cabinet going down (see Figure 5).
-
Page 13: Connections
CONNECTIONS Connecting the TV Antenna Connect a TV antenna or CATV cable or Satellite system to the TV antenna terminal. TV antenna To the TV ANT IN terminal Connecting the Unit to a TV or other Video Equipment Use the Video cable (not supplied). Connect the VIDEO OUT on the rear of the unit to the VIDEO IN on your TV or other video equipment. -
Page 14: Plugging In The Unit
CONNECTIONS Plugging in the Unit Plug the AC power cord into the wall outlet a) Before plugging in the power cord, make sure the voltage of the unit matches your local voltage. b) Plug the power cord directly into the nearest wall outlet, and wrap the remaining cord around the cord storage knob at the rear of the unit. -
Page 15: Unit Operation
UNIT OPERATION Turning the Unit On While the power cord is connected and the unit is on standby, power will be consumed and only the clock display will flash. • Press the ON/OFF button to turn the unit on and the DVD indicator lights up. After a short period of time, “DVD”... -
Page 16: Setting The Clock
SETTING THE CLOCK To adjust the clock, the unit must be in standby mode. To enter standby mode, make sure that the unit is plugged in, but not turned on. • Check that the rated voltage of the unit matches your local voltage. 1. -
Page 17: Playing A Disc
PLAYING A DISC This owner’s manual explains the basic instructions of this unit. Some DVDs are produced in a manner that allows specific or limited operation during playback. Such as, the unit may not respond to all operating commands. This is not a defect in the unit. Refer to the instruction notes of discs. -
Page 18: Angle Selection
PLAYING A DISC Angle Selection Some DVDs contain scenes which have been shot from a number of different angles. For these discs, the same scene can be viewed from each of these different angles. 1. While you are playing a DVD with different angles recorded, press the ANGLE button to view the num- Sequence of angle shots ber of current angles available. -
Page 19: Display Function
PLAYING A DISC Display Function While the disc is playing, press the DISPLAY button on the remote control repeatedly to display information on operation status. Time: The elapsed time from the beginning of the title which is currently playing. Title/Chapter: The number of the title/chapter currently playing and total titles/chapter on disc. -
Page 20: Setting Favorite Bookmark During Playback
SPECIAL FUNCTION Setting Favorite Bookmarks During Playback While a disc is playing, you can mark the desired scene. 1. Press the GOTO button until Bookmark1 appears. 2. Press the ENTER button to mark the desired scene and the time of this point will be shown in Bookmark1. -
Page 21: Dvd Programmable Memory
DVD PROGRAMMABLE MEMORY DVD Programmed Playback You can combine your favorite titles/chapters and play them in the order you determine. 1. Press the MEMORY button on the remote control. 2. Use the button to select the title you want, then press the ENTER button on the remote control to confirm. -
Page 22: Play Modes For Cd Or Jpeg Disc
PLAY MODES FOR CD OR JPEG DISC When playing CD/JPEG discs, you can modify the Play Modes through the Toolkit which appears on the right in the window. Press the button on the remote control to navigate between the left/right windows and the button on the remote control to select files/tracks or play mode items. -
Page 23: Customizing The Function Settings
CUSTOMIZING THE FUNCTION SETTINGS Language OSD Language 1. Press the SETUP button in stop mode. 2. Press the button to select OSD Language. 3. Press the button. Use the button to make adjustments, then press the ENTER button. The screen will change to your selected language immediately. 4. -
Page 24: Default
CUSTOMIZING THE FUNCTION SETTINGS Notes: • The displayable picture size is preset on the DVD. Therefore, the playback picture of some DVDs may not conform to the picture size you select. • When you play DVDs recorded in the 4:3 picture size only, the playback picture always appears in the 4:3 picture size regardless of the TV Shape setting. -
Page 25: Using The Tv
USING THE TV Connect a TV antenna or CATV cable or Satellite system to the TV antenna terminal before searching TV channels Searching for TV channels automatically (Only appears to the first time Power ON) 1. Connect the TV antenna. 2. -
Page 26: Tv Setup
TV SETUP Picture Setting 1. Press the TV MENU button. 2. Use the button to select the options (Picture Mode / Contrast / Brightness / Sharpness / Tint / Color). 3. Use the button to make adjustment. The screen will Picture Mode Standard change to your selected mode immediately. - Page 27 TV SETUP TV Timer Setting 1. Press the TV MENU button. 2. Use the button to select TIMER SETTING. 3. Use the button to select the options (OSD Duration / Time Zone / Day Saving Time). OSD Duration 30 Sec 4.
- Page 28 TV SETUP TV Channel Setting 1. Press the TV MENU button. 2. Use the button to select TV CHANNEL SETTING. 3. Use the button to select the options (Antenna / Auto Scan / Auto Scan Add CH / Channel Skip / Channel No.
-
Page 29: Listening To The Radio
LISTENING TO THE RADIO Tuning in to a Station Manually 1. Press the DVD/TV/RADIO button (the FUNCTION button on the remote) until the radio frequency appears on the front panel display. 2. Press the / BAND (AM/FM) button to select AM or FM. 3. -
Page 30: Troubleshooting Guide
TROUBLESHOOTING GUIDE SYMPTOM CAUSE (AND REMEDY) No power. • Ensure the AC power cord is connected. • The unit is not turned on. The remote does • Remove any obstacles between the remote and the unit. not function. • Use the remote near the unit. •... -
Page 31: Maintenance
MAINTENANCE Cleaning the Disc A defective or soiled disc inserted into the unit can cause sound to drop out during playback. Handle the disc by holding its inner and outer edges. • Do NOT touch the surface of the unlabeled side of the disc. •... -
Page 32: Limited Warranty
VENTURER, or to products or parts thereof which have had the serial number removed or changed. Out of Warranty In the event your product requires repair after the limited warranty period has expired, please contact our Customer Support Center at 1-866-444-6478, 1-800-252-6123 or www.1800customersupport.com/audiovox Hours: Monday-Thursday: 9-7, Friday: 9-5, Saturday: 9-12 EST Important: You are responsible for any transportation, shipping or insurance relative to the return of the product to our Product Returns Center.