Table of Contents
Advertisement
Advertisement
Table of Contents

Related Manuals for Audiovox VE1020


Summary of Contents for Audiovox VE1020
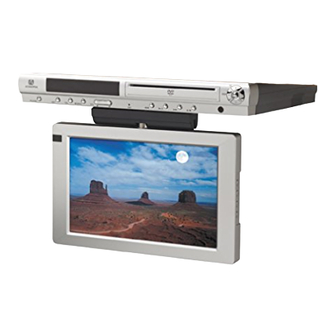
- Page 1 10.2” Low Profile DVD/TV/Speakerphone - DVD Player & 10.2” TFT LCD Monitor - AM/FM Stereo Radio - Multi-Function Remote Control - Hands Free Speaker Phone Mode - Cable Ready 125 Channel Tuner - Internal Stereo Speakers - 2 A/V Inputs - Under Cabinet / Table Top Mounting - Message Record - 1 -...
- Page 2 INTRODUCTION WARNING – To prevent fire or shock hazard, do not expose this unit to moisture. CAUT ION This symbol is intended to alert the user to the presence of uninsured “dangerous voltage” within the product’s enclosure that may be of sufficient magnitude to constitute a risk of electric shock to persons.
- Page 3 INFORMATION This equipment generates and uses radio frequency energy and if not installed and used property, that is, in strict accordance with the manufacture’s instructions, may cause interference to radio and found to not comply with the limited for a Class B computing device in accordance with the specifications in Subpart J of Part 15 or FCC Rules, which are designed to provide reasonable protection against such interference in a residential installation.
-
Page 4: Important Safety Information
IMPORTANT SAFETY INFORMATION 1. Read Instructions – All the safety and operating instructions should be read before the product is operated. 2. Retain Instructions – The safety and operating instructions should be retained for future reference. 3. Head Warnings – All warnings on the product and in the operating instructions should be adhered 4. - Page 5 12. Grounding or Polarization – This product may be equipped with a polarized alternating current line plug (a plug having one blade wider than the other). This plug will fit into the power outlet only one way. This is a safety feature. If you are unable to insert the plug fully into the outlet, try reversing the plug.
- Page 6 If the product has been dropped or damaged in any way. When the product exhibits a significant change in performance – this indicates a need or service. 21. Replacement Parts – When replacement parts are required, be sure the service technician has used replacement parts specified by the manufacturer or that have the same characteristics as the original part.
- Page 7 Never spill liquid of any kind on the unit. 7) Do not attempt to service the VE1020 yourself as opening or removing covers may expose you to dangerous voltage or other hazards. Refer all servicing to qualified service personnel.
-
Page 8: Contents Of Package
CONTENTS OF PACKAGE 1. VE700TVPhone 2. Hardware bag A. 3/4”Mounting screws (4) B. 1-1/4” Mounting screws (4) C. 1-1/2”Mounting screws (4) D. Foot (4) E. Hole cap (4) 3. Remote Control Unit - 8 - 4. F. 1/4” Spacer (4) G. -
Page 9: Under Cabinet Installation
TV antenna or cable connection and a telephone jack will facilitate a neat, easy installation. Do not mount the VE1020 above a range or oven. Be sure that the location chosen will provide adequate access to the electrical connection on the rear of the unit before continuing. -
Page 10: Countertop / Desktop Installation
COUNTERTOP / DESKTOP INSTALLATION NOTE: Use caution to avoid damaging the LCD screen and the main unit when converting this unit from an under-counter unit to a countertop unit. Leave the protective plastic on the screen until this procedure is completed. Place the unit (with the screen facing up) on a soft padded surface. -
Page 11: Front Panel Controls
11. MESSAGE: Play or Recording Button 12. MESSAGE Record indicator: Flashes when a message is present. 13. Remote Infrared Sensor: This sensor receives infrared signals from the remote control unit. 14. VFD Display: Vacuum Fluorescent Display for various VE1020 modes. - 11 -... -
Page 12: Rear Panel Controls
16. Channel Control Button (UP, DOWN, LEFT, RIGHT): Navigation button in DVD play mode. 17. ENTER: Enters the desired function during the DVD Mode. Rear Panel Controls Delete item 1, renumber 2 - 8 1) AUDIO LOW-LEVEL LINE OUT – Connect to low-level input of stereo system or low-level input of computer speakers. -
Page 13: Lcd Control Functions
LCD Control Functions 1. MENU Button – When pressed, the LCD control MENU is displayed. 2. SEL Button – Highlights the menu item to be changed using the UP/DOWN buttons. 3. UP Button – Scrolls upward through menu items, also adjusts selected item in upward (increase) direction. -
Page 14: Operation
POSITIONING THE SCREEN Unlatch and pivot the screen forward until a comfortable viewing angle is reached. The screen may also be rotated from side to side. Do not force the screen beyond its rotational limit. The VE1020 is now ready for use. - Page 15 NOTE: the VE1020 must be turned ″OFF″ when performing the following procedure. 1) Press the SET button (1) twice and VE1020 is in alarm mode indicated by ”alarm”. A present time will be displayed with the minutes portion blinking. (Alarm ACTIVATED mode, Alarm indicator ″ALM″...
-
Page 16: Remote Control
Remote Control (1) EJECT (2) DVD (3) TV (4) SETUP (5) SEEK DN, SEEKUP (6) MENU (7) FR( (8) STOP( █ ) (9) PREV ( (10) Digit 0-9 Select (11) TITLE (12) DISPLAY (13) SUB TITLE (14) AUDIO (15) SCREEN (16) ANGLE (AP) (17) ON/OFF (18) A/V... -
Page 17: Remote Control Functions
Remote Control Functions DVD MENU (1) EJECT: Press this button to Eject and Load the disc tray. (2) DVD: Press this button to select DVD mode of operation. (4) SETUP: Displays setup menu for initial user settings. (5) SEEK DN/UP (21) CH+/-: For selecting item on menu. (6) MENU: For displaying the menu contained in the disc. - Page 18 RADIO MENU (5) SEEK DN/UP: Use these buttons to advance to the next higher or lower station. (19) AM/FM: Each time this button is pressed, the VE1020 will alternate between AM and FM radio bands. (21) CH +/-: Use these buttons to advance to the next higher or lower channel.
-
Page 19: Modes Of Operation
Modes of Operation SETTING THE CABLE TV MODE 1) With the unit turned off, press the SET button three times to enter the cable configuration mode. 2) CABL appears on the display. Note: If AIR appears, use the Seek Up/Seek Dn to select CABL. - Page 20 Using the Remote Control Functions Inserting and Ejecting the Disc 1. Set the unit to DVD mode (press source button until --------- appears on the display. 2. Insert the disc with the label facing up. 3. The disc will begin playing automatically. If it is a DVD it will go to the menu. Press PLAY to begin watching the movie.
- Page 21 Using the Remote Control Functions Searching for a Specific Scene/song by using Playback Speed 1. Search by fast forward ( ) and reverse ( 2. Search by slow forward ( 3. 3. Search by watching one frame at a time. Press the PLAY/PAUSE button ( STEP button.
- Page 22 ZOOM 1. Pressing the ZOOM button would allow the picture to be enlarged by X1, X2, or X3. 2. Navigation buttons (Seek Dn/Seek Up/Ch Up/Ch Dn) allow the enlarged picture to be shifted. 3. To resume normal settings, press the ZOOM button again until ZOOM is OFF). Viewing Different Angles 1.
-
Page 23: Using The Setup Menu
Using The Setup Menu The setup menu allows the user to select the play mode settings. Follow the basic steps below for each setup menu selection. To use the SETUP menu: 1. Press the SETUP button to display the main menu. The following Menu will appear 2. - Page 24 6. Press the ENTER button to select the option item, then press the ◄ buttons to return to the sub-menu. 7. Press the ▲ or ▼ Buttons to highlight the next sub-menu item for setup and repeat steps 4 and 5. 8.
- Page 25 ) PG - Will play PG rated movies ) PG-13 - Will play PG-13 rated movies ) PG-R - Will play PG-R rated movies ) R - Will play R rated movies ) NC-17 - Will play NC-17 rated movies ) Adult - Will play Unrated rated movies PASSWORD: The user will be prompted to enter the Previous Password.
-
Page 26: Definition Of Terms
Definition of terms DEFINITON OF TERMS Title TITLE The largest playback unit of images or music recorded in DVD. Each title has a title number that simplifies the song selecting process. CHAPTER A smaller playback unit than title image or music recorded on a DVD. Several chapters compose a Title. -
Page 27: Troubleshooting Checklist
Troubleshooting Check List Problem Solution • Check if the power cord is securely plugged into the wall Power does not turn on • Check if the batteries of the remote control unit are not depleted. • Check if the disc is inserted properly into tray. Disc fails to play •... -
Page 28: Technical Specification
Technical Specification GENERAL: Power supply: AC 100 – 240V, 50/ 60hZ, 40 watts Operating Temperature: 0~40C° (32 – 100F) Operating Humidity: 10% ~ 75 % Unit Size: 13-3/4” W x 10.2” D x 1.85” H – (Screen closed) 352 X 259 X 47(mm) Weight: 5.4 lbs (2.7 kg) DISPLAY: LCD Illumination: CCFL Edge Lit Tube... - Page 29 - 29 -...