Table of Contents
Advertisement
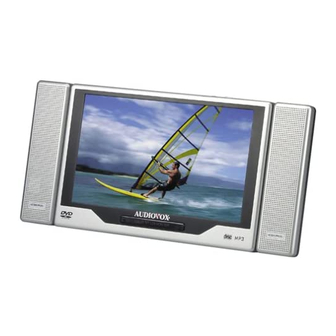
12" LCD TV with
10" LCD TV with DVD Player
Operating Instructions
O
per ating Ins tructions
Model No.D1020
D1210
Model No.
For assistance, please call: 1-800-645-4994
Or visit us at
Before connecting, operating or adjusting this product, please read these instructions completely
.
Please keep this manual for future reference
128-6935A
Advertisement
Table of Contents

Related Manuals for Audiovox D1020


Summary of Contents for Audiovox D1020
-
Page 1: Operating Instructions
Operating Instructions per ating Ins tructions Model No.D1020 D1210 Model No. For assistance, please call: 1-800-645-4994 Or visit us at Before connecting, operating or adjusting this product, please read these instructions completely Please keep this manual for future reference 128-6935A... - Page 2 An LCD panel or video monitor used for television reception, video or DVD play that operates when the vehicle is in gear or when the parking brake is not applied must be installed to the rear of the driver’s seat where it will not be visible, directly or indirectly, to the operator of the motor vehicle.
-
Page 3: Table Of Contents
Controls/Indicators/Connectors ........13 Remote Controls ............14 DVD Player ..............15 System Operation ............28 Watching TV ..............25 Playing a Video Game ..........29 Use Headphones ............29 Support Home TV ............30 Support External Speaker ........... 30 Specifications ............. 30... -
Page 4: Introduction
The unit is compact so that you can take it with you anywhere and is designed for easy installation. Please read all the instructions in this manual to assure proper installation and best equipment performance. - Page 5 10. Cabinet Slots – NEVER push objects or any kind into the unit through the cabinet slots as they may touch dangerous voltage points or short out parts that could result in a fire or electric shock. NEVER spill liquid of any kind on the prod- uct.
- Page 6 14. Power Sources – This product should be operated only from the type of power source indicated on the rear panel. If you are not sure of the type of power supply to your home consult your product dealer or local power company.
- Page 7 21. CAUTION – There is a danger of explosion if the battery is incorrectly replaced. Replace only with the same or equiva- lent type.
- Page 8 If this equipment does cause or receive interference, which can be deter mined by turning equipment off and on, the user is encour- aged to try to correct the interference by one of the following measures:...
- Page 9 Also determine the length of cable you’ll need. c. Optimum Quality picture – Turn off florescent lamps near the LCD and place in a location not exposed to outdoor light.
- Page 10 27. DVD CAUTION: This unit employs a laser system. To ensure the proper use of the unit, read this manual carefully and keep it for future reference. To prevent direct exposure to the laser radiation, do not open the cabinet. Invisible laser radiation could be present when the cabinet is opened or the interlocks are defeated.
-
Page 11: C. Contents
Swing up the rear metal stand and place the unit on a table or other level surface. Plug one end of the AC to DC adapter into the DC 12V input on the right side of the main unit, then plug the other end into the 110V AC power receptacle. -
Page 12: Car Installation
(Passenger Seat). 2. Take another strap and connect the latch to the lower metal ring on the back of the bag. Attach the “S” hook to the same ring after looping the strap around the rail located beneath the seat track. - Page 13 2) Connect the 3.5mm audio jack to the audio output jack on the rear of the DVD player. 3) Connect the DC jack to the 9 VDC input on the side of the DVD player. 4) Tune the vehicle radio to the same frequency that is selected on the modulator.
-
Page 14: Controls/Indicators/Connectors
F. Controls/Indicators/Connectors (Refer to Figure 3) 1. Power On/Off 14. DVD Eject 2. TV Auto Program 15. IR Headphone Sensor 3. TV Channel Down /Remote Sensor 4. TV Channel Up 16. Left Speaker 5. Volume Down 17. Right Speaker 6. Volume Up 18. -
Page 15: Remote Controls
G. Remote Controls (Refer to Figure 4) 1. TV/DVD/AUX Select 2. DVD Number Control Select 3. Numbers 0-9 4. TV/CATV Select 5. Mute 6. Picture Select 7. Volume Up/Down (+/-) 8. DVD Eject Button 9. Up/Down-Left/Right/Enter 10. DVD Menu 11. DVD Display 12. -
Page 16: Dvd Player
NEXT during playback Go back to the preceding chapter, PREVIOUS track or scene during playback Scan forward at 2, 4, 6, or 8 times normal FORWARD SCAN speed Scan backward at 2, 4, 6, or 8 times normal REVERSE SCAN... - Page 17 A DVD is divided into sections called title and chapter. When you play a DVD, a root menu of the disc will appear on the screen of your TV or Monitor. The contents of the menu vary from disc to disc.
- Page 18 Press DISPLAY the 3rd time to display the elapsed time for the chapter. The heading will disappear automatically in about 3 seconds. d. Press DISPLAY the 4th time to display the remaining time for the chapter. The heading will disappear automatically in about 3 seconds.
- Page 19 3) Audio During playback, press AUDIO to select the audio language you desire, with the current audio channel number (1) and the total number of audio channels (2) displayed. Press AUDIO again to select another audio language. The audio display will disappear automatically if the AUDIO button isn’t pressed again for 3 sec-...
- Page 20 During playback, press REPEAT again to repeat ALL chap- ters and titles. d. During playback, press REPEAT a 4th time to cancel the re- peated playing (REPEAT OFF) and resume normal playback. The repeat display will disappear automatically if the RE-...
-
Page 21: Playing Audio Cds
The options below show you what information is available using this function. a. The current track and playing time of that track will be displayed on the screen. b. Press ‘DISPLAY’ one time and SINGLE RE MAIN appears along with the current track playing and the amount of time left. - Page 22 Press ‘DISPLAY’ three times and TOTAL REMAIN appears along with the current track playing and the amount of time remaining on the CD. e. P ress ‘DISPLAY’ four times and “ DISPLAY OFF ” wi ll appear momentarily then disappear. The CD time Information will not be displayed.
- Page 23 Press LEFT to return. * NORMAL/PS: When the player is connected to a normal TV, and a wide picture is shown on the full screen, with a portion that may be cut off automatically. * NORMAL/LB: When the player is connected to a normal TV, and a wide picture is shown on the screen, with black strip at both top and bottom of the screen.
- Page 24 UP/DOWN and then press ENTER to confirm the setting. Press LEFT to return. * ON: The screen will show an angle mark. (If angle option is available) * OFF: the screen won’t show an angle mark.
- Page 25 Note: The default password is 3308 and this password is always effective whether you’ve changed it to another new one or not, in case that you forget the new password. To avoid others using it to set the parental level and change the password, you may note this default password by other means and delete it from this manual.
- Page 26 Note: Language selection is only available for discs re corded in the languages listed in the submenus above. If not, the player will play and display on the screen the original recorded language contained in the disc. d. Select PARENTAL using UP/DOWN and then press RIGHT to enter the submenu.
- Page 27 Press ENTER. If you have changed the parental level, the PASSWORD page will be displayed; otherwise it will not. Input the password in 4 digits, and then press ENTER to confirm the parental level setting. Note: After inserting the disc in the player, if the paren-...
- Page 28 REPEAT ONE (repeat playback of a song) REPEAT FOLDER (repeat playback of a specific folder) Insert an MP3 CD, the DVD player will initialize the disc and the directory (folder) will be shown on the TV screen. When an MP3 disc is inserted into the unit, the menu screen appears automatically.
- Page 29 NOTICE “ “ icon in front of a file name indicates that this is a folder, not an MP3 file. “MP3” icon in front of a file name indicates that this is a MP3 file.
-
Page 30: System Operation
I. System Operation 1. Press POWER to switch the unit on or off. The switch indica- tor will light red and the unit will go to the mode last used and stored in memory. 2. Press DVD/TV/AV to select your desired mode. When switch- ing the mode, the DVD player can memorize the present play ing point. -
Page 31: Playing A Video Game
Plug the AV output from your game system into the AV IN jack on the front of the unit. You can use the attached AV cable to convert the 3.5mm AV jack on the unit to RCA type AV jacks,... -
Page 32: Support Home Tv
M. Support Home TV Match the color-coded plugs to the appropriate DVD outputs in the rear of the unit: Yellow (VIDEO) to Yellow, White (AUDIO L) to White, and Red (AUDIO R) to Red. N. Support External Speaker Connect the EXT. SPEAKER output to an external speaker. -
Page 33: Day Limited Warranty
This Warranty does not apply to any product or part thereof which, in the opinion of the Company, has suffered or been damaged through alteration, improper installation, mishandling, misuse, neglect, accident, or by removal or defacement of the factory serial number/bar code label(s). -
Page 34: Customer Record
________________________________ Customer Record: This Model number and Serial number of this product can be found on its rear panel. You should note this serial number in the space provided below and retain this book, plus your purchase receipt, as a permanent record of your purchase to aid in identification in the event of theft or loss, Repair and Warranty Service purpose.