
Related Manuals for Datavideo RMC-120


Summary of Contents for Datavideo RMC-120
- Page 1 Ethernet Control Box for SE-800 RMC-120 錯誤! USER MANUAL Http://www.datavideo-tek.com 2005/1/4...
-
Page 2: Warnings And Precautions
AC adapter. If you are not sure of the type of power available, consult your Datavideo dealer or your local power company. 8. Do not allow anything to rest on the power cord. Do not locate this unit where the power cord will be walked on, rolled over, or otherwise stressed. - Page 3 11. Never push objects of any kind into this unit through the cabinet ventilation slots, as they may touch dangerous voltage points or short out parts that could result in risk of fire or electric shock. Never spill liquid of any kind onto or into this unit.
-
Page 4: Table Of Contents
…... …... …... …... …... …... …... …..1 Warnings and Precautions What's in the Box……………..……….………………...…...……….4 Introduction……………………………………...……………..………5 Introduction Product overview Features…………………………………………………..….………...6 User Interface Functions……………………………..……….……...7 Installation, Connections, Set Connections PC IP setting RMC-120 IP setting SE-800 IP setting Troubleshooting…………………….…………..…………...……...22 No connection FAQ……………………………………………..………..….………..23 Specification…………..………………………..………..….……….25 Technical Support...…………………………………….…………...26 up…………………………..……...14... -
Page 5: What's In The Box
What’s in the box? 1. RMC-120 3. RJ45 Ethernet cable 1M * 1 (cross over) 5. User manual 2. AC / DC Power Adaptor * 1 4. RS-232 cable 1.2M * 1 6. Installation CD... -
Page 6: Introduction
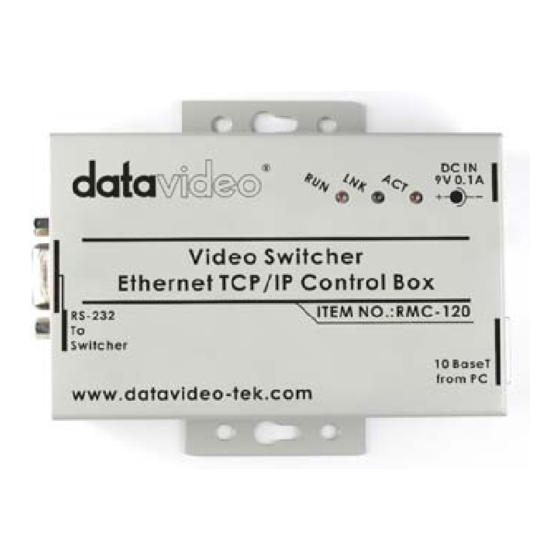
RMC-120 is special designed for SE-800 control by Ethernet. Now you can remote control shots, mix, and edit, all within the SE-800 RS-232 protocol. RMC-120 is a simple RJ45 to RS-232 device, featuring powerful software that allows you to use your PC or laptop as a control center. -
Page 7: Features
Features Standard RJ 45 and RS-232 connectors Easy to install Simply connection Full functions remote control Friendly user interface... -
Page 8: User Interface Functions
User Interface Functions Joy stick and mode selector Voice sync adjustment Video input format selector Audio channel selectors Audio follow video switch Color processor Border control Background control Transition source selectors 10. GPI function on/off button 11. Play F1 to F30 by sequence 12. - Page 9 1. Joystick and Joystick mode selector: The Joystick control can function either in RGB Color Correction mode or Position Control mode, depending on the position of the selector below it. In RGB Correction mode, you can make real time RGB white balance corrections to the Main Source video.
- Page 10 selected on the Main Source bus is automatically selected. If A+V is not engaged, the input source is user selectable. Level controls for each input source are the rotary pots below the selection buttons. 5. A+V: Audio follow video switch. When this button is engaged (you’ll know it is engaged because the LED is lit), the audio associated with a selected input source automatically follows the video through the...
- Page 11 7. Border: controls the border style and color for the Picture in Picture effect. This control is accessible when the Picture in Picture controls, Wipe and Zoom effects. (22.) are engaged. 8. Background: when Background is selected in either the Main or Sub Video Source (14, 15.), and the ON button is pressed (and the LED is lit), repeated presses of the color button cycle...
- Page 12 14. Main Video Source Selector: used to select which of the four video input channels or background is sent to the Main video output. 15. Sub Video Source Selector: used to select which of the four video input channels or background will be transitioned to or used as a sub source in an effect.
- Page 13 19. Paint: when engaged (and the Paint LED is lit), this applies a posterized effect to the selected Main Video Source. Repeated presses of the up and down buttons set the intensity level of the effect, from 1 (least) to 4 (most). The level setting is displayed in the Effects window above the Keypad (21.).
- Page 14 23. Audio Bus selectors: the LEDs indicate which of the audio inputs are active in the Main audio output mix. Press the button to either include or exclude the channel. The left button, labeled Mic/Aux, can be set to either Mic, Aux, or off. Above all are basic functions descriptions.
-
Page 15: Installation, Connections, Set Up
Installation, Connections, Set up Connections RS-232 SE-800 Real Panel RS-232 Ethernet Cable RMC-120 Ethernet Cable Computer Real Panel... - Page 16 Set up PC Computer IP address Step 1: Click “Start” button. Go to “Setting”, then click on “Control Panel” Step 2: Click on “Network and Dial-up Connections”...
- Page 17 Step 3: Click on “Properties” Step 4: Select “Internet Protocol (TCP/IP)”, click on “Properties”...
- Page 18 Step 5: Set up IP address and Subnet mask. IP address: 192.168.0.1 Subnet mask: 255.255.255.0...
- Page 19 Set up RMC-120 IP address Step 1: Double click or Config Icon Step 2: Click on the Search Buttion Step 3: clink on the MAC List...
- Page 20 Step 4: Setting the Local IP: 192.168.0.7 Setting the Subnet Mask : 255.255.255.0 Setting the Remote IP: 192.168.0.1 Setting the Baud Rate: 57600 Setting the Data Bit: 8 Setting the Stop Bit: 1 Setting the Parity: Odd Select TCP Misc Mode and Click on the Write Button, and then Exit Button...
- Page 21 Set up SE-800 IP address Step 1: Clink on the se800 icon Step 2: Right Click on the mouse button and select “Options”...
- Page 22 Step 3: Select “Client Mode” and set up Remote IP 192.168.0.7 then Click on the “OK” button...
-
Page 23: Troubleshooting
IP address: 192.168.0.1 Subnet mask: 255.255.255.0 RMC-120 IP address settings assigned Condition Setting the Local IP: 192.168.0.7 Setting the Subnet Mask : 255.255.255.0 Setting the Remote IP: 192.168.0.1 SE-800 PC Control Software IP address settings assigned Condition Client Mode setting Remote IP 192.168.0.7... -
Page 24: Faq
A: We already notice this problem, and will fix it in next version software. Q: Are all SE-800 can be controlled by RMC-120? A: No. RMC-120 can only use with SE-800 ROM A: v5.6; ROM B: v2.4, or later version firmware. Q: How do I check my SE-800 firmware version? A: For the ROM A, when SE-800 turns on, please check the digital number which shows on “EFFECT”... - Page 25 A: For the ROM B, please make sure all the video effects and transition effects have turned off. Then, press up key and check the check the digital number which shows on “EFFECT” and “SPEED” if it’s showing 2.4 as below. EFFECT SPEED 0 2 4...
-
Page 26: Specification
Specifications RS-232 Data Control Port Connecting Datavideo SE-800 RS-232 Remote Control Port RJ-45 Ethernet Port Connecting PC or Laptop Ethernet Port for Remote Trigger Control Dimensions W x D x H 100m/m x 67m/m x 23m/m Weight 0.12 Kg Power Input: DC 9V/0.1A... -
Page 27: Technical Support
Tech support Datavideo maintains five offices worldwide to support this and other products. Datavideo Technologies Co., LTD. 10F, No. 176, Jian-Yi Rd, Chung Ho City, Taipei Hsien 235, Taiwan R.O.C. Tel: 886-2-8227-2888 Email: info@datavideo.com.tw Datavideo Corporation USA 12300-U East Washington Blvd. - Page 28 Datavideo UK Limited Unit 2 Waterside Business Park Manchester, England Tel: +44(0) 1457 851000 Email: sales@datavideo.co.uk All the trademarks are the properties of their respective owners. Datavideo Technologies Co., Ltd. All rights reserved 2004. P/N:...