TRENDnet TV-IP662PI User Manual
Megapixel poe day/night ptz network camera
Hide thumbs
Also See for TV-IP662PI:
- Quick installation manual (8 pages) ,
- Quick installation manual (11 pages)
Table of Contents
Advertisement
Quick Links
Advertisement
Table of Contents

Related Manuals for TRENDnet TV-IP662PI


Summary of Contents for TRENDnet TV-IP662PI
- Page 1 Cover Page TRENDnet User’s Guide...
-
Page 2: Table Of Contents
Step 4: Camera Name Settings ................20 Troubleshooting ................. 48 Step 5: Time Settings ....................20 System ......................... 22 Admin ........................23 Time and Date ......................24 Network ........................25 Network ........................26 Dynamic DNS ......................27 © Copyright 2014 TRENDnet. All Rights Reserved. -
Page 3: Product Overview
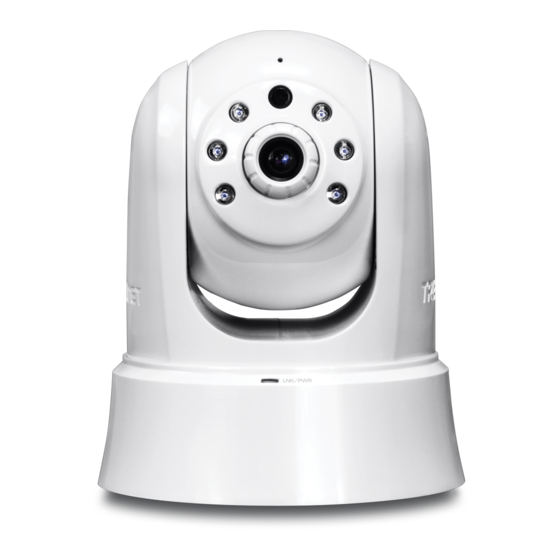
Features Product Overview The Megapixel PoE Day/Night PTZ Network Camera, model TV-IP662PI, provides day and night monitoring over a large area. Pan and tilt the camera from a mobile device, record video to a Micro SD Card, and have camera email motion detection video clips. A wall/ceiling mounting kit is included and the camera’s off white housing blends into... -
Page 4: Product Hardware Features
Air Vent – This is to cool the camera. indicator is blinking green when there is connection/data to your camera. PoE / Ethernet Port – Connect Ethernet cables to your wired network devices. © Copyright 2014 TRENDnet. All Rights Reserved. -
Page 5: Wall Mount Installation
(PoE) injector. This product is sold separately. More details are available on the TRENDnet web site. To attach the metal plates carry out the following: To setup a TRENDnet PoE injector (TPE-113GI) with the TV-IP662PI, connect one end of Remove the two rubber pads under the base of the Camera. -
Page 6: Using The Autorun Wizard
TRENDnet User’s Guide Using the Autorun Wizard To setup a TRENDnet PoE switch (TPE-S80, sold separately) with the TV-IP662PI, connect one end of an ordinary Etherenet cable to one of the PoE ports, and the other end to the Ethernet port at the back of the camera. - Page 7 1. Click Install Camera and follow the on-screen steps to continue the installation. 3. Follow the instructions in the next screen to Power up the Camera. Connect one end of the power adapter to the camera and watch the LED flicker. Click Next to continue. © Copyright 2014 TRENDnet. All Rights Reserved.
- Page 8 If you do not see any of your camera(s) in the wizard, click Retry to scan for the camera again. Click Next to continue. 5. The wizard will search the network for your camera. © Copyright 2014 TRENDnet. All Rights Reserved.
- Page 9 8 and 30 characters. Click Next to continue. 8. The wizard will configure your parameters. If you have entered the incorrect admin details, you are prompted to change the configuration, as shown below. © Copyright 2014 TRENDnet. All Rights Reserved.
- Page 10 Android™ devices. The app can also be found by searching TRENDnet from the Click Next to continue to the next step. Apple App Store or Google Play™...
-
Page 11: Mobile Apps
Android, and scan the image. The Bar Code app will read the QR Code and record it. The app will copy the QR link and provides a HTML link to the TRENDnet app. You will be directed to the Google Play™ Storefront to download the app. Download the app, install it and use the app on your mobile device to view the TRENDnet camera. -
Page 12: Setup Wizard (Finding Ip Address Of The Cameras)
TV-IP662PI TRENDnet User’s Guide 4. Click Start > Programs > TRENDnet > SetupWizard > SetupWizard. The Setup Wizard (Finding IP address of the cameras) TRENDnet Setup Wizard appears. To locate the IP address of your camera(s) on the same network with your PC, please install the Setup Wizard utility (for Windows only) from the SetupWizard folder . - Page 13 ISP requires a PPPoE authentication to the Internet. DHCP: Select this option if your camera is connected to a router and DHCP is enabled. Fixed IP: Select this option if your wish to connected the camera via a fixed IP. © Copyright 2014 TRENDnet. All Rights Reserved.
- Page 14 11. A summary screen of the settings you have chosen appears. Click Next to 13. When the Setup Wizard has finished, the configuration is complete and the continue. following screen appears: 12. After the Setup Wizard configures the camera, the wizard starts to setup process. © Copyright 2014 TRENDnet. All Rights Reserved.
-
Page 15: Web Browser Management
The camera’s built-in Web configuration utility is designed to allow you to easily access required. Click Allow to install the add-on. and configure your TV-IP662PI camera. Open a web browser such as Internet Explorer® and enter the IP address of your camera (through the setup wizard utility software on the CD). - Page 16 Download the plug-in to a folder on the local PC and run the download plug-in file. Click Next to continue. Note: Please ensure all browsers are closed during the installation. © Copyright 2014 TRENDnet. All Rights Reserved.
-
Page 17: Main Web User Interface
Also, for more accuracy, arrows are available in between the left, right, up and down arrows. Click the [+] button to return the camera to the home position. © Copyright 2014 TRENDnet. All Rights Reserved. - Page 18 Click this icon to view the video feed in the full screen mode. Click this icon to manually take a snapshot of the video feed. Click this icon to manually enable or disable video recording. © Copyright 2014 TRENDnet. All Rights Reserved.
-
Page 19: Setup
In the Setup section we can view and configure more advanced features available on The wizard will guide users through a simplified step-by-step wizard to configure basic the TV-IP662PI. After clicking the Setup button, the following page will be displayed. settings available on this camera. Click Next to continue. -
Page 20: Step 1: Lan Settings
Under Host Name enter the name the DDNS service provided. Enter a Username and Password, repeat the password and finally enter the Timeout value. Timeout states the time DDNS is updated. Click Next to continue. © Copyright 2014 TRENDnet. All Rights Reserved. -
Page 21: Step 4: Camera Name Settings
Enable Daylight Saving. Or Select the Keep Current Date and Time or Select the Offset of the time within 1 to 2 hours. Then select a Start Time and an End Synchronize with Network Time Protocol server. Time from the drop-down menus provided. © Copyright 2014 TRENDnet. All Rights Reserved. - Page 22 Select the Setup Date and Time Manually option to manual configure the date and time the local computer. Click Next to continue. settings for this camera. © Copyright 2014 TRENDnet. All Rights Reserved.
-
Page 23: System
60 seconds and that it is saving the settings to the camera. After the restart, the Web UI will direct back to the start of the wizard. © Copyright 2014 TRENDnet. All Rights Reserved. -
Page 24: Admin
In the New Password and Confirm New Password fields, enter the new login password that will be used for this camera. Click the Add button to add the new user account created. © Copyright 2014 TRENDnet. All Rights Reserved. -
Page 25: Time And Date
To calibrate the pan and tilt region of the camera, click the Calibrate the Device button. options. After selecting to manually configure the daylight saving time, select the Offset value used. Select the Start time and End time options. © Copyright 2014 TRENDnet. All Rights Reserved. -
Page 26: Network
Alternatively, click the Sync with Computer Time button to automatically configure the camera’s date and time settings to be the same as the current date and time settings on the local computer. Click the Apply button to apply the modifications made. © Copyright 2014 TRENDnet. All Rights Reserved. -
Page 27: Network
External HTTP and External RSTP port number in the respective spaces provided. acquired from your ISP. In the Apple part, we can enable the Bonjour feature. Click the Apply button to apply the modifications made. © Copyright 2014 TRENDnet. All Rights Reserved. -
Page 28: Dynamic Dns
Server Address field. Enter the Host Name, User Name, Password, and Timeout information in the spaces provided. Click the Apply button to apply the modifications made. © Copyright 2014 TRENDnet. All Rights Reserved. -
Page 29: Audio And Video
When selecting Manual, the user can manually toggle between day as such. When users choose the CBR encode method, the camera selects the bitrate as the first priority. The TV-IP662PI will adjust the image quality to fit the bitrate. When the and night modes by clicking the button on the Live View page. - Page 30 Enter the Day Time values in the spaces provided. First enter the starting hour and minute values next to the From option and then enter the ending hour and minute values next to the to option. © Copyright 2014 TRENDnet. All Rights Reserved.
-
Page 31: Image Setup
(1/15 second, 1/10 second, 1/7.5 second or 1/3.75 second) from the drop-down list. Click the Reset to Default button to return the image settings to their default values. © Copyright 2014 TRENDnet. All Rights Reserved. -
Page 32: Recording
After selecting the Always option as the Trigger by event, the following can be Sound. The parameters available for configuration will change depending on the configured. selections made. Selecting Always, will tell the camera to record always. © Copyright 2014 TRENDnet. All Rights Reserved. - Page 33 Enter the Interval value in the space provided. The interval value means that a snapshot will be taken at every interval configured. Only Profile 3 can be used for this selection. © Copyright 2014 TRENDnet. All Rights Reserved.
- Page 34 Samba network storage available on the network. Enter the Samba Server * For snapshot, the Address in the space provided. To connect to the Samba server as anonymous, select default video © Copyright 2014 TRENDnet. All Rights Reserved.
-
Page 35: Video Clip
After selecting the Motion option as the Trigger by event, the following can be Event supported when configured. trigger by Motion/Sound is activated. * Snapshot, it's activated using 6 snapshots only. Real Time © Copyright 2014 TRENDnet. All Rights Reserved. - Page 36 Selecting Sound, will tell the camera only to record when sound is detected. Tick the Schedule option to only record video when sound is detected at specific times of the week. Tick the Day and enter the Start and End times. © Copyright 2014 TRENDnet. All Rights Reserved.
-
Page 37: Snapshot
SSL-TLS, and STARTTLS. Click the Test button to test the E-mail connection. After selecting the Motion option as the Trigger by event, the following can be Click the Apply button to apply the modifications made. configured. © Copyright 2014 TRENDnet. All Rights Reserved. - Page 38 Selecting Sound, will tell the camera only to take snapshots when sound is detected. Tick the Schedule option to only take snapshots when sound is detected at specific times of the week. Tick the Day and enter the Start and End times. © Copyright 2014 TRENDnet. All Rights Reserved.
- Page 39 Click the Test button to test the FTP connection. SSL-TLS, and STARTTLS. Click the Test button to test the E-mail connection. Click the Apply button to apply the modifications made. © Copyright 2014 TRENDnet. All Rights Reserved.
-
Page 40: Preset Position
A list of configured preset positions will be displayed in the drop-down list. Select a configured Preset Position from the drop-down list and click the Delete button to remove a saved preset position. © Copyright 2014 TRENDnet. All Rights Reserved. -
Page 41: Sd Management
SD card. Click the Apply button to apply the modifications made. Note: When formatting the SD card, all files and folders will be removed from the micro SD card and cannot be recovered. © Copyright 2014 TRENDnet. All Rights Reserved. -
Page 42: Sound Detection
Tick the Enable button to enable the sound detection feature of this camera. Select the sound Detection Sensitivity Level value from the drop-down list provided. Configure the sensitivity levels to higher settings in noisy environments. Click the Apply button to apply the modifications made. © Copyright 2014 TRENDnet. All Rights Reserved. -
Page 43: System
Note: To find the latest firmware available for this camera, visit the TRENDnet website. its factory default configuration. Click the Reboot button to simply reboot the camera. -
Page 44: Advanced
Click the Clear button to remove all the log entries from the table. Click the Download button export the log table to a text file and then save it to the local computer. © Copyright 2014 TRENDnet. All Rights Reserved. -
Page 45: Trendnetview Pro Software
Add up to 32 network cameras to monitor Please refer to TRENDnetVIEW Pro User Guide for more details on the software. using the software. Additional software, TRENDnetVIEW Pro Player software is also © Copyright 2014 TRENDnet. All Rights Reserved. -
Page 46: How To Setup/Access The Camera Remotely
Server Address field. 4. Open the router’s Web configuration page. (In the example, TRENDnet’s TEW-651BR Wireless N Home Router is used) 2. Enter Dynamic DNS’ Host Name, User Name and Password. Re-enter the password to confirm it. - Page 47 Some router might use Port Forwarding or Special applications for this function. The setup steps should be very similar. 6. Open another web browser and enter your DDNS domain and camera’s port number. http://yourDomainName:PortNumber © Copyright 2014 TRENDnet. All Rights Reserved.
- Page 48 LAN Server: The local IP address of your Camera. Click Add to add the application. * Please refer to your router’s user’s manual for detail Virtual Server setting. Some router might use Port Forwarding or Special applications for this © Copyright 2014 TRENDnet. All Rights Reserved.
-
Page 49: Troubleshooting
Network Camera. Try also viewing the video using Java. Ensure that you have the latest version of Java installed before you do. Go to www.java.com for more information. © Copyright 2014 TRENDnet. All Rights Reserved. - Page 50 EN 60950-1: 2006+A11:2009+A1:2010+A12:2011. Safety of Information Technology Equipment EN55022:2010/AC:2011 Information technology equipment - Radio disturbance characteristics - Limits and methods of measurement EN55024:2010 Information technology equipment - Immunity characteristics - Limits and methods of measurement © Copyright 2014 TRENDnet. All Rights Reserved.
- Page 51 Note: This country code selection is for non-US models only and is not available to all US models. Per FCC regulation, all WiFi products marketed in the US must be fixed to US operation channels only. 以下警語適用台灣地區 經型式認證合格之低功率射頻電機,非經許可,公司、商號或使用者均不得 擅自變更頻率、加大功率或變更原設計之特性及功能。 低功率射頻電機之使用不得影響飛航安全及干擾合法通信;經發現有干擾現象時, 應立即停用,並改善至無干擾時方得繼續使用。前項合法通信,指依電信法規定作 業之無線電通信。低功率射頻電機須忍受合法通信或工業、科學及醫療用電波輻射 性電機設備之干擾 © Copyright 2014 TRENDnet. All Rights Reserved.
- Page 52 Download section limited to, duty, tax, and other fees. and look for the desired TRENDnet product to access to the GPL Code or LGPL Code. These codes are distributed WITHOUT WARRANTY and are subject to the copyrights of WARRANTIES EXCLUSIVE: IF THE TRENDNET PRODUCT DOES NOT OPERATE AS the developers.