
Related Manuals for Daewoo DF-8100


Summary of Contents for Daewoo DF-8100
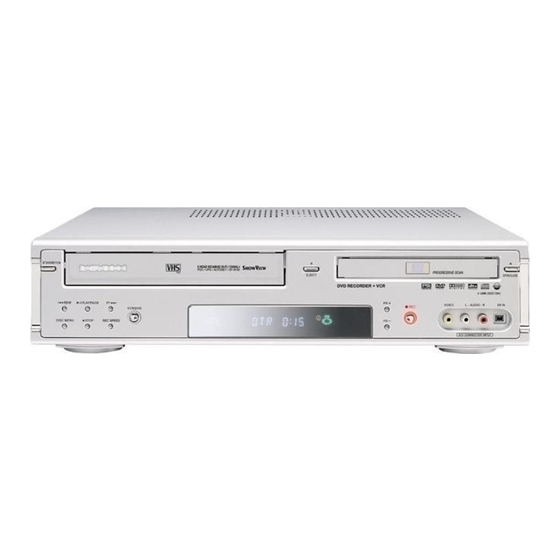
- Page 1 HELP LINE ; 0870 100 2525 With queries, please quote the page number, reference number and model number. DVD Recorder + VCR DVD Recorder + VCR DF-8100 User Manual P/N : 97P95600D0-1V...
-
Page 2: Safety Instructions
• Do not open the DVD Recorder+VCR. Get a qualified technician to carry out any repairs. • Do not connect the DVD Recorder+VCR to the power supply if you have just moved it from a cold environment to a warm room. This can lead to condensation inside the DVD Recorder+VCR, which can damage it. -
Page 3: Important Safeguards
Important Safeguards Important Safeguards CAUTION RISK OF ELECTRIC SHOCK DO NOT OPEN CAUTION: TO REDUCE THE RISK OF ELECTRIC SHOCK, DO NOT REMOVE COVER (OR BACK). NO USER-SERVICEABLE PARTS INSIDE. REFER SERVICING TO QUALIFIED SERVICE PERSONNEL. WARNING TO REDUCE THE RISK OF FIRE OR ELECTRIC SHOCK, DO NOT EXPOSE THIS APPLIANCE TO RAIN OR MOISTURE. -
Page 4: Table Of Contents
closing. It may cause serious personal injury. uses have the same safety characteristics as the original parts. Use of replacements specified by 15 OVERLOADING the unit manufacturer can prevent fire, electric Do not overload wall outlets of extension cords shock, or other hazards. as this can result in a risk of fire or electric shock. -
Page 5: Overview
Old recordings can be deleted but they can no longer be overwritten. The deleted recordings (titles) are marked 'deleted title'. Before a DVD+R can be played in a DVD player, it must be finalized in the DVD Recorder+VCR. Once this process is complete, no further recordings can be added. - Page 6 • Video that is ‘copy-once only’ can only be recorded using DVD+RW discs with CPRM. Copyright Notice • Audio and video recordings you make using the DVD Recorder+VCR are for your personal use only. You may not sell, lend, or rent them to other people.
-
Page 7: Identification Of Controls
$ Indicates when the DVD Recorder+VCR is playing or recording a tape with Hi-Fi sound. % Indicates the DVD Recorder+VCR is in TV mode (as set by the [TV/DVD] button). ^ Indicates the current Repeat mode. & Indicates when the DVD Recorder+VCR is locked. - Page 8 Selects Recording mode: - DVD : HQ (1hr), SP (2hrs), EP (4hrs) or SLP (6hrs). - VCR : SP or LP. Switches the DVD Recorder+VCR input to Tuner, AV1, AV2, AVF, or DV. (DV : DF-8100P/8150P only.) Selects a subtitle language, if available.
-
Page 9: Connections
Connections Connections • There are a variety of ways to connect the DVD Recorder+VCR to your TV and other equipment. Use only one of the connections described below. Whichever TV connection you use will work with all input sources. • Please refer to the manuals for your TV, VCR, stereo system, or other devices as necessary to make the best connections. -
Page 10: Connecting A Tv
Connecting to an amplifier equipped with two channel analog stereo or Dolby Pro Logic ll/Pro Logic Connect the Left and Right AUDIO OUT jacks on the DVD Recorder+VCR to the left and right audio in jacks on your amplifier, receiver, or stereo system, using the supplied audio cables (A). -
Page 11: Connecting Optional Equipment
Connecting Optional Equipment To receive audio/video signals from other equipment, connect Jack Panel of Accessory Component the AVF jacks on the DVD Recorder+VCR to the audio/video out jacks on your external component, using optional audio/video cables. Connecting a Digital Camcorder... -
Page 12: Initial Setup
Setup-Exit INSTALLATION Settings Set Clock Manual Set To complete the set-up of your DVD Recorder+VCR when the auto set has Please set the clock: not stored all of the channels or when you wish to store a new channel. …... - Page 13 Store PR01 Program Name P-01 Connect the DVD Recorder+VCR to the desired type of antenna or cable TV Instructions system, as shown in ‘Connecting Antenna/Cable‘ on page 15. Enter-Confirm Setup-Exit Move …† Follow steps 1-2 as shown under ‘Manual Set’.
-
Page 14: Recording Options Settings
Use […/†] to select the PR number you want to adjust. Then press [ENTER]. Delete After tuning TV stations into your DVD Recorder +VCR, you may wish to delete a station. Use […/†] to select 'Delete' and press [ENTER]. Edit After tuning TV stations into your DVD Recorder +VCR, you may wish to put a name into any channel you want to. -
Page 15: Preferences / Video Settings
Progressive Scan Video provides the highest picture quality with reduced flickering. RGB : If you connect the DVD Recorder+VCR to a analog television using the SCART jacks, set Video Output to ‘RGB’. Interlace or Progressive : digital television (DTV) or Monitor using the COMPONENT jacks, set Video Output to ‘Interlace’... -
Page 16: Preferences / Audio Settings
ADULT to KIDS: Audio set a rating for the DVD Recorder+VCR, all scenes with the same rating or lower will be played. Higher rated scenes will not be played unless an Digital Output alternative scene is available on the disc. The alternative must have the... -
Page 17: Preferences / Auto Settings
Set Parental Country Code Instructions Enter-Confirm Setup-Exit Move …† Auto Clock Set Parental Control Auto Clock enables the DVD Recorder+VCR to set the clock automatically Set Parental Level ADULT whenever it is in Standby mode (plugged in but powered off). Change Password Auto Clock is only available for models with the VPS/PDC function. -
Page 18: System Information
If you select ‘Index+’ (or ‘Index–’) and press [ENTER], your DVD Recorder+ VCR will locate your index mark and begin playback. If you select ‘Go-To Search’ and press [ENTER], your DVD Recorder+ VCR will wind to the position 0:00:00 and stop. - Page 19 OSD Menu Options for DVD During DVD playback, press [DISPLAY] to show information about the current disc. While the disc information is displayed, press [DISPLAY] again to show the disc remaining time. Title Shows the current title number and total number of titles, and skips to the desired title number. Press [DISPLAY] during playback.
-
Page 20: Dvd Playback
‘Set Parental Level‘ on page 29. • The DVD Recorder+VCR will not play discs with Region codes different from the DVD Recorder+VCR. The Region code for this DVD Recorder+VCR is 2 (two). -
Page 21: Vcr Playback
Make sure the TIMER indicator on the front panel display is not lit. If it is, press [POWER] once. If a tape without a safety tab is inserted, the DVD Recorder+VCR will start playback automatically. • If the DVD Recorder+VCR is powered on by inserting a video cassette, playback will not start automatically. Press [PLAY/PAUSE]. -
Page 22: Other Disc Playback
Press [REW] or [FF] during playback. Search mode will be activated. If the DVD Recorder+VCR is left in Search mode for more than 3 minutes, the DVD Recorder+VCR will automatically resume Play mode to protect the tape and video heads. -
Page 23: Basic Recording
To record for a fixed length of time, see One Touch Record on the next page. Press [STOP (I)] to stop recording. • The maximum number of DVD titles per disc is 49. If the DVD Recorder+VCR is powered off during DVD recording, the recording will not be saved. -
Page 24: One Touch Record (Otr)
Note • To quit One Touch Recording, press and hold [STOP] for 3 seconds. • The DVD Recorder+VCR will automatically power off when One Touch Recording ends. Tip (VCR mode only) • Always use [PLAY/PAUSE] for best results when making changes during recording. -
Page 25: One Touch Copy - Vhs To Dvd
The ‘Timer Recording’ menu appears. Use […†] to move to a timer recording slot, and press [ENTER] to modify it. If you did not set the clock on the DVD Recorder+VCR, you must do so before programming a timer recording. -
Page 26: Timer Recording Using Videoplus System
Thanks to this programming system, you no longer need to tediously enter the date, programme number, start and end time. All the information needed by the DVD recorder for programming is contained in the VideoPlus programming number. This VideoPlus number is found in most TV listings. -
Page 27: Recording From An External Input
To record for a fixed length of time, see ‘One Touch Record‘ on page 44. Press [STOP (I)] to stop recording. Note • If your source is copy-protected, you will not be able to record it using the DVD Recorder+VCR. See ‘Copyright Notice‘ on page 8 for more details. Recording from a Digital Camcorder... -
Page 28: Editing
Editing Editing DISC Initialize • If you load a blank DVD+R(+RW) disc, it will be initialized (formatted to enable recording). • Do not start recording until disc initialization is complete. • If you load a DVD+RW that has already been used you can record a program immediately. Disc Menu For recordable DVD media, such as DVD+R and DVD+RW discs, you can manage the disc using the Disc Menu. -
Page 29: Title Menu
Change Disc Name You can rename your disc to any name you choose. The default disc name is ‘MY DVD‘. Use […] to go to the top menu. Press [√] to display the Disc Information Menu. Press [√] and select ‘Change Disc Name‘. Press [ENTER] as shown on the screen. -
Page 30: Editing
Editing Editing When you insert a DVD+R or DVD+RW disc already recorded by your DVD Recorder+VCR, you can edit the titles and chapters in a variety of ways. To edit a recorded title, select the title on the disc menu and press [EDIT]. -
Page 31: Troubleshooting
DVD Recorder+VCR Setup menu. details. Camcorder is off. Turn camcorder on and operate properly. DVD Recorder+VCR’s source is not set Use [INPUT] to select AV input channel to AV1, AV2, AVF, or DV. (AV1, AV2, AVF, or DV). (DV : DF-8100P/8150P only) The disc was not finalized (or not made Finalize the disc;... -
Page 32: Technical Specifications
Moisture Condensation Moisture condensation can occur: In locations where moisture condensation may occur: When the DVD Recorder+VCR is moved from a cold Keep the DVD Recorder+VCR plugged into an AC place to a warm place. power outlet with the power on. This will help prevent condensation. - Page 33 Outputs Video output (DVD/VCR) Video output terminal, 1.0 Vp-p, unbalanced Video output (DVD) RGB output (75Ω in load, R : 0.7Vp-p, G : 0.7Vp-p, B : 0.7Vp-p) Audio output (DVD/VCR) Audio output terminal (2 kinds), -5.8dBm (VCR), 2Vrms (DVD) Audio output (DVD) Analog audio output : 2.0Vrms, Digital audio output : coaxial S-Video output (Y) 1.0Vp-p, 75Ω...