D-Link DI-524 Owner's Manual
802.11g/2.4ghz wireless router
Hide thumbs
Also See for DI-524:
- Quick installation manual (156 pages) ,
- Owner's manual (95 pages) ,
- Manual (92 pages)

Related Manuals for D-Link DI-524


Summary of Contents for D-Link DI-524
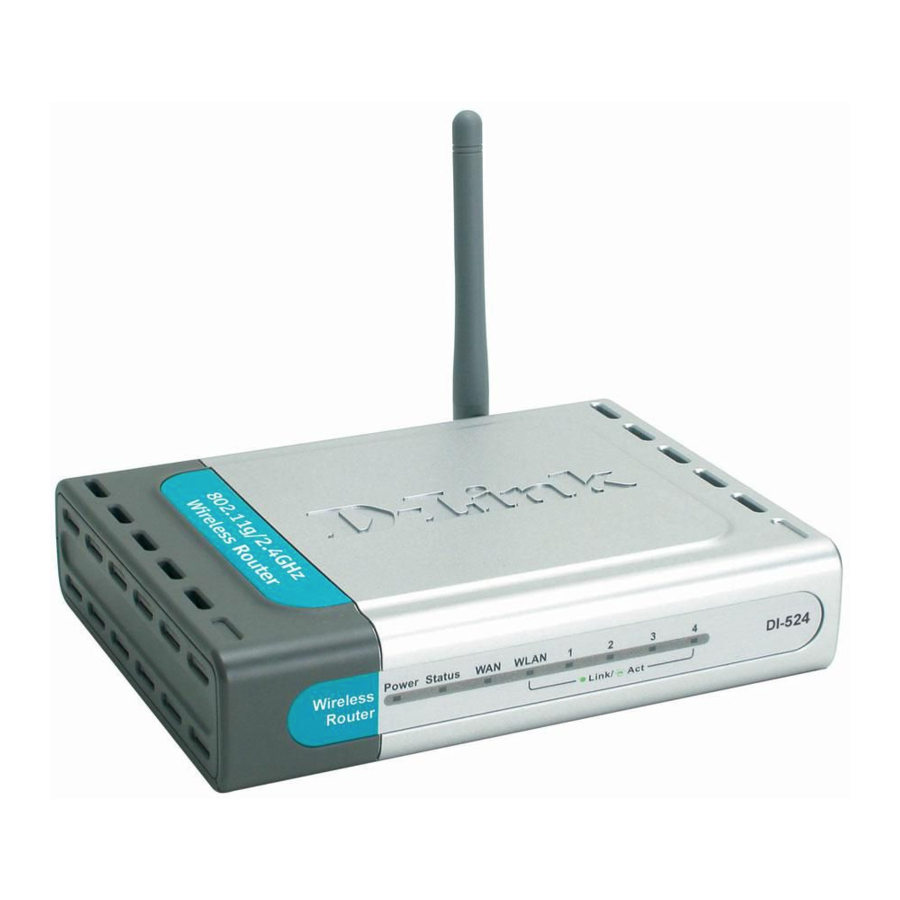
- Page 1 D-Link AirPlus G DI-524 DI-524 DI-524 DI-524 DI-524 802.11g/2.4GHz Wireless Router Manual Building Networks for People...
-
Page 2: Table Of Contents
Contents Package Contents ...3 Introduction...4 Wireless Basics ...8 Getting Started ... 11 Using the Configuration Menu...12 Networking Basics ...39 Troubleshooting ...54 Technical Specifications ...61 Frequently Asked Questions ...64 Contacting Technical Support ...92 Warranty and Registration ...93... -
Page 3: Contents Of Package
Ethernet Cable (All the DI-524’s Ethernet ports are Auto-MDIX) Note: Using a power supply with a different voltage rating than the one included with the DI-524 will cause damage and void the warranty for this product. If any of the above items are missing, please contact your reseller. - Page 4 DI-524, used in conjunction with other 802.11g products, will still be much stronger than ever before. Utilizing the Pre Shared Key mode of WPA, the DI-524 will obtain a new security key every time it connects to the 802.11g network. You only need to input your encryption information once in the configuration menu.
-
Page 5: Connections
Connections All Ethernet Ports (WAN and LAN) are auto MDI/MDIX, meaning you can use either a straight-through or a crossover Ethernet cable. Auto MDI/MDIX LAN ports automatically sense the cable type when connecting to Ethernet-enabled computers. Pressing the Reset Button restores the router to its original factory... - Page 6 This LED blinks during wireless data transmission STATUS A blinking light indicates that the DI-524 is ready LOCAL NETWORK LED A solid light indicates a connection to an Ethernet-enabled computer on ports 1- 4. This LED blinks...
-
Page 7: Features
Features Fully compatible with the 802.11g standard to provide a wireless data rate of up to 54Mbps Backwards compatible with the 802.11b standard to provide a wireless data rate of up to 11Mbps WPA (Wi Fi Protected Access) authorizes and identifies users based on a secret key that changes automatically at a regular interval, for example: TKIP (Temporal Key Integrity Protocol), in conjunction with a RADIUS server, changes the temporal key every 10,000 packets, ensuring greater... - Page 8 D-Link wireless products will allow you access to the data you want, when and where you want it. You will be able to enjoy the freedom that wireless networking brings.
-
Page 9: Wireless Basics
OFDM reduces the amount of crosstalk (interference) in signal transmissions. The DI-524 is backwards compatible with 802.11b devices. This means that if you have an existing 802.11b network, the devices in that network will be compatible with 802.11g... -
Page 10: Installation Considerations
Wireless Basics (continued) Installation Considerations The D-Link AirPlus G DI-524 lets you access your network, using a wireless connection, from virtually anywhere within its operating range. Keep in mind, however, that the number, thickness and location of walls, ceilings, or other objects that the wireless signals must pass through, may limit the range. -
Page 11: Setting Up Wireless Infrastructure Network
(See the printed Quick Installation Guide included with the DWL-G630.) Install the D-Link DFE-530TX+ adapter into a desktop computer. The four Ethernet LAN ports of the DI-524 are Auto MDI/MDIX and will work with both Straight-Through and Cross-Over cable. (See the printed Quick Installation Guide included with the DFE-530TX+.) -
Page 12: Using The Configuration Menu
Type in the IP Address of the Router (http://192.168.0.1) Note: if you have changed the default IP Address assigned to the DI-524, make sure to enter the correct IP Address. Type admin in the User Name field Leave the Password blank Click OK The Home>Wizard... - Page 13 WLAN. Select Enabled or Disabled. Disabled is the default setting. (Note: If you enable encryption on the DI-524 make sure to also enable encryption on all the wireless clients or wireless connection will not be established.)
- Page 14 Using the Configuration Menu (continued) Dynamic IP Address- Host Name- MAC Address- Clone MAC Address- Home > WAN > Dynamic IP Address Choose Dynamic IP Address to obtain IP Address information automatically from your ISP. Select this option if your ISP does not give you any IP numbers to use.
- Page 15 Using the Configuration Menu (continued) Static IP Address- IP Address- Subnet Mask- Gateway Address- Primary DNS Address- Secondary DNS Address- Home > WAN > Static IP Address Choose Static IP Address if all WAN IP information is provided to you by your ISP. You will need to enter in the IP address, subnet mask, gateway address, and DNS address(es) provided to you by your ISP.
- Page 16 Using the Configuration Menu (continued) Please be sure to remove any existing PPPoE client software installed on your computers. Choose PPPoE (Point to Point Protocol over Ethernet) if your ISP uses a PPPoE con- nection. Your ISP will provide you with a username and pass- word.
- Page 17 LAN is short for Local Area Network. This is considered your internal network. These are the IP settings of the LAN interface for the DI-524. These settings may be referred to as Private settings. You may change the LAN IP address if needed. The LAN IP address is private to your internal network and cannot be seen on the Internet.
- Page 18 Using the Configuration Menu (continued) DHCP stands for Dynamic Host Control Protocol. The DI-524 has a built-in DHCP server. The DHCP Server will automatically assign an IP address to the computers on the LAN/ private network. Be sure to set your computers to be DHCP clients by setting their TCP/ IP settings to “Obtain an IP Address Automatically.”...
- Page 19 Using the Configuration Menu (continued) Advanced > Virtual Server The DI-524 can be configured as a virtual server so that remote users accessing Web or FTP services via the public IP address can be automatically redirected to local servers in the LAN (Local Area Network).
- Page 20 Using the Configuration Menu (continued) Advanced > Virtual Server continued Virtual Server- Name- Private IP- Protocol Type- Private Port- Public Port- Schedule- Example #1: Select Enabled or Disabled. Enter the name referencing the virtual service. The server computer in the LAN (Local Area Network) that will be providing the virtual services.
- Page 21 Using the Configuration Menu (continued) Advanced > Virtual Server continued Click on this icon to edit the virtual service Click on this icon to delete the virtual service Example #2: If you have an FTP server that you wanted Internet users to access by WAN port 2100 and only during the weekends, you would need to enable it as such.
- Page 22 Port” field, select the protocol type as TCP or UDP, then enter the public ports associated with the trigger port to open them for inbound traffic. The DI-524 provides some predefined applications in the table on the bottom of the web page. Select the application you want to use and enable it.
- Page 23 Filters are used to deny or allow LAN (Local Area Network) computers from accessing the Internet. The DI-524 can be setup to deny internal computers by their IP or MAC addresses. The DI-524 can also block users from accessing restricted web sites.
- Page 24 Using the Configuration Menu (continued) Advanced > Filters > URL Blocking URL Blocking is used to deny LAN computers from accessing specific web sites by the URL. A URL is a specially formatted text string that defines a location on the Internet. If any part of the URL contains the blocked word, the site will not be accessible and the web page will not display.
- Page 25 Using the Configuration Menu Advanced > Filters > MAC Filters Use MAC (Media Access Control) Filters to allow or deny LAN (Local Area Network) computers by their MAC addresses from accessing the Network. You can either manually add a MAC address or select the MAC address from the list of clients that are currently connected to the Broadband Router.
- Page 26 Using the Configuration Menu Advanced > Filters > Domain Blocking Domain Blocking is used to allow or deny LAN (Local Area Network) computers from accessing specific domains on the Internet. Domain blocking will deny all requests to a specific domain such as http and ftp. It can also allow computers to access specific sites and deny all other sites.
- Page 27 Firewall Rules is an advanced feature used to deny or allow traffic from passing through the DI-524. It works in the same way as IP Filters with additional settings. You can create more detailed access rules for the DI-524. When virtual services are created and enabled, it will also display in Firewall Rules.
- Page 28 If you have a client PC that cannot run Internet applications properly from behind the DI-524, then you can set the client up for unrestricted Internet access. It allows a computer to be exposed to the Internet. This feature is useful for gaming purposes.
- Page 29 Wireless Performance- Displayed in this win- dow are the Wireless Performance fea- tures for the Access Point portion of the DI-524. Beacon Interval- RTS Threshold- Fragmentation- DTIM interval- Preamble Type- Advanced > Performance Beacons are packets sent by an Access Point to synchronize a wireless network.
- Page 30 Using the Configuration Menu (continued) At this page, the DI-524 administrator can change the system password. There are two accounts that can access the Broadband Router’s Web-Management interface. They are admin and user. Admin has read/write access while user has read-only access. User can only view the settings but cannot make any changes.
-
Page 31: Ntp Server
Using the Configuration Menu (continued) Time Zone- Default NTP Server- Set the Time- Daylight Saving- Tools > Time Select the Time Zone from the pull-down menu. NTP is short for Network Time Protocol. NTP synchronizes com- puter clock times in a network of computers. This field is optional. - Page 32 Using the Configuration Menu (continued) Tools > System The current system settings can be saved as a file onto the local hard drive. The saved file or any other saved setting file can be loaded back on the Broadband Router. To reload a system settings file, click on Browse to browse the local hard drive and locate the system file to be used.
- Page 33 Click on Browse to browse the local hard drive and locate the firmware to be used for the update. Please check the D-Link support site for firmware updates at http://support.dlink.com. You can download firmware up- grades to your hard drive from the D-Link support site.
- Page 34 (IP Security). Once VPN pass-through is enabled, there is no need to open up virtual services. Multiple VPN connections can be made through the DI-524. This is useful when you have many VPN clients on the LAN network. Tools > Misc...
- Page 35 Using the Configuration Menu (continued) This page displays the current information for the DI-524. It will display the LAN, WAN, and MAC address information. If your WAN connection is set up for a Dynamic IP address then a Release button and a Renew button will be displayed.
- Page 36 Using the Configuration Menu (continued) Status > Log The Broadband Router keeps a running log of events and activities occurring on the Router. If the device is rebooted, the logs are automatically cleared. You may save the log files under Log Settings. View Log- First Page - The first page of the log.
-
Page 37: Smtp Server
Using the Configuration Menu (continued) Status > Log > Log Settings Not only does the Broadband Router display the logs of activities and events, it can setup to send these logs to another location. SMTP Server/ IP Address - The address of the SMTP server that will be used to send the logs. Email Address - The email address to which the logs will be sent. - Page 38 Status > Stats The screen above displays theTraffic Statistics. Here you can view the amount of pack- ets that pass through the DI-524 on both the WAN and the LAN ports. The traffic counter will reset if the device is rebooted.
-
Page 39: Networking Basics
Networking Basics Using the Network Setup Wizard in Windows XP In this section you will learn how to establish a network at home or work, using Microsoft Windows XP. Note: Please refer to websites such as http://www.homenethelp.com http://www.microsoft.com/windows2000 for information about networking computers using Windows 2000, ME or 98. - Page 40 Networking Basics Please follow all the instructions in this window: Click Next In the following window, select the best description of your computer. If your computer connects to the internet through a gateway/router, select the second option as shown. Click Next...
- Page 41 Networking Basics Enter a Computer description and a Computer name (optional.) Click Next Enter a Workgroup name. All computers on your network should have the same Workgroup name. Click Next...
- Page 42 Networking Basics Please wait while the Network Setup Wizard applies the changes. When the changes are complete, click Next. Please wait while the Network Setup Wizard configures the computer. This may take a few minutes.
- Page 43 Networking Basics In the window below, select the option that fits your needs. In this example, Create a Network Setup Disk has been selected. You will run this disk on each of the computers on your network. Click Next. Insert a disk into the Floppy Disk Drive, in this case drive A. Click Next.
- Page 44 Networking Basics Please wait while the Network Setup Wizard copies the files. Please read the information under Here’s how in the screen below. After you complete the Network Setup Wizard you will use the Network Setup Disk to run the Network Setup Wizard once on each of the computers on your network.
- Page 45 Networking Basics Please read the information on this screen, then click Finish to complete the Network Setup Wizard. The new settings will take effect when you restart the computer. Click Yes to restart the computer. You have completed configuring this computer. Next, you will need to run the Network Setup Disk on all the other computers on your network.
- Page 46 Networking Basics Naming your Computer To name your computer, please follow these directions:In Windows XP: Click Start (in the lower left corner of the screen) Right-click on My Computer Select Properties and click Select the Computer Name Tab in the System Properties window.
-
Page 47: Getting Started
Naming your Computer In this window, enter the Computer name Select Workgroup and enter the name of the Workgroup All computers on your network must have the same Workgroup name. Click OK Checking the IP Address in Windows XP The wireless adapter-equipped computers in your network must be in the same IP Ad- dress range (see Getting Started in this manual for a definition of IP Address Range.) To check on the IP Address of the adapter, please do the following: Right-click on the... -
Page 48: Checking The Ip Address In Windows Xp
Checking the IP Address in Windows XP This window will appear. Click the Support tab Click Close Assigning a Static IP Address in Windows XP/2000 Note: Residential Gateways/Broadband Routers will automatically assign IP Addresses to the computers on the network, using DHCP (Dynamic Host Configuration Protocol) technology. - Page 49 Assigning a Static IP Address in Windows XP/2000 Double-click on Network Connections Right-click on Local Area Connections Double-click on Properties...
- Page 50 Assigning a Static IP Address in Windows XP/2000 Click on Internet Protocol (TCP/IP) Click Properties Input your IP address and subnet mask. (The IP Addresses on your network must be within the same range. For example, if one computer has an IP Address of 192.168.0.2, the other computers should have IP Addresses that are...
- Page 51 Assigning a Static IP Address with Macintosh OSX Go to the Apple Menu and se- lect System Preferences Click on Network Select Built-in Ethernet in the Show pull-down menu Select Manually in the Con- figure pull-down menu Input the Static IP Address, the Subnet Mask and the Router IP Address in the ap- propriate fields...
- Page 52 Networking Basics Selecting a Dynamic IP Address with Macintosh OSX Go to the Apple Menu and select System Preferences Click on Network Select Built-in Ethernet in the Show pull-down menu Select Using DHCP in the Configure pull-down menu Click Apply Now The IP Address, Subnet mask, and the Router’s IP Address will appear in a few...
- Page 53 Checking the Wireless Connection by Pinging in Windows XP and 2000 Go to Start > Run > type cmd. A window similar to this one will appear. Type ping xxx.xxx.xxx.xxx, where xxx is the IP Address of the Wireless Router or Access Point.
-
Page 54: Troubleshooting
DI-524 Wireless Broadband Router. 1.The computer used to configure the DI-524 cannot access the Configuration menu. Check that the Ethernet LED on the DI-524 is ON. If the LED is not ON, check that the cable for the Ethernet connection is securely inserted. -
Page 55: Infrastructure Mode
Check that the IP Address assigned to the wireless adapter is within the same IP Address range as the access point and gateway. (Since the DI-524 has an IP Address of 192.168.0.1, wireless adapters must have an IP Address in the same range, e.g., 192.168.0.x. Each device must have a unique IP Address;... - Page 56 Troubleshooting 3. Check that the drivers for the network adapters are installed properly. You may be using different network adapters than those illustrated here, but this procedure will remain the same, regardless of the type of network adapters you are using.
- Page 57 D-Link AirPlus DWL-650 Select Properties to check that the drivers are in- stalled properly. D-Link AirPlus DWL-G650 Wireless Cardbus Adapter D-Link AirPlus DWL-650 Wireless Cardbus Adapter Look under Device Status to check that the device is working properly. Click OK.
- Page 58 RF noise, like microwaves, Monitors, electric motors, etc. 6. Why can’t I get a wireless connection? If you have enabled Encryption on the DI-524, you must also enable encryption on all wireless clients in order to establish a wireless connection.
- Page 59 6. Why can’t I get a wireless connection? (continued) Turn off your DI-524 and the client. Turn the DI-524 back on again, and then turn on the client. Make sure that all devices are set to Infrastructure mode. Check that the LED indicators are indicating normal activity. If not, check that the AC power and Ethernet cables are firmly connected.
- Page 60 8. Resetting the DI-524 to Factory Default Settings After you have tried other methods for troubleshooting your network, you may choose to Reset the DI-524 to the factory default settings. Remember that D-Link AirPlus G products network together, out of the box, at the factory default settings.
-
Page 61: Technical Specifications
Technical Specifications Standards IEEE 802.11g IEEE 802.11b IEEE 802.3 IEEE 802.3u VPN Pass Through/ Multi-Sessions PPTP L2TP IPSec Device Management Web-Based- Internet Explorer v6 or later; Netscape Navigator v6 or later; or other Java-enabled browsers DHCP Server and Client Advanced Firewall Features NAT with VPN Passthrough (Network Address Translation) MAC Filtering IP Filtering... - Page 62 Technical Specifications LEDs: Power LAN (10/100) WLAN (Wireless Connection) Physical Dimensions: L = 5.6 inches (142mm) W = 4.3 inches (109mm) H = 1.2 inches (31mm) Wireless Transmit Power: ± 15dBm Security: 802.1x WPA- WiFi Protected Access (WEP with TKIP, MIC, IV Expansion, Shared Key Authentication) External Antenna Type: Single detachable reverse SMA Modulation Technology:...
-
Page 63: Receiver Sensitivity
Wireless Data Rates with Automatic Fallback: 54 Mbps 48 Mbps 36 Mbps 24 Mbps 18 Mbps 12 Mbps 11 Mbps 9 Mbps 6 Mbps 5.5 Mbps 2 Mbps 1 Mbps Receiver Sensitivity: 54Mbps OFDM, 10% PER, -68dBm 48Mbps OFDM, 10% PER, -68dBm 36Mbps OFDM, 10% PER, -75dBm 24Mbps OFDM, 10% PER, -79dBm 18Mbps OFDM, 10% PER, -82dBm... -
Page 64: Frequently Asked Questions
Frequently Asked Questions Why can´t I access the web based configuration? When entering the IP Address of the DI-524 (192.168.0.1), you are not connecting to the Internet or have to be connected to the Internet. The device has the utility built-in to a ROM chip in the device itself. - Page 65 Frequently Asked Questions (continued) Why can´t I access the web based configuration? (continued) What type of cable should I be using? (continued) What´s the difference between a crossover cable and a straight-through cable? The wiring in crossover and straight-through cables are different. The two types of cable have different purposes for different LAN configurations.
- Page 66 Frequently Asked Questions (continued) Why can´t I access the web based configuration? (continued) Step 2 Disable any Internet security software running on the computer. Software firewalls like Zone Alarm, Black Ice, Sygate, Norton Personal Firewall, etc. might block access to the configuration pages. Check the help files included with your firewall software for more information on disabling or configuring it.
- Page 67 Step 4 Check your IP Address. Your computer must have an IP Address in the same range of the device you are attempting to configure. Most D-Link devices use the 192.168.0.X range. How can I find my IP Address in Windows 95, 98, or Step 1 Click on Start, then click on Run.
- Page 68 Step 4 (continued) Check your IP Address. Your computer must have an IP Address in the same range of the device you are attempting to configure. Most D-Link devices use the 192.168.0.X range. How can I find my IP Address in Windows 2000/XP? Step 1 Click on Start and select Run.
- Page 69 Step 4 (continued) Check your IP Address. Your computer must have an IP Address in the same range of the device you are attempting to configure. Most D-Link devices use the 192.168.0.X range. Make sure you take note of your computer´s Default Gateway IP Address. The Default Gateway is the IP Address of the D-Link router.
- Page 70 Frequently Asked Questions (continued) Why can´t I access the web based configuration? (continued) How can I assign a Static IP Address in Windows 2000? (continued) Click Use the following IP Address and enter an IP Address that is on the same subnet as the LAN IP Address on your router.
- Page 71 Step 5 Access the web management. Open your web browser and enter the IP Address of your D-Link device in the address bar. This should open the login page for the web management. Follow instructions to login and complete the configuration.
- Page 72 Frequently Asked Questions (continued) How can I setup my router to work with a Cable modem connection? (IE AT&T-BI, Cox, Adelphia, Rogers, Roadrunner, Charter, and Comcast). Note: Please configure the router with the computer that was last connected directly to the cable modem. Step 1 Log into the web based configuration by typing in the IP Address of the router (default:192.168.0.1) in your web browser.
-
Page 73: Static Cable Connection
Frequently Asked Questions (continued) How can I setup my router to work with a Cable modem connection? (continued) Step 3 Power cycle the cable modem and router: Turn the cable modem off (first). Turn the router off Leave them off for 2 minutes.** Turn the cable modem on (first). - Page 74 300 from your computer or you will not be able to connect to the Internet. Step 1 Upgrade Firmware if needed. (Please visit the D-Link tech support website at: firmware upgrade information.) Step 2 Take a paperclip and perform a hard reset. With the unit on, use a paperclip and hold down the reset button on the back of the unit for 10 seconds.
- Page 75 Step 9 Turn off your DSL modem for 2-3 minutes. Turn back on. Once the modem has established a link to your ISP, plug the power back into the D-Link router. Wait about 30 seconds and log back into the router.
- Page 76 To allow traffic from the internet to enter your local network, you will need to open up ports or the router will block the request. Step 1 Open your web browser and enter the IP Address of your D-Link router (192.168.0.1). Enter username (admin) and your password (blank by default). Step 2...
- Page 77 DMZ hosts security, the Web pages might be corrupted but no other company information would be exposed. D-Link, a leading maker of routers, is one company that sells products designed for setting up...
- Page 78 Continue to save the changes. Note: When DMZ is enabled, Virtual Server settings will still be effective. Remember, you cannot forward the same port to multiple IP Addresses, so the Virtual Server settings will take priority over DMZ settings. DI-524 admin...
- Page 79 Frequently Asked Questions (continued) How do I open a range of ports on my DI-524 using Firewall rules? Step 1 Access the router’s web configuration by entering the router’s IP Address in your web browser. The default IP Address is 192.168.0.1. Login using your password.
- Page 80 1723 How do I use PC Anywhere with my DI-524 router? You will need to open 3 ports in the Virtual Server section of your D-Link router. Step 1 Open your web browser and enter the IP Address of the router (192.168.0.1).
- Page 81 Frequently Asked Questions (continued) How do I use PC Anywhere with my DI-524 router? (continued) Step 6 Create a second entry as shown here: Step 7 Click Apply and then click Continue. Step 8 Create a third and final entry as shown...
- Page 82 Frequently Asked Questions (continued) How can I use eDonkey behind my DI-524 router? You must open ports on your router to allow incoming traffic while using eDonkey. eDonkey uses three ports (4 if using CLI): 4661 (TCP) To connect with a server 4662 (TCP) To connect with other clients 4665 (UDP) To communicate with servers other than the one you are connected to.
- Page 83 Frequently Asked Questions (continued) How do I set up my DI-524 router for SOCOM on my Playstation 2? To allow you to play SOCOM and hear audio, you must download the latest firmware for the router (if needed), enable Game Mode, and open port 6869 to the IP Address of your Playstation.
- Page 84 Frequently Asked Questions (continued) How can I use Gamespy behind my DI-524 router? Step 1 Open your web browser and enter the IP Address of the router (192.168.0.1). Enter admin for the username and your password (blank by default). Step 2 Click on the Advanced tab and then click Virtual Server on the left side.
- Page 85 Frequently Asked Questions (continued) How do I configure my DI-524 router for KaZaA and Grokster? The following is for KaZaA, Grokster, and others using the FastTrack P2P file sharing system. In most cases, you do not have to configure anything on the router or on the Kazaa software.
- Page 86 Frequently Asked Questions (continued) How do I configure my DI-524 router to play Warcraft 3? You must open ports on your router to allow incoming traffic while hosting a game in Warcraft 3. To play a game, you do not have to configure your router.
- Page 87 D-Link is not one of the manufacturers. To read more on this visit How do I set up my DI-524 router to use iChat? -for Macintosh users- You must open ports on your router to allow incoming traffic while using iChat.
- Page 88 Frequently Asked Questions (continued) How do I set up my DI-524 router to use iChat? -for Macintosh users- (continued) Step 3 Create a new firewall rule: Click Enabled. Enter a name (ichat1). Click Allow. Next to Source, select WAN under interface.
- Page 89 Frequently Asked Questions (continued) How do I set up my DI-524 router to use iChat? -for Macintosh users- (continued) For File Sharing: Step 1 Click on Advanced and then Virtual Server. Step 2 Check Enabled to activate entry. Step 3...
- Page 90 Frequently Asked Questions (continued) How do I send or receive a file via iChat when the Mac OSX firewall is active? -for Macintosh users- Mac OS X 10.2 and later The following information is from the online Macintosh AppleCare knowledge base: “iChat cannot send or receive a file when the Mac OS X firewall is active in its default state.
- Page 91 Simply put, it is a method of connecting multiple computers to the Internet (or any other IP network) using one IP Address. D-Link´s broadband routers (ie: DI-524) support NAT. With proper configuration, multiple users can access the Internet using a single account via the NAT device.
-
Page 92: Contacting Technical Support
Technical Support You can find software updates and user documentation on the D-Link website. D-Link provides free technical support for customers within the United States and within Canada for the duration of the warranty period on this product. U.S. and Canadian customers can contact D-Link technical support through our web site, or by phone. -
Page 93: Warranty And Registration
D-Link’s sole obligation shall be to repair or replace the defective Hardware during the Warranty Period at no charge to the original owner or to refund at D-Link’s sole discretion. Such repair or replacement will be rendered by D-Link at an Authorized D-Link Service Office. The replacement Hardware need not be new or have an identical make, model or part. - Page 94 Canada) D-Link may reject or return any product that is not packaged and shipped in strict compliance with the foregoing requirements, or for which an RMA number is not visible from the outside of the package. The product owner agrees to pay D-Link’s reasonable handling and return shipping charges for any product...
- Page 95 LIABILITY OF D-LINK UNDER THIS WARRANTY IS LIMITED TO THE PURCHASE PRICE OF THE PRODUCT COVERED BY THE WARRANTY. THE FOREGOING EXPRESS WRITTEN WARRANTIES AND REMEDIES ARE EXCLUSIVE AND ARE IN LIEU OF ANY OTHER WARRANTIES OR REMEDIES, EXPRESS, IMPLIED OR STATUTORY.