D-Link DCS-6620G User Manual
D-link user's manual 802.11g ptz internet camera
Hide thumbs
Also See for DCS-6620G:
- Install manual (16 pages) ,
- Quick installation manual (25 pages) ,
- Quick install manual (16 pages)
Table of Contents
Advertisement
Advertisement
Table of Contents

Related Manuals for D-Link DCS-6620G


Summary of Contents for D-Link DCS-6620G
-
Page 2: Table Of Contents
Windows Installing IP surveillance Software...22 Testing the DCS-6620G ...26 Security ...27 Using and Configuring the DCS-6620G with a Router ...28 Using the DCS-6620G with an Internet Browser...34 Record Snapshots to your FTP server with Motion Detection...65 Using IP surveillance Software...69 Installing IP surveillance Software...69... -
Page 3: Contents Of Package
Installation software and manual on CD If any of the above items are missing, please contact your reseller. Note: Using a power supply with a different voltage than the one included with the DCS-6620G will cause damage and void the warranty for this product. -
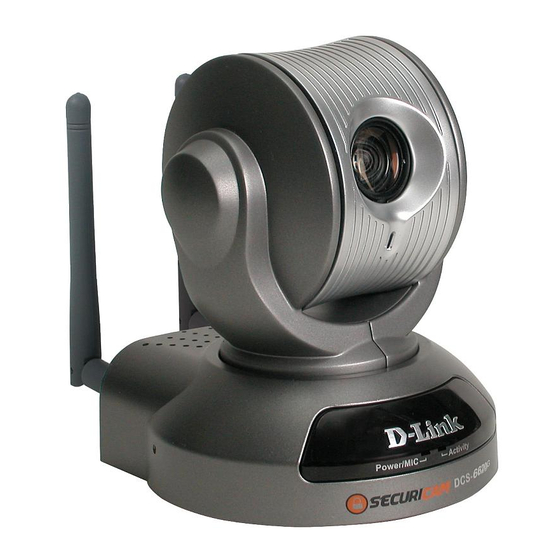
Page 4: Introduction
IP Address. Motorized Pan and Tilt Operation The DCS-6620G has a pan and tilt function that can expand your viewing area to cover a wide angle side-to-side and a 90 any location or locally using the included infrared remote control. - Page 5 A/V Output The SECURICAM Network DCS-6620G comes with an A/V output allowing you to connect to your TV for local viewing. The DCS-6620G can also be connected directly to your VCR to record activities. Web Configuration Using the Internet Explorer Web browser, administrators can configure and manage the...
-
Page 6: Connections
The DCS-6620G 802.11g PTZ Internet Camera has an internal microphone. However, you have the option of using an external microphone by plugging it into the microphone connector. A/V Out Plug the included A/V cable into the A/V out connector to use the DCS-6620G with a television or VCR. D-Link Systems, Inc. - Page 7 Attachment socket for the Camera Stand Located on the bottom panel of the DCS-6620G, the socket is used to connect the camera stand to the 802.11g PTZ Internet Camera by attaching the screw head on the camera stand to the 802.11g PTZ Internet Camera.
- Page 8 DCS-6620G User’s Manual Infrared Remote Control Included with the DCS-6620G is an infrared remote control. You have the option of controlling the camera via the Pan/Tilt/Zoom Controls using the IP surveillance software, Internet Explorer, or via the infrared remote. To use the remote, make sure that IR Control is enabled on the Camera Control page in the Configuration Menu under Advanced.
-
Page 9: Hardware Installation
Internet camera, the power and the activity LED will flash green several times. The DCS-6620G is conducting a self-test. Upon passing the self-test, the LED will be solid and the Ethernet port. If you are directly connected to the camera via a crossover cable, the light may cycle on and off and your computer may show an intermittent loss of connectivity. -
Page 10: Installation Wizard
Installation Wizard and installation of the IP surveillance software. Launching the Installation Wizard program Insert the CD that is included with the DCS-6620G 802.11g PTZ Internet Camera into your computer’s CD-ROM. The DCS-6620G installation menu will start up automatically from the CD. - Page 11 DCS-6620G User’s Manual Installation Wizard Install Wizard Click Please wait while the InstallShield Wizard prepares to install. Next Click D-Link Systems, Inc.
- Page 12 DCS-6620G User’s Manual The InstallShield will install in the following folder. To install into a different folder, click Browse and select another folder. Next Click Select the Program folder that Setup will add program icons to.You may type a new folder name, or select one from the existing folders list.
- Page 13 The opening Installation Wizard screen will appear and show a MAC address of the DCS-6620G and an IP Address (which may or may not be correct depending on what you have your DCS-6620G connected to). If you have a DHCP* server on your network, there will be a valid IP Address displayed here, indicated by a “Yes”...
- Page 14 DCS-6620G User’s Manual The Installation Wizard will now show a MAC address for the DCS-6620G and an IP address. This IP address may not be correct at this step in the installation until you see “Yes” under the assigned column. The camera is now automatically configured with an IP address consistent to the network it is connected to.
-
Page 15: Installation Wizard Screen
You have now completed the Setup Wizard and are ready to use your camera! You can also continue to the section titled “Installing IP surveillance Software” (page 22) to install the IP surveillance software before you begin to use the DCS-6620G. Installation Wizard Screen... - Page 16 DCS-6620G User’s Manual Setup On the initial Setup Screen you can configure System and Date/Time settings for each camera. Click Next to configure Network settings for the camera. System Enter a Camera Name and create an Settings: Admin password for the camera.
- Page 17 DCS-6620G User’s Manual Click Next and then Apply to save the configured settings. Users can click Previous to modify changes or mistakes. Upgrade The upgrade window allows users to upload a saved firmware file. If the firmware is older than that currently on the camera, a screen will appear indicating so and prompting the user to confirm...
-
Page 18: Enabling Upnp Tm For Windows ® Xp
UPnP is short for Universal Plug and Play, which is a networking architecture that provides compatibility among networking equipment, software, and peripherals. The DCS-6620G is a UPnP enabled 802.11g PTZ Internet Camera. If your operating system is UPnP enabled, the device will be easier to configure. If you do not want to use the UPnP functionality, it can be disabled by unselecting “Enabled”... - Page 19 DCS-6620G User’s Manual Add/Remove Windows Click Components The following screen will appear: Select Details Click Select and Play Click D-Link Systems, Inc. Networking Services Universal Plug Enabling UPnP for Windows ®...
- Page 20 DCS-6620G User’s Manual Enabling UPnP for Windows ® Next Click Please wait while Setup configures the components. Finish Click D-Link Systems, Inc.
- Page 21 Camera’s IP address (in this example, 198.168.0.146). After you click on the DCS-6620G-146 icon, your Internet browser will automatically be opened to the IP Address of the DCS-6620G, in this example it is: http://192.168.0.120. Your DCS-6620G may have a different IP Address.
-
Page 22: Installing Ip Surveillance Software
DCS-6620G User’s Manual Installing IP Surveillance Software The IP surveillance Software on the CD included with the DCS-6620G 802.11g PTZ Internet Camera converts the DCS-6620G into a powerful, yet flexible, surveillance system for home or business, with the following features: Real-time Monitoring ... - Page 23 DCS-6620G User’s Manual Installing IP surveillance Software Click Please read the Software Licensing Agreement and click yes if you wish to accept the agreement. Click “No” to exit the installation. Next Click Enter your name and company information and then click “Next”.
- Page 24 DCS-6620G User’s Manual Select the destination directory. Click Select the program folder the software will be installed into. Click D-Link Systems, Inc. Next Next Installing IP surveillance Software...
- Page 25 DCS-6620G User’s Manual Installing IP surveillance Software Click Next Finish Click The installation is complete. D-Link Systems, Inc.
-
Page 26: Testing The Dcs-6620G
The window in the center of your browser is the camera image window.You should now see a video image and hear the audio over your computer speakers from the DCS-6620G. If you are having problems please consult the FAQ section of this manual (page 128). -
Page 27: Security
DCS-6620G User’s Manual Security At this point it is highly recommended that you click on the Configuration button on the Home screen, and then the Tools tab to bring you to the Admin screen. Enter a password for security purposes. -
Page 28: Using And Configuring The Dcs-6620G With A Router
Open Virtual Server Ports for Your Router (Enable Remote Viewing) This section is designed to walk you through the setup process for installing your camera behind a router and enable remote video viewing. For the basic setup of the DCS-6620G, follow the steps outlined in the Quick Installation Guide. - Page 29 802.11g PTZ Internet Camera by the Installation Wizard program. The DCS-6620G Home Page appears with a window displaying live video from the camera.You are able to view this screen from any PC running Internet Explorer on your LAN.
- Page 30 Router Set-Up and Installation The following steps generally apply to any router that you have on your network. The D-Link DI-624 is used as an example to clarify the configuration process. Configure the initial settings of the DI-624 by following the steps outlined in the DI-624 Quick Installation Guide.
- Page 31 The firewall security features built into the DI-624 router prevent users from accessing the video from the DCS-6620G over the Internet. The router connects to the Internet over a series of numbered ports. The ports normally used by the DCS-6620G are blocked from access over the Internet.
- Page 32 Enter valid ports in the Virtual Server section of your router Please make sure to check the box on this line to enable settings D-Link Systems, Inc. Using and Configuring the DCS-6620G with a Router ...
-
Page 33: Viewing Your Camera
DCS-6620G User’s Manual Using and Configuring the DCS-6620G with a Router Viewing Your Camera After all settings have been entered correctly, a PC user inside or outside your network will have access to the camera through the Internet Explorer Web browser. To access the camera from the Internet, type the IP Address of the router given to you by your ISP, followed by a colon, and the port number that you gave your camera (e.g., http://205.163.122.96:83). -
Page 34: Using The Dcs-6620G With An Internet Browser
If you are following this manual in the order it is presented, you should now have an operating DCS-6620G 802.11g PTZ Internet Camera configured with the Installer program.You also have installed the IP surveillance software from the CD. This section of the manual will deal with using the 802.11g PTZ Internet Camera in two parts:... - Page 35 DCS-6620G User’s Manual Home Page Screen The image from the DCS-6620G should be visible from the Home page on your computer monitor. To the right of the image are controls that allow you to pan and tilt the camera. Pan and tilt can also be controlled within the image.
- Page 36 DCS-6620G User’s Manual Home Page Screen (continued) The image from the DCS-6620G should be visible from the Home page on your computer monitor. There are two buttons on the left side of the Home page: Client Settings and Configuration. Click on the Client Settings button to change settings related to the connection.
- Page 37 UDP -> HTTP. After the client connects to the DCS-6620G successfully, the working protocol will be displayed in “Protocol Option”. The chosen protocol will be recorded in the user’s PC and used for the next connection.
- Page 38 Click Configuration There are 5 tabs across the top of the Configuration screen. From each tab, different elements of the DCS-6620G can be configured. The Advanced tab is the default screen in Configuration and Network is the default screen under Advanced.
-
Page 39: General Settings
Configuration > Advanced > Network (continued) Reset IP Address at next boot Once the DCS-6620G is configured, this box should be unchecked at all times. If the box has been checked and the connection is lost, run Installation Wizard to find the camera’s IP address. - Page 40 Key length: Key format: D-Link Systems, Inc. Using the DCS-6620G with an Internet Browser (Service Set Identifier) is a name that identifies your wireless network. Access Points and wireless clients attempting to connect to a specific WLAN (Wireless Local Area Network) must use the same SSID.
- Page 41 Click the Mail & FTP button from the Configuration screen to access video settings that control sending images via e-mail or FTP. Click Mail & FTP D-Link Systems, Inc. Using the DCS-6620G with an Internet Browser This will preset 4 separate keys that you can choose at a later time.
- Page 42 1st FTP user name: 1st FTP password: D-Link Systems, Inc. Using the DCS-6620G with an Internet Browser The domain name or IP address of external mail server. The user name used to log into your e-mail account (e.g. jdoe or jdoe@yourisp.com depending on your ISP).
- Page 43 Invalid settings may cause the DCS-6620G to not respond. Change the configuration settings only if necessary. Consult with your network administrator or your Internet Service Provider (ISP) if you do not have the necessary information. If you cannot connect to the camera, refer to page 132 for camera reset and restore factory settings procedures.
- Page 44 IP address and that address is used only for the duration of that specific connection. With the DCS-6620G, you can setup your DDNS service and the DCS-6620G will automatically update your DDNS server every time it receives a different IP address. Depending on the service, this update may take a few hours.
- Page 45 UPnP is short for Universal Plug and Play, which is a networking architecture that provides compatibility among networking equipment, software, and peripherals. The DCS-6620G is a UPnP enabled 802.11g PTZ Internet Camera. If your operating system is UPnP enabled, the device will be easier to configure.
- Page 46 Maximum frame rate: Video codec type: D-Link Systems, Inc. Using the DCS-6620G with an Internet Browser Select either for color or monochrome video display Three options exist for the sizes of the video display. You can select between 176x120/176x144, 352x240/352x288, or 704x480/ 401x576.
- Page 47 D-Link Systems, Inc. Using the DCS-6620G with an Internet Browser A large “Key frame interval” value can reduce the bit rate, but if there is a packet loss during transmission, it will cause image corruption. “Fix bit rate” and “Key frame interval” are only available in “MPEG4”...
- Page 48 Simplex- Listen only: Disable: D-Link Systems, Inc. Using the DCS-6620G with an Internet Browser There are five options to select. For all the modes, only one client can talk to the server at the same time. In this mode, the User can talk to the server while listening sound from the server simultaneously.
- Page 49 Because the network has burst constraints and everyone’s environment is not the same, any poor connection will impair normal performance. D-Link Systems, Inc. Using the DCS-6620G with an Internet Browser In half duplex transmission mode, select the option to talk to the server and broadcast your voice to all the other clients.
- Page 50 DCS-6620G User’s Manual Using the DCS-6620G with an Internet Browser Recommendations for setting video for the best performance (continued): Recording settings to compromise between real-time and clear images If you have a broadband network, set Fix quality to Good image quality, or higher, instead of setting the Bit rate.
- Page 51 CCD will become fixed. Select this setting if you select Low lux mode. Checking this box will assist in seeing objects in poor illuminative environments. Apply when the DCS-6620G is aiming outdoors. Adjusting the 9 levels of white levels can help the camera to capture video with correct colors.
- Page 52 Configuration > Advanced > Motion Detection Click the Motion Detection button from the Configuration screen to access settings that effect how the DCS-6620G PTZ Internet Camera can serve as a security device by recording only when motion is detected. Click Motion Detection D-Link Systems, Inc.
- Page 53 (note: remember that you can have up to 3 windows selected for motion detection).You can return to the DCS-6620G Home Page and the monitored window will not be visible, but the red frame will show on the home page when motion is detected.
- Page 54 Configuration > Advanced > Camera Control Click the Camera Control button from the Configuration screen to access settings that affect how the DCS-6620G 802.11g PTZ Internet Camera can pan and move to preset locations. Click Camera Control Left, Up, Right, Down, & Home:...
- Page 55 Using the DCS-6620G with an Internet Browser Enter a name for the position at which you would like to preset the DCS-6620G. Click Add to add the new preset position to the Preset Locations list. Using the pull down menu, you can delete a preset position by selecting it and clicking Delete.
- Page 56 The DCS-6620G is manufactured without any passwords by default. This allows the ability to access the DCS-6620G (including the Configuration) by anyone as long as the IP address is known. It is recommended that you enter a password to restrict others from accessing your camera.
- Page 57 Turn off the LED indicator: D-Link Systems, Inc. Using the DCS-6620G with an Internet Browser This option allows a user to connect to a camera with view -only privileges. User name is “demo”. No password is required. This is useful for demonstrations and keeps guests separate from users with accounts.
- Page 58 D-Link Systems, Inc. Using the DCS-6620G with an Internet Browser Click to save the current date and time of DCS-6620G. An internal real-time clock maintains the date and time even time: when the power is off.
- Page 59 DCS-6620G User’s Manual Using the DCS-6620G with an Internet Browser Configuration > Tools > Applications Click on the Applications button to access the Applications settings from the Tools menu. D-Link Systems, Inc.
- Page 60 Trigger condition: Reset output: D-Link Systems, Inc. Using the DCS-6620G with an Internet Browser Select the weekdays that should perform the following operations: Set the time to start operations. Setting the begin time the same as the stop time will force the operations to run continuously.
-
Page 61: Sequential Operation
The date and time suffix may be added according to the option. Confirm the external mail or FTP server settings in network configuration. The DCS-6620G will send snapshots at the specified interval to the external server according to the chosen method. Remember this operation is dependent to the weekly schedule. - Page 62 After confirmation, the system will restart and require the Installation Wizard software program to locate the IP address of the DCS-6620G. Click Apply under Calibrate to restore them camera’s factory lens position. This means that the camera will be recalibrated to the default center to position to recover from any external forces that may have affected it.
- Page 63 DCS-6620G User’s Manual Configuration > Status > Device Info Click on the Status tab to access Device Info and a Log of DCS-6620G system activity. The Device Info is the default screen when you click on the Status tab. Click Device Info...
- Page 64 DCS-6620G User’s Manual Using the DCS-6620G with an Internet Browser Configuration > Help Click on the Help tab to access descriptions of the particular function you need help with. The help screen is organized in the order of the tabs and then each menu item under that tab.
-
Page 65: Record Snapshots To Your Ftp Server With Motion Detection
FTP or SMTP server. Click the Motion Detection button under the Advanced tab from the Configuration screen to access settings that affect how the DCS-6620G 802.11g PTZ Internet Camera can serve as a security device by recording only when motion is detected. - Page 66 DCS-6620G User’s Manual Next, click the Mail & FTP button under the Advanced tab to set the FTP server settings for the DCS-6620G. Click Mail & FTP In this window, enter the settings for the FTP server you wish to record to. Optionally, you can enter settings for a secondary backup FTP server.
- Page 67 2nd FTP remote folder: Secondary FTP passive For detailed information about each setting, please refer to Configuration > Advanced > Network in the section titled “Using the DCS-6620G With an Internet Browser” (page 34). Click the apply button when finished. D-Link Systems, Inc.
- Page 68 DCS-6620G User’s Manual Next, click the Applications button under the Tools tab to set the application settings for the DCS-6620G. Click Applications In this window, follow the steps below to set the application settings for snapshots to be recorded to an FTP site: ...
-
Page 69: Using Ip Surveillance Software
DCS-6620G User’s Manual Using IP surveillance Software Using IP surveillance Software Installing the IP surveillance Software Before you begin installing this application software, the hardware system requirements must be checked first. The minimum system requirements recommended for this application are as follows: Browser: Internet Explorer 5.x or above... - Page 70 DCS-6620G User’s Manual Installing the IP surveillance Software (continued) The “License Agreement” window below will appear. Please read the following license agreement carefully. Click “Yes” to accept this agreement and proceed with the installation. D-Link Systems, Inc. Click Next Click Yes...
- Page 71 DCS-6620G User’s Manual Using IP surveillance Software Installing the IP surveillance Software (continued) Next, the “User information” window below will appear. This window will prompt you to enter the user name and company name. Enter your user name and company name and then click “Next”...
- Page 72 DCS-6620G User’s Manual Using IP surveillance Software Installing the IP surveillance Software (continued) Select the installation directory for this application software and click “Next”, which is shown in the figure below. You can change the installation directory by clicking “Browse…”...
- Page 73 DCS-6620G User’s Manual Installing the IP surveillance Software (continued) After checking all the setup information in the window shown below, click “Next” to start the installation of the application software. Click “Finish”, in the window shown below, to finish installation. The program is now installed on your computer.
-
Page 74: Launcher
DCS-6620G User’s Manual Using IP surveillance Software Launcher Launcher is a controller program that allows users to invoke Monitor or Playback quickly. System Tray Icon The Launcher icon reflects current state of IP surveillance. The icon in the system tray signifies that the IP surveillance Software is currently active on the system. - Page 75 DCS-6620G User’s Manual Launcher (continued) When Launcher is locked, the unlock window will appear, prompting for the user password in order to unlock. The input area of the dialog will be grayed (disabled) for 60 seconds after 3 consecutive failures.
- Page 76 DCS-6620G User’s Manual Launcher (continued) Tools Contains many utilities. Currently only change password is implemented. The change password dialog looks like this: Autorun at Startup Users can select whether or not to autorun Launcher when Window boots up.
-
Page 77: Monitor Program
DCS-6620G User’s Manual Monitor Program Features of the Monitor Tool Traditional Surveillance Features: Real-time monitoring Pan and Tilt control Recording Special Features: The digital surveillance system supports not only the features listed above, but also the following features, which make the system more powerful and convenient. - Page 78 DCS-6620G User’s Manual Monitor Program (continued) Application Layout and Functionalities This section demonstrates a global view of the monitor tool, shown below. The components of the monitor tool will be introduced in detail in the following sections. Misc. Functions Channel Area...
- Page 79 DCS-6620G User’s Manual Monitor Program (continued) Layout area You can change the monitoring layout in this area.There are six kinds of layouts: 1, 4, 6, 9, 13, or 16 video display frames in the video area. Hard disk status ...
- Page 80 Change the local settings Again, if you need to change the settings of the DCS-6620G, you must have the password of the admin user. Camera Configurations When you log in for the first time, you should configure this application software to connect the DCS-6620G in “Configuration Menu >...
- Page 81 DCS-6620G User’s Manual Monitor Program (continued) The Layout of the Configuration This section discusses the local settings for the connection and the functional configuration of each camera. If you are interested in the remote settings for each camera, you can refer to the user’s manual that accompanied the hardware.
- Page 82 DCS-6620G User’s Manual Monitor Program (continued) Insert – To insert a remote 802.11g PTZ Internet Camera to the camera list. Click the “Insert” button, an “Insert New Channel” dialog will popup, as shown below. Specify the IP address, port, and admin password of the 802.11g PTZ Internet Camera, click the “Ok” button to close the dialog.
- Page 83 DCS-6620G User’s Manual Monitor Program (continued) Delete – Removes the selected 802.11g PTZ Internet Camera from the camera list. Highlight the camera that you want to delete from the list and click on the “Delete” button. History – Clicking the “History” button will popup a historical camera list, which lists the latest 16 cameras you inserted into the camera list.
- Page 84 Digital input alert This application software provides options for you to define the triggering criteria for the digital input of the DCS-6620G. The alert of the digital input can be defined as high-level triggered or low-level triggered. Recording Settings: Record # secs.
- Page 85 DCS-6620G User’s Manual Monitor Program (continued) Changing the Camera Order in the List You can apply “drag and drop” in the grid area of the camera list to change the sequence of the connected Internet Cameras, which is shown below. This will enable you to rearrange the camera order of your choice.
-
Page 86: Global Settings
DCS-6620G User’s Manual Monitor Program (continued) Global Settings After completing the connection for each remote 802.11g PTZ Internet Camera, we need to configure some global settings for all the cameras.These include the video database directory, the usage of the Hard disk, and options for video display. - Page 87 DCS-6620G User’s Manual Monitor Program (continued) Directory Settings: Snapshot directory The directory for storing the snapshot in *.bmp format from video channels of the monitor tool and the playback tool, which is shown on page 86. Recording directory ...
- Page 88 You must select the input signal format (NTSC or PAL) for displaying the original resolution of video stream from DCS-6620G. If you are not sure which format to select, then leave the input signal format at it’s default (NTSC).
- Page 89 DCS-6620G User’s Manual Monitor Program (continued) Backup Settings: Using Backup Settings in the global settings window, you can backup recorded data from selected cameras to a specified location. Directory This is the directory where backup data will be saved.You can select the location by clicking on the folder icon.
- Page 90 Connection of the DCS-6620G Channel: Once you have the privilege to connect to the DCS-6620G, the cameras will automatically appear in the video area in the order they are connected. Once you have set up the camera in the video channel, the color of the channel number will turn blue, indicating that the camera has been added to IP surveillance.
- Page 91 DCS-6620G User’s Manual Monitor Program (continued) Selected Channel Recording Connected and monitoring If you do not want to monitor one video, you can drag and drop the video (in the video area) to the trashcan in the common control area of the monitor program. The following section will demonstrate the procedures for “drag and drop”...
- Page 92 DCS-6620G User’s Manual Using IP surveillance Software Monitor Program (continued) Step 2: Press and hold the left mouse button, and then move the cursor to a display window in the video area, which is shown below. Note that the cursor will change according to the area in order to indicate whether the area is droppable or not.
- Page 93 DCS-6620G User’s Manual Using IP surveillance Software Monitor Program (continued) Video shown Empty video box Removing video from a display window Step 1: Move the mouse cursor to the display window that contains the video channel you wish to remove.
- Page 94 DCS-6620G User’s Manual Monitor Program (continued) Press and hold the left mouse button here. Move the mouse cursor here, and then release the left mouse button. The Layout There are six different layouts available, as shown below, for the display windows in the monitor program.
- Page 95 DCS-6620G User’s Manual Monitor Program (continued) Double click a display window to switch to a single channel layout. When you choose the one-camera layout or four-camera layout, the “Page up” and “Page down” buttons will be shown in the left-bottom corner of the video area. You can use these two buttons to switch the pages, as shown in the figure below.
- Page 96 DCS-6620G User’s Manual Monitor Program (continued) To view an individual camera from the multi-camera layout, double-click on the desired display window.You will see that the size of the display window is the same as the one-channel layout. Clicking the “Back” button in the upper-left corner of the video area will switch to the previous selected multi-camera layout.
- Page 97 DCS-6620G User’s Manual Monitor Program (continued) IP surveillance includes pan/tilt control, DI/DO (Digital Input / Digital Output) control, and an alert message receiver. Each of these are described in detail below. PTZ Control Refer to the following figure to use the pan and tilt controls.
- Page 98 DCS-6620G User’s Manual Using IP surveillance Software Monitor Program (continued) Alert Message If you have checked the box for “Enable Motion Detect” or “Enable Digital Input” on “Camera Configurations > Alert Settings“ screen, the alert message will show in the window shown above.
- Page 99 DCS-6620G User’s Manual Monitor Program (continued) About By choosing “About”, located in the configuration menu shown below, a dialog box will appear and display the information about the installed version of IP surveillance. The information includes the software name, version, user name, and company.
- Page 100 DCS-6620G User’s Manual Monitor Program (continued) Full Screen With this function, you can enlarge the selected video channel to a full-screen display. Press the “ESC” key on the keyboard or double-click the mouse on the screen to return to a regular display.
- Page 101 Click on the printer icon to print the current image to your default printer. Trashcan You can drag and drop the video channel to the Trashcan to close the video connection with the DCS-6620G. Status Bar Local time Current login user D-Link Systems, Inc.
-
Page 102: Scheduling
The scheduler allows the user to schedule recordings from the selected video channel of the DCS-6620G. Through both the graphic user interface and time period selection options, you will be able to easily regulate a schedule for each video channel. - Page 103 DCS-6620G User’s Manual Scheduling (continued) The scheduler will not be accessible until at least one camera has been added to the camera list. Go to the configuration menu and click on “Scheduler” to launch the scheduler. The Layout and Functionalities Introduction The layout of the scheduler and its components, shown below, will be described.
- Page 104 DCS-6620G User’s Manual Scheduling (continued) The layout of the scheduler is roughly divided into 4 parts: Part 1 The first part of the scheduler is the video channel selection area. It provides the IP addresses and location information of the connected video channels for the user’s reference.
- Page 105 DCS-6620G User’s Manual Using IP surveillance Software Scheduling (continued) In this area you will select the video channel that you want to set a schedule for. Each video channel will display a name, IP address, and location. Please note that when you switch between video channels in this area, the changes in the schedule of the previous video channel will be saved automatically.
- Page 106 DCS-6620G User’s Manual Using IP surveillance Software Scheduling (continued) Hour Time-Line In the figure below, the Hour time-line is displayed. Marking/Unmarking the Recording Time on the Hour Time-Line You can apply the one-click function by clicking the left mouse button and dragging to mark the time on this time-line.
- Page 107 DCS-6620G User’s Manual Using IP surveillance Software Scheduling (continued) Apply and Erase Buttons After you have selected the time period with “Begin time” and “End time” picker, you can apply the period picker, shown in the figure below, to set the periodical types of the time interval set previously.
- Page 108 DCS-6620G User’s Manual Scheduling (continued) Digital Input In the figure above, there are four conditions for the digital input. Check the condition that you would like to record while the condition triggers. high Checking this will trigger recording while the digital input is high/ The technical name for this event is line trigger.
- Page 109 DCS-6620G User’s Manual Scheduling (continued) There are three modes in the secondary schedule: Disable, Event mode, and Continuous mode. If event mode is selected in the secondary schedule, the camera will record whenever an event is triggered. If continuous mode is selected, the camera will begin recording continuously after scheduling settings are saved.
-
Page 110: Playback Program
DCS-6620G User’s Manual Playback Program The playback program is a very powerful, convenient, and easy way to browse the recorded video. It has one display mode (normal display mode) and two playback methods (full range and time period).There are several main functions including special features in the Playback program.These functions are depicted... - Page 111 DCS-6620G User’s Manual Using IP surveillance Software Playback Program (continued) Logging In Before you start the playback program, it is necessary for you to log in to the application software. The figure below shows the login dialog. For security concerns, only the admin account can log in to this program.
- Page 112 DCS-6620G User’s Manual Using IP surveillance Software Playback Program (continued) When you successfully log in to the playback system, the main window will be shown on the top of the screen and the display resolution will be changed to 1024x768 automatically (see previous page).
- Page 113 DCS-6620G User’s Manual Using IP surveillance Software Playback Program (continued) Histogram Area The histogram is an interactive control. Not only can you get the event’s location in time domain and its quantity of the motion percentage, but you can also select a group of events or a period from the event histogram area and show it on the display area.
- Page 114 DCS-6620G User’s Manual Using IP surveillance Software Playback Program (continued) Pull Bar The pull bar is a fast, flexible control for seeking data in the selected time period. It represents the total length of time in that period. You can pull the indicator on the pull bar to the specific time-point you would like to view.
- Page 115 DCS-6620G User’s Manual Playback Program (continued) The items in the settings windows are: Database location The most important item in the settings dialog is the database location setting. You must set it to the directory that contains the surveillance database to make the program to work properly.
- Page 116 DCS-6620G User’s Manual Playback Program (continued) Normal (Single Frame) Mode While in the normal (single frame) display mode, you can change the video currently displayed (1) Changing the database path for retrieving another one in the settings dialog of “System Control”...
- Page 117 DCS-6620G User’s Manual Using IP surveillance Software Playback Program (continued) Histogram Area Inverted region Dark Region The histogram area in the normal display (single frame) mode only shows the events’ occurred time and the percentage of motion detection with red bars. If you want to access the histogram area, you must change the area selection indicator to the histogram area.
- Page 118 DCS-6620G User’s Manual Playback Program (continued) Location selector Period selector Playback method selector Alert area selector Location Selector The location selector is a control that lets you select the camera you want to see (refer to the figure above). The location name is the same as the camera name (text on video) unless you have specified otherwise.
- Page 119 DCS-6620G User’s Manual Playback Program (continued) Playback Method Selector Full Range If you select this method, the database will be displayed from the beginning to the end of this location. Any change in the period selector will have no effect except when you change this selector to “Time Period.”...
- Page 120 DCS-6620G User’s Manual Playback Program (continued) Speed Indicator Play The supported “Play” button is an intelligent play user-interface.The functionality of this button can vary to fit different circumstances. In the normal display mode, clicking on the “Play” button can restart the displaying video sequence.
- Page 121 DCS-6620G User’s Manual Using IP surveillance Software Playback Program (continued) Display Adjustment Tool When you move the mouse cursor to the displaying area, the display adjustment toolbox will appear. Using the display adjustment toolbox, you can change the displaying video sequence to the size you want to see in the normal display mode when you move the area selection indicator to the display area.
- Page 122 DCS-6620G User’s Manual Using IP surveillance Software Playback Program (continued) Full Screen When you click on the “Full Screen” button, the video sequence will be enlarged to the whole screen instantly.You can double click on any place or the “ESC” key to return back to the normal screen.
- Page 123 DCS-6620G User’s Manual Using IP surveillance Software Playback Program (continued) Zoom Out Each time you click on the “Zoom Out” button in the searching range adjustment toolbox, the displayed time period will be double in the center of the original time period unless the start time or end time exceeds the whole database time-boundary.
- Page 124 DCS-6620G User’s Manual Playback Program (continued) Settings The settings dialog will pop up when you click the “Settings” button. For more information about setting this program, please refer to the section titled “Settings.” Minimize Click this button in order to minimize the playback program window.
-
Page 125: Schedule Video Recording With Motion Detection
802.11g PTZ Internet Camera. Click the Motion Detection button under the Advanced tab from the Configuration screen to access settings that affect how the DCS-6620G 802.11g PTZ Internet Camera can serve as a security device by recording only when motion is detected. - Page 126 DCS-6620G User’s Manual Schedule Video Recording with Motion Detection Scheduler Click In the Primary Schedule you can choose either Once (for one time recording) or Every Day (for scheduled recording). For example, if you would like to record events every day during a certain time frame, click on the beginning time and drag your mouse to the ending time.
- Page 127 DCS-6620G User’s Manual In this window, follow the steps below to schedule video recording with motion detection in the Primary Schedule: Check if you want the recording schedule to occur Once or Every day. Set the date, time-line, and begin and end times for recording.
-
Page 128: Appendix
Intranet or the Internet from a web browser. Q: What is the maximum number of users that can be allowed to access DCS-6620G simultaneously? A: The maximum number of users that can log onto the 802.11g PTZ Internet Camera at the same time is 10. - Page 129 Q: Why am I unable to access the 802.11g PTZ Internet Camera from a web browser? A1: If a router or firewall is used on the network, the correct ports for the DCS-6620G may not be configured on the router or firewall. To correct the problem, you need to determine if the DCS-6620G is behind a router or firewall and if the router or firewall is properly configured for...
- Page 130 DCS-6620G User’s Manual Frequently Asked Questions Q: I connected the 802.11g PTZ Internet Camera directly to a computer with a cross-over cable Ethernet cable and received the following Windows error upon running the Installation Wizard: A1: This Windows error will occur if the 802.11g PTZ Internet Camera is connected to a computer that is not properly configured with a valid IP address.
-
Page 131: How To Ping Your Ip Address
DCS-6620G User’s Manual How to PING Your IP Address The PING (Packet Internet Groper) command can determine whether a specific IP address is accessible by sending a packet to the specific address and waiting for a reply. It can also provide a very useful tool to confirm if the IP address conflicts with the 802.11g PTZ Internet... -
Page 132: Reset And Restore
There is a button hidden in the pinhole beside the Ethernet socket. It is used to reset the system or restore the factory default settings. Sometimes resetting the DCS-6620G will return the system back to a normal state. If the system still has problems after... -
Page 133: External I/O Port
External I/O Port Definition for the 802.11g PTZ Internet Camera The DCS-6620G provides a general I/O terminal block with one digital input and one relay switch for device control. Pin 1 and pin 2 can be connected to an external sensor and the state of voltage will be monitored from the initial state ‘LOW’. - Page 134 DCS-6620G User’s Manual External I/O Port The above diagram shows a typical wiring configuration for a normally closed PIR motion sensor. Please refer to your specific motion sensor for the power supply connection to the device since this will be critical to the success of your installation. Note that the positive from the PIR is connected to the D- of the I/O port of the camera and the negative from the PIR is connected to the D+ of the camera I/O port.
- Page 135 In this window, enter the settings for the SMTP or FTP server to which recorded snapshots will be sent. For detailed information about each setting, please refer to Configuration > Advanced > Mail & FTP in the section titled “Using the DCS-6620G With an Internet Browser” (page 34). Click the apply button when finished.
- Page 136 Configuring Your Camera for External Trigger Based Recording (continued) Next, click the Applications button under the Tools tab to set the application settings for the DCS-6620G. Click Applications In this window, follow the steps below to set the application settings for snapshots to be sent...
-
Page 137: Technical Specifications
DCS-6620G User’s Manual Technical Specifications Technical Specifications Remote management Configuration and system log can be accessed via Web browser, using Internet Explorer 5.X and above, and FTP application remotely Networking Protocol TCP/IP, HTTP, SMTP, FTP, Telnet, NTP, DNS, and DHCP... - Page 138 DCS-6620G User’s Manual LED indicator 2 Status indicators: 1) Power, 2) POST, connection, and heartbeat Camera specification 1/4 inch color CCD sensor AGC/AWB Electronic shutter: 1/60 ~ 1/15000 second Fixed focus glass lens, F2.0, 1 LUX Auto focus, F2.0, .05 LUX...
-
Page 139: Contacting Technical Support
DCS-6620G User’s Manual Contacting Technical Support You can find software updates and user documentation on the D-Link website. D-Link provides free technical support for customers within the United States and within Canada for the duration of the warranty period on this product. -
Page 140: Time Zone Table
DCS-6620G User’s Manual Time Zone Table Time Zone Table GMT stands for Greenwich Mean Time, which is the global time that all time zones are measured from. D-Link Systems, Inc. - Page 141 DCS-6620G User’s Manual Time Zone Table D-Link Systems, Inc.
-
Page 142: Warranty
DCS-6620G User’s Manual Warranty Warranty D-Link Systems, Inc. - Page 143 DCS-6620G User’s Manual Warranty D-Link Systems, Inc.
- Page 144 DCS-6620G User’s Manual Warranty D-Link Systems, Inc.
-
Page 145: Registration
DCS-6620G User’s Manual Registration Registration 05/03/05 D-Link Systems, Inc.