Table of Contents
Advertisement
Available languages
Available languages
Advertisement
Chapters
Table of Contents

Related Manuals for Sennheiser EK 3041-U


Summary of Contents for Sennheiser EK 3041-U
- Page 1 Diversity-Empfänger EK 3041-U Gebrauchsanleitung...
-
Page 2: Table Of Contents
Sennheiser mit seinem guten Namen und seiner in mehr als 50 Jahren erworbenen Kompetenz als Hersteller hochwertiger elektroakustischer Produkte „Made in Germany“. Nehmen Sie sich nun ein paar Minuten Zeit, um diese Anleitung zu lesen. Wir möchten, daß Sie einfach und schnell in den Genuß dieser Technik kommen. Kap. -
Page 3: Ek 3041-U, Kurzbeschreibung
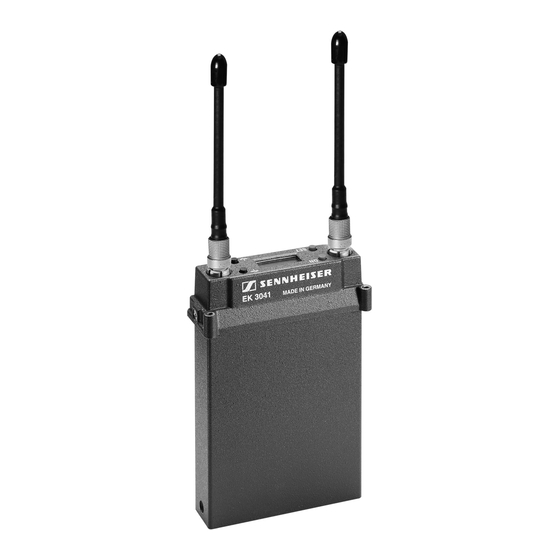
EK 3041-U, Kurzbeschreibung Der EK 3041-U ist ein True-Diversity-Empfänger im Miniaturformat. So paßt er direkt in den Empfänger-Einschub der meisten professionellen Video-Kameras. Zusammen mit einem leistungsfähigen Taschen- oder Handsender von Sennheiser entsteht eine äußerst betriebssichere und hochwertige Tonübertragungsstrecke. Störendes Rauschen wird wirkungsvoll durch , dem professio- ®... -
Page 4: Rauschunterdrückung Durch Hidyn Plus
Breitband-Kompanderverfahren, das die NF-Pegel auf der HiDyn plus ® Senderseite im Verhältnis 2:1 (auf dB bezogen) komprimiert und auf der Empfängerseite exakt spiegelbildlich wieder expandiert. Die Optimierung des dynamischen Verhaltens und die unterstützende Wirkung des Regelverstärkers im Sender vermindern zusätzlich Aussteuerungsprobleme ganz wesentlich. -
Page 5: Vorzüge Des Diversity-Empfanges
Reflexionen, die im Raum durch Wände, Fenster, Decken und Einbauten erzeugt werden. Bei Überlagerung dieser Wellen treten Auslöschungen auf, die man auch als „Feldstärkelöcher“ bezeichnet. Eine andere Position für die Empfangsantenne kann bei derselben Senderposition Abhilfe schaffen. Bei beweglichen Sendern und Empfängern (wie hier) tritt dann jedoch das Feldstärkeloch bei einer anderen Position wieder auf. -
Page 6: Bedienelemente
Bedienelemente SET-Taster für die Menüauswahl und Programmierung Antennenbuchse, Diversity-Zweig A Ein- / Aus-Taster Multifunktions-Display Wahltaste für Menü und Funktionen, abwärts zählend Wahltaste für Menü und Funktionen, aufwärts zählend Antennenbuchse, Diversity-Zweig B... -
Page 7: Antennen Am Ek 3041-U Befestigen
Antennen am EK 3041-U befestigen Ihr Empfänger EK 3041-U arbeitet mit zwei Antennen. Diese sind für den Diversity-Betrieb (siehe Kapitel 5) erforderlich. Die Antennen sind im Lieferumfang enthalten und in ihrer Länge auf den Empfangsfrequenzbereich Ihres Empfängers EK 3041-U abgestimmt. -
Page 8: Montage Z.b. In Die Kamera Philips Z.b. "Ldk 120
Schrauben. Der Philips-Einsatz (Zubehör) hat eine 44-polige Steckleiste. PHILIPS Einbau in die Kamera: • Befestigen Sie den Empfänger mit den vier kleinen Schrauben von oben am Montagerahmen. • Schieben Sie den Empfänger ein, bis die Steckleiste im Schacht sicher kontaktiert hat. -
Page 9: Montage Z.b. In Die Kamera Ikegami Z.b. "Hl-V77
Schrauben Sie den Montagerahmen auf dem IKEGAMI-Kameragehäuse über dem Einbauschacht fest. • Schieben Sie den Empfänger ein, bis die Steckleiste im Schacht sicher kontaktiert hat. • Befestigen Sie den Empfänger EK 3041-U mit den vier kleinen Schrauben von oben am... -
Page 10: Montage Z.b. In Die Kamera Sony Z.b. "Sx
• Schrauben Sie den Montagerahmen auf dem SONY-Kameragehäuse über dem Einbauschacht fest. • Schieben Sie den Empfänger ein, bis die Steckleiste im Schacht sicher kontaktiert hat. • Befestigen Sie den Empfänger mit den vier kleinen Schrauben von oben am Montage-... -
Page 11: Stromversorgung
Sie auch die Kamera in Betrieb nehmen. Die ON/OFF-Taste ist gesperrt, es erscheint beim Betätigen lediglich der Schriftzug "loc" im Display. Wird der Empfänger EK 3041-U im Köcher betrieben, drücken Sie bitte auf den ON/OFF-Taster . Nach ca. 2 Sekunden erscheint im Display die Anzeige der Sendefrequenz bzw. -
Page 12: Umschalten Frequenzanzeige / Kanalnummer
Die einzelnen Menüpunkte werden in den Kapiteln 16 bis 22 näher beschrieben. Hier zunächst eine Übersicht: einmal "SET" drücken Einstellung der Kopfhörerlautstärke. Wird übersprungen (nicht in Funktion), wenn das Gerät in einer Kamera betrieben wird. (u Kap. 17) zweimal "SET" drücken Einstellung "Squelch" , Rauschsperre. (u Kap. 18) -
Page 13: Repetierfunktion / Schnell-Lauf Im Display
Schnell-Lauf ("Repetieren") ausgestattet. Lassen Sie eine Tasten gedrückt, beschleunigt sich stetig die Anzeige. Lassen Sie die Taste wieder los und starten neu, beginnt der Durchlauf der Anzeige wiederum langsam. Sie gelangen so schnell und komfortabel in beiden Anzeigerichtungen zum... -
Page 14: Kopfhörerlautstärke Einstellen
Drücken Sie einmal kurz auf die Taste "SET". Das Display zeigt nun abwechselnd "PHonE" und eine dreistellige Zahl. Diese Zahl gibt einen möglichen Einstellwert zwischen 0 und 126 für die Lautstärke am Kopfhörerausgang Ihres Empfängers EK 3041 an. Der Kopfhörerausgang kann nur in Verbindung mit einem Köcher (Zubehör) genutzt werden. -
Page 15: Squelch, Rauschsperre Einstellen
Drücken Sie zweimal kurz auf die Taste "SET". Das Display zeigt nun abwechselnd "SquELH" und in Fünferschritten einen von neun möglichen Einstellwerten für die Rauschsperre von "OFF" bis "40". Diese Werte sind in etwa mit einer Eingangsspannung in db V vergleichbar. Sie können mit den Tasten diese Einstellung verändern. -
Page 16: Empfangsfrequenz Wechseln
Mit den Tasten und können sie nun eine andere Frequenz auswählen. Die Anzeige springt jeweils zur nächsten in der Programmierung fest eingestellten Frequenz. Haben Sie die Frequenz richtig eingestellt? Dann drücken Sie für ca. eine Sekunde auf die Taste „SET“. Ihre Eingabe wird bestätigt, indem kurz der Schriftzug „Sto“ erscheint. -
Page 17: Kanalnummer Einer Empfangsfrequenz Zuordnen
20 Kanalnummer einer Empfangsfrequenz zuordnen Sie können jeder der maximal 32 Empfangsfrequenzen eine Kanalnummer zuweisen! Sie darf zwischen 1 und 255 liegen. Es ist sinnvoll, bei größeren Systemen mit gleichen Kanalnummern bei Sendern und Empfängern zu arbeiten, Sie erleichtern sich damit die gegenseitige Zuordnung. -
Page 18: Limiter
Köcher als Einzelgerät betrieben wird. Dieser Menüpunkt wird im Kamerabetrieb übersprungen. Drücken Sie fünfmal kurz auf die Taste „SET“. Das Display zeigt nun abwechselnd "- - Ltd --" und die aktuelle Anzeige der Limiter-Einstellung. Diese kann sein: • "Ltd.OFF", wenn der Limiter ausgeschaltet ist, •... -
Page 19: Tasten Sperren
22 Tasten sperren / Fehlbedienungsschutz Sie können an Ihrem Empfänger EK 4031-U die Bedientasten sperren. Sie verhindern damit, daß ein Benutzer, dem der Umgang nicht geläufig ist, den Empfänger EK 3041-U unbeabsichtigt aus- oder umschaltet. Verriegeln Drücken Sie sechsmal kurz auf die Taste „SET“ bis im Display die Anzeige „Loc“... -
Page 20: Sennheiser-Sender Melden Ihre Batterie-Leistung
Empfänger geben. Mit dem Empfänger EK 3041-U kann die Anzeige der kritischen Restleistung ("Batterietelegramm")ausgewertet werden. Ist die Batterie- oder Akkukapazität am Sender so weit erschöpft, daß nur noch ca. 20 bis 30 Minuten Sendezeit bleiben, blinkt die Anzeige „bat.tr“ im Display im Wechsel mit der Kanal- oder Frequenzanzeige auf. -
Page 21: Passende Sennheiser-Sender
Über die vielfältigen Kombinationsmöglichkeiten der Sennheiser-Produkte und über den Einsatz in Mehrkanalanlagen informiert Sie die Broschüre „HF- Technik“, die Ihr Fachhändler bereithält oder gern für Sie bei Sennheiser bestellt. Aktuelle Informationen zu Sennheiser-Produkten erhalten Sie auch im Internet unter „http://www.sennheiser.com“. -
Page 22: Sicherheitshinweise
Kunden geöffnet wurden, erlischt die Gewährleistung. Halten Sie Abstand zu Heizungen und Heizstrahlern, stellen Sie das Gerät nie direkt in die Sonne. Zur Reinigung genügt es völlig, das Gerät mit einem leicht feuchten Tuch abzuwischen. Verwenden Sie bitte keine Lösungs- oder Reinigungsmittel. 26 Fehlermeldungen Das Display des Empfängers wird vom eingebauten Mikroprozessor auch... -
Page 23: Empfohlenes Zubehör
28 Empfohlenes Zubehör • GA 3041-C Bodenplatte mit Köcher Art. Nr. 04642 • GA 3041-B Speiseadapter Art. Nr. 04643 • GA 3041-15 SONY-Einsatz Art. Nr. 04639 • GA 3041-25 IKEGAMI-Einsatz Art. Nr. 04640 • GA 3041-44 PHILIPS-Einsatz Art. Nr. 04641 •... -
Page 24: Technische Daten
–10 dB und – 20 dB Klirrfaktor bei 1 kHz und Nennhub 1 %, typ. 0,8 % für Gesamtsystem Temperaturbereich –10 ºC bis +55 ºC Abmessungen / Gewicht 120 x 74 x 28 mm / ca. 200 g zugelassen nach ETS 300422... - Page 25 Diversity Receiver EK 3041-U Instructions for use...
- Page 26 Thank you for choosing Sennheiser! We have designed this product to give you reliable operation over many years. Please take a few moments to read these instructions carefully, as we want you to enjoy your new Sennheiser product quickly and to the full. Chapter Contents ............................
-
Page 27: Brief Description
Brief description The EK 3041-U is a miniature true diversity radiomicrophone receiver designed for use with the new digital ENG camcorders. It can be inserted in the slot-in facility of most professional camcorders such as the Philips LDK 120, Ikegami Hl-77 or Sony SX. Together with a suitable Sennheiser UHF pocket or hand-held transmitter, a highly reliable radio link can be set up. -
Page 28: Noise Reduction With Hidyn Plus
HiDyn plus ® on the transmitter side in a ratio of 2:1 (related to dB), and expands it in an exactly the same way on the receiver side. The optimisation of the dynamic range and the supporting effect of the control amplifier in the transmitter effectively reduce modulation problems. -
Page 29: Diversity Reception
The EK 3041-U receiver operates on the „true diversity“ principle: A receiving antenna receives not only the electromagnetic waves which reach it by a direct path, but also the reflections of these waves which are created in the room by walls, windows, ceilings and fittings. When these waves are superimposed, destructive interference occurs, which can also be called „field... -
Page 30: Connections And Operating Elements
SET button for menu selection and programming Antenna socket, diversity branch A ON / OFF switch Multi-function display panel Button for adjusting the settings of a selected menu (cycling downwards) Button for adjusting the settings of a selected menu (cycling upwards) Antenna socket, diversity branch B... -
Page 31: Mounting The Antennæ
Mounting the antennæ Your EK 3041-U receiver is supplied with two antenna which are necessary for true diversity operation (see chapter 5). The length of the antenna has been matched to the frequency range of your EK 3041-U receiver. Insert the antenna into sockets... -
Page 32: Mounting The Ek 3041-U Into The Philips Ldk 120
Fix the receiver (from above) to the mounting frame by means of four small screws. • Insert the receiver in the slot-in facility until the 44-pin connector securely connects. • Fix the receiver to the slot-in facility by means of the two knurled screws. -
Page 33: Mounting The Ek 3041-U Into The Ikegami Hl-V77
• Screw the mounting frame to the Ikegami camcorder housing. • Insert the receiver in the slot-in facility until the 25-pin connector securely connects. • Fix the receiver (from above) to the mounting frame by means of four small... -
Page 34: Mounting The Ek 3041-U Into The Sony Sx
10 Mounting the EK 3041-U into the Sony SX camcorder Preparation: Mount the base plate suitable for the Sony camcorder and fix it to the left and right of the receiver by means of two screws. The Sony adaptor features a 15-pin connector (accessories). -
Page 35: Power Supply
GA 3041-B power adaptor which is attached to the special housing 12 Putting the receiver into operation / Switching the receiver on If the receiver is inserted in the slot-in facility of a camcorder, the receiver is switched on as soon as the camcorder is put into operation. The receiver’s ON/OFF switch is then locked. -
Page 36: Display Of Receiving Frequency Or Channel Number
If you press button , the respective channel number is indicated. Information on how to change the receiving frequency is given in chapter 19, information on how to assign a channel number can be found in chapter 20. 15 Overview of menus Despite its small dimensions, the EK 3041-U features an easy-to-use operating menu comprising six menus with extensive adjustment facilities. -
Page 37: Fast Search" Function
(u see chapter 20). Press the SET button five times to adjust the limiter of the headphone output. This menu is skipped (= out of operation) if the receiver is inserted into a camcorder (u see chapter 21). -
Page 38: Adjusting The Headphone Volume
U receiver. The adjustment range of the headphone volume is between 0 an 126 (on the display). The headphone output can only be used if the receiver is not inserted in the slot-in facility of a camcorder but is operated as a stand-alone receiver, e.g. -
Page 39: Adjusting The Squelch
The display now indicates „Squelch“ in alternation with one of nine possible squelch values (adjustable in 5-dB steps from „OFF“ to „40“). These values are – to some extent – comparable to an input voltage in dB V. With the buttons you can now select a different setting. -
Page 40: Changing The Receiving Frequency
The display always jumps to the next fixed frequency setting in the program. When you get to the desired frequency, press the SET button for about 1 second. Your entry is confirmed by the fact that „Sto“ briefly appears on the display. -
Page 41: Assigning A Channel Number
20 Assigning a channel number You can assign a channel number (from 001 to 255) to each of the 32 receiving frequencies. With larger systems, it is recommended to use the same channel number for both transmitters and receivers in order to provide for simpler monitoring of the system. -
Page 42: Limiter
Note The limiter can only be used if the receiver is not inserted in the slot-in facility of a camcorder but is operated as a stand-alone receiver, e.g. inserted into a special housing (accessory). If the receiver is inserted in the slot-in facility of a camcorder, this menu is skipped. -
Page 43: Locking The Operating Buttons / „Lock Mode" Function
Locking the buttons Briefly press the SET button six times until „Loc“ begins to flash on the display. Now press the SET button for more than one second to store your setting. -
Page 44: Sennheiser Transmitters Report Their Battery/Accupack Status
Sennheiser supplies hand-held and pocket transmitters (u see chapter 24) which provide information on the available transmitter battery/accupack status to the receiver. This information can be evaluated with the EM 3041- U receiver. When the battery or accupack capacity is so low that only a transmission time of about 20 to 30 minutes remains, the „bat.tr“... -
Page 45: Suitable Sennheiser Transmitters
24 Suitable Sennheiser transmitters For the optimum use of the excellent reception qualities of the EK 3041-U receiver, Sennheiser offers hand-held and pocket transmitters in a variety of configurations: Pocket transmitters: • SK 1063-U (without display of battery status) •... -
Page 46: Safety Instructions
The display of the receiver is also used by the integrated microprocessor to display error messages for service purposes. If you see error messages such as „EE_DEF“ or „rS_232“, there is a fault in the receiver unit which can only be corrected by your local Sennheiser service department. -
Page 47: Recommended Accessories
28 Recommended accessories • GA 3041-C Base plate with special housing Cat. no. 04642 • GA 3041-B Power adaptor Cat. no. 04643 • GA 3041-15 Sony adaptor Cat. no. 04639 • GA 3041-25 Ikegami adaptor Cat. no. 04640 • GA 3041-44 Philips adaptor Cat. -
Page 48: Technical Data
GA 3041-C: AF output 3-pin XLR + 9 dB (2.2 V rms), electronically balanced, standard wiring at pin 2 and 3, + at pin 2, 3 screen/ground Terminating impedance 10 k Power supply via 4-pin „HIROSE“ DC-socket HR 10-7- R45, pin 1: ground, pin 4 10.5–18 V DC,... - Page 49 Récepteur Diversity EK 3041-U Notice d‘emploi...
- Page 50 Vous apprécierez ce produit Sennheiser pendant de longues années; sa fiabilité et sa simplicité d’utilisation vous convaincront. Sennheiser engage sa renommée et son expérience, accumulées depuis plus de 50 ans en tant que fabricant de produits électroacoustiques haut de gamme ”Made in Germany”.
-
Page 51: Description
Le EK 3041-U est un récepteur „True Diversity“ en format miniaturisé, destiné à l’insertion directe dans des caméras ENG (par ex. Philips LDK 120, Ikegami Hl-77 ou Sony SX). Allié à un émetteur de poche ou à main Sennheiser, il permet d’établir une transmission HF extrêmement fiable. -
Page 52: Principe Compandeur/Expandeur Hidyn Plus
HiDyn plus ® le niveau BF côté émission à un taux de 2:1 (en dB) et en assurant l’expansion exactement correspondante côté récepteur. Cette optimisation de la dynamique, associée à l’action de l’amplificateur limiteur automatique de niveau à partir de l’émetteur, réduit de façon non négligeable les problèmes de modulation. -
Page 53: Réception Diversity - Principe De Fonctionnement
Une antenne de réception ne capte pas seulement les ondes électromagnétiques lui parvenant directement par la voie directe, mais aussi les réflexions de ces mêmes ondes réfléchies dès le départ par les murs, les fenêtres, les plafonds etc. -
Page 54: Commandes Et Raccordements
Commandes et raccordements Touche SET pour la sélection de menu et la programmation Prise d’antenne, canal Diversity A Interrupteur marche/arrêt Zone d’affichage à fonctions multiples Touche pour sélectionner le réglage voulu dans un menu Touche pour sélectionner le réglage voulu dans un menu... -
Page 55: Montage Des Antennes
„True Diversity“ (voir chap. 5). La longueur des antennes est adaptée de façon optimale à la plage de fréquences de votre récepteur EK 3041-U. Insérer les antennes dans les prises b et g et les visser à fond. -
Page 56: Montage Direct Dans La Caméra Philips Ldk 120
Fixer le récepteur sur le châssis de montage au moyen de quatre petites vis. • Insérer le récepteur dans la caméra jusqu’à ce que le connecteur à 44 pôles se branche. • Fixer le châssis de montage sur le boîtier de la caméra au moyen de deux vis moletées. -
Page 57: Montage Direct Dans La Caméra Ikegami Hl-V77
à 25 pôles (accessoires). IKEGAMI Montage : • Fixer le châssis de montage sur le boîtier de la caméra Ikegami. • Insérer le récepteur dans la caméra jusqu’à ce que le connecteur à 25 pôles se branche. -
Page 58: Montage Direct Dans La Caméra Sony Sx
à 15 pôles (accessoires). Montage : SONY • Fixer le châssis de montage sur le boîtier de la caméra Sony SX. • Insérer le récepteur dans la caméra jusqu’à ce que le connecteur à 15 pôles se branche. -
Page 59: Alimentation
GA 3041-B fixé sur un accessoire de fixation externe. 12 Mise en service / Mettre en marche le récepteur Si le récepteur est inséré dans une caméra, il est allumé aussitôt que la caméra est mise en service. L’interrupteur marche/arrêt du récepteur est alors verrouillé. -
Page 60: Affichage De La Fréquence De Réception Ou Du Numéro De Canal
Appuyer une fois sur la touche SET pour régler le volume au niveau du casque. Ce menu est inaccessible (= hors service) si le récepteur est inséré dans une caméra (u voir chap. 17). Appuyer deux fois sur la touche SET... -
Page 61: Fonction „Recherche Rapide
Appuyer trois fois sur la touche SET pour sélectionner une fréquence de réception (u voir chap. 19). Appuyer quatre fois sur la touche SET pour affecter un numéro de canal à une fréquence de réception (u voir chap. 20). Appuyer cinq fois sur la touche SET pour régler le limiteur au niveau de la sortie casque. -
Page 62: Réglage Du Volume Pour La Sortie Casque
Appuyer une fois brièvement sur la touche SET L’affichage indique alors „PHonE“ en alternance avec la valeur actuelle du volume au niveau de la sortie casque de votre récepteur EK 3041-U. La plage de réglage du volume est comprise entre 0 et 126 (sur l’affichage). -
Page 63: Réglage Du Squelch
18 Réglage du Squelch Le récepteur EK 3041-U est équipé d’un Squelch réglable, permettant de supprimer les bruits indésirables lors de la mise en circuit et hors circuit de l’émetteur. Il permet également d’éviter la montée du bruit de souffle au moment où... -
Page 64: Comment Changer De Fréquence De Réception
Appuyer trois fois brièvement sur la touche SET. L’affichage indique alors la fréquence de réception en alternace avec le numéro de canal assigné. (S’il n’y a pas de numéro de canal déjà assigné, trois traits apparaissent sur l’affichage) : Sélectionner la fréquence voulue à l’aide des touches et . -
Page 65: Affectation D'un Numéro De 0On
20 Affectation d’un numéro de canal à une fréquence de réception Vous pouvez affecter un numéro de canal (compris entre 001 et 255) à chacune des 32 fréquences de réception. Dans le cas d’installations complexes, il est judicieux de travailler avec ces numéros de canaux pour les émetteurs et les récepteurs, car le repérage s’en trouve facilité. -
Page 66: Réglage Du Limiteur
21 Réglage du limiteur Votre récepteur EK 3041-U est equipé d’un limiteur commutable permettant de réduire la tension de sortie de l’amplificateur casque intégré. Il conviendrait alors d’activer systématiquement le limiteur afin de protéger votre ouïe. Nota : Le limiteur est uniquement opérationnel si le récepteur n’est pas inséré... -
Page 67: Verrouillage Des Commandes / Protection Contre Les Erreurs De Manipulation
éviter ainsi qu’un utilisateur non familiarisé avec sa manipulation puisse éteindre le récepteur par inadvertance. Verrouillage Appuyer six fois brièvement sur la touche SET jusqu’à ce que „Loc“ commence à clignoter sur l’affichage. Appuyer ensuite sur la touche SET et la maintenir enfoncée pendant plus d’une seconde. -
Page 68: Affichage De La Puissance D'accus Des Émetteurs Sennheiser
émetteurs. Cet information peut être analysée par le récepteur EK 3041-U. Lorsque la capacité des accus ou des piles en arrive à environ 20 ou 30 minutes de temps d’émission résiduel, l’affichage ”bat.tr” commence à clignoter alternativement avec l’affichage de la fréquence de réception ou du numéro de canal. -
Page 69: Les Émetteurs Sennheiser Associés
24 Les émetteurs Sennheiser associés Vous trouverez dans la gamme des produits Sennheiser, sous leurs différentes versions respectives, les émetteurs de poche et à main destinés à être associés au récepteur EK 3041-U, pour en exploiter à fond toutes les possibilités qualitatives de réception. -
Page 70: Remarques Importantes
La zone d’affichage est également utilisée par le microprocesseur intégré pour annoncer les messages d’erreurs destinés au service d’entretien. Si vous trouvez un message d’erreur tel que : ”EE_DEF” ou ”rS_232”, c’est qu’il y a un défaut au niveau du récepteur; seul l’agent Sennheiser autorisé pouvant y remédier. -
Page 71: Accessoires Recommandés
28 Accessoires recommandés • GA 3041-C Sabot avec accessoire de fixation externe N Réf. 04642 • GA 3041-B Adaptateur d’alimentation N Réf. 04643 • GA 3041-15 Adaptateur Sony N Réf. 04639 • GA 3041-25 Adaptateur Ikegami N Réf. 04640 •... -
Page 72: Caractéristiques Techniques
10 k Alimentation par prise DC à 4 pôles „HIROSE“ HR 10-7-R45, broche 1 : masse, broche 4 : 10.5–18 V DC, approx. 40 mA à 12 V par GA 3041-B Alimentation 1.8–4.8 V, approx. 150 mA à 2.4 V Packs piles associés... - Page 73 Receptor Diversity EK 3041-U Instrucciones para el uso...
- Page 74 Este producto Sennheiser le convencerá durante largos años debido a su fiabilidad, rentabilidad y facilidad de manejo. Se lo garantiza Sennheiser con su excelente renombre y su experiencia, adquiridos en más de 50 años, como fabricante de magníficos productos electroacústicos „Made in Germany“.
- Page 75 El EK 3041-U es un receptor True-Diversity de tamaño pequeñísimo. Por eso puede insertarse directamente en el compartimiento especial existente en la mayoría de las cámaras de vídeo para uso profesional. Utilizado junto con un potente transmisor de Sennheiser, bien sea manual o de bolsillo, se logra un trayecto de transmisión de sonido de funcionamiento muy seguro, y de...
- Page 76 ® HiDyn plus comprime el nivel de BF en el lado del transmisor en un relación de 2:1 (con referencia a dB), expandiéndolo de nuevo exacta y simétricamente, en el lado del receptor. El perfeccionamiento del comportamiento dinámico y el efecto de asistencia del amplificador regulador en el transmisor disminuyen considerablemente los problemas de excitación completa en el transmisor.
- Page 77 Sin tener que modificar la posición de los transmisores, el reubicar la antena receptora en otro sitio puede contribuir a solucionar esta situación. En el caso de transmisores móviles (como en este caso), sin embargo, el hueco de la intensidad de campo se presenta entonces en otra posición del transmisor.
- Page 78 Elementos de mando Pulsador SET para selección del menú y la programación Casquillo de la antena, ramal Diversity A Pulsador de conexión/desconexión Display multifuncional Tecla selectora para menú y funciones, retrocediendo Tecla selectora para menú y funciones, avanzando Casquillo de la antena, ramal Diversity B...
- Page 79 Forma de fijar las antenas en el EK 3041-U Su transmisor EK 3041-U funciona con dos antenas. Estas son necesarias para la operación Diversity (véase el capítulo 5). Las antenas están incluidas en el suministro; su longitud ha sido adaptada al margen de frecuencia de recepción del modelo EK 3041-U.
- Page 80 44 polos (accesorios). PHILIPS Montaje en la cámara: • Por arriba, fijar el receptor con los cuatro tornillos al bastidor de montaje. • Introducir el receptor hasta que la regleta enchufable haya hecho buen contacto en el compartimiento.
- Page 81 IKEGAMI sobre el compartimiento de montaje, apretando bien. • Introducir el receptor hasta que la regleta enchufable haya hecho buen contacto en el compartimiento. • Por arriba, con los cuatro tornillos pequeños fijar el receptor EK 3041-U al bastidor de montaje.
- Page 82 SONY, sobre el compartimiento de montaje, apretando bien. • Introducir el receptor hasta que la regleta enchufable haya hecho buen contacto en el compartimiento. • Por arriba, fijar el receptor con los cuatro tornillos pequeños al bastidor de montaje.
- Page 83 • Puede tomarse directamente de la cámara con 12 V ó 5,6 V, o bien • del bloque de pilas GA 3041-B que se instala en la caja.
- Page 84 Al pulsar la tecla se indicará el respectivo número de canal. En el capítulo 19 se indica la forma de cambiar de frecuencia de transmisión; en el capítulo 20 se indica la forma de asignar un número de canal. 15 Sinopsis de funciones A pesar del tamaño tan pequeño del receptor, para poder lograr los diferentes...
- Page 85 („Repetición“). Al mantener una de estas teclas pulsada, se acelera constantemente la indicación. Al soltar la tecla y comenzar otra vez, el ciclo se inicia de nuevo lentamente. De tal forma puede avanzarse cómoda y confortablemente en ambos sentidos,...
- Page 86 En el visualizador aparece ahora, alternando „PHonE“ y un número de tres dígitos. Este número le permite a Vd. asignar un valor de ajuste entre 0 y 126 para el volumen en la salida de auricular de su receptor EK 3041.
- Page 87 También evita los ruidos que se producen cuando el transmisor sale del margen de recepción, con lo cual no se dispone de suficiente potencia de transmisión en el receptor. Pulse brevemente dos veces la tecla „SET“.
- Page 88 19 Cambiar la frecuencia de recepción Pulse tres veces brevemente la tecla „SET“. En el visualizador aparece alternando la frecuencia de recepción ajustada y el número de canal asignado. (Si no se ha asignado ningún número de canal, aparecen tres rayas): Con las teclas puede Vd.
- Page 89 20 Asignar un número de canal a una frecuencia de recepción Puede asignar Vd. un número de canal a cada una de las frecuencias de recepción, 32 en total. Dicho número puede ser cualquiera entre 1 y 255. En sistemas de mayor tamaño es aconsejable trabajar con idénticos números de canal en transmisores y receptores, dado que se simplifica así...
- Page 90 Notas La operación de ingreso puede terminarse en cualquier momento. Pulse la tecla „SET“ para pasar al siguiente punto de menú, o pulse brevemente „ON/OFF“ para terminar. El visualizador confirma con „ESC“. La indicación regresa luego al servicio normal previamente ajustado (indicación de la frecuencia de recepción o del número de canal) (u Cap.
- Page 91 22 Bloqueo de las teclas/protección contra manejo operación errónea Las teclas de manejo del receptor EK 40 4031-U pueden ser bloqueadas. Con ello se evita que una persona no familiarizada con el manejo del aparato pueda desconectar o conectar el receptor EK 3041-U inadvertidamente. Bloquear Pulse seis veces brevemente la tecla „SET“...
- Page 92 Hay transmisores Sennheiser, manuales y de bolsillo (u Cap. 24) que informan la capacidad restante existente en las pila o los acumuladores de los receptores. Con el receptor EK 3041-U puede evaluarse la indicación de la capacidad restante („telegrama de pilas“).
- Page 93 24 Transmisores sennheiser adecuados Para aprovechar perfectamente las magníficas características del receptor EK 3041-U, en el programa Sennheiser encontrará Vd. transmisores manuales y de bolsillo de diferentes modelos y equipamientos: Transmisores de bolsillo • SK 1063-U (sin indicación a distancia del estado de la pila) •...
- Page 94 Mantenga siempre distancia razonable de radiadores y cuerpos calefactores; no exponga el aparato directamente a los rayos solares. Para limpiarlo, basta con frotar el aparato de vez en cuando con un paño ligeramente húmedo. No emplear nunca disolventes ni detergentes.
- Page 95 28 Accesorios recomendados • GA 3041-C Placa de base con caja Art. núm. 04642 • GA 3041-A Adaptador de alimentación Art. núm. 04643 • GA 3041-15 Inserto SONY Art. núm. 04639 • GA 3041-25 Inserto IKEGAMI Art. núm. 04640 •...
- Page 96 GA 3041-C Salida de BF XLR-3 +9dB (2,2V efect.), equilibrada electrónicamente, conmutación normalizada, Pin 2 y 3, + a 2, 1 pantalla/masa Impedancia final 10 W Alimentación de corriente a través de casquillo DC „HIROSE“ HR 10-7-R45.
- Page 97 Aktuelle Informationen zu Sennheiser-Produkten erhalten Sie auch im Internet unter „http://www.sennheiser.com“. Up to date information on Sennheiser products can also be found on the Internet under “http://www.sennheiser.com”. Vous trouverez également toutes les informations actuelles relatives aux produits Sennheiser sur Internet, sous “http://www.sennheiser.com“.