Table of Contents
Advertisement
Quick Links
Advertisement
Table of Contents

Related Manuals for Minolta MN4K300WP


Summary of Contents for Minolta MN4K300WP
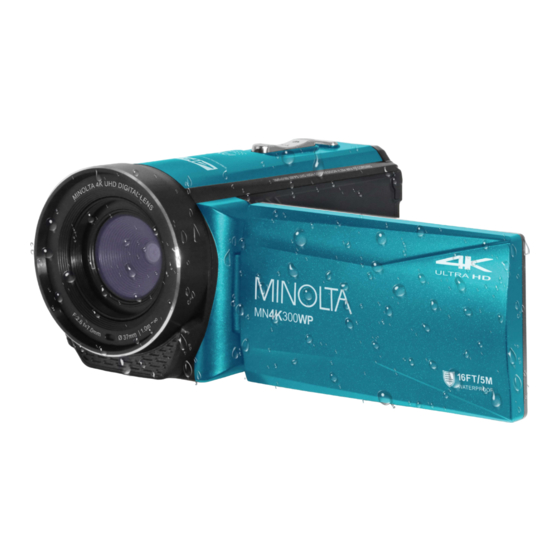
- Page 1 MN4K300WP User Manual...
- Page 2 1. About Your Camcorder About this Manual Congratulations on purchasing the Minolta MN4K300WP Waterproof Camcorder! The contents of this manual are subject to change without notice. Note that the example screens and product illustrations shown in this somewhat from the screens and configuration of the actual camcorder.
- Page 3 1. About Your Camcorder be provided with antenna installation instructions and transmitter operating conditions for satisfying RF exposure compliance. FCC: SAR standard Value: 1.6 W/Kg, Maximal Measure: 0.4 W/kg CE Mark Warning This is a Class B product, in a domestic environment, this product may cause radio interference, in which case the user may be required to take adequate measures.
- Page 4 1. About Your Camcorder batteries according to the instructions. Please keep the batteries out of the reach of children to prevent from swallowing batteries, which might cause poisoning. Once the battery's color changes or its shape is twisted, please stop using it. USB adapter Information Do not expose the adapter to high temperatures or moisture places.
- Page 5 1. About Your Camcorder If a foreign substance adheres to the outside of the camcorder or inside of the battery cover, immediately remove it with a soft cloth. Do not leave the camcorder in cold conditions or hot conditions of 40°C (104°F) or more for a long period of time.
- Page 6 1. About Your Camcorder To Lock the Battery Door Precautions When Cleaning...
- Page 7 1. About Your Camcorder Do not puncture the microphone or speaker openings with a sharp implement. If the inside of the camcorder is damaged, the waterproof performance will deteriorate. Do not use soap, natural detergents, or chemicals such as benzene for cleaning.
- Page 8 1. About Your Camcorder The Battery Precautions for Use Note that the battery may become hot after use. Do not use the battery at ambient temperatures below 0°C (32°F) or above 40°C (104°F) as this could cause damage or malfunction. If you notice any abnormalities such as excessive heat, smoke, or an unusual smell coming from the battery, immediately discontinue use and consult your retailer.
- Page 9 1. About Your Camcorder Cleaning After Using the Camcorder Underwater Follow the procedure below to rinse the camcorder with fresh water within 30 minutes after using it under saltwater or at the beach. camcorder with fresh water. Immerse the camcorder minutes.
-
Page 10: Camcorder Interface
1.1 Camcorder Interface... - Page 12 1.2 Button Function Description Function Description Press once to power on and press and hold for 5 Power seconds to power off. Press to change modes. OK button in menus. Tap to confirm a setting. In Video: Tap to pause a recording, tap again to Mode | OK resume recording.
- Page 13 2. First Use 2. First Use Opening and Closing the Battery Door Follow the steps below to open and close the battery door:...
-
Page 14: Inserting The Memory Card
2. First Use Inserting the Memory Card Insert the included MicroSD memory card to record and store your videos and photos. When the battery is low, media stored on the memory card will not be erased. Please insert the MicroSD memory card by following the steps below: 1. -
Page 15: Charging The Battery
2. First Use 1. Open the battery door to access the battery compartment. 2. Insert the battery. Ensure that the metal contacts are inserted first. Push the down until you hear an audible click. 3. Close the battery door, you will hear an audible click when the battery door is locked. -
Page 16: Using The Zoom Function
2. First Use desired mode and press the MODE/OK button to enter into that mode. If a mode after 5 seconds. Connecting to a TV The camcorder can also be connected to a TV. When connected, the camcorder screen will turn off and the camcorder will function normally. Use the TV as the camcorder monitor. - Page 17 3. Using the Camcorder 3. Using the Camcorder Video Recording You may rotate the mode dial to switch to another mode. A camcorder icon will appear in the top left corner of the screen when you are in Video mode. 1.
- Page 18 3. Using the Camcorder MODE/OK button to confirm your selected setting (Off, 1 Minute, 3 Minutes, 5 Minutes, 10 Minutes). 4. You can also press the MENU button to exit the submenu without making a selection. 3.1.3 Color Filter This function sets the color filter effect of a video. 1.
- Page 19 3. Using the Camcorder -1, -2, -3). 4. You can also press the MENU button to exit the submenu without making a selection. 3.1.6 Motion Detection This setting allows the camcorder to automatically begin recording if movement is detected in front of the camcorder lens. Once recording, the camcorder will stop recording if not further movement is detected within a 10- second period of the last movement registered.
- Page 20 3. Using the Camcorder 3. Press the UP or DOWN buttons to navigate the menu and press the MODE/OK button to confirm your selected setting (Off, 0.1 Seconds, 0.2 Seconds, 0.5 Seconds, 1 Second, 5 Seconds, 10 Seconds, 30 Seconds, 1 Minute, 5 Minutes).
-
Page 21: Photo Shooting
3. Using the Camcorder Photo Shooting Power the camcorder on and press the MODE/OK button or press the icon in the top left corner of the touch screen to switch to Photo mode. 1. Line up your shot by looking at the LCD screen to see what is in the shot. 2. - Page 22 3. Using the Camcorder 4. You can also press the MENU button to exit the submenu without making a selection. 3.2.3 Self-Timer This function determines the time delay before a photograph is captured. This setting can be used by photographers to take photographs of themselves. 1.
- Page 23 3. Using the Camcorder 3.2.6 Quality This setting determines the level of compression the camcorder uses when saving photos to your memory card. A high level of compression will produce a lower quality photo, and will also use less space when saving your photos. 1.
- Page 24 3. Using the Camcorder 3.2.8 ISO This function adjusts the light sensitivity in your photograph. 1. In Photo Mode press the MENU button. 2. Select ISO using the UP or DOWN buttons and press the MODE/OK button to enter the ISO submenu. 3.
- Page 25 3. Using the Camcorder 3.3 Playback Mode Videos and photos captured on your camcorder can be easily played back. 1. Press the MODE/OK button until you enter Playback mode. 2. Press the UP or DOWN buttons to cycle through the captured files stored on the memory card.
- Page 26 3. Using the Camcorder 4. Press the MENU button to exit the menu without protecting any videos. 3.3.3 Slide Show Photographs can be viewed as a slideshow on the camcorder. 1. In Playback Mode press the MENU button. 2. Use the UP or DOWN buttons to select Slide Show . Press the MODE/OK button to enter the Slide Show submenu.
- Page 27 3. Using the Camcorder 3.4 Setup Mode Basic settings can be changed in the Setup menu. These include date & time, language and sound options. Power the camcorder on and rotate the mode dial to enter the Settings mode. A menu will display on the screen. 3.4.1 Date and Time Set This function allows you to set the current Date and Time on your recorded video clips and captured photos.
- Page 28 3. Using the Camcorder 3.4.3 Auto Power Off This function sets the duration of time in which the camcorder will wait with no user input before automatically powering off. 1. In Video or Photo Mode press the MENU button to enter the settings mode. 2.
- Page 29 3. Using the Camcorder MODE/OK button to enter the utton submenu. 4. Press the UP or DOWN buttons to select your desired setting (Off, On), Then press the MODE/OK button to confirm your selection. 5. You can also press the MENU button to exit the submenu without making a selection.
- Page 30 3. Using the Camcorder 2. Then press the MENU button again to enter the Setup mode. 3. Use the UP or DOWN buttons to select Memory Card and press the MODE/OK button to enter the submenu. 4. Press the UP or DOWN buttons to select your desired selection, press the MODE/OK button for your selected setting (Cancel, OK).
-
Page 31: Technical Specifications
4. Technical Specifications 4. Technical Specifications Model Number Minolta MN4K300WP 2.4 37mm Front Lens Threading for Lens Accessory Attachments Zoom 18X Digital Zoom Image Sensor 13MP CMOS Sensor Digital Stabilization Shutter Electronic JPEG: Pixels (photo) MP4: Pixels (video) ISO Sensitivity... - Page 32 Minolta is a registered trademark of JMM Lee Properties, LLC and is used in the United States by Elite Brands Inc. under license. -441-1100 www.minoltadigital.com www.elitebrands.com Copyright © 2023 Elite Brands Inc. camcorder, or would like further assistance, please call our toll-free technical support hotline at 800-441-1100.