Table of Contents
Advertisement
Advertisement
Table of Contents

Related Manuals for Minolta MN80NV


Summary of Contents for Minolta MN80NV
- Page 1 MN80NV User Manual...
-
Page 2: Table Of Contents
Contents 1. About Your Camcorder ..........................3 Cautionary Information ....................... 3-5 1.1 System Requirements ....................... 6 1.2 Camcorder Interface ........................ 6 1.3 Button Function Description ..................... 7 2. First Use ................................7 2.1 Inserting The Memory Card .......................7 2.2 Installing The Battery .........................8 2.3 Charging The Battery ........................ - Page 3 3.3 The Setup Menu ......................... 19-20 3.4 Playback Mode ........................21-22 4. Appendix ..............................23 4.1 Technical Specifications ......................23 4.2 Support and Information ......................24...
-
Page 4: About Your Camcorder
1. About Your Camcorder About this Manual Congratulations on purchasing the Minolta MN80NV 1080p Camcorder! The contents of this manual are subject to change without notice. Note that the example screens and product illustrations shown in this User’s Guide may differ somewhat from the screens and configuration of the actual camera. - Page 5 1. About Your Camcorder This device must accept any interference received, including interference that may cause undesired operation. RF Exposure Warning This equipment complies with FCC RF radiation exposure limits set forth for an uncontrolled environment. This equipment must be installed and operated in accordance with provided instructions and must not be co-located or operating in conjunction with any other antenna or transmitter.
- Page 6 1. About Your Camcorder or moisture. Battery Information • Turn off the camera before installing or removing the battery. • Use only the provided batteries or type of battery and charger that came with your camera. Using other types of battery or charger may damage the device and invalidate the warranty.
-
Page 7: System Requirements
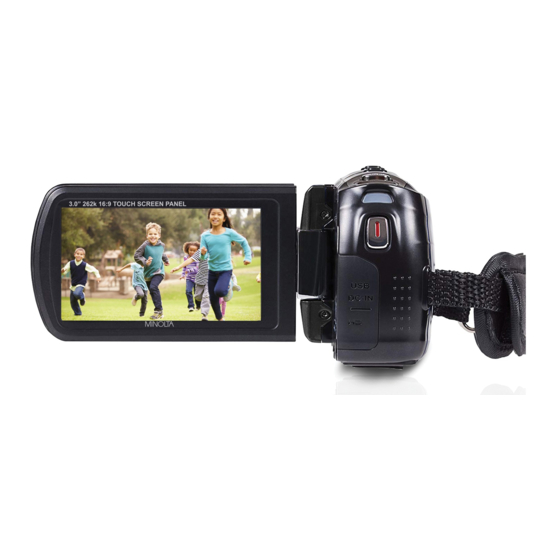
1. About Your Camcorder 1.1 System Requirements Below are the minimum following specification: Intel® 2.0 GHZ or equivalent Operating System: Microsoft Windows 7+ / Mac OS+ 2GB RAM 40GB above available disk storage Standard USB interface CD-ROM Driver 1GB Graphics or higher 1024*768 pixel or higher resolution 1.2 Camcorder Interface [Front View]... -
Page 8: Button Function Description
1. About Your Camcorder 1.3 Button Function Description Icon Button Name Function Description Hold the POWER button for 2 seconds to turn the power on/off. Power Button Push the POWER button to turn the IR light on/off. Mode Button Press the MODE button to switch between Video, Photo and Setup Mode. -
Page 9: Installing The Battery
2. First Use 2.2 Installing The Battery Insert the li-ion battery into the battery compartment with the metal contacts facing the back of the camcorder. Push the battery in until it clicks. Attention! 1. Slide the battery door switch Please insert the battery in the correct way. forward to open the battery door. -
Page 10: Connecting To A Computer
2. First Use 2.6 Connecting to a Computer The camcorder can be connected to a computer to transfer photo and video files for viewing and editing, as shown below. Connect this terminal to the standard USB interface of the computer. Connect this terminal to the standard USB interface of the camcorder. -
Page 11: Video Mode
2. First Use 2.8 Video Mode In Video Mode, you can record video clips. The meaning of each icon within Video Mode is explained in the table below: 1) Video mode 6) Recording time 2) Video quality indicator 7) Memory card 3) Exposure 8) Battery 4) Video size (Resolution) -
Page 12: Using The Zoom Function
2. First Use 2.10 Using the Zoom Function This camcorder has a digital zoom function. To operate the zoom function, slide the ZOOM buttons from right to left during recording. 2.11 Using the IR Night Vision Mode Your camcorder has a built in infrared LED for night vision recording, giving you the ability to take photos and videos in a dark environment. -
Page 13: Using Your Camcorder
3. Using Your Camcorder 3. Using the Camcorder 3.1 Photo Shooting Power the camcorder on and press the MODE button or press the icon in the top left hand corner of the touch screen to switch to Photo mode. 1. Line up your photo by looking at the LCD screen to see what is in the shot. 2. - Page 14 3. Using Your Camcorder 3.1.4 White Balance White Balance changes the color of light in your pictures, making it seem warmer or cooler depending on how the light you're shooting in affects the frame. 1. In Photo Mode press MENU, select ‘White Balance’ using the ZOOM buttons and press the PHOTO button to enter the white balance sub-menu.
- Page 15 3. Using Your Camcorder 3.1.9 Sharpness This function adjusts the visible detail of a photograph. 1. In Photo Mode, press MENU, select ‘Sharpness’ using the ZOOM buttons and press the PHOTO button to enter the sharpness sub-menu. 2. Push the ZOOM buttons to navigate the menu, and press the PHOTO button to confirm how sharp you would like your photograph to be (hard, normal, soft).
- Page 16 3. Using Your Camcorder 3.1.14 Time Lapse This function allows you to capture a long sequence of events in a much shorter time period. This specific setting will determine how often an image is automatically captured. 1. In Photo Mode press MENU, select ‘Time Lapse’ using the ZOOM buttons and press the PHOTO button to enter the effect sub-menu.
-
Page 17: Video Recording
3. Using Your Camcorder 3.2 Video Recording Power the camcorder on and press the MODE button or press the icon in the top left hand corner of the touch screen to switch to Video mode. A camcorder icon will now appear in the top left hand corner of the screen. 1. - Page 18 3. Using Your Camcorder 3.2.4 White Balance White Balance changes the color of light in your pictures, making it seem warmer or cooler depending on how the light you're shooting in affects the frame. 1. In Photo Mode press MENU, select ‘White Balance’ using the ZOOM buttons and press the PHOTO button to enter the white balance sub-menu.
- Page 19 3. Using Your Camcorder 3.2.9 Slow Motion This function sets the frame rate of recorded video to a much slower 10 frames per second speed. 1. In Photo Mode press MENU, select ‘Slow Motion’ using the ZOOM buttons and press the PHOTO button to enter the effect sub-menu. 2.
-
Page 20: The Setup Menu
3. Using Your Camcorder 3.3 The Setup Menu Basic settings can be changed in the setup menu. These include date & time, language and sound options. Power the camera on and press the MODE button, or press the icon in the top left hand corner of the touch screen to switch to setup mode. - Page 21 3. Using Your Camcorder 3.3.5 Language Set the camcorder’s interface language in the language submenu. 1. In Setup Mode select ‘Language’ using the ZOOM button and press the PHOTO button to enter the language submenu. 2. Push the ZOOM (right or left) buttons to navigate, and press the PHOTO button to select your required language.
-
Page 22: Playback Mode
3. Using Your Camcorder 3.4 Playback Mode Photos and videos captured on the camcorder can be played back. You can also delete, protect and play media back in slideshow format. In Playback Mode, the following operations are an option: 3.4.1.1 Lock The Files This function protects the photo/video file. - Page 23 3. Using Your Camcorder 3.4.2 Video Playback Videos can be played back and viewed on your camcorder. 1. In Playback Mode, slide the ZOOM buttons (from left to right) to select the video file for playback. 2. Press the PHOTO button to start playing the video. Press the PHOTO button a second time to pause the video.
-
Page 24: Appendix
4. Appendix 4.1 Technical Specifications Model Number Minolta MN80NV Lens Fixed Focus • f=7.5mm • F/3.2 • Wide Angle Zoom 16x Digital Image Sensor 1/3.2" IMX179 Sony CMOS; 3288x2512 Pixels Shutter Speed 1/60 ~ 1/30 sec Shutter Electronic • Anti-Shake Image Stabilization JPEG: 24 MP •... -
Page 25: Support And Information
4. Appendix Minolta is a registered trademark of JMM Lee Properties, LLC and is used in the United States by Elite Brands Inc. under license. 40 Wall Street, 61st Floor, New York, NY 10005 USA • Tel: 800-441-1100 www.minoltadigital.com • www.elitebrands.com Copyright ©...