Advertisement
Table of Contents
- 1 Wheel Drive
- 2 Table of Contents
- 3 Important Safe Operation Practices
- 4 Maintenance and Storage
- 5 Assembling Your Snow Thrower
- 6 Final Adjustments
- 7 Know Your Snow Thrower
- 8 Operating Your Snow Thrower
- 9 Electric Starter
- 10 Making Adjustments
- 11 Maintaining Your Snow Thrower
- 12 Servicing Your Snow Thrower
- 13 Troubleshooting
- 14 Parts List
- 15 Cub Cadet Corp
- 16 Cleveland, Ohio
- Download this manual
OPERATOR'S MANUAL
IMPORTANT: READ SAFETY RULES AND INSTRUCTIONS CAREFULLY
Warning:
This unit is equipped with an internal combustion engine and should not be used on or near any unimproved forest-
covered, brush-covered or grass-covered land unless the engine's exhaust system is equipped with a spark arrester meeting
applicable local or state laws (if any). If a spark arrester is used, it should be maintained in effective working order by the operator.
In the State of California the above is required by law (Section 4442 of the California Public Resources Code). Other states may have
similar laws. Federal laws apply on federal lands. A spark arrester for the muffler is available through your nearest engine authorized
service dealer or contact the service department, P.O. Box 368023 Cleveland, Ohio 44136-9722.
CUB CADET CORP. P.O. BOX 368023 CLEVELAND, OHIO 44136-9722
PRINTED IN U.S.A.
SNOW
THROWER
MODEL
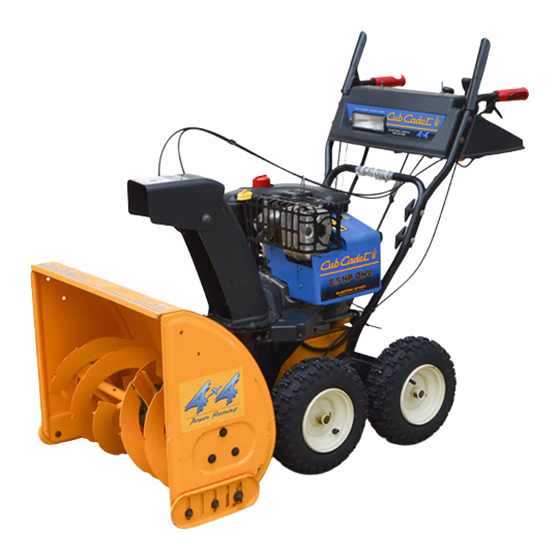
826 4x4
4-Wheel Drive
770-10260A.fm
FORM NO.
(6/00)
Advertisement
Table of Contents

Related Manuals for Cub Cadet 826 4x4


Summary of Contents for Cub Cadet 826 4x4
-
Page 1: Wheel Drive
Federal laws apply on federal lands. A spark arrester for the muffler is available through your nearest engine authorized service dealer or contact the service department, P.O. Box 368023 Cleveland, Ohio 44136-9722. CUB CADET CORP. P.O. BOX 368023 CLEVELAND, OHIO 44136-9722 PRINTED IN U.S.A. -
Page 2: Table Of Contents
(Model Number) (Serial Number) CUB CADET CORP. P.O. BOX 368023 CLEVELAND, OHIO 44136 If you have difficulty assembling this product or have any questions regarding the controls, operation or maintenance of this unit, please call the Customer Dealer Referral Line. -
Page 3: Important Safe Operation Practices
SECTION 1: IMPORTANT SAFE OPERATION PRACTICES WARNING: This symbol points out important safety instructions which, if not followed, could endanger the personal safety and/or property of yourself and others. Read and follow all instructions in this manual before attempting to operate this machine. Failure to comply with these instructions may result in personal injury. -
Page 4: Maintenance And Storage
The clutch levers must operate easily in both directions and automatically return to the disengaged position when released. Never operate with a missing or damaged discharge chute. Keep all safety devices in place and working. Never run an engine indoors or in a poorly ventilated area. -
Page 5: Assembling Your Snow Thrower
SECTION 2: ASSEMBLING YOUR SNOW THROWER NOTE: Any reference in this manual to the left or right side of the snow thrower is observed from the operator’s position. Unpacking • Remove staples from the top sides and ends of the shipping crate. -
Page 6: Final Adjustments
Figure 5 Final Adjustments Auger Control Adjustment Check the adjustment of the auger control as follows: • Push forward on the auger control until the small rubber bumper contacts the upper handle. There should be slack in the cable. See Figure 6. •... -
Page 7: Know Your Snow Thrower
Skid Shoes Figure 7 SECTION 3: KNOW YOUR SNOW THROWER Traction Control / Auger Control Lock Heated Handles Switch Headlight Discharge Chute Auger WARNING: Read, understand, and follow all instructions and warnings on the machine and in this manual before operating. -
Page 8: Operating Your Snow Thrower
Auger Drive Control The auger drive control is located on the left handle. Squeeze the control grip to engage the augers. Release to stop the snow throwing action. (Traction control must also be released.) See Figure 8. Trigger Lever The left and right turn triggers are located on the underside of the handles and are used to assist in steering your snow thrower. -
Page 9: Electric Starter
WARNING: extreme handling gasoline. Gasoline is extremely flammable and the vapors are explosive. Never fuel machine indoors or while the engine is hot or running. Extinguish cigarettes, cigars, pipes an other sources of ignition. • A plastic cup is provided inside the fuel fill opening on the fuel tank. -
Page 10: Making Adjustments
• Remove ignition key. Do not turn key. Disconnect the spark plug wire from the spark plug to prevent accidental starting while equipment is unattended. NOTE: Keep it in a safe place. Engine will not start without ignition key. Wipe all snow and moisture from the carburetor cover in the area of the control levers. -
Page 11: Maintaining Your Snow Thrower
Gear Shaft Friction Wheel Rubber Figure 9 Shift Rod Adjustment To adjust the shift rod, proceed as follows: • Remove the hairpin clip and slide the shift rod connector up, to separate the upper shift rod from the lower shift rod. See Figure 10. •... -
Page 12: Servicing Your Snow Thrower
Electric Chute-Rotation Motor The gear on the electric chute-rotation motor and the base of the discharge chute itself should be lubed with multi-purpose automotive grease once a season. See Figure 11. Lube Gear & Chute Base Figure 11 Gear Case The gear case is equipped with a grease fitting on the left housing and should be lubricated with Shell Alvania grease EPR00, part number 737-0168 every 25 hours. - Page 13 Belt Cover Figure 13 • Remove the three hex nuts and lock washers which attach the auger housing assembly to the frame assembly on each side. See Figure 14. WARNING: Do not attempt to change the auger belt without the help of an assistant. It is very important that one person, standing at the operating position, firmly hold the snow thrower housing to prevent...
- Page 14 • Remove the plastic belt cover on the front of the engine by removing the two self-tapping screws. • Tip the snow thrower up and forward, so that it rests on the housing. • Remove six self-tapping screws from the frame cover underneath the snow thrower.
- Page 15 • Reassemble new friction wheel rubber to the friction wheel assembly, tightening the six screws in rotation and with equal force. • Insert the pin from the shift arm assembly into the friction wheel assembly and hold assembly in position. Refer to Figure 18. •...
-
Page 16: Troubleshooting
Loose electrical connections. not creating heat Blown fuse. Faulty heated handles grip. NOTE: For repairs beyond the minor adjustments listed above, please contact your local Cub Cadet dealer. Corrective Action Fill tank with clean, fresh gasoline. Fuel becomes stale after thirty days. -
Page 17: Parts List
Model 826 Ref. Part No. 710-0459A Special Hex Screw: 3/8-24 x 1.5” 710-0599 TT Screw: 1/4-20 x 0.5” 712-0116 Jam Nut 713-0491 Sprocket 713-0492 Chain 714-0161 736-0235 Flat Washer 736-0351 Flat Washer 737-0170 Lubricant: 6in 1 737-3000 Lube Fitting 738-1135A Drive Axle 738-1136A Wheel Axle... - Page 18 Model 826 26 40...
- Page 19 Model 826 Ref. Part No. Description 05931A Bearing Housing 684-0065 Impeller Assy. 12” dia. 705-5226 Chute Reinforcement 710-0451 Carriage Bolt 5/16-18 x .75” Gr.2 710-0459A Hex Screw 3/8-24 x 1.5” Gr.5 710-0604 Hex Screw 5/16-18 710-0703 Carriage Screw 1/4-20 x .75” 710-0890A Shear Bolt 5/16-18 x 1.5”...
- Page 20 Model 826 17 29 33 39...
- Page 21 Oval C-Sunk Machine Screw Weld Nut Cable Tie (not shown) Turn Trigger Frame Label: Auger Side 4x4 Label: Heated Handle Label: Handle Panel Label: Housing 826 4x4 Label: Engine Label: H-Steer LH Label: H-Steer RH Label: Chute Danger Label: Housing Danger...
- Page 22 Model 826...
- Page 23 Model 826 Ref. Part No. Description 05896A Idler Bracket 710-0230 Hex Bolt 1/4-28 x 0.5” Gr.5 710-0627 Hex Scr w/ Patch: 5/16-24 x 0.75” 710-0654A Hex Washer Head Sems Screw 710-0696 Hex Bolt 3/8-24 x .875” Gr.8 710-1245 Hex Scr w/ Patch: 5/16-24 x .875” 710-1652 Hex Washer Head TT 710-3005...
- Page 24 Model 826 For Reference Only For Reference Only...
- Page 25 Model 826 Ref. Part No. Part Description 684-0008A Shift Arm Assembly 710-0262 Carriage Bolt 5/16-18 x 1.5” 710-0449 Carriage Bolt 5/16-18 x 2.25” 710-0788 TT Screw 1/4-20 x 1” 710-0837 C-Sunk Screw #10-16x 0.625” 710-3008 Hex Screw 5/16-18 x .75” 711-0677 Ferrule 712-0429...
- Page 26 Notes...
-
Page 28: Cleveland, Ohio
There is no other express warranty. Contact your authorized Cub Cadet servicing dealer who sold you your Cub Cadet equipment. If this dealer is not available, see the Consumer Yellow Pages under “lawn mowers” for the name of a dealer near you.