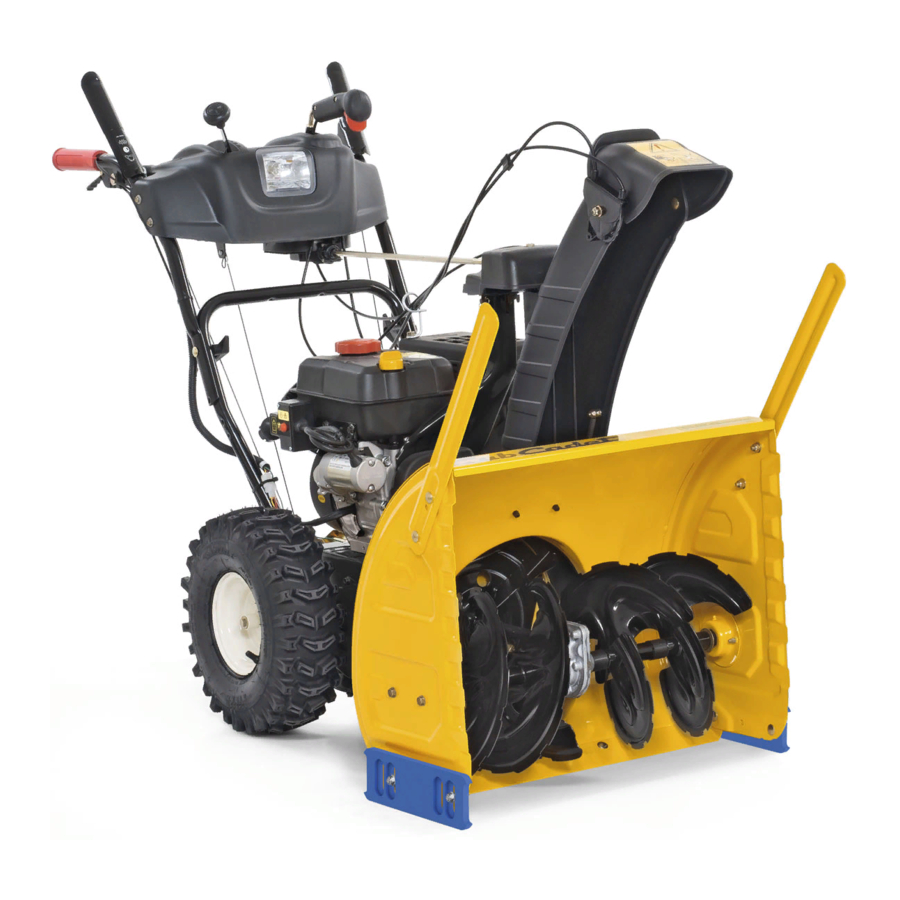
Cub Cadet 524 SWE Operator's Manual
Cub cadet two-stage snow thrower operator's manual
Hide thumbs
Also See for 524 SWE:
- Operator's manual (28 pages) ,
- Illustrated parts list (12 pages) ,
- Specifications (2 pages)
Table of Contents
Advertisement
Safe Operation Practices • Set-Up • Operation • Maintenance • Service • Troubleshooting • Warranty
O
'
M
peratOr
s
anual
Two-Stage Snow Thrower — 524 SWE
WARNING
READ AND FOLLOW ALL SAFETY RULES AND INSTRUCTIONS IN THIS MANUAL
BEFORE ATTEMPTING TO OPERATE THIS MACHINE.
FAILURE TO COMPLY WITH THESE INSTRUCTIONS MAY RESULT IN PERSONAL INJURY.
CUB CADET LLC, P.O. BOX 361131 CLEVELAND, OHIO 44136-0019
Printed In USA
Form No. 769-03344A
(December 2, 2007)
Advertisement
Table of Contents

Related Manuals for Cub Cadet 524 SWE


Summary of Contents for Cub Cadet 524 SWE
- Page 1 READ AND FOLLOW ALL SAFETY RULES AND INSTRUCTIONS IN THIS MANUAL BEFORE ATTEMPTING TO OPERATE THIS MACHINE. FAILURE TO COMPLY WITH THESE INSTRUCTIONS MAY RESULT IN PERSONAL INJURY. CUB CADET LLC, P.O. BOX 361131 CLEVELAND, OHIO 44136-0019 Printed In USA Form No. 769-03344A...
-
Page 2: Table Of Contents
Call a Customer Support Representative at (800) 828-5500 or (330) 558-7220 ◊ ◊ ◊ Write us at Cub Cadet LLC • P.O. Box 361131 • Cleveland, OH • 44136-0019 Locate your nearest Cub Cadet Dealer at (877) 282-8684 Locate your nearest Cub Cadet Dealer at (877) 282-8684 ◊... -
Page 3: Safe Operation Practices
Important Safe Operation Practices WARNING! This symbol points out important safety instructions which, if not followed, could endanger the personal safety and/or property of yourself and others. Read and follow all instructions in this manual before attempting to operate this machine. Failure to comply with these instructions may result in personal injury. - Page 4 Safe Handling of Gasoline To avoid personal injury or property damage use extreme care in handling gasoline. Gasoline is extremely flammable and the vapors are explosive. Serious personal injury can occur when gasoline is spilled on yourself or your clothes which can ignite. Wash your skin and change clothes immediately.
-
Page 5: Maintenance & Storage
Maintenance & Storage Never tamper with safety devices. Check their proper operation regularly. Refer to the maintenance and adjustment sections of this manual. Before cleaning, repairing, or inspecting machine disengage all control levers and stop the engine. Wait until the auger/impeller come to a complete stop. Disconnect the spark plug wire and ground against the engine to prevent unintended starting. -
Page 6: Assembly & Set-Up
Assembly & Set-Up Contents of Carton Contents of Carton Contents of Carton Contents of Carton • • • • One Snow Thrower One Snow Thrower One Snow Thrower One Snow Thrower • • • One Snow Thrower Operator’s One Snow Thrower Operator’s One Snow Thrower Operator’s Manual Manual... - Page 7 Finish securing chute control assembly to chute support Finish securing chute control assembly to chute support bracket with wing nut and hex screw removed earlier. bracket with wing nut and hex screw removed earlier. See See Fig. 3-4. See See Fig. 3-4. Figure 3-4 Figure 3-4 Check that all cables are properly routed through the cable...
- Page 8 Set-Up Set-Up Tire Pressure Tire Pressure Before operating, check tire pressure and reduce pressure in Before operating, check tire pressure and reduce pressure in Shear Pins Shear Pins both tires to between 15 psi and 20 psi. both tires to between 15 psi and 20 psi. A pair of replacement auger shear pins and bow tie cotter pins A pair of replacement auger shear pins and bow tie cotter pins NOTE: If the tire pressure is not equal in both tires, the machine...
- Page 9 Adjustments Adjustments Adjustments Auger Control WARNING! Prior to operating your snow thrower, Skid Shoes Skid Shoes Skid Shoes carefully read and follow all instructions below. Perform all The snow thrower skid shoes are adjusted upward at the factory The snow thrower skid shoes are adjusted upward at the factory The snow thrower skid shoes are adjusted upward at the factory adjustments to verify your snow thrower is operating safely and for shipping purposes.
-
Page 10: Controls And Features
Controls and Features Drive Control Drive Control Drive Control Drive Control Electric Start Button Electric Start Button Electric Start Button Gas Cap Gas Cap Gas Cap Gas Cap Oil Fill Chute Assembly Chute Assembly Chute Assembly Chute Assembly Oil Fill Oil Fill Oil Fill Clean Out... - Page 11 Throttle Control Throttle Control Throttle Control Throttle Control The throttle control is located on the rear of the engine. It The throttle control is located on the rear of the engine. It The throttle control is located on the rear of the engine. It regulates the speed of the engine and will shut off the engine regulates the speed of the engine and will shut off the engine regulates the speed of the engine and will shut off the engine...
- Page 12 Chute Directional Control Chute Directional Control Chute Directional Control Chute Directional Control The chute directional control is located on the left side of the The chute directional control is located on the left side of the The chute directional control is located on the left side of the dash panel.
-
Page 13: Starting Engine
Operation Starting the Engine Starting The Engine Starting The Engine Starting The Engine Attach spark plug wire to spark plug. Make certain the Attach spark plug wire to spark plug. Make certain the Attach spark plug wire to spark plug. Make certain the WARNING! Always keep hands and feet clear of metal loop on the end of the spark plug wire (inside the... - Page 14 Recoil Starter When disconnecting the extension cord, always unplug the When disconnecting the extension cord, always unplug the When disconnecting the extension cord, always unplug the end at the three-prong wall outlet before unplugging the end at the three-prong wall outlet before unplugging the end at the three-prong wall outlet before unplugging the CAUTION! Do not pull the starter handle while the...
-
Page 15: Shave Plate & Skid Shoes
Maintenance & Adjustments Maintenance Maintenance Maintenance Maintenance Engine Engine Engine Engine Refer to the Engine Maintenance section. Refer to the Engine Maintenance section. Refer to the Tecumseh Engine manual packed with your Refer to the Tecumseh Engine manual packed with your machine for all engine maintenance. -
Page 16: Adjustments
Auger Shaft Auger Shaft Auger Shaft Auger Shaft At least once a season, remove the shear pins from the auger At least once a season, remove the shear pins from the auger At least once a season, remove the shear pins from the auger At least once a season, remove the shear pins from the auger shaft. - Page 17 Drive Control Drive Control Drive Control Drive Control When the drive control is released and in the disengaged “up” When the drive control is released and in the disengaged “up” When the drive control is released and in the disengaged “up” When the drive control is released and in the disengaged “up”...
-
Page 18: Maintenance Schedule
Engine Maintenance WARNING! To prevent accidental start-up, shut off the engine and remove the ignition key before performing any type of engine maintenance. Maintenance Schedule Tasks First 5 Hrs. Each Use or Every 5 Hrs. Check engine oil Change engine oil Check spark plug Service spark plug Clean exhaust area... -
Page 19: Spark Plug
Spark Plug WARNING! DO NOT check for spark with spark plug removed. DO NOT crank engine with spark plug removed. WARNING! If the engine has been running, the muffler will be very hot. Be careful not to touch the muffler. To ensure proper engine operation, the spark plug must be properly gapped and free of deposits. -
Page 20: Auger Belt Replacement
Service Service Belt Replacement Belt Replacement Auger Belt Auger Belt To remove and replace your snow thrower’s auger belt, proceed To remove and replace your snow thrower’s auger belt, proceed as follows: as follows: To prevent spillage, place a piece of plastic wrap under the To prevent spillage, place a piece of plastic wrap under the gas cap and tighten securely. - Page 21 Remove the belt from around the auger pulley, and slip the Remove the belt from around the auger pulley, and slip the belt between the support bracket and the auger pulley. belt between the support bracket and the auger pulley. See Fig.
- Page 22 Slip the drive belt off the pulley and between friction Slip the drive belt off the pulley and between friction wheel and friction wheel disc. See Fig. 7-7. wheel and friction wheel disc. See Fig. 8-7. Figure 8-7 Remove and replace belt in the reverse order. Remove and replace belt in the reverse order.
-
Page 23: Troubleshooting
Replace shear pin(s). Replace shear pin(s). Replace shear pin(s). Have unit serviced by an authorized Service Have unit serviced by your Cub Cadet Dealer. Have unit serviced by an authorized Service Have unit serviced by your Cub Cadet Dealer. Center. -
Page 24: Replacement Parts
Phone (800) 965-4CUB to order replacement parts or a complete Parts Manual (have your full model number and serial number Contact you Cub Cadet Dealer to order replacement parts or a complete Parts Manual (have your full model number and serial Phone (800) 828-5500 to order replacement parts or a complete Parts Manual (have your full model number and serial number ready). - Page 25 Notes Notes...
- Page 26 Cub Cadet LLC (Cub Cadet), The United States Environment Protection Agency (U. S. EPA) The U. S. EPA and Cub Cadet are pleased to explain the emissions control system warranty on your model year 2005 and later small off-road engine. New small off-road engines must be designed, built and equipped to meet the stringent anti-smog standards. Cub Cadet must warranty the emission control system on your engine for the period of time listed below, provided there has been no abuse, neglect or improper maintenance of your small off-road engine.
- Page 27 (c) Cub Cadet will include a copy of the following emission warranty parts list with each new engine, using those portions of the list applicable to the engine.
- Page 28 MANUFACTURER’S LIMITED WARRANTY FOR The limited warranty set forth below is given by Cub Cadet LLC with respect to new merchandise purchased and used in the United States, its possessions and territories, and by MTD Products Limited with respect to new merchandise purchased and used in Canada and/or its territories and possessions.