Yamaha RX-V465 Owner's Manual
5.1-channel digital home theater receiver
Hide thumbs
Also See for RX-V465:
- Owner's manual (268 pages) ,
- Service manual (147 pages) ,
- Firmware update procedures (5 pages)
Table of Contents
Advertisement
Advertisement
Table of Contents

Related Manuals for Yamaha RX-V465


Summary of Contents for Yamaha RX-V465
- Page 1 RX-V465 AV Receiver OWNER’S MANUAL...
-
Page 3: Important Safety Instructions
This product, when installed as indicated in the instructions contained in this manual, meets FCC requirements. Modifications not expressly approved by Yamaha may void your authority, granted by the FCC, to use the product. 2 IMPORTANT: When connecting this product to accessories and/or another product use only high quality shielded cables. - Page 4 12 Only voltage specified on this unit must be used. Using this unit with a higher voltage than specified is dangerous and may cause fire, damage to this unit, and/or personal injury. Yamaha will not be held responsible for any damage resulting from use of this unit with a voltage other than specified.
-
Page 5: Table Of Contents
Information on jacks and cable plugs ... 13 Connecting a TV monitor or projector ... 14 Connecting other components ... 15 Connecting a Yamaha iPod universal dock or Bluetooth™ wireless audio receiver... 16 Using the VIDEO AUX jacks on the front panel ... 16 Connecting the FM and AM antennas ... -
Page 6: Introduction
– High refresh rate and high resolution video signals capability – High definition digital audio format signals capability ■ DOCK terminal • DOCK terminal to connect a Yamaha iPod universal dock (such as YDS-11, sold separately) or Bluetooth wireless audio receiver (such as YBA-10, sold separately) ■... -
Page 7: About This Manual
“HDMI,” the “HDMI” logo and “High-Definition Multimedia Interface” are trademarks, or registered trademarks of HDMI Licensing LLC. x.v.Color™ “x.v.Color” is a trademark of Sony Corporation. “SILENT CINEMA” is a trademark of Yamaha Corporation. “SILENT CINEMA” is a trademark of Yamaha Corporation. Supplied accessories... -
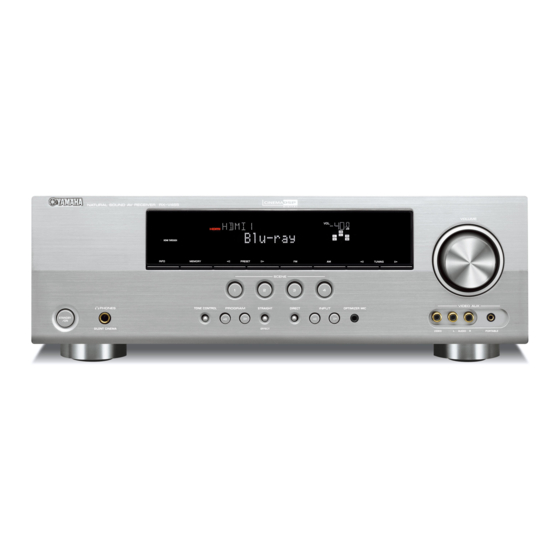
Page 8: Part Names And Functions
Front panel HDMI THROUGH INFO PHONES STANDBY SILENT CINEMA STANDBY/ON Switches this unit between standby and on (see page 17). PHONES jack For plugging headphones (see page 22). INFO Changes information display screens on the front panel display (see page 23). MEMORY Registers FM/AM stations as preset stations (see page 29). -
Page 9: Rear Panel
AV 3 AV 4 AV 5 AV 6 DOCK terminal For connecting an optional Yamaha iPod universal dock (YDS- 11) or Bluetooth wireless audio receiver (YBA-10) (see page 16). HDMI OUT/HDMI 1-4 For connecting an HDMI-compatible video monitor or external components for HDMI inputs 1-4 (see page 15). -
Page 10: Front Panel Display
Part names and functions Front panel display HDMI indicator Lights up during normal communication when HDMI is selected as an input source. CINEMA DSP indicator Lights up when a sound field program that uses CINEMA DSP is selected. Tuner indicator Lights up while receiving a radio broadcast signal from an FM/ AM station (see page 28). -
Page 11: Remote Control
Adjust the volume of this unit (see page 21). DISPLAY Changes the operation mode of the iPod connected to the Yamaha iPod universal dock (see page 30). MUTE Turns the mute function of the sound output on and off (see page 22). -
Page 12: Quick Start Guide
Place your speakers in the room and connect them to this unit. • Placing speakers • Connecting speakers • This unit has a YPAO (Yamaha Parametric Room Acoustic Optimizer) that automatically optimizes this unit based on room acoustic Subwoofer characteristics (audio characteristics of the speakers, speaker positions, and room acoustics, etc.). -
Page 13: Preparation
PREPARATION Preparing remote control Installing batteries in the remote control Take off the battery compartment cover. Insert the two supplied batteries (AAA, R03, UM-4) according to the polarity markings (+ and –) on the inside of the battery compartment. Snap the battery compartment cover back into place. -
Page 14: Connections
(LFE) sounds included in Dolby Digital and DTS signals. Use a subwoofer with a built-in amplifier, such as the Yamaha Active Servo Processing Subwoofer System. Place it exterior to the front left and right speakers facing slightly inward to reduce reflections... -
Page 15: Connecting Speakers
To obtain the balanced sound during playback, set the speaker output characteristics in advance using the Yamaha Parametric Room Acoustic Optimize (YPAO, see page 18) or “Speaker Setup” of the setup menu (see page 39). -
Page 16: Connecting The Speaker Cable
Connections Connecting the speaker cable Caution • A speaker cable is a pair of insulated cables running side by side in general. One of the cables is colored differently or striped to indicate a polarity. Connect one end of the colored/striped cable to the “+” (red) terminal of this unit and the other end to that of your speaker, and connect one end of the other cable to the “–”... -
Page 17: Information On Jacks And Cable Plugs
Information on jacks and cable plugs This unit has the following input and output jacks. Use jacks and cables appropriate for components that you are connecting. ■ Audio jacks Jack and cables Description AUDIO jacks To transmit conventional analog left and right audio signals. Use (white) stereo pin cables. -
Page 18: Connecting A Tv Monitor Or Projector
Connections Connecting a TV monitor or projector Connect a video monitor such as a TV or projector to an output terminal of this unit. You can select one of the following three types according to the input signal format supported by the video monitor. Note •... -
Page 19: Connecting Other Components
Composite output • Input sources in parentheses are recommended to connect to the respective jacks. If your Yamaha component has the Remote in/out terminal, you can switch the input source to that component with a single key operation using the SCENE function (see page 21). -
Page 20: Connecting A Yamaha Ipod Universal Dock Or Bluetooth™ Wireless Audio Receiver
Bluetooth™ wireless audio receiver This unit has the DOCK jack, to which you can connect a Yamaha iPod universal dock (YDS-11, sold separately) or a Bluetooth wireless audio receiver (YBA-10, sold separately). You can play an iPod or a Bluetooth component with this unit by connecting it to the DOCK jack. -
Page 21: Connecting The Fm And Am Antennas
• Position the AM loop antenna away from this unit. • If you cannot get good reception, we recommend that you use an outdoor antenna. For more details, consult the nearest authorized Yamaha dealer or service center. • Always use the AM loop antenna even when the outdoor antenna is connected. -
Page 22: Optimizing The Speaker Setting For Your Listening Room (Ypao)
Optimizing the speaker setting for your listening room (YPAO) This unit has a Yamaha Parametric Acoustic Optimizer (YPAO). With the YPAO, this unit automatically adjusts the output characteristics of your speakers based on speaker position, speaker performance, and the acoustic characteristics of the room. - Page 23 To select a sound character for adjustment, press nCursor k to select “EQ” and then press nCursor l / h. If this unit does not work when you press nCursor, press lSETUP once and then operate this unit. EQ;;;;;Natural This unit has a parametric equalizer that adjusts the output levels for each frequency range.
-
Page 24: When An Error Message Is Displayed During Measurement
Optimizing the speaker setting for your listening room (YPAO) When an error message is displayed during measurement Select “Retry” or “Exit” using nCursor l / h and then press nENTER. Retry Performs “Auto Setup” again. Exit Terminates the measurement and “Auto Setup.” •... -
Page 25: Basic Operation
BASIC OPERATION Basic procedure Turn on external components (TV, DVD player, etc.) connected to this unit. Press NINPUT l / h (or gInput selection keys) to select an input source. The name of the selected input source is displayed for a few seconds. -
Page 26: Muting Audio Output Temporarily (Mute)
Playback Press gInput selection keys on the remote control for the input source whose remote control code was registered in step 1 for about 3 seconds while pressing down kSCENE key whose assignment you want to change. The external component can now be controlled remotely just by selecting a scene. -
Page 27: Displaying Input Signal Information
Displaying input signal information You can display information on audio/video signals input to this unit for each input source. Select the desired input source, and press mOPTION. The option menu for the selected input source is displayed (see page 33). Press nCursor k / n to select “Signal Info,”... -
Page 28: Enjoy The Sound Field Programs
Enjoy the sound field programs This unit is also equipped with a Yamaha digital sound field processing (DSP) chip. You can enjoy multi-channel sounds for almost all input sources using various sound field programs stored on the chip and a variety of surround decoders. - Page 29 Program Drama This sound field features stable reverberations that match a wide range of movie genres from serious dramas to musicals and comedies. The reverberations are modest but offer an optimum 3D feeling, reproducing effects tones and background music softly but cubically around clear words and center positioning in a way that does not fatigue the listener even after long hours of viewing.
- Page 30 Enjoy the sound field programs For Multi-channel stereo reproduction Program 7ch Stereo Use this program to output sound from all speakers. When you play back multi-channel sources, this unit downmixes the source to 2 channels, and then outputs the sound from all speakers. This program creates a larger sound field and is ideal for background music at parties, etc.
-
Page 31: Enjoying Unprocessed Input Sources (Straight Decoding Mode)
Enjoying unprocessed input sources (Straight decoding mode) In straight decoding mode, sounds are reproduced without sound field effect. 2-channel stereo sources are output from only the front left and right speakers. Multi-channel input sources are decoded straight into the appropriate channels and multi-channel sounds are reproduced without a sound field effect. -
Page 32: Fm/Am Tuning
The FM/AM tuner of this unit provides the following two modes for tuning. ■ Frequency tuning mode (Auto tuning / Manual tuning) You can tune in to a desired FM/AM station by searching or specifying its frequency. ■ Preset tuning mode (Preset tuning) You can preset the frequencies of FM/AM stations by registering them to specific numbers, and later just select those numbers to tune in. - Page 33 During the automatic station preset, the upper area of the screen changes as follows: READY → SEARCH → MEMORY each time a station is registered. When registration is complete, “FINISH” appears and the option menu screen automatically reappears. When you press mOPTION on the remote control, the screen returns to the original state.
-
Page 34: Using Ipod
• Some features may not be compatible depending on the model or the software version of your iPod. • Some features may not be available depending on the model of Yamaha iPod universal dock. The following sections describe the procedure when using the YDS-11. - Page 35 Shuffle/repeat playback You can use a special playback function such as shuffle playback and repeat playback by setting the option menu. Press pDISPLAY to switch to menu browse mode while “DOCK” is selected as the input source. The option menu can be displayed only in menu browse mode.
-
Page 36: Using Bluetooth™ Components
Using Bluetooth™ components You can connect a Yamaha Bluetooth wireless audio receiver (such as YBA-10, sold separately) to the DOCK terminal of this unit and enjoy the music contents stored in your Bluetooth component (such as a portable music player) without wiring between this unit and the Bluetooth component. -
Page 37: Advanced Operation
ADVANCED OPERATION Setting the option menu for each input source (OPTION menu) This unit has an OPTION menu of frequently used menu items for input sources compatible with this unit. The procedure for setting the OPTION menu items is described below. Select an input source using NINPUT l / h (or gInput selection keys). - Page 38 Setting the option menu for each input source (OPTION menu) ■ Decoder Mode Input source: HDMI1-4, AV1-4 Auto*/DTS Choices: Selects DTS digital audio signals for reproduction. Auto Automatically selects audio input signals. Selects DTS signals only. Other input signals are not reproduced. ■...
-
Page 39: Auto Preset
■ Auto Preset Input source: TUNER Automatically detects radio stations in the FM frequency band and registers them as preset stations (see page 28). ■ Clear Preset Input source: TUNER Clears the preset stations (see page 29). ■ Shuffle Input source: iPod (DOCK) Off*/Songs/Albums Choices: Changes the shuffle playback style (see page 31). -
Page 40: Editing Surround Decoders/Sound Field Programs
Editing surround decoders/sound field programs Selecting a decoder used with a sound field program When using sound field programs for movies or TV programs (except for Mono Movie), you can select a surround decoder to be used with the sound field program after setting the parameters from the following decoders. - Page 41 ■ Straight Enhancer/7ch Enhancer only EFCT LVL Choices: High*/Low Adjusts the Compressed Music Enhancer effect level. When the high-frequency signals of the source is emphasized too much, set the effect level to “Low.” To reduce the effect, set this parameter to “Low.” To increase the effect, set it to “High.”...
-
Page 42: Operating Various Settings For This Unit (Setup Menu)
Operating various settings for this unit (Setup menu) You can call the setup menu using the remote control and change the settings of various menus. You can change the following settings in the setup menu. For details, read “Basic operation of the setup menu” first, and see the respective pages. -
Page 43: Basic Operation Of The Setup Menu
Basic operation of the setup menu Press lSETUP on the remote control. The setup menu screen appears. Select a menu using nCursor k / n, and press nENTER. Items of the selected menu are displayed. For example, the following screen appears when you select “Function Setup.”... - Page 44 Operating various settings for this unit (Setup menu) Low-frequency components of other channel signals Front Parameter Subwoofer speakers Both SWFR Front Not output Outputs low-frequency components of the front left and right channels and the channel of speaker, the size of which is set to “Small.”...
-
Page 45: 2 Lipsync
■ B)Level Adjustable range: -10.0dB to +10.0dB (0.5 dB step) Defaults: “FL/FR/SW” 0dB* “C/SL/SR/SBL/SBR” -1.0dB Separately adjusts volume of each speaker so that the sounds form speakers are at the same volume at the listening position. Items to be displayed vary depending on the number of speakers connected. -
Page 46: Standby
Operating various settings for this unit (Setup menu) Auto Adjustable range: 0 to 240ms (1 ms step) Enables manual fine adjustment of the correction time when “HDMI Auto” is set to “On.” Manual Adjustable range: 0* to 240ms (1 ms step) Manually adjusts the correction time. -
Page 47: Dsp Parameter
■ MaxVol Adjustable range: -30.0dB to +15.0dB/+16.5dB* (5.0 dB step) Sets the maximum volume level so that the volume will not be accidentally increased. For example, you can adjust the volume between –80.0 dB and –5.0 dB when you set this parameter to “–5.0dB.”... -
Page 48: Controlling Other Components With The Remote Control
“List of remote control codes” at the end of this manual. ■ Default remote control code settings Input source Category Manufacturer [HDMI1] Blu-ray Disc Yamaha [HDMI2] — — [HDMI3] — — [HDMI4] — —... -
Page 49: Advanced Setup
Setting a remote control ID Two IDs are provided for the remote control of this unit. If another Yamaha amplifier is in the same room, setting a different remote control ID to this unit prevents unwanted operation of the other amplifier. -
Page 50: Appendix
Refer to the table below when this unit does not function properly. If the problem you are experiencing is not listed below or if the instruction below does not help, turn off this unit, disconnect the power cable, and contact the nearest authorized Yamaha dealer or service center. General... - Page 51 Problem No picture. An appropriate video input is not selected on the monitor. The composite output terminals are used to output a component video signal, or the COMPONENT VIDEO jacks are used to output a composite video signal. Non-standard video signals are input. The sound suddenly The protection circuitry has been activated goes off.
- Page 52 Troubleshooting Problem No sound is heard “Bass Out” of “A)Config” in “Speaker from the subwoofer. Setup” of the setup menu (Speaker Setup→Manual Setup→A)Config) is set to “Front” when a Dolby Digital, DTS or AAC signal is being played. “Bass Out” of “A)Config” in “Speaker Setup”...
-
Page 53: Hdmi
Problem The picture is The video software is copy-protected. disturbed. This unit suddenly The internal temperature becomes too enters the standby high and the overheat protection circuitry mode. has been activated. HDMI Problem No picture or sound. The number of the connected HDMI components is over the limit. -
Page 54: Remote Control
SETUP menu operation: press the key applicable for the current menu operation again. Cause Turn off this unit and reconnect the Yamaha iPod universal dock to the DOCK terminal of this unit. Remove your iPod in the Yamaha iPod universal dock and then place it back in the dock. -
Page 55: Bluetooth
• Warning message “W-2” or “W-3” indicates that the adjusted settings may not be optimal. • Depending on the speakers, warning message “W-1” may appears even if the speaker connections are correct. • If error message “E-10” occurs repeatedly, contact a qualified Yamaha service center. Before Auto Setup... - Page 56 Check whether the microphone is properly placed. Check whether the speakers are properly placed and connected. The optimizer microphone or OPTIMIZER MIC jack may be defective. Contact the nearest Yamaha dealer or service center. Run “Auto Setup” again. Run “Auto Setup” again.
-
Page 57: Glossary
■ Audio and video synchronization (lip sync) Lip sync, an abbreviation for lip synchronization, is a technical term that involves both a problem and a capability of maintaining audio and video signals synchronized during post-production and transmission. Whereas the audio and video latency requires complex end-user adjustments, HDMI version 1.3 incorporates an automatic audio and video syncing capability that allows devices to perform this synchronization automatically and accurately without user interaction. -
Page 58: Dts Digital Surround
HDMI (High-Definition Multimedia Interface) is the first industry- supported, uncompressed, all-digital audio/video interface. Providing an interface between any source (such as a set-top box or AV receiver) and an audio/video monitor (such as a digital television), HDMI supports standard, enhanced or high-definition video as well as multi- channel digital audio using a single cable. -
Page 59: Sound Field Program Information
Based on a wealth of actually measured data, Yamaha CINEMA DSP provides the audiovisual experience of a movie theater in the listening room of your own home by using the Yamaha original sound field technology combined with various digital audio systems. -
Page 60: Specifications
AUDIO SECTION • Minimum RMS Output Power for Front, Center, Surround, Surround back [U.S.A. and Canada models] 1 kHz, 0.9% THD, 8 Ω ... 105 W [Other models] 1 kHz, 0.9% THD, 6 Ω ... 105 W • Dynamic Power (IHF) [U.S.A. -
Page 61: Index
AV OUT, rear panel ...5 ■ B)Level, speaker setup ...41 Basic operation, setup menu ...39 Bass Out, A)Config, speaker setup ...39 Bluetooth component playback ...32 Bluetooth wireless audio receiver connection ...16 Bluetooth, troubleshooting ...51 ■ C)Distance, speaker setup ...41 C.Image, decoder parameter ...37 Cellar Club, sound field program ...25... - Page 62 Index SCENE, remote control ... 7 Sci-Fi, sound field program ... 24 Selecting SCENE ... 21 Setting remote control code ... 44 Set-top box connection ... 15 Setup menu ... 38 Setup menu basic operation ... 39 SETUP, remote control ... 7 Shuffle playback, iPod ...
-
Page 63: List Of Remote Control Codes
List of remote control codes Ausind Autovox A.R. Systems 0274 Acme 0260 Aventura Acura 0261, 0273 0259 Axion Admiral 0100, 0224, 0257, Baird 0258, 0259, 0264, Bang & Olufsen 0265 Basic Line Advent 0204 Adventura 0107 Bastide Adyson 0260, 0327, 0328 Baur Agashi 0327, 0328... - Page 64 Fujitsu Siemens 0425, 0426, 0427, Hinari 0428, 0429 Funai 0033, 0034, 0035, 0036, 0037, 0097, Hisawa 0104, 0105, 0225, Hisense 0259 Hitachi Futuretech 0104, 0225 Galaxi 0269, 0274 Galaxis 0243, 0274 Gateway 0163, 0226, 0227 0261, 0266, 0273 0069, 0071, 0072, 0073, 0077, 0090, 0099, 0102, 0106, 0112, 0131...
- Page 65 Neckermann 0243, 0257, 0260, 0264, 0268, 0269, 0271, 0274, 0328 0268, 0271, 0274 Net-TV 0226 Neufunk 0273, 0274 New Tech 0261, 0268 New World 0262 NewTech 0273, 0274, 0328 Nicamagic 0260, 0327 Nikkai 0259, 0260, 0262, 0268, 0271, 0273, 0274, 0327, 0328 Nikko 0072, 0077, 0096 Nobliko...
- Page 66 0272, 0274, 0335 Thorn 0271, 0274 0072, 0077, 0090 TNCi 0076 Wincom Tokai 0268, 0274, 0328 Xrypton Tokyo 0260, 0327 Yamaha Tomashi 0270 Toshiba 0027, 0043, 0053, 0054, 0061, 0062, 0063, 0064, 0065, Yamishi 0122, 0123, 0124, Yokan 0128, 0130, 0132, Yoko...
- Page 67 Videon 1074 Videosonic 1020 Viewsonic 1066 Voodoo 1066 Wards 1020, 1021, 1022, 1023 Weltblick 1077 XR-1000 1022, 1023 Yamaha 1018, 1019 Yamishi 1079, 1090 Yokan 1079, 1090 Yoko 1076, 1077, 1079, 1090 Zenith 1032 ZT Group 1066 4Kus 2097 Accurian...
- Page 68 ATACOM 2318 Enzer Audiovox 2111, 2199 Epson Avious 2317 2313 Finlux Axion 2171 Fintec Bang & Olufsen 2210 Fisher Baze 2317 Funai 2318 Gateway Bellagio 2313 Best Buy 2309 Gericom Blaupunkt 2209 Blue Parade 2207 Giec Boghe 2300 Global Solutions Brainwave 2312 Global Sphere 2305...
- Page 69 Xlogic Sonic Blue 2215 Sontech 2316 Xoro Sony 2005, 2006, 2007, Yamada 2020, 2021, 2022, Yamaha 2023, 2024, 2025, 2069, 2072, 2073, 2085, 2086, 2087, 2091, 2092, 2093, Yamakawa 2102, 2128, 2129, Yukai 2130, 2249, 2250, Zenith 2323, 2334, 2335,...
- Page 70 Viewmaster 3045 Condor Vision 3045 Connexions Visiopass 3051, 3054, 3055 Conrad Vortex View 3045 Wittenberg 3048 Conrad Electronic 4137, 4139 Zenith 3035, 3040, 3046 Contec Zentek 3044 Coolsat Cosat Sattelite Coship AB Sat 4138, 4139 Crown AccessHD 4058 Daeryung 4142 Daewoo 4138 Akai...
- Page 71 4074, 4088, 4090, 4074, 4089, 4100 4131, 4133 4141 Zenith 4052, 4057, 4145 4102 Zodiac 4086 4086 4084 4090 Yamaha 5000, 5013 4094 CD Recoder 4071, 4072, 4073, 4092, 4103, 4116, Yamaha 5001 4117, 4134, 4135, 4136 4140 Yamaha 5002, 5003, 5004...
- Page 72 © 2009 Yamaha Corporation All rights reserved. Printed in China WQ95630...