Table of Contents
Advertisement
Quick Links
Advertisement
Table of Contents

Related Manuals for Eureka ERK-ED-TX60L


Summary of Contents for Eureka ERK-ED-TX60L
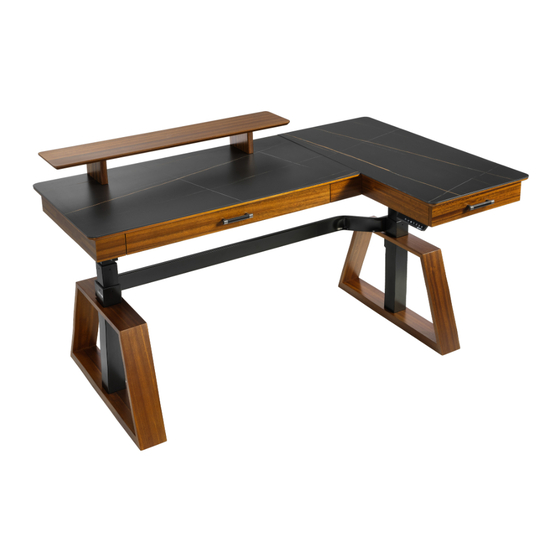
- Page 2 ERK-ED-TX60L MODEL # L60 Two-Drawer Electric Standing Desk Bureau debout électrique à deux tiroirs L60 Escritorio de pie eléctrico de dos cajones L60 L60梯形双抽桌 The image shown here is indicative only. If there is inconsistency between the image and the actual product, the actual product shall govern.
- Page 3 PARTS / PIÈCES / PARTES / 部件清单 (P1) (P2) (P3) (P4) (P5) (P6) (P7) (P8) (P9) (P10) (P11) (P12) (P13) (P14) (P15) (P16)
- Page 4 (P17) (P18) (P19) (P20) (P21) (P22) (P23)
- Page 5 HARDWARE / MATÉRIEL / HARDWARE / 配件清单 M8*15mm M8*35mmX20 1/4*12mm M8*60mm 1/4*51mmX15...
- Page 6 ASSEMBLY INSTRUCTIONS INSTRUCTIONS DE MONTAGE INSTRUCCIONES DE MONTAJE 安装说明 Do not tighten the screws until all of them are fastened into the holes. Ne serrez pas les vis tant qu'elles ne sont pas toutes fixées dans les trous. No apriete los tornillos hasta que todos estén fijados en los orificios. 安装时先不要把螺丝拧紧,等所有螺丝都拧到螺纹孔上再将全部螺丝拧紧。...
- Page 7 STEP 2 Pay attention to distinguish between left and right! Attention à faire la distinction entre gauche et droite ! ¡Presta atención para distinguir entre izquierda y derecha! 注意区分左右! (P10) (P11) M8*35mm STEP 3 M8*35mm...
- Page 8 STEP 4 (P9) M8*35mm STEP 5 M8*15mm...
- Page 9 STEP 6 (P1) 1/4*51mm STEP 7 1/4*12mm...
- Page 10 STEP 8 (P2) 1/4*51mm...
- Page 11 STEP 9 (P8) 1/4*12mm X8...
- Page 12 STEP 10 (P18) 1/4*12mm X2...
- Page 13 STEP 11 (P15) (P17) (P16)
- Page 14 STEP 12 Tighten! Serrer! Apretar! 拉紧! Stick Coller (P21) Pegar 粘上 (P22) (P23) 1/4*12mm Put the extra wire into the tray and lock it up, and tie the remaining wire with cable management accessories. Placez le fil supplémentaire dans le plateau et verrouillez-le, puis attachez le fil restant avec les accessoires de gestion des câbles.
- Page 15 STEP 13 (P19) 1/4*12mm...
- Page 16 STEP 14 (P12) (P13) (P14) M8*15mm X8 STEP 15 M8*15mm X8...
- Page 17 STEP 16 (P3) (P4) M8*60mm X4 STEP 17 (P20)
- Page 18 STEP 18 Open the drawers and remove the handles with the screwdriver. Then, install the handles on the outside of the drawers and be careful to tighten the screws! Ouvrez les tiroirs et retirez les poignées avec le tournevis. Ensuite, installez les poignées à...
-
Page 19: Adjust The Height
OPERATING INSTRUCTIONS Adjust the Height When you press "∧", the desk goes upward until it reaches the highest point. When you press "∨", the desk goes downward until it reaches the lowest point. When you press "∧" or "∨" briefly, the desk goes a small distance correspondingly. Set Memory Heights Set the height: 4 memory heights can be saved as follows. -
Page 20: Lock And Unlock
Lock and Unlock Lock: press "M" and "4" at the same time for 5 seconds until the display shows "L". And the height cannot be adjusted. Unlock: press "M" and "4" at the same time for 5 seconds until the display changes from “L” to the current height. -
Page 21: Error Codes And Troubleshooting
ERROR CODES AND TROUBLESHOOTING ERROR CODES CAUSE SOLUTION 1. Press "∧" or "∨" again. If the code still exists, please check whether the leg cables are loose. Loose connection between the 2. If the code still exists after step 1, please switch the leg cables. If the code does not E01、E02 legs and the control box change, the control box is faulty. -
Page 22: Instructions D'utilisation
INSTRUCTIONS D'UTILISATION Régler la hauteur Lorsque vous appuyez sur "∧", le bureau monte jusqu'à ce qu'il atteigne le point le plus haut. Quand vous appuyez sur "∨", le bureau descend jusqu'à ce qu'il atteigne le point le plus bas. Lorsque vous appuyez brièvement sur "∧" ou "∨", le pupitre se déplace sur une petite distance correspondante. -
Page 23: Modifier Les Paramètres
Supprimer les réglages Appuyez simultanément sur "M" et "1" pendant 5 secondes jusqu'à ce que l'écran affiche "CLr". Verrouiller et déverrouiller Verrouiller : appuyez simultanément sur "M" et "4" pendant 5 secondes jusqu'à ce que l'écran affiche "L". Et la hauteur ne peut plus être réglée. Déverrouiller : appuyez simultanément sur "M"... - Page 24 CODES D'ERREUR ET RÉSOLUTION D'ERREURS CODES D'ERREUR CAUSE SOLUTION 1. Appuyez à nouveau sur "∧" ou "∨". Si le code existe toujours, veuillez vérifier si les câbles des jambes sont desserrés. Connexion desserrée entre les 2. Si le code existe toujours après l'étape 1, veuillez intervertir les câbles des jambs. Si le code ne pieds et le boîtier de commande E01、E02 change pas, le boîtier de commande est défectueux.
-
Page 25: Instrucciones De Uso
INSTRUCCIONES DE USO Ajustar la altura Al pulsar "∧", el escritorio sube hasta alcanzar el punto más alto. Al pulsar "∨", el escritorio desciende hasta alcanzar el punto más bajo. Cuando se pulsa brevemente "∧" o "∨", el pupitre se desplaza una pequeña distancia correspondiente. - Page 26 Eliminar los ajustes Pulse "M" y "1" al mismo tiempo durante 5 segundos hasta que la pantalla muestre "CLr". Bloquear y desbloquear Bloqueo: pulse "M" y "4" al mismo tiempo durante 5 segundos hasta que la pantalla muestre "L". Y no se puede ajustar la altura. Desbloquear: pulse "M"...
-
Page 27: Códigos De Error Y Solución De Problemas
CÓDIGOS DE ERROR Y SOLUCIÓN DE PROBLEMAS CÓDIGOS CAUSA SOLUCIÓN DE ERROR 1. Pulse de nuevo "∧" o "∨". Si el código sigue existiendo, compruebe si los cables del motor de las patas están sueltos. 2. Si el código sigue existiendo después del paso 1, por favor cambie los cables del motor de Conexión suelta entre las E01、E02 la pata. - Page 28 升降操作说明 高度调节操作 当按下“∧”键,桌面向上运行,直到到达桌子的最高点。 当按下“∨”键,桌面向下运行,直到到达桌子的最低点。 当短按“∧”或者“∨”键,桌面相应运行很小的距离,实现点动。 设置记忆高度 位置设置:可以存储4个记忆高度,存储方法如下: 1. 让桌面运行到要设定的高度; 2. 此时点击“M”键,显示“S-”同时“-”闪烁,此时按“1/2/3/4”键,将存储此时位置到 对应标号。 位置查询:短按一次“1/2/3/4”键,闪烁显示对应的记忆高度。 位置运行:双击或长按“1/2/3/4”键,桌面自动运行到记忆位置的高度,运行中,按任意键 能够停止运行。 设置最低高度 限定最低高度:限定最低高度以防止碰撞,当桌面运行到最低点时,会显示“- L o”。操作方 法如下: 1. 让桌面运行到要设定的位置; 2. 同时按住“M”和“∨”两个按键5秒,显示“‒ d o”表示最低位置设置成功。 取消设置高度: 方法1. 参考初始化设置过程。 方法2. 让桌面运行到最低点,显示“- L o”;同时“M”和“∨”两个按键5秒,显示“‒ d o” 则表示取消成功 设置最高高度 限定最高高度:限定最低高度以防止碰撞,当运行到高位点时,会显示“- h I ”。操作方 法如下: 1.
- Page 29 锁定和解锁 锁定:同时按住“M” 和“4”两个按键5秒,显示“L”则表示系统已锁定,无法进行升降 操作。 解锁:同时按住“M” 和“4”两个按键5秒,从显示“L”到恢复正常数字显示,则表示系 统已解锁。 内部参数设置和说明 长按“M”键10秒,进入设置界面,显示“x-y”同时“x”闪烁,其中“x”为参数组, “y”为对应不同参数值。此时按“M”键可以切换参数组,按“∧”或“∨”键可以调整对 应参数值。设定完成后长按“M”键10秒,返回运行界面。设定参数如下: 显示内容 数字范围 设置参数 说 明 显示高度制式 0表示按公制/厘米,1表示按英制/英寸; 防夹灵敏度 0表示关闭,1为最低灵敏度,9为最高灵敏度; 1表示30秒无操作后息屏; 息屏时间 2表示智能息屏; 3表示不息屏; 久坐/久站提醒功能 桌子停留在预设的坐/站高度超过一定时间后,显示器显示“CHr”。 系统默认记忆位置1为坐姿高度,记忆位置2为站姿高度。 只有当桌面高度停留在记忆位置1或记忆位置2时超过设定时间,系统才会进行提醒。 显示代码释义 机器版本号 按键锁定 位置保存 久站/久坐提醒 桌面运行到设定最高位置 桌面运行到设定最低位置 最高位置设置成功/取消 最低位置设置成功/取消 恢复参数设置 复位中 显示高度制式 息屏时间...
- Page 30 常见错误代码及处理方式 故障代码 原因 处理方式 1. 重新按“∧”或者“∨”键,如代码仍存在,请检查桌腿电机线是否松动; 2.如1操作后代码仍存在,请对调桌腿电机线,若代码不变,则控制盒故障,若 桌腿与控制盒连接松动 代码改变(如:E01 -> E02 或 E02 -> E01),则桌腿故障。请联系当地客服更 E01、E02 换部件。 对调桌腿电机线,若代码不变,则控制盒故障,若代码改变(如:E03 -> E04 桌腿负载过重或电机故障 或 E04 -> E03),则桌腿故障。请联系当地客服更换部件。 E03、E04 1. 重新按“∧”或者“∨”键,如代码仍存在,请检查桌腿电机线是否松动; 2.如1操作后代码仍存在,请对调桌腿电机线,若代码不变,则控制盒故障,若 桌腿位置传感器异常 代码改变(如:E05 -> E06 或 E06 -> E05),则桌腿故障。请联系当地客服更 E05、E06 换部件。 断电10秒后重连,如代码仍存在,则控制盒故障。 控制盒电源异常...
- Page 31 5. Scan the QR code below to download the app. 6. Open the “Eureka” app and sign up for an account or log in with your existing account. Ce produit est contrôlé par une application mobile, disponible sur les appareils Android et iOS.
- Page 32 CONNECT TO THE APP CONNECTEZ-VOUS À L'APPLICATION CONECTARSE A LA APLICACIÓN 设备连接APP Preparation / Préparation / Preparación / 准备工作 Turn on the device and open the app. Please make sure your phone and device are connected to the same Wi-Fi. Allumez l'appareil et ouvrez l'application.
- Page 33 Make sure that you turn on Bluetooth on your phone beforehand. Otherwise, when you open the app, a pop-up window will appear inviting you to enable Bluetooth. Then, select “Allow”. Assurez-vous d'avoir activé Bluetooth sur votre téléphone au préalable. Sinon, lorsque vous ouvrirez l'application, une fenêtre contextuelle apparaîtra pour vous inviter à...