Breville Pro Kitchen VFJ016 - Whole Fruit Juicer Manual
- User manual (21 pages)
Advertisement
- 1 before first use
- 2 features
- 3 assembling
- 4 using your appliance
- 5 hints and tips
- 6 fruit and vegetable facts
-
7
recipes
- 7.1 Apple, Peach and Grapefruit
- 7.2 Apple, Pear and Strawberry
- 7.3 Sparkling Pear and Apricot Cooler
- 7.4 Blueberry, Blackberry, Strawberry and Lime
- 7.5 Frothy Orange Juice
- 7.6 Tropical Blend
- 7.7 Tomato, Carrot, Celery and Lime
- 7.8 Carrot, Beetroot and Orange
- 7.9 Bloody Mary
- 7.10 Hearty Veg and Bean Soup
- 8 care and cleaning
- 9 after sales service
- 10 troubleshooting
- 11 connection to the mains supply
- 12 guarantee
- 13 product safety
- 14 Documents / Resources
before first use
 Ensure that the appliance is switched off and unplugged from the supply socket if it is left unattended and before assembling, disassembling or cleaning.
Never immerse any part of the appliance or power cord and plug in water or any other liquid.
Never use harsh, abrasive or caustic cleaners to clean this appliance.
- Before using your juicer for the first time, remove any packaging material and promotional stickers and labels.
- Ensure your juicer is switched off and the power cord is unplugged from the mains supply socket.
- Wash the bowl, stainless steel sieve, juicer cover, food pusher, pulp container and juice jug and lid in warm, soapy water using a soft cloth.
- Rinse and dry thoroughly. The motor base can be wiped with a damp cloth. Dry thoroughly.
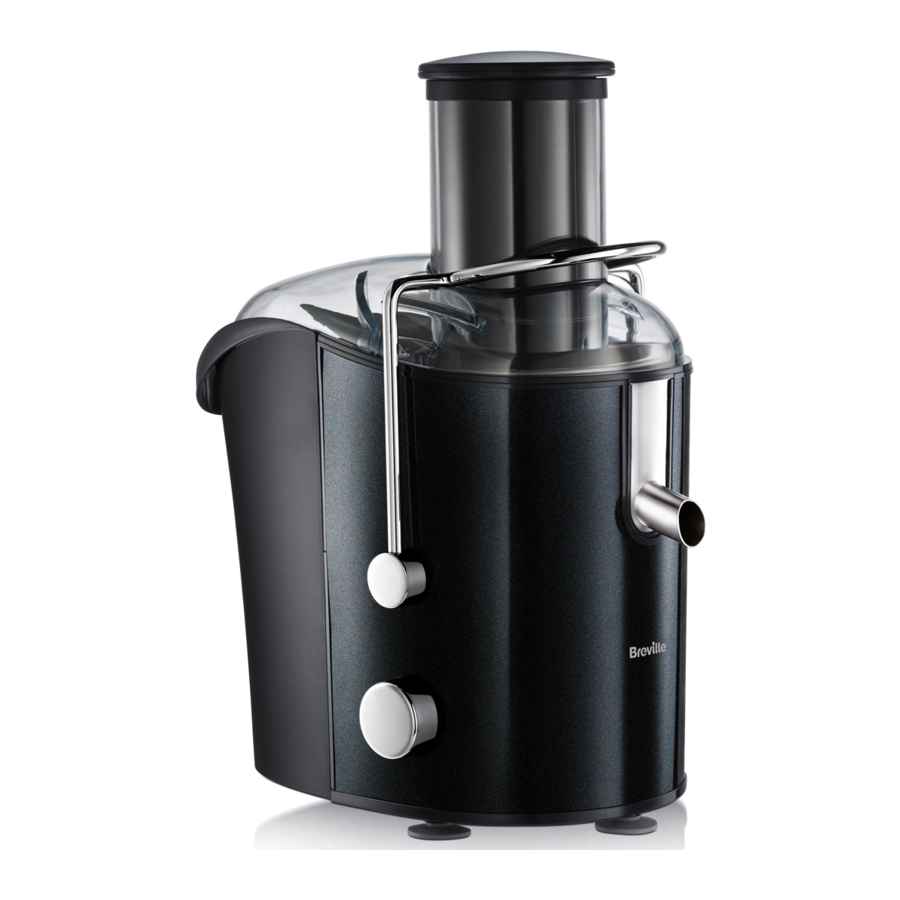
features

- Food pusher
For safely pushing whole fruit and vegetables into the professional juicer's feed chute. Dishwasher safe. - Extra wide feed chute
Fits whole apples, carrots, tomatoes and peeled oranges. Makes juicing fruit and vegetables fast and easy. - Juicer cover
Dishwasher safe, durable, clear cover. - Stainless steel, micro mesh sieve
Dishwasher safe. - Bowl
Dishwasher safe. - Large pulp container
Dishwasher safe. - Motor base
High performance, 1000W motor. - Cleaning brush
For cleaning the stainless steel sieve. - Juice jug lid
Dishwasher safe lid for the juice container. - Juice jug
Dishwasher safe, 1 litre jug with integrated handle for left or right handed use. Use it with the lid on to store juice in the refrigerator. - Froth separator
For removing the froth from the juice when pouring. - 3-position switch
This switch controls your juicer's two speeds and off. Setting 1 (low speed) is for juicing soft fruits with high water content such as watermelon. Setting 2 (high speed) is for juicing hard fruits and vegetables. Setting 0 is off.
Due to our policy of continuous improvement, the actual product may differ slightly from the one illustrated in these instructions.
assembling
Be careful when handling the stainless steel sieve. Do not touch the small sharp blades inside the sieve.
Place the motor base on a flat, dry surface such as your kitchen worktop. Ensure that the 3-position switch is in the off (0) position, then switch the appliance off at the power outlet and unplug the cord.
- Fit the bowl onto the motor base. The spout on the filter bowl should be on the same side of the motor base as the safety locking arm.
![]()
- Gently push the sieve down onto the motor base drive coupling until it clicks into place. Make sure that the sieve is fitted securely inside the bowl and onto the drive coupling.
![]()
- Place the juicer cover over the bowl. The feed chute should be positioned over the stainless steel sieve.
![]()
- Pivot the safety locking arm upwards until it engages with the two grooves in the juicer cover. The safety locking arm should now be vertical and locked into place on the top of your juicer. If the arm doesn't fit into place easily, don't force it. Check that you have fitted the juicer cover correctly.
![]()
- Tilt the large pulp container slightly and place it underneath the pulp outlet side of the juicer cover.
![]()
- Fit the lid onto the juice jug. Position the juice jug over the juice outlet spout on the right hand side of your juicer.

- Slide the food pusher into the feed chute. The food pusher has a groove in it which must be lined up with the protrusion inside the feed tube.


using your appliance
When juicing hard foods, we recommend a maximum quantity of 3kg with a maximum operating time of 2 minutes. Switch your whole fruit juicer off for approximately 10 minutes before resuming juicing.
Some very hard foods may make your juicer slow down or stop. if this happens, switch off and unplug your juicer then unblock the sieve.
Never use your fingers to push food down the feed chute or to clear the feed chute. Always use the food pusher provided.
- Wash your selection of fruit or vegetables ready for juicing.
![]()
- Make sure that your whole fruit juicer is correctly assembled and that the stainless steel sieve is thoroughly cleaned before each use (refer to care and cleaning). Place the juice jug (or a glass) under the spout before starting to juice.
![]()
- Connect the plug into a suitable electrical socket. Set the 3-position switch to either 1 for low speed or 2 for high speed depending on the type of fruit or vegetable being juiced.

- With your whole fruit juicer running, place the food into the feed chute. Using the food pusher, gently guide the food down the feed chute. To extract the maximum amount of juice, always push the food pusher down slowly. Juice will flow into the juice jug and the separated pulp will accumulate in the pulp container.


hints and tips
To minimize washing up, place a plastic freezer bag into the pulp container to collect the pulp.
Most fruit and vegetables such as apples, carrots and cucumbers will not need to be cut to size as these will fit into the feed chute whole. When juicing carrots place the tip of the carrot into the feed chute last.
Don't allow the pulp container to overfill as this may cause damage or prevent correct operation.
The pulp container can be emptied during juicing by turning your whole fruit juicer off.
Carefully remove the pulp container, empty it then replace it before continuing to juice.
95% of the nutrient content of fruit and vegetables is found in the juice. Liquids extracted from fresh fruits and vegetables form an important part of a well-balanced healthy diet. Fresh fruit and vegetable juices are an easy way to introduce a source of vitamins and minerals to your diet. Juices are rapidly absorbed into the blood stream therefore being the quickest way in which the body can digest nutrients.
When you make your own juices, you have complete control over what you include in them. You select the ingredients and decide if you need to use sugar, salt or other flavouring agents.
Freshly extracted juices should be consumed just after they have been made to avoid a loss of vitamin content.
Purchasing and storing fruit and vegetables
- To save money and obtain fresher produce, purchase fruit or vegetables that are in season—see the fruit and vegetable facts chart.
- Keep your fruit and vegetables ready for juicing by washing them before storing.
- Most fruits and hardier type vegetables can be stored at room temperature. The more delicate and perishable items such as tomatoes, berries, leafy greens, celery, cucumbers and herbs should be stored in the refrigerator until required.
Preparation of fruit and vegetable
- Always use fresh fruit and vegetables for juicing.
- Always wash fruit and vegetables before juicing.
- If you are using fruits with hard or inedible skins such as mangoes, guava, melons or pineapple, always peel them before juicing.
- Citrus fruit can be juiced in your whole fruit juicer if peeled first.
- All fruits with pits, hard seeds or stones such as nectarines, peaches, mangoes, apricots, plums and cherries must be pitted or destoned before juicing.
- A small amount of lemon juice can be added to apple juice to prohibit browning.
Technique
When juicing a variety of ingredients with varying textures, start with the softer textured ingredients on a low speed then change to high speed for the harder textured ingredients.
If you are juicing herbs, sprouts or leafy green vegetables either wrap them together to form a bundle or juice them in the middle of a combination of ingredients on low speed to obtain the best extraction.
If juicing herbs or leafy green vegetables on their own, the juice yield will be low due to the nature of centrifugal juicing. It's best to juice them with a combination of other fruit and vegetables.
All fruit and vegetables produce different amounts of liquids. This varies within the same group i.e. one batch of tomatoes can produce more juice than another batch. Since juice recipes are not exact, the precise quantities of any juice are not crucial to the success of the recipe.
To extract the maximum amount of juice always use the food pusher down slowly.
Experiment
It's easy to create great tasting juice. If you have been making your own vegetable and fruit juices, then you know how simple it is to invent new combinations. Taste, colour, texture and ingredient preference is a personal thing. Just think of some of your favourite flavours and foods—would they work well together or would they clash? Some strong flavours could overpower more subtle flavours. A good rule of thumb is to combine starchy, pulpy ingredients with those high in moisture.
Using the pulp
The remaining pulp left after juicing fruit or vegetables is mostly fibre and cellulose which, like the juice, contains vital nutrients necessary for the daily diet. Pulp can be used in many ways, however, like the juice, pulp should be used the same day to avoid the loss of vitamins.
Pulp can also be used to bulk out casseroles or soups. Fruit pulp can be simply placed in a bowl, topped with meringue and baked for a simple dessert.
Pulp is also great used in the garden for compost.
When using the pulp, there may be some pieces of fruit or vegetable remaining. These should be removed before using the pulp in any recipes.
fruit and vegetable facts
| Fruit/Vegetable | Best season to buy | Storing |
| Apples | Autumn/winter | Store in a vented plastic bag in the refrigerator |
| Apricots, tomatoes | Summer | Store unwrapped in the salad crisper of the refrigerator |
| Beetroot | Winter | Cut off the beetroot tops then store unwrapped in the refrigerator |
| Blueberries | Summer | Store covered in the refrigerator |
| Broccoli | Autumn/winter | Store in a plastic bag in the refrigerator |
| Brussels sprouts | Autumn/winter | Store unwrapped in the salad crisper of the refrigerator |
| Cabbage | Winter | Trim, then store wrapped in the refrigerator |
| Carrots | Winter | Store uncovered in the refrigerator |
| Cauliflower | Autumn/winter | Remove the outer leaves, then store in a plastic bag in the refrigerator |
| Celery | Autumn/winter | Store in a plastic bag in the refrigerator |
| Cucumber | Summer | Store in the salad crisper of the refrigerator |
| Fennel | Winter/spring | Store in the salad crisper of the refrigerator |
| Grapes (seedless) | Summer | Store in a plastic bag in the refrigerator |
| Kiwi fruit | Winter/spring | Store in the salad crisper of the refrigerator |
| Mangoes | Summer | Store covered in the refrigerator |
| Melons, inc. watermelon | Summer/Autumn | Store in the salad crisper of the refrigerator |
| Nectarines | Summer | Store in the salad crisper of the refrigerator |
| Oranges | Winter/autumn/ spring | Store in a cool, dry place for 1 week. Transfer oranges to the refrigerator to keep them longer. |
| Peaches | Summer | Store uncovered in the refrigerator |
| Pears | Autumn | Store uncovered in the refrigerator |
| Pineapples | Summer | Store uncovered in the refrigerator |
| Plums | Summer | Store uncovered in the refrigerator |
| Raspberries | Summer | Store covered in the refrigerator |
| Tomatoes | Summer | Store uncovered in the salad crisper of the refrigerator |
recipes
Apple, Peach and Grapefruit
1 small Delicious apple
2 large peaches, halved and stones removed
2 grapefruits, peeled
- Process the apple, peaches and grapefruit with your juice extractor.
- Serve immediately.
Apple, Pear and Strawberry
1 small Granny Smith apple
3 small ripe pears
Handful of strawberries, trimmed
- Process the apple, pears and strawberries with your juice extractor.
- Serve immediately.
Sparkling Pear and Apricot Cooler
4 large apricots, halved and stones removed
3 large pears
250 ml mineral water
Crushed ice
- Process the apricots and pears with your juice extractor.
- Scoop ice into 4 tall glasses.
- Divide the juice between the glasses.
- Top with mineral water and stir well to blend. Serve immediately.
Blueberry, Blackberry, Strawberry and Lime
500g blackberries
500g blueberries
500g strawberries, hulled
1 lime, peeled
- Process the blackberries, blueberries, strawberries and lime with your juice extractor.
- Serve immediately.
Frothy Orange Juice
1kg oranges, peeled (refrigerate the oranges before processing)
- Process the oranges with your juice extractor.
- Serve immediately.
Tropical Blend
2 mangoes, halved, seeded and peeled
3 kiwi fruit, peeled
¼ small pineapple, peeled and halved
A few sprigs of fresh mint, leaves only
Crushed ice
- Process the mangoes, kiwi fruit, pineapple and mint with your juice extractor.
- Scoop ice into 4 glasses, pour over juice and mix well to combine. Serve immediately.
Tomato, Carrot, Celery and Lime
2 medium tomatoes
1 large carrot, trimmed
2 celery stalks, trimmed
1 lime, peeled
- Process the tomatoes, carrot, celery and lime with your juice extractor.
- Serve immediately.
Carrot, Beetroot and Orange
2 medium carrots, trimmed
3 medium beetroot, trimmed
4 oranges, peeled
- Process the carrots, beetroot and oranges with your juice extractor.
- Serve immediately.
Bloody Mary
4 medium tomatoes
2 sticks celery
1 large red pepper, stalk, pith and seeds removed
2 measures of vodka
Crushed ice
- Process the tomatoes, celery and red pepper with your juice extractor.
- Stir in the vodka. Scoop ice into 4 glasses, pour over the tomato mixture and mix well. Serve immediately.
Instead of wasting the fibre and pulp from fruit and vegetables that have been juiced why not use them to create other dishes...
Hearty Veg and Bean Soup
Serves 4
1 tbsp olive oil
1 onion finely chopped
1 leek finely chopped
50g potato pulp (strained and juice kept)
50g carrot pulp (strained and juice kept)
100g tomato pulp (strained and juice kept)
50g cabbage pulp (strained and juice kept)
1 vegetable stock cube
Enough water to make up 2 litres of liquid
400g of mixed beans (tin of mixed bean salad in water)
1 tsp lemon juice
Seasoning
Mixed herbs
50ml low fat fromage frais
- Cook onion and leeks in the oil in a large saucepan over a medium heat until soft
- Add the vegetable pulp and reserved juices, stock cube, water, lemon juice, seasoning and mixed herbs and bring to the boil
- Add the mixed beans, reduce the heat and simmer for 30-40 minutes
- Add the fromage frais and mix well just before serving
care and cleaning
Removing the sieve
The stainless steel sieve has very sharp teeth and so should be handled with care. The best way to remove it from your juicer is as follows:
- Lift the bowl with the stainless steel sieve inside it off the motor base.
![]()
- Tip the stainless steel sieve out of the bowl. We recommend you do this over a sink full of hot soapy water. Don't let the sieve fall too far when tipping it out.
![]()


Cleaning the sieve
- For consistent juicing results always ensure that the stainless steel sieve is thoroughly cleaned using the supplied nylon brush. Hold the sieve under running water and brush from the inside of the sieve to the outer rim. After cleaning the sieve, hold it up towards a light to ensure the fine mesh holes are not blocked. If the holes are blocked, soak the sieve in hot water with 10% lemon juice to loosen the blocked holes. Alternatively, wash the sieve in the dishwasher.

- If pulp is left to dry on the sieve it may clog the fine pores of the mesh and reduce the effectiveness of the Juicer.
- Do not soak the stainless steel sieve in bleach.
- Always treat the sieve with care as it can be easily damaged.

General cleaning
Do not immerse the motor base, cord or mains plug in water or any other liquid. The stainless steel sieve and feed chute contain sharp parts. Do not touch these parts when handling or cleaning.
- For easy cleaning - immediately after each use rinse removable parts under running water (to remove wet pulp). Allow parts to air dry.
- After disassembling the unit all removable parts may be washed in hot soapy water.
- The juicer cover, bowl, large pulp container, stainless steel sieve and juice jug are dishwasher safe. Only use the top shelf of your dishwasher.
- Wipe the motor base with a damp cloth. Do not immerse the motor base in any liquid.
- Before washing the juice jug, remove the froth separator by lifting it up and out of the jug. Rinse the jug and separator under running water.
- Discolouration of the plastic may occur with strongly coloured fruit and vegetables. To help prevent this, wash parts immediately after use.
- If discolouration does occur, the plastic parts can be soaked in 10% lemon juice and water or they can be cleaned with a non abrasive cleaner.
after sales service
These appliances are built to the very highest of standards. There are no user serviceable parts. Follow these steps if the unit fails to operate:
- Check the instructions have been followed correctly.
- Check that the fuse has not blown.
- Check that the mains supply is functional.
If the appliance will still not operate, return the appliance to the place it was purchased for a replacement. To return the appliance to the Customer Service Department, follow the steps below:
- Pack it carefully (preferably in the original carton). Ensure the unit is clean.
- Enclose your name and address and quote the model number on all correspondence.
- Give the reason why you are returning it.
- If within the guarantee period, state when and where it was purchased and include proof of purchase (e.g. till receipt).
- Send it to our Customer Service Department at the address below:
Customer Service Department Jarden Consumer Solutions (Europe) Limited
Middleton Road, Royton, Oldham OL2 5LN, UK.
Telephone: 0161 621 6900 Fax: 0161 626 0391
e-mail: enquiriesEurope@jardencs.com
Replacement parts
For additional or replacement parts, please visit www.breville.co.uk or call us on 0161 621 6900.
Turn on your Creativity
Let the Breville team help you turn on your creativity with a gateway to a world of food and drinks without limits. You don't have to travel far—just to your computer, tablet or mobile—where you will discover our FREE website with top tips and recipes to inspire your imagination. Join us now at www.turnonyourcreativity.com
troubleshooting
For troubleshooting and FAQs visit www.breville.co.uk/faqs
connection to the mains supply
If the plug is not suitable for the socket outlets in your home, it can be removed and replaced by a plug of the correct type.
If the fuse in a moulded plug needs to be changed, the fuse cover must be refitted. The appliance must not be used without the fuse cover fitted.
If the plug is unsuitable, it should be dismantled and removed from the supply cord and an appropriate plug fitted as detailed. If you remove the plug it must not be connected to a 13 amp socket and the plug must be disposed of immediately.
If the terminals in the plug are not marked or if you are unsure about the installation of the plug please contact a qualified electrician.

This symbol indicates that this unit is a Class II appliance and therefore an earth connection is not required.
Plug should be ASTA approved to BS1363
Fuse should be ASTA approved to BS1362
Ensure that the outer sheath of the cable is firmly held by the cord grip

guarantee
Jarden Consumer Solutions (Europe) Limited
5400 Lakeside
Cheadle Royal Business Park
Cheadle
SK8 3GQ
UK
e-mail: enquiriesEurope@jardencs.com
Telephone: 0161 621 6900
For Customer Service details, please see the website.
www.breville.co.uk
product safety
READ CAREFULLY AND KEEP FOR FUTURE REFERENCE This appliance can be used by children aged from 8 years and above and persons with reduced physical, sensory or mental capabilities or lack of experience and knowledge if they have been given supervision or instruction concerning use of the appliance in a safe way and understand the hazards involved. Children shall not play with the appliance. Cleaning and user maintenance shall not be made by children without supervision.
Check the sieve for damage every time you use the appliance. Do not use the appliance if the rotating sieve is damaged.
Always disconnect the appliance from the mains supply socket if it is left unattended and before assembling, disassembling or cleaning.
If the supply cord is damaged, it must be replaced by the manufacturer, its service agent or similarly qualified persons in order to avoid a hazard.
Never use this appliance for anything other than its intended use. This appliance is for household use only. Do not use this appliance outdoors.
Always ensure that hands are dry before handling the plug or switching on the appliance.
Always use the appliance on a stable, secure, dry and level surface.
This appliance must not be placed on or near any potentially hot surfaces (such as a gas or electric hob).
Never immerse any part of the appliance or power cord and plug in water or any other liquid.
Never let the power cord hang over the edge of a work top, touch hot surfaces or become knotted, trapped or pinched.
Do not use the appliance if it has been dropped, if there are any visible signs of damage or if it is leaking.
Never use any accessory or attachment not recommended by the manufacturer.
Switch off the appliance before changing accessories or approaching parts which move during use.
Allow moving parts to come to a stop before opening or cleaning.
Never insert your fingers, utensils or any other object into the feeding tube. Always use the food pusher.
Never attempt to remove or replace any part of the appliance whilst it is in operation.

Documents / Resources
References
High Quality Small Kitchen & Cooking Appliances | Breville
High Quality Small Kitchen & Cooking Appliances | Breville
Help Center Breville
Download manual
Here you can download full pdf version of manual, it may contain additional safety instructions, warranty information, FCC rules, etc.
Download Breville Pro Kitchen VFJ016 - Whole Fruit Juicer Manual
Advertisement
Thank you! Your question has been received!


Need Assistance?
Do you have a question about the Pro Kitchen VFJ016 that isn't answered in the manual? Leave your question here.