Table of Contents
Advertisement
Quick Links
Advertisement
Table of Contents

Related Manuals for Transcend Tsonic 530 1GB


Summary of Contents for Transcend Tsonic 530 1GB
- Page 1 T.sonic™ 530 User’s Manual...
-
Page 2: Table Of Contents
Introduction ... 5 Introduction... 5 Package Contents... 5 Features... 6 System Requirements... 6 Safety ... 7 Safety Precautions ... 7 General Use... 7 Backing Up Data ... 7 Caution: Risk of Deafness ... 7 Reminders... 7 Player Controls... 8 Product Overview ... 8 OLED Display... - Page 3 File Navigator Mode... 14 RADIO Functions ... 15 RADIO Mode... 15 Listen to the Radio ... 15 Selecting a Radio Station... 15 Increase/Decrease the Volume... 15 Saving a Radio Station ... 16 Recall a Saved Station... 16 Record a Radio Station... 16 RECORD Functions ...
- Page 4 ™ Recover the T.sonic Troubleshooting... 43 Troubleshooting ... 43 Specifications... 46 Specifications ... 46 Ordering Information... 46 Warranty... 47 Transcend Limited Warranty ... 47 Glossary... 48 Glossary Icons... 48 98/98SE... 29 Me, 2000 and XP... 30 ™ OS 10.2.8, or Later ... 31 ™...
-
Page 5: Introduction
T.sonic addition, you can record memos to yourself or from others using the digital voice recorder. The stylish ™ T.sonic 530 from Transcend will change the way you think about your digital music forever. Package Contents ™ The T.sonic 530 package includes the following items: •... -
Page 6: Features
Features • MP3 Player that supports MP3, WMA and WAV formats • FM Radio (FM Radio recording and the ability to preset 20 FM radio stations) • Digital Voice Recorder • Karaoke-type lyrics display • A-B repeat function allows you to continuously replay a designated section of a track •... -
Page 7: Safety
2. To protect your health and your hearing, keep the volume for your MP3 player below 80 decibels and do not use for an extended period of time. Stop use if symptoms like headaches, nausea, or hearing disorders occur. -
Page 8: Player Controls
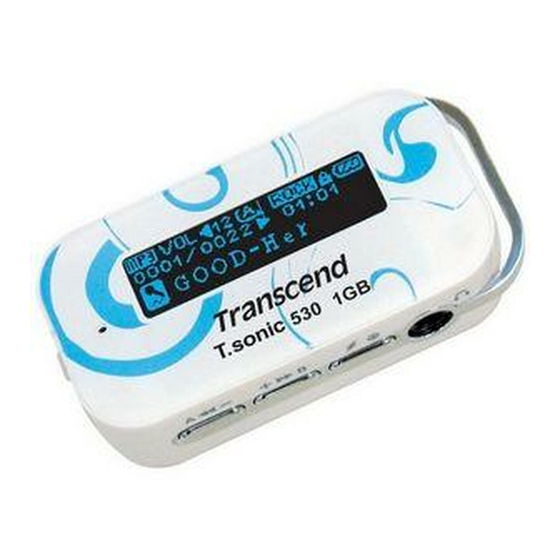
Product Overview Figure 1. T.sonic 530 LOCK Switch Menu Button PLAY/PAUSE/POWER ON-OFF OLED Display Neck Strap holder Earphones Jack Hot-Key/REC Button Volume Up/Next-Fast Forward/B Button Volume Down/Back-Fast Rewind/A Button Microphone Mini USB Port... -
Page 9: Oled Display
ICON Player Mode Indicates the T.sonic Indicates the Volume Hot-Key Mode , A-B Displays the Volume level Volume Indicates the A-B Repeat/Play modes, Normal, Repeat One, A-B Repeat/ Repeat All, Random and Repeat All in Folder Play Modes Player Status Indicates the Play, Pause, Next, Back, FF and FR status Indicates the Equalizer (EQ) mode, Normal, POP, Rock, Classical, EQ Mode... -
Page 10: Basic Operation
Before using the T.sonic least 12 hours by plugging it into a computer using the Mini USB to USB A-Type adapter. Charging the Battery • Plug the small end of the Mini USB to USB A-Type adapter into the Mini USB connector on the ™... -
Page 11: Power Off
Power OFF • Press and Hold the “PLAY/PAUSE/PWR ON-OFF” button 530. It takes a few seconds to Power OFF the unit. The OLED screen will display the Power OFF status. Play a Track • Press the “PLAY/PAUSE/PWR ON-OFF” button track. Pause a Track •... -
Page 12: Repeat A Track
Repeat a Track Please see the REPEAT Mode in the Settings section for detailed instructions. Repeat All Tracks Please see the REPEAT Mode in the Settings section for detailed instructions. Play Random Tracks Please see the REPEAT Mode in the Settings section for detailed instructions. Repeat All Tracks in a Folder Please see the REPEAT Mode in the Settings section for detailed instructions. -
Page 13: Music Functions
Play MP3 and WMA Music 1. Press and Hold the “PLAY/PAUSE/PWR ON-OFF” button default screen is the MUSIC Mode screen. You can also enter the MUSIC Mode by pressing the “Menu” button Menu, then press the “Volume Up/Next-Fast Forward/B” button Down/Back-Fast Rewind/A”... -
Page 14: Decrease Volume
Decrease Volume • Press the “Hot-Key/REC” button • Press once, or Press and Hold the “Volume Down/Back-Fast Rewind/A” button reach the desired volume level. Next Track, Previous Track, Fast Forward, Fast Rewind • Press the “Hot-Key/REC” button icon. • Press the “Volume Up/Next-Fast Forward/B” button •... -
Page 15: Radio Functions
Listen to the Radio 1. The Earphones must be plugged in to 2. Press the “Menu” button 3. Press the “Volume Up/Next-Fast Forward/B” button Rewind/A” button ON-OFF” button to enter the RADIO Mode. 4. The FM radio frequency will be displayed on the OLED screen. For your convenience the first time you use the Radio, all the FM channels will be automatically scanned and the first 20 channels with a strong signal will be preset. -
Page 16: Saving A Radio Station
Saving a Radio Station You can save your 20 favorite Radio stations from CH 01 to CH 20 in the T.sonic 1. Select the Radio station (FM frequency) that you wish to save. 2. Press the “PLAY/PAUSE/PWR ON-OFF” button on the screen. 3. - Page 17 4. Files Recorded from the FM Radio are named in the order [F0001.WAV], then [F0002.WAV], and so forth. 5. Pressing the “PLAY/PAUSE/PWR ON-OFF” button recording, pressing the “PLAY/PAUSE/PWR ON-OFF” button recording. 6. Press and Hold the “Hot-Key/REC” button the screen will return to the RADIO Mode. 7.
-
Page 18: Record Functions
Record Sound ™ The T.sonic 530 has a built-in Microphone that can be used to make Audio Recordings. 1. Pressing and Holding the “Hot-Key/REC” button ™ activate the T.sonic 530’s built-in Microphone and begin recording. 2. A Recording file is generated and will appear on the screen; this file is saved in the RECORD Mode in the [/Record.DIR/] folder 3. -
Page 19: Hot-Key Functions
Hot-Key Functions Increase Volume • Press the “Hot-Key/REC” button • Press once, or Press and Hold the “Volume Up/Next-Fast Forward/B” button reach the desired volume level. Decrease Volume • Press the “Hot-Key/REC” button • Press once, or Press and Hold the “Volume Down/Back-Fast Rewind/A” button reach the desired volume level. -
Page 20: File Navigator Mode
File Navigator Mode The File Navigator is a fast and convenient way of moving between tracks, files and folders. 1. In RECORD Mode, Press and Hold the “Menu” button 2. Press the “Volume Up/Next-Fast Forward/B” button Rewind/A” button 3. Press the “PLAY/PAUSE/PWR ON-OFF” button you are already at a file, to play the selected WAV file. -
Page 21: File Navigator
The File Navigator is a fast and convenient way of moving between tracks, files and folders. 1. Press the “Menu” button 2. Press the “Menu” button 3. Press the “Volume Up/Next-Fast Forward/B” button Rewind/A” button to enter the folder. 4. Press the “Volume Up/Next-Fast Forward/B” button Rewind/A”... -
Page 22: Settings
Enter the Settings Menu 1. Press the “Menu” button 2. Press the “Volume Up/Next-Fast Forward/B” button Rewind/A” button ON-OFF” button to enter the SETTINGS Mode. Repeat Mode There are several REPEAT Modes to choose from, Normal, Repeat One, Repeat All, Random and Repeat In Folder. -
Page 23: Equalizer (Eq) Mode
Equalizer (EQ) Mode There are several EQUALIZER Modes to choose from, Normal, Pop, Rock, Classical, Jazz, or User 1. In the SETTINGS menu, press the “Volume Up/Next-Fast Forward/B” button “Volume Down/Back-Fast Rewind/A” button press the “PLAY/PAUSE/PWR ON-OFF” button 2. Press the “Volume Up/Next-Fast Forward/B” button Rewind/A”... -
Page 24: Rec Quality
REC Quality The quality of an audio recording can be set to 8000Hz or 16000Hz, but the higher you set the Recording Quality the greater the memory space required to save the resulting WAV file. 1. In the SETTINGS menu, press the “Volume Up/Next-Fast Forward/B” button “Volume Down/Back-Fast Rewind/A”... -
Page 25: Power Saving
Power Saving Sets a time delay to Power OFF the T.sonic inactivity. 1. In the SETTINGS menu, press the “Volume Up/Next-Fast Forward/B” button “Volume Down/Back-Fast Rewind/A” button press the “PLAY/PAUSE/PWR ON-OFF” button 2. Press the “Volume Up/Next-Fast Forward/B” button Rewind/A” button DISABLE –... -
Page 26: Language
Language ™ Sets the T.sonic 530’s User language, including the display of song and artist titles. The player supports 12 User languages. 1. In the SETTINGS menu, press the “Volume Up/Next-Fast Forward/B” button “Volume Down/Back-Fast Rewind/A” button press the “PLAY/PAUSE/PWR ON-OFF” button 2. -
Page 27: Fm Reset
FM Reset Resets the saved Radio stations, so the next time you enter the RADIO Mode the T.sonic automatically scan and save the 20 strongest Radio station signals. 1. In the SETTINGS menu, press the “Volume Up/Next-Fast Forward/B” button “Volume Down/Back-Fast Rewind/A” button press the “PLAY/PAUSE/PWR ON-OFF”... -
Page 28: About
level). 7. Pressing the “Menu” button About Displays information about the T.sonic 1. In the SETTINGS menu, press the “Volume Up/Next-Fast Forward/B” button “Volume Down/Back-Fast Rewind/A” button the “PLAY/PAUSE/PWR ON-OFF” button screen. in the root directory (top folder level) will quit the Navigator. ™... -
Page 29: Use With A Computer
Driver Installation Driver Installation for Windows 98/98SE 1. Put the Driver CD into the CD-ROM (Auto-Run supported). Click on the “Win98 Driver Installation” button. Figure 4. Windows 98/98SE Driver Installation 2. Click on the “Next” button to continue. Figure 5. Driver Installation InstallShield Wizard... -
Page 30: Driver Installation For Windows Me, 2000 And Xp
3. The InstallShield Wizard will guide you through the installation process. 4. After the drivers are installed onto the computer, plug the T.sonic the “New Hardware Found” dialogue boxes will appear. 5. The computer will automatically detect the T.sonic assigned drive letter will appear in the My Computer window. Figure 7. -
Page 31: Driver Installation For Mac ™ Os 10.2.8, Or Later
Driver Installation for Mac No drivers are required. Just plug your T.sonic automatically detect it. SETTING.530 Driver Installation for Linux No drivers are required. Just plug your T.sonic Example: Create directory for /mnt/T.sonic first: mkdir /mnt/T.sonic mount T.sonic: mount –a –t msdos /dev/sda1 /mnt/T.sonic ™... -
Page 32: Connecting To A Computer
Connecting to a Computer 1. Plug the small end of the Mini USB to USB A-Type adapter into the Mini USB connector on the ™ T.sonic 530 and plug the large end of the adapter into an available USB port on your desktop, or notebook computer. -
Page 33: Download And Upload Music And Other Files
Download and Upload Music and other Files If you want to use your T.sonic or WMA music files onto the Player. 1. Plug the small end of the Mini USB to USB A-Type adapter into the T.sonic and plug the large end of the adapter into an available USB port on a computer. When the T.sonic is connected to a computer the unit’s rechargeable Li-ion battery will begin charging and the ™... - Page 34 3. Drag and drop your files, or folders onto the T.sonic letter, at this stage the players’ screen will display a “WRITE” message indicating that the files are being transferred to the T.sonic will know that the files have successfully transferred. 4.
-
Page 35: Disconnecting From A Computer
Disconnecting from a Computer Before removing your T.sonic READ/WRITE status or the files or your T.sonic ™ Removing the T.sonic ™ Unplug your T.sonic 530 from your system directly when data is not transferring. ™ Removing the T.sonic 1. Select the Hardware icon on the system tray. -
Page 36: Restoring Factory Defaults
Restoring Factory Defaults ™ If your T.sonic 530 ever stops working properly, try Powering it OFF and ON a number of times. Alternatively you can try to solve the problem by Resetting the unit. If neither of these options solves the problem, you can use the Recovery program to restore the T.sonic Before using the Recovery function, please read the following sections carefully. - Page 37 Wizard will guide you through the Recovery Program installation process. Figure 16. Recovery Program InstallShield Wizard 3. The Recovery Program can be found in Programs > Transcend T.sonic 530 >> T.sonic 530 Firmware Update. Figure 17. Firmware Update Program Location...
-
Page 38: Recover The T.sonic ™ 530 In Windows ® 98/98Se
USB port on your desktop, or notebook computer. 1. Click on the button located on the taskbar and select Programs > Transcend T.sonic 530 >> T.sonic 530 Firmware Update to run the T.sonic 530 Firmware Update program. - Page 39 Figure 20. Confirm Firmware Update 4. Click on the “Start” button to initiate the Firmware Update. Figure 21. Firmware Update Progress 5. A “Firmware Update Completed” window will appear, click on the “Close” button to exit the ™ window. Your T.sonic is now restored to its Factory Defaults.
-
Page 40: Recover The T.sonic ™ 530 In Windows ® Me, 2000 And Xp
™ ® Recover the T.sonic 530 in Windows Me, 2000 and XP ™ Plug the T.sonic into an available USB port on your desktop, or notebook computer. 1. The “Found New Hardware” dialogue boxes will appear. Figure 22. Found New Hardware... - Page 41 2. Click on the button located on the task bar and select Programs > Transcend T.sonic 530 >> T.sonic 530 Firmware Update to run the T.sonic 530 Firmware Update program. Figure 23. Firmware Update Program Location ™ 3. The “T.sonic 530 Firmware Update”...
- Page 42 4. Click on the “Format Data Area” checkbox. The “Option” window will appear. Click on the “Yes” button to continue. Selecting this Option will erase all of the data on your T.sonic 5. Click on the “Start” button to initiate the Firmware Update. 6.
-
Page 43: Troubleshooting
T.sonic 530 for repair. If you are unable to remedy a problem from the following hints, please consult your dealer, service center, or local Transcend branch office. We also have FAQ and Support services on our websites. Driver CD cannot auto-run in Windows Go to the Device Manager in the Control Panel and enable the Auto-Insert function of the CD-ROM drive. - Page 44 Cannot hear track playback 1. Have you downloaded any music files onto the T.sonic computer or the Internet. (Only Mpeg I Layer 3 and WMA files compressed at a rate of 32Kbps–320Kbps are supported.) 2. Are the earphones properly connected to the earphone jack? If not, reconnect them. 3.
- Page 45 ™ T.sonic automatically removed from the operating system This problem occurs when you press the “PLAY/PAUSE/PWR ON-OFF” button ™ T.sonic is still connected to a Computer USB port. Unplug your T.sonic it back in again. ™ T.sonic cannot operate after it was formatted in Windows ™...
-
Page 46: Specifications
51 mm × 26 mm × 19 mm Up to 10 years ≧ 100,000 times ≧ 90dB 15 hours (fully charged battery) MP3 and WMA (Does not support DRM) ADPCM (WAV) 32Kbps to 320Kbps CE, FCC, BSMI Memory Size Transcend P/N 512MB TS512MMP530 TS1GMP530... -
Page 47: Warranty
Transcend is also not responsible for damage or failure of any third party equipment, even if Transcend has been advised of the possibility. This limitation does not apply to the extent that it is illegal or unenforceable under applicable law. -
Page 48: Glossary
MUSIC: Select this icon to access your MP3 and WMA music files. RADIO: Select this icon to choose, save, listen to and record a Radio station. RECORD: Select this icon to access the Audio Recordings you made. Settings: Select this icon to customize the T.sonic’s settings to your specific preferences. Repeat: Select this icon to repeat a song, a section of a song, or even the contents of a folder.