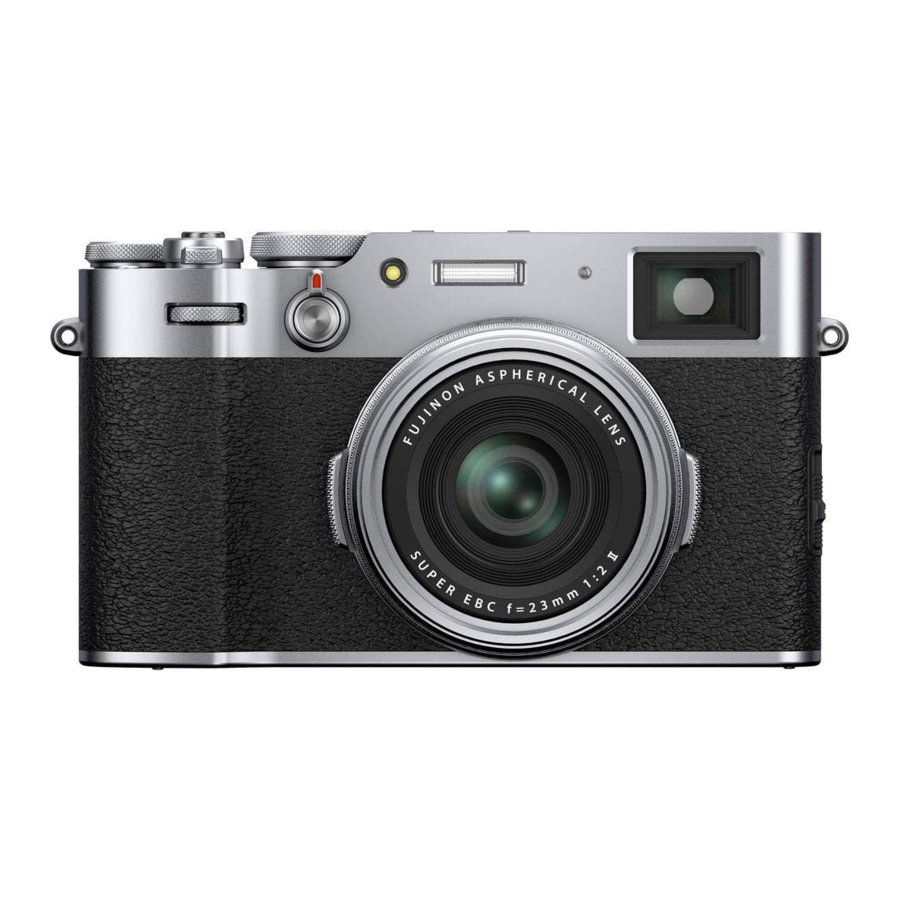
FujiFilm X100V - Digital Camera Manual
- Owner's manual (344 pages) ,
- New features manual (12 pages) ,
- User manual (6 pages)
Advertisement
- 1 Contents
- 2 The EVF/LCD Monitor
- 3 ND FILTER
- 4 The Digital Teleconverter
- 5 RAW CONVERSION
- 6 AREA SETTING
- 7 TIME DIFFERENCE
- 8 RESET
- 9 BRIGHT FRAME POSITION MEMORY
- 10 LOCATION INFO
- 11 Fn1 BUTTON SETTING
- 12 GEOTAGGING
- 13 FUNCTION (Fn) SETTING
- 14 LOCK
- 15 Bluetooth/SMARTPHONE SETTING
- 16 CONNECTION MODE
- 17 Connecting to Smartphones
- 18 Smartphones and Tablets
- 19 Copying Pictures to a Computer: PC AutoSave
- 20 Documents / Resources

Contents
X100V firmware version 3.00 adds or updates the features listed below.
| No. | Description | X100V | Ver. |
| 1 | ND FILTER is now available during movie recording. This has resulted in a change in the position of the ND filter icon in the EVF/LCD shooting display. | 16, 150 | 2.00 |
| 2 | The digital teleconverter can now also be used when RAW is selected for  IMAGE QUALITY SETTING > IMAGE QUALITY in the shooting menu. A DIGITAL TELE-CONV. option has consequently been added to RAW CONVERSION in the playback menu. IMAGE QUALITY SETTING > IMAGE QUALITY in the shooting menu. A DIGITAL TELE-CONV. option has consequently been added to RAW CONVERSION in the playback menu. | 80, 181 | 2.00 |
| 3 | An  AREA SETTING option has been added under AREA SETTING option has been added under  USER SETTING in the setup menu, resulting in a change to the basic setup procedure and adjustments to TIME DIFFERENCE. In addition, DATE/TIME now offers a 24-hour clock. USER SETTING in the setup menu, resulting in a change to the basic setup procedure and adjustments to TIME DIFFERENCE. In addition, DATE/TIME now offers a 24-hour clock. | 201 | 3.00 |
| 4 | The items listed in the setup menu under  USER SETTING > RESET have changed. USER SETTING > RESET have changed. | 204 | 3.00 |
| 5 | A BRIGHT FRAME POSITION MEMORY item has been added to  SCREEN SET-UP in the setup menu. SCREEN SET-UP in the setup menu. | 207 | 2.00 |
| 6 | Function buttons can now be assigned SPOT METERING LOCK. | 222, 253 | 2.00 |
| 7 | Changes have been made to the VIEWFINDER SELECTOR option for  BUTTON/DIAL SETTING > LOCK > FUNCTION SELECTION in the setup menu. BUTTON/DIAL SETTING > LOCK > FUNCTION SELECTION in the setup menu. | 230 | 2.00 |
| 8 | The  CONNECTION SETTING > Bluetooth SETTINGS item in the setup menu has been renamed Bluetooth/SMARTPHONE SETTING and now offers an IMAGE TRANSFER WHILE POWER OFF option. In addition, AUTO IMAGE TRANSFER and SMARTPHONE SYNC. SETTING have respectively been renamed AUTO IMAGE TRANSFER ORDER and SMARTPHONE LOCATION SYNC. CONNECTION SETTING > Bluetooth SETTINGS item in the setup menu has been renamed Bluetooth/SMARTPHONE SETTING and now offers an IMAGE TRANSFER WHILE POWER OFF option. In addition, AUTO IMAGE TRANSFER and SMARTPHONE SYNC. SETTING have respectively been renamed AUTO IMAGE TRANSFER ORDER and SMARTPHONE LOCATION SYNC. | 236 | 3.00 |
| 9 | Upload timing has changed. Pictures can now be uploaded not only during playback or when the camera is off but also while shooting is in progress. | 236 | 3.00 |
| 10 |  CONNECTION SETTING > GENERAL SETTINGS has been reorganized as follows: CONNECTION SETTING > GENERAL SETTINGS has been reorganized as follows:
| 217, 228, 235, 236 | 3.00 |
| 11 | The camera can now be used as a webcam. The  CONNECTION SETTING > PC CONNECTION MODE item in the setup menu has consequently been renamed CONNECTION MODE and an X WEBCAM option has been added. CONNECTION SETTING > PC CONNECTION MODE item in the setup menu has consequently been renamed CONNECTION MODE and an X WEBCAM option has been added. | 239 | 2.00 |
| 12 | The procedure for connecting wirelessly to smartphones has changed. | 274 | 3.00 |
The EVF/LCD Monitor
 The position of the ND filter icon has changed.

ND FILTER
Selecting ON enables the camera's built-in Neutral Density (ND) filter, reducing exposure by the equivalent of 4 EV. This allows slower shutter speeds or wider apertures to be used with brightly lit subjects, making it possible to blur motion or soften background details without risk of overexposure.
| Options | |
| ON | OFF |

The Digital Teleconverter
Use the digital teleconverter to further magnify the image while processing it for sharp, high-resolution results.
- Assign DIGITAL TELE-CONV. to the control ring.
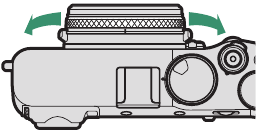
- Choose the zoom angle using the control ring.
![]()
![FujiFilm - X100V - Using the Digital Teleconverter Using the Digital Teleconverter]()
*35 mm format equivalent - Take pictures at the selected zoom angle.
- Image quality drops slightly at DIGITAL TELE-CONV. settings of 50 and 70 mm.
- The digital teleconverter can now be used for RAW pictures.
- The digital teleconverter may be unavailable in some modes.
- Digital teleconverter settings can also be accessed via
![]() SHOOTING SETTING > DIGITAL TELE-CONV..
SHOOTING SETTING > DIGITAL TELE-CONV.. - The zoom angles available when a conversion lens is attached are 72 and 100 mm for telephoto conversion lenses (teleconverters) and 41 and 58 mm for wide-angle conversion lenses.
RAW CONVERSION
The settings that can be adjusted when converting pictures from RAW to another format are:
| Setting | Description |
| REFLECT SHOOTING COND. | Create a copy using the settings in effect at the time the photo was taken. |
| IMAGE SIZE | Choose an image size. |
| IMAGE QUALITY | Adjust image quality. |
| PUSH/PULL PROCESSING | Adjust exposure. |
| DYNAMIC RANGE | Enhance details in highlights for natural contrast. |
| D RANGE PRIORITY | Reduce loss of detail in highlights and shadows for natural-looking results when photographing high-contrast scenes. |
| FILM SIMULATION | Simulate the effects of different types of film. |
| MONOCHROMATIC COLOR | Add a warm or cool cast to monochrome pictures. |
| GRAIN EFFECT | Add a film grain effect. |
| COLOR CHROME EFFECT | Increase the range of tones available for rendering colors that tend to be highly saturated, such as reds, yellows, and greens. |
| COLOR CHROME FX BLUE | Increase the range of tones available for rendering blues. |
| WHITE BALANCE | Adjust white balance. |
| WB SHIFT | Fine-tune white balance. |
| TONE CURVE | Adjust highlights and shadows. |
| COLOR | Adjust color density. |
| SHARPNESS | Sharpen or soften outlines. |
| NOISE REDUCTION | Process the copy to reduce mottling. |
| CLARITY | Increase definition. |
| COLOR SPACE | Choose the color space used for color reproduction. |
| HDR | Reduce loss of detail in highlights and shadows. |
| DIGITAL TELE-CONV. | Process the picture using super-resolution imaging to create an enlarged copy with a longer apparent focal length. |
AREA SETTING
Adjust settings for your current time zone.
AREA SETTING
Choose your time zone from a map.
DAYLIGHT SAVINGS
Turn daylight saving time on or off.
| Option | Description |
| ON | Daylight saving time on. |
| OFF | Daylight saving time off. |
TIME DIFFERENCE
Switch the camera clock instantly from your home time zone to the local time at your destination when traveling. To specify the difference between your local and home time zone:

 AREA SETTING to choose your home time zone before selecting a local time zone using
  LOCAL.
- Highlight
![]() LOCAL and press MENU/OK.
LOCAL and press MENU/OK. - Use the focus stick (focus lever) to choose the local time zone. Press MENU/OK when settings are complete.

To set the camera clock to local time, highlight  LOCAL and press MENU/OK. To set the clock to the time in your home time zone, select
  HOME.
HOME.
| Options | |
 LOCAL LOCAL |  HOME HOME |

 LOCAL is selected,
  will be displayed in yellow for about three seconds when the camera is turned on.
RESET
Reset shooting or setup menu options to default values.
- Highlight the desired option and press MENU/OK.
| Option | Description |
| SHOOTING MENU RESET | Reset all shooting menu settings other than custom white balance and custom settings banks created using EDIT/SAVE CUSTOM SETTING to default values. |
| SET-UP RESET | Reset all setup menu settings other than DATE/TIME,  AREA SETTING, TIME DIFFERENCE, and COPYRIGHT INFO to default values. AREA SETTING, TIME DIFFERENCE, and COPYRIGHT INFO to default values. |
| INITIALIZE | Reset all settings other than custom white balance to default values. |
- A confirmation dialog will be displayed; highlight OK and press MENU/OK.
BRIGHT FRAME POSITION MEMORY
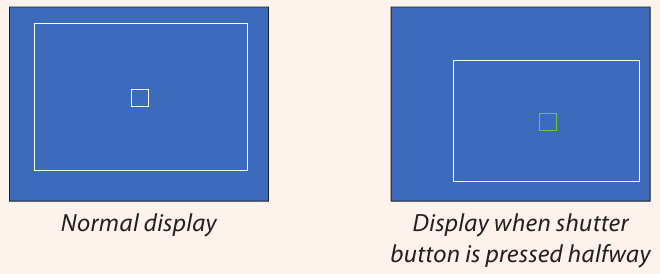
The bright frame moves to show the actual crop when the shutter button is pressed halfway. Choose whether the bright frame remains in the new position once the button is released.
| Option | Description |
| ON | The bright frame stays in the new position when the shutter button is released. |
| OFF | The bright frame returns to its normal position when the shutter button is released. |
LOCATION INFO
Select ON to display location info downloaded from a smartphone.
| Options | |
| ON | OFF |
Fn1 BUTTON SETTING
Choose the role performed by the Fn1 button during playback.
| Option | Description |
 SMARTPHONE TRANSFER ORDER SMARTPHONE TRANSFER ORDER | Pressing the button marks the current picture for transfer. If the camera is not currently paired with a smartphone, Bluetooth/SMARTPHONE SETTING options will be displayed. |
 SELECT & SMARTPHONE TRANSFER ORDER SELECT & SMARTPHONE TRANSFER ORDER | Pressing the button displays a dialog where pictures can be selected for upload to a smartphone with which the camera is paired. If the camera is not currently paired with a smartphone, Bluetooth/SMARTPHONE SETTING options will be displayed instead. |
 WIRELESS COMMUNICATION WIRELESS COMMUNICATION | The button can be used for wireless connections. |
GEOTAGGING
If ON is selected, location data downloaded from a smartphone will be embedded in pictures as they are taken.
| Options | |
| ON | OFF |
FUNCTION (Fn) SETTING
Assigning Roles to the Function Buttons
Roles That Can Be Assigned to the Function Buttons
Choose from:
- IMAGE SIZE
- IMAGE QUALITY
- RAW
- FILM SIMULATION
- GRAIN EFFECT
- COLOR CHROME EFFECT
- COLOR CHROME FX BLUE
- DYNAMIC RANGE
- D RANGE PRIORITY
- WHITE BALANCE
- CLARITY
- SELECT CUSTOM SETTING
- FOCUS AREA
- FOCUS CHECK
- AF MODE
- AF-C CUSTOM SETTINGS
- FACE SELECT
![]() *
* - FACE DETECTION ON/OFF *
- AF RANGE LIMITER
- SPORTS FINDER MODE
- SELF-TIMER
- AE BKT SETTING
- FOCUS BKT SETTING
- PHOTOMETRY
- SHUTTER TYPE
- FLICKER REDUCTION
- ISO AUTO SETTING
- CONVERSION LENS
- ND FILTER
- WIRELESS COMMUNICATION
- FLASH FUNCTION SETTING
- TTL-LOCK
- MODELING FLASH
- FULL HD HIGH SPEED REC
- ZEBRA SETTING
- INTERNAL/EXTERNAL MIC LEVEL ADJUSTMENT
- MOVIE SILENT CONTROL
- VIEW MODE SETTING
- PREVIEW DEPTH OF FIELD
- PREVIEW EXP./WB IN MANUAL MODE
- NATURAL LIVE VIEW
- HISTOGRAM
- ELECTRONIC LEVEL
- LARGE INDICATORS MODE
- CONTROL RING SETTING
- SPOT METERING LOCK
- AE LOCK ONLY
- AF LOCK ONLY
- AE/AF LOCK
- AF-ON
- AWB LOCK ONLY
- LOCK SETTING
- PERFORMANCE
- AUTO IMAGE TRANSFER
- SELECT PAIRING DESTINATION
- Bluetooth ON/OFF
- QUICK MENU
- PLAYBACK
- NONE (control disabled)
* Selection via the function buttons is not available when the OVF is displayed.
SPOT METERING LOCK
If SPOT METERING LOCK is selected, you can press the control to meter your subject using SPOT metering regardless of the option currently selected for  SHOOTING SETTING > PHOTOMETRY. The option selected for
  SHOOTING SETTING > PHOTOMETRY can be restored by pressing the control again.
LOCK
Lock selected controls to prevent unintended operation.
| Option | Description |
| LOCK SETTING | Choose from the following:
|
| FUNCTION SELECTION | Choose the controls locked when SELECTED FUNCTION is chosen for LOCK SETTING. |
- The controls selected using SELECTED FUNCTION can be locked at any time during shooting by pressing and holding MENU/OK. To unlock the controls, press and hold the button again.
- The FUNCTION SELECTION > VIEWFINDER SELECTOR option has changed:
- VIEWFINDER SELECTOR (ROTATE AND HOLD): Lock the feature assigned to the viewfinder selector in its role as a function button.
- VIEWFINDER SELECTOR: Lock the EVF/OVF/ERF display selection.
Bluetooth/SMARTPHONE SETTING
Adjust Bluetooth settings.
| Option | Description |
| PAIRING REGISTRATION | Pair the camera with a smartphone or tablet to which the smartphone app has been installed. |
| SELECT PAIRING DESTINATION | Choose a connection from a list of devices with which the camera has been paired using PAIRING REGISTRATION. Select NO CONNECTION to exit without connecting. |
| DELETE PAIRING REG. | Delete pairing information for selected devices. Choose the device in the device list. The selected device will also be removed from the devices listed in SELECT PAIRING DESTINATION. |
| Bluetooth ON/OFF |
|
| AUTO IMAGE TRANSFER ORDER | Choose whether pictures are automatically marked for upload as they are taken. |
| SMARTPHONE LOCATION SYNC. | Choose whether to synchronize the camera to the location provided by a paired smartphone. |
| NAME | Choose a name (NAME) to identify the camera on the wireless network (the camera is assigned a unique name by default). |
| IMAGE TRANSFER WHILE POWER OFF | Choose whether the camera uploads pictures to paired smartphones while off. |
RESIZE IMAGE FOR SMARTPHONE  | Choose whether to resize images for upload to smartphones. Resizing applies only to the copy uploaded to the smartphone; the original is not affected.
|
- Be sure your smartphone is running the latest version of the applicable smartphone app. Different operating systems use different apps; for more information, visit: https://app.fujifilm-dsc.com/
- Pictures will be uploaded during shooting and playback and while the camera is off if ON is selected for both Bluetooth ON/OFF and AUTO IMAGE TRANSFER ORDER or if images are currently selected for upload using the IMAGE TRANSFER ORDER option in the playback menu.
- The camera clock will automatically be set to the time reported by paired smartphones whenever the app is launched.
CONNECTION MODE
Adjust settings for connection to external devices.
| Option | Description |
| USB CARD READER | Connecting the camera to a computer via USB automatically enables data transfer mode, allowing data to be copied to the computer. The camera functions normally when not connected. |
| X WEBCAM | The camera can be used as a webcam when connected to a computer running FUJIFILM X Webcam. |
| USB RAW CONV./ BACKUP RESTORE | Connecting the camera to a computer via USB automatically enables USB RAW conversion/backup restore mode. The camera functions normally when not connected.
|

- Capture One Express Fujifilm:
https://www.captureone.com/products-plans/capture-one-express/fujifilm - Capture One Pro Fujifilm:
https://www.captureone.com/explore-features/fujifilm - FUJIFILM X Acquire:
https://fujifilm-x.com/products/software/x-acquire/ - FUJIFILM X RAW STUDIO:
https://fujifilm-x.com/products/software/x-raw-studio/ - RAW FILE CONVERTER EX powered by SILKYPIX:
https://fujifilm-x.com/support/download/software/raw-file-converter-ex-powered-by-silkypix/ - FUJIFILM X Webcam:
https://fujifilm-x.com/products/software/x-webcam/
Connecting to Smartphones
Access wireless networks and connect to computers, smartphones, or tablets. For more information, visit: http://fujifilm-dsc.com/wifi/
Smartphones and Tablets
Installing Smartphone Apps
Before establishing a connection between the smartphone and camera, you will need to install at least one dedicated smartphone app. Visit the following website and install the desired apps on your phone.
https://app.fujifilm-dsc.com/

Connecting to a Smartphone
Pair the camera with the smartphone and connect via Bluetooth.
- Press DISP/BACK while shooting information is displayed.
![]()
You can also proceed directly to Step 3 by holding the DISP/BACK button during playback.
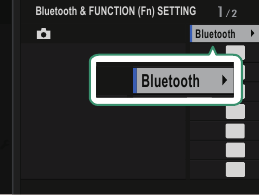
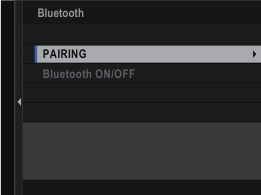
- Highlight Bluetooth and press MENU/OK.
![]()
- Highlight PAIRING and press MENU/OK.
![]()
- Launch the app on the smartphone and pair the smartphone with the camera.
More information is available at the following website:
https://app.fujifilm-dsc.com/
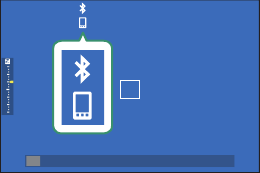
When pairing is complete, the camera and smartphone will automatically connect via Bluetooth. A smartphone icon and a white Bluetooth icon will appear in the camera display when a connection is established.
![]()
- Once the devices have been paired, the smartphone will automatically connect to the camera when the app is launched.
- Disabling Bluetooth when the camera is not connected to a smartphone reduces the drain on the battery.
Using the Smartphone App
Read this section for information on the options available for downloading pictures to your smartphone using the smartphone app.

Selecting and Downloading Pictures Using the Smartphone App
You can download selected pictures to a smartphone using the smartphone app.

Uploading Pictures as They Are Taken
Pictures taken with ON selected for  CONNECTION SETTING > Bluetooth/SMARTPHONE SETTING > AUTO IMAGE TRANSFER ORDER will automatically be marked for upload to the paired device.
- If ON is selected for both Bluetooth/SMARTPHONE SETTING > Bluetooth ON/OFF and IMAGE TRANSFER WHILE POWER OFF in the
![]() CONNECTION SETTING menu, upload to the paired device will continue even while the camera is off.
CONNECTION SETTING menu, upload to the paired device will continue even while the camera is off. - Selecting ON for
![]() CONNECTION SETTING > Bluetooth/SMART- PHONE SETTING > RESIZE IMAGE FOR SMARTPHONE
CONNECTION SETTING > Bluetooth/SMART- PHONE SETTING > RESIZE IMAGE FOR SMARTPHONE ![]() enables compression, reducing file size for upload.
enables compression, reducing file size for upload.
Selecting Pictures for Upload in the Playback Menu
Use IMAGE TRANSFER ORDER > SELECT FRAMES to select pictures for upload to a paired smartphone or tablet via Bluetooth.
Copying Pictures to a Computer: PC AutoSave
Install the latest version of FUJIFILM PC AutoSave to your computer to upload pictures from the camera over wireless networks (Wi-Fi).
FUJIFILM PC AutoSave
For downloads and other information, visit: http://app.fujifilm-dsc.com/en/pc_autosave/
Computers: Wireless Connections
You can upload pictures from the camera using the PC AUTO SAVE option in the playback menu.

Features added or changed as a result of firmware updates may no longer match the descriptions in the documentation supplied with this product. Visit our website for information on the updates available for different products:
https://fujifilm-x.com/support/download/firmware/
FUJIFILM Corporation
7-3, AKASAKA 9-CHOME, MINATO-KU, TOKYO 107-0052, JAPAN
https://fujifilm-x.com

Documents / Resources
References
https://app.fujifilm-dsc.com
Free photo editing software for Fujifilm
Discover Capture One for Fujifilm
![fujifilm-x.com]() FUJIFILM X Acquire | Software | FUJIFILM Digital Camera X Series & GFX – USA
FUJIFILM X Acquire | Software | FUJIFILM Digital Camera X Series & GFX – USA![fujifilm-x.com]() FUJIFILM X RAW STUDIO | Software | FUJIFILM Digital Camera X Series & GFX – USA
FUJIFILM X RAW STUDIO | Software | FUJIFILM Digital Camera X Series & GFX – USA![fujifilm-x.com]() RAW FILE CONVERTER EX 3.0 powered by SILKYPIX | Software | FUJIFILM Digital Camera X Series & GFX – USA
RAW FILE CONVERTER EX 3.0 powered by SILKYPIX | Software | FUJIFILM Digital Camera X Series & GFX – USA![fujifilm-x.com]() FUJIFILM X Webcam | Software | FUJIFILM Digital Camera X Series & GFX – USA
FUJIFILM X Webcam | Software | FUJIFILM Digital Camera X Series & GFX – USAhttp://fujifilm-dsc.com/wifi/
Application Software PC AutoSave | FUJIFILM Corporation
![fujifilm-x.com]() Firmware: Camera | FUJIFILM Digital Camera X Series & GFX – USA
Firmware: Camera | FUJIFILM Digital Camera X Series & GFX – USA![fujifilm-x.com]() FUJIFILM Digital Camera X Series & GFX – USA
FUJIFILM Digital Camera X Series & GFX – USA
Download manual
Here you can download full pdf version of manual, it may contain additional safety instructions, warranty information, FCC rules, etc.
Advertisement
Thank you! Your question has been received!
 Fn1 BUTTON SETTING,
 have been moved to Bluetooth/SMARTPHONE SETTING.




Need Assistance?
Do you have a question about the X100V that isn't answered in the manual? Leave your question here.