Table of Contents
Advertisement
Quick Links
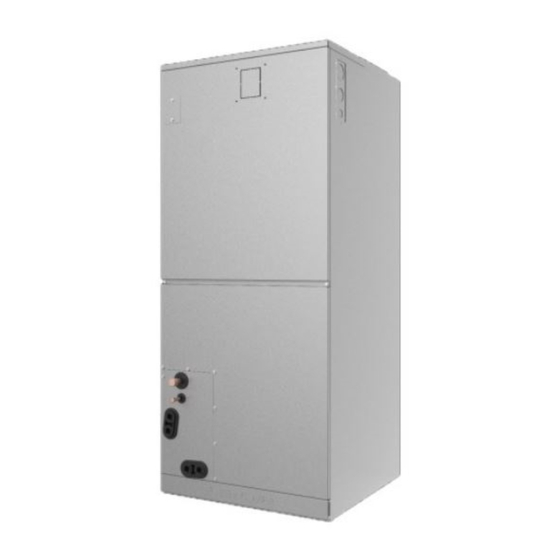
40MUAA
Air Handler Unit
Sizes 18 to 60
TABLE OF CONTENTS
SAFETY CONSIDERATIONS ....................................................... 1
INTRODUCTION............................................................................ 1
MODEL NUMBER NOMENCLATURE ....................................... 2
ROTARY AND DIP SWITCHES ................................................... 6
INDOOR UNIT WIRING................................................................ 8
WIRING REQUIREMENTS ........................................................... 9
CONNECTION DIAGRAMS ......................................................... 10
WIRING DIAGRAMS..................................................................... 11
REFRIGERANT LINES .................................................................. 12
TROUBLESHOOTING................................................................... 13
DIAGNOSIS AND SOLUTION...................................................... 16
DISASSEMBLY INSTRUCTIONS ................................................ 35
APPENDICES.................................................................................. 41
SAFETY CONSIDERATIONS
Installing, starting up, and servicing air-conditioning equipment can
be hazardous due to unit pressures, electrical components, and
equipment location (roofs, elevated structures, etc.).
Only trained, qualified installers and service mechanics should install,
start-up, and service this equipment.
Untrained personnel can perform basic maintenance functions such as
coil cleaning. All other operations should be performed by trained
service personnel only.
When working on the equipment, observe the precautions in the
literature and on tags, stickers, and labels attached to the equipment.
Follow all safety codes. Wear safety glasses and work gloves. Keep a
quenching cloth and fire extinguisher nearby when brazing. Use care
in handling, rigging, and setting bulky equipment.
Read this manual thoroughly and follow all the warnings or cautions
included in the literature and attached to the unit. Consult local building
codes and the National Electrical Code (NEC) for special requirements.
Recognize safety information. This is the safety-alert symbol
When you see this symbol on the unit and in instructions or manuals,
be alert to the potential for personal injury. Understand these signal
words: DANGER, WARNING, and CAUTION.
These words are used with the safety-alert symbol. DANGER
identifies the most serious of hazards which will result in severe
personal injury or death. WARNING signifies hazards which could
result in personal injury or death. CAUTION is used to identify
unsafe practices which may result in minor personal injury or product
and property damage. NOTE is used to highlight suggestions which
will result in enhanced installation, reliability, or operation.
Service Manual
PAGE
ELECTRICAL SHOCK HAZARD
Failure to follow this warning could result in personal injury or
death. Before installing, modifying, or servicing the unit, the
main electrical disconnect switch must be in the OFF position.
There may be more than 1 disconnect switch. Lock out and tag
switch with a suitable warning label.
EQUIPMENT DAMAGE HAZARD
Failure to follow this caution may result in equipment damage
or improper operation.
Do not bury more than 36 in. (914 mm) of refrigerant pipe in the
ground. If any section of pipe is buried, there must be a 6 in. (152
mm) vertical rise to the valve connections on the outdoor units. If
more than the recommended length is buried, refrigerant may
migrate to the cooler buried section during the extended periods
of unit shutdown. This causes refrigerant slugging and could
possibly damage the compressor at start-up.
.
INTRODUCTION
This service manual provides the necessary information to service,
repair, and maintain the indoor units. This manual contains an
"DISASSEMBLY INSTRUCTIONS" on page 35 with data required to
troubleshoot issues. Use the "TABLE OF CONTENTS" on page 1 to
locate a desired topic.
Specifications subject to change without notice.
WARNING
WARNING
EXPLOSION HAZARD
Failure to follow this warning could
result in death, serious personal
injury, and/or property damage.
Never use air or gases containing
oxygen for leak testing or operating
refrigerant compressors. Pressurized
mixtures of air or gases containing
oxygen can lead to an explosion.
CAUTION
Advertisement
Table of Contents

Related Manuals for Carrier 40MUAAQ18XB3


Summary of Contents for Carrier 40MUAAQ18XB3
-
Page 1: Table Of Contents
40MUAA Air Handler Unit Sizes 18 to 60 Service Manual TABLE OF CONTENTS WARNING PAGE SAFETY CONSIDERATIONS ............1 INTRODUCTION................1 ELECTRICAL SHOCK HAZARD MODEL NUMBER NOMENCLATURE ........2 Failure to follow this warning could result in personal injury or AUXILLIARY CONTACTS FOUND ON THE MAIN BOARD .. -
Page 2: Model Number Nomenclature
40MUAA: Service Manual MODEL NUMBER NOMENCLATURE Table 1 — Unit Sizes KBTUH V-PH-HZ ID MODEL NO. 40MUAAQ18XB3 40MUAAQ24XB3 40MUAAQ30XB3 208/230-1-60 40MUAAQ36XA3 40MUAAQ36XB3 40MUAAQ48XA3 40MUAAQ60XA3 INDOOR UNIT 40 = INDOOR UNIT M = SUPPLIER VOLTAGE U = UNITARY 3 = 208/230-1-60... -
Page 3: Auxilliary Contacts Found On The Main Board
40MUAA: Service Manual AUXILLIARY CONTACTS FOUND ON THE MAIN BOARD Work Terminal Port CN23 - Normally Open Dry Contact (Output) • The WORK terminal port is linked to the unit's indoor blower • When the indoor blower is off, the contact is open •... - Page 4 40MUAA: Service Manual WATER LEVEL Switch Terminal Port CN5 - SWITCH INPUT: • To enable this switch, jumper J1 must be removed • A field supplied float switch can be directly connected to CN5 • CLOSED contacts = normal • OPEN contacts = overflow •...
- Page 5 40MUAA: Service Manual Auxiliary Contacts found on the 24V interface Board: Remote control (ON-OFF) terminal port CN2 and jumper JR1 - INPUT: • Remove the jumper JR1 to enable the ON-OFF function • When the remote switch is off (OPEN); the unit is OFF •...
-
Page 6: Rotary And Dip Switches
40MUAA: Service Manual ROTARY AND DIP SWITCHES Micro-Switch Setting: FOR SETTING NETADDRESS S1+S2 CODE 0~15 16~31 32~47 48~63 NETADDRESS F A C T O R Y S E T T I N G Fig. 6 —Net Address Micro-switch S1 and dial-switch S2 are for address setting when the user wants to control the unit with a central controller. Range: 00-63 Fig. - Page 7 40MUAA: Service Manual Connectors Table 2 — Unit Configuration Settings Dial Code Control Scenario Function OFF for 2 ON for 1 and 3 Please note: SW 1-4 [Default] Auto Detect or RS485 S1-S2 SW1-1* Control Function 24 V Communication needs to be ON as well Communication for Scenario 3 SW1-2...
-
Page 8: Indoor Unit Wiring
40MUAA: Service Manual INDOOR UNIT WIRING Before proceeding with electrical connections, make certain that the supply voltage, frequency, phase, and ampacity are as specified on the unit rating plate. Review the unit wiring label for proper field high and low voltage wiring. Ensure all electrical connections are in accordance with the NEC and any local codes or ordinances that may apply. -
Page 9: Wiring Requirements
40MUAA: Service Manual WIRING REQUIREMENTS CAUTION Size all wires per the NEC (National Electrical Code) or CEC (Canadian Electrical Code) and local codes. Use the electrical data from the outdoor unit (MCA - minimum circuit amps and MOCP - maximum over current EQUIPMENT DAMAGE HAZARD protection), to correctly size the wires and the disconnect fuse or breakers Be sure to comply with local codes while running wire from the indoor... -
Page 10: Connection Diagrams
40MUAA: Service Manual CONNECTION DIAGRAMS Scenario 1 - Non-Polarity RS485 Communication + 24V Thermostat This is the preferred method when using a 24V thermostat and when the indoor unit communicates with the outdoor unit via RS485 (S1/S2) protocol. NOTE: After the serial number (0223V26809), the Auto Discovery feature is available. Control Indoor Unit Display Board Board... -
Page 11: Wiring Diagrams
40MUAA: Service Manual WIRING DIAGRAMS WIRING DIAGRAM 24V THERMOSTATS SETTING NOTE: 1.The parts with a dotted line indicates CODE PART NAME optional features. INDOOR ECM MOTOR SW 1 SW 3 SW 4 2.Remove the short connector of JR1 SW 2 when you use the "on-off"... -
Page 12: Refrigerant Lines
40MUAA: Service Manual REFRIGERANT LINES General refrigerant line sizing 1. The outdoor units are shipped with a full charge of R410A refrigerant. All charges, line sizing, and capacities are based on runs of 25 ft. (7.6 m). For runs over 25 ft. (7.6 m), consult the product data. 2. -
Page 13: Troubleshooting
40MUAA: Service Manual TROUBLESHOOTING WARNING WARNING Turn off all power supplies or disconnect all wires to avoid electric Electricity remains in capacitors even when the power supply is off. shock. While checking indoor/outdoor PCB, please equip oneself with Ensure the capacitors are fully discharged before troubleshooting. anti-static gloves or wrist strap to avoid damage to the board. - Page 14 40MUAA: Service Manual Quick Maintenance by Error Code Review Tables 8 - 11 for common faulty parts associated with each error code. Table 8 — Quick Maintenance by Error Code ERROR CODE PART REQUIRING REPLACEMENT EH 00 EL 01 EH 03 EH 60 EH 61 EH 62...
- Page 15 40MUAA: Service Manual Quick Maintenance by Error Code (Cont.) Table 10 — Quick Maintenance by Error Code PART REQUIRING REPLACEMENT EL 16 PC 06 PC 08/44/ 49 PC 0A PC 0F EH 0 Indoor PCB ...
-
Page 16: Diagnosis And Solution
40MUAA: Service Manual DIAGNOSIS AND SOLUTION EH00 - EEPROM Parameter Error Diagnosis and Solution Description: Indoor or outdoor PCB main chip does not receive feedback from the EEPROM chip. Recommended parts to prepare: • Indoor PCB • Outdoor PCB Troubleshooting and Repair: Shut o the power and turn it on 2 minutes later. - Page 17 40MUAA: Service Manual DIAGNOSIS AND SOLUTION (CONT.) EL01 - Indoor and Outdoor Unit Communication Error Diagnosis and Solution Description: Indoor unit can not communicate with the outdoor unit. Recommended parts to prepare: • Signal wires • Magnet ring • Indoor PCB •...
- Page 18 40MUAA: Service Manual DIAGNOSIS AND SOLUTION (CONT.) (S) Current Loop Communication: Power off, then restart the unit af ter 2 minutes. Does the error code Solved disappear? Check t he w iring connection Correct the connection or bet ween indoor and out door change w ires unit, are t hey good? The value is alt ernative...
- Page 19 40MUAA: Service Manual REMARKS: • Use a multimeter to test the DC voltage between the 2 port (or S or L2 Terminal) and the 3 port (or N or S Terminal) of the outdoor unit. • The red pin of the multimeter connects with the 2 port (or S or L2 port) while the black pin is for the 3 port (or N or S Terminal). •...
- Page 20 40MUAA: Service Manual DIAGNOSIS AND SOLUTION (CONT.) EH03 / EC07 - Fan Speed Is Operating Outside of Normal Range / EC 71 Over Current Failure of Outdoor DC Fan Motor / EC73 Zero-speed failure of outdoor DC fan motor Diagnosis and Solution Description: When the indoor / outdoor fan speed operates at too low or too high a speed for a certain time, the unit ceases operation and the LED displays the failure.
- Page 21 40MUAA: Service Manual Index: 1. Indoor DC Fan Motor (control chip is on PCB) Power on the unit and when the unit is in the STANDBY mode, measure the pin1&pin2 voltage of CN15, and pin3 of CN34 in the fan motor connector.
- Page 22 40MUAA: Service Manual DIAGNOSIS AND SOLUTION (CONT.) EH60/EH61/EH62/EH65/EC53/EC52/EC54 - Open Circuit or Short Circuit of Temperature Sensor Diagnosis and Solution Description: If the sampling voltage is lower than 0.06V or higher than 4.94V, the LED displays the failure. Recommended parts to prepare: •...
- Page 23 40MUAA: Service Manual DIAGNOSIS AND SOLUTION (CONT.) EL0C - Refrigerant Leakage Detection Diagnosis and Solution Description: If the sampling voltage is lower than 0.06V or higher than 4.94V, the LED displays the failure. Recommended parts to prepare: • Indoor PCB •...
- Page 24 40MUAA: Service Manual DIAGNOSIS AND SOLUTION (CONT.) EH0E - Water-Level Alarm Malfunction Diagnosis and Solution Description: If the sampling voltage is not 5V, the LED displays the failure code. Recommended parts to prepare: • Connection wires • Water-level switch • Water pump •...
- Page 25 40MUAA: Service Manual DIAGNOSIS AND SOLUTION (CONT.) PC 00 - IPM malfunction or IGBT over-strong current protection Diagnosis and Solution Description: When the voltage signal that the IPM sends to the compressor drive chip is abnormal, the LED displays “PC 00” and the AC turns off.
- Page 26 40MUAA: Service Manual DIAGNOSIS AND SOLUTION (CONT.) PC 01 - Over voltage or too low voltage protection / PC 10 - Outdoor unit low AC voltage protection / PC 11 - Outdoor unit main control board DC bus high voltage protection / PC 12 (Outdoor unit main control board DC bus high voltage protection / 341 MCE error Diagnosis and Solution Description: Abnormal increases or decreases in voltage are detected by checking the specified voltage detection circuit.
- Page 27 40MUAA: Service Manual DIAGNOSIS AND SOLUTION (CONT.) PC 02 - Top temperature protection of compressor or High temperature protection of IPM module Diagnosis and Solution Description: For some models with overload protection, if the sampling voltage is not 5V, the LED displays the failure. If the IPM module temperature is higher than a certain value, the LED displays the failure code.
- Page 28 40MUAA: Service Manual DIAGNOSIS AND SOLUTION (CONT.) PC 03 - Low Pressure Protection Diagnosis and Solution Description: If the sampling voltage is not 5V, the LED displays a failure code. Recommended parts to prepare: • Connection wires • Low pressure protector •...
- Page 29 40MUAA: Service Manual DIAGNOSIS AND SOLUTION (CONT.) PC 04 - Inverter compressor drive error Diagnosis and Solution Description: An abnormal inverter compressor drive is detected by a special detection circuit, including the communication signal detection, voltage detection, compressor rotation speed signal detection. Recommended parts to prepare: •...
- Page 30 40MUAA: Service Manual DIAGNOSIS AND SOLUTION (CONT.) EC 0d - Outdoor Unit Malfunction Diagnosis and Solution Description: The indoor unit detects the outdoor unit has an error. Recommended parts to prepare: • Outdoor unit Troubleshooting and Repair: , then restart the unit 2 minutes later.
- Page 31 40MUAA: Service Manual DIAGNOSIS AND SOLUTION (CONT.) EH 0b - Communication error between the two indoor chips Diagnosis and Solution Description: Indoor PCB main chip does not receive feedback from another chip. Recommended parts to prepare: • Indoor main board •...
- Page 32 40MUAA: Service Manual DIAGNOSIS AND SOLUTION (CONT.) EL 16 - Communication malfunction between adapter board and outdoor main board Diagnosis and Solution Description: The adapter PCB cannot detect the main control board. Recommended parts to prepare: • Connection wires • Adapter board •...
- Page 33 40MUAA: Service Manual DIAGNOSIS AND SOLUTION (CONT.) Temperature Sensor Check WARNING Turn off all power supplies or disconnect all wires to avoid electric shock. Operate after compressor and coil have returned to normal temperature in case of injury. 1. Disconnect the temperature sensor from the PCB. 2.
- Page 34 40MUAA: Service Manual Compressor Check 1. Disconnect the compressor power cord from the outdoor PCB. 2. Measure the resistance value of each winding using a multi-meter. 3. Check the resistance value of each winding (see Figure 18). Fig. 18 — Input Terminal (typical) Manufacturer reserves the right to change, at any time, specifications and designs without notice and without obligations.
-
Page 35: Disassembly Instructions
40MUAA: Service Manual DISASSEMBLY INSTRUCTIONS Electrical Parts (Anti-static gloves must be worn) PROCEDURES ILLUSTRATION 1. Remove the 2 screws of the upper cover plate assembly then remove it. 2. Remove 2 screws then unplug the plugs. 3. Pull out the electric control box subassembly. Manufacturer reserves the right to change, at any time, specifications and designs without notice and without obligations. - Page 36 40MUAA: Service Manual DISASSEMBLY INSTRUCTIONS (CONT.) Electrical Parts (Anti-static gloves must be worn) (CONT.) PROCEDURES ILLUSTRATION 4. Remove the 2 screws and 1 ground screw. 5. Unplug the plugs then remove the main control board subassembly. 6. Release the data transfer module control board screw (1) and remove the board.
- Page 37 40MUAA: Service Manual DISASSEMBLY INSTRUCTIONS (CONT.) Fan Motor and Fan PROCEDURES ILLUSTRATION 1. Remove the 2 fan assembly screws. 2. Remove the fan assembly. Manufacturer reserves the right to change, at any time, specifications and designs without notice and without obligations.
- Page 38 40MUAA: Service Manual DISASSEMBLY INSTRUCTIONS (CONT.) Fan Motor and Fan (Cont) PROCEDURES ILLUSTRATION 3. Release the 3 nuts securing the fan motor then remove the fan motor. 4. Release the 1 nut securing the fan and then remove the fan. Manufacturer reserves the right to change, at any time, specifications and designs without notice and without obligations.
- Page 39 40MUAA: Service Manual DISASSEMBLY INSTRUCTIONS (CONT.) Evaporator PROCEDURES ILLUSTRATION 1. Remove the cover plate. 2. Remove the cover plate assembly screws (3). Manufacturer reserves the right to change, at any time, specifications and designs without notice and without obligations.
- Page 40 40MUAA: Service Manual DISASSEMBLY INSTRUCTIONS (CONT.) Evaporator (Cont.) PROCEDURES ILLUSTRATION 3. Remove the evaporator (with a water collector assembly). 4. Remove the water collector assembly screws (2). 5. Release the evaporator and water collector assembly. Manufacturer reserves the right to change, at any time, specifications and designs without notice and without obligations.
-
Page 41: Appendices
40MUAA: Service Manual APPENDICES Appendix 1 ° Table 14 — Temperature Sensor Resistance Value Table for T1, T2, T3, T4 ( C--K) °C °F K OHM °C °F K OHM °C °F K OHM °C ° F K OHM 115.266 12.6431 2.35774 0.62973... - Page 42 78.79 15.16 4.045 75.24 14.62 3.927 71.86 14.09 3.812 © 2023 Carrier. All rights reserved. Edition Date: 07/23 Catalog No: SG-40MUAA-01 Replaces: NEW Manufacturer reserves the right to change, at any time, specifications and designs without notice and without obligations.