Advertisement
Product Introduction
Built-in motion and ambient light sensors work together to realize hands-free control. Kasa smart dimmer switch turns on and dims the lights automatically, saving you effort and electricity bills.

Wire Your Switch
- Turn off the circuit breaker. Then remove the old wallplate of the wall switch and label the Ground and Neutral wires.
Ground: Usually green or copper.
Neutral: Usually white and not connected to a dumb switch.
Line: Usually black and coming from the circuit breaker.
Load: Usually black. One end is connected to the light. If you are unsure, consult a qualified electrician. - Disconnect the wires from the old switch.
- Identify Line and Load wires.
- Turn on the circuit breaker. Use a voltage detector to identify the energized wire (Line wire).

![shock hazard]()
Take care to avoid electric shocks.
- Turn on the circuit breaker. Use a voltage detector to identify the energized wire (Line wire).
- Connect the wires to the smart dimmer switch as shown below.

- Line up the switch with the mounting holes. Secure it with screws.

- Attach the wallplate. Then the wiring is finished.

![]() Flip the page over to complete setup.
Flip the page over to complete setup.


Need some help?
Visit www.tp-link.com/support for technical support, user guides, FAQs, warranty & more
Set Up Your Switch
STEP 1: DOWNLOAD APP
Get the Kasa Smart app from the App Store or Google Play.


STEP 2: SET UP
Tap the ![]() button in the app and select Smart Switches. Then follow the step-by-step app instructions to set up your smart dimmer switch.
button in the app and select Smart Switches. Then follow the step-by-step app instructions to set up your smart dimmer switch.

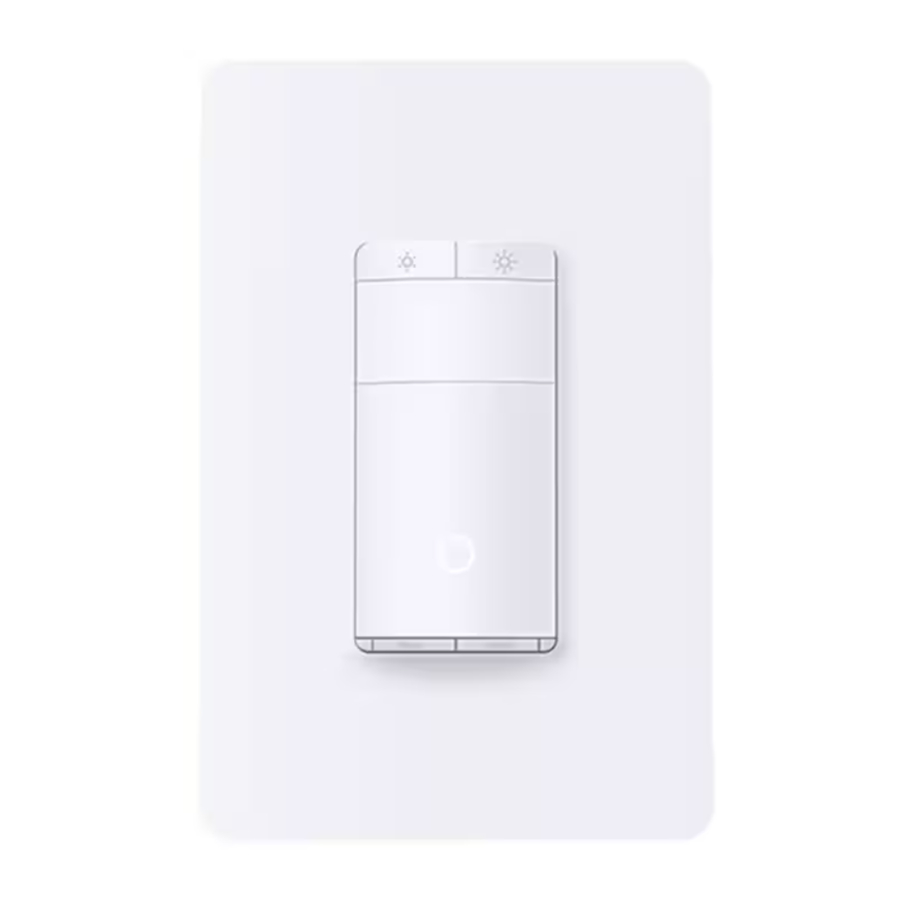
Appearance

Button Explanations
 | Decrease or increase the brightness. |
| Reset | Press and hold for about 5s to reset Wi-Fi while keeping other settings. Press and hold for about 10s to restore your switch to factory default settings. |
| Restart | Press to restart your switch. |
LED Status
| Flashing amber & green | Ready for setup. |
| Flashing green | Connecting to Wi-Fi. |
| Stay green for 30s | Connected to Wi-Fi. |
| Solid red | Disconnected from Wi-Fi. |
| Flashing amber | Device resetting. |
| White | Light fixture is off. |
Specifications
Rating: 120V~ 60Hz
Load: 300W Incandescent, 150W LED
Operation temperature: 0~40℃
Method of mounting included: Independently mounted
(Vertically position only);
Operating control, Type 1 action
Pollution Degree 2, Rated Impulse Voltage 2500 V Software Class A, NEMA Type 1

High Voltage-Disconnect power supply before servicing
Safety Notice
Before installing, servicing or removing the switch, read and follow all safety precautions including the following:
![]()
Risk of Electric Shock – More than one disconnect switch may be required to de-energize the equipment before servicing. A circuit breaker which disconnects the Line and Neutral conductor simultaneously is suitable. Ensure power is off at the circuit breaker before removing or installing any switch. Use a non-contact voltage tester to ensure the power is off.- The Smart Switch must be installed and used in accordance with the National Electric Code (NEC) or your local electrical code. If you are unfamiliar with these codes and requirements, or are uncomfortable performing the installation, consult a qualified electrician.
- Do not install the Smart Switch with wet hands or when standing on wet or damp surfaces.
- Install only in a suitable UL Listed outlet box (suitable dimensions: H > 2.95 in./75 mm, W > 1.81 in./46 mm, D > 2 in./51 mm).
- Tighten terminal screws to 13 lbf-in.

Documents / Resources
References
Download manual
Here you can download full pdf version of manual, it may contain additional safety instructions, warranty information, FCC rules, etc.
Advertisement
Thank you! Your question has been received!


Need Assistance?
Do you have a question about the ES20M that isn't answered in the manual? Leave your question here.