TP-Link Tapo S505D - Smart Wi-Fi Light Switch, Dimmer Manual
- User manual (20 pages)
Advertisement
About This Guide
This guide provides a brief introduction to the Smart Wi-Fi Light Switch, Dimmer and regulatory information.
Please note that features available in Tapo may vary by model and software version. Tapo availability may also vary by region. All images, steps, and descriptions in this guide are only examples and may not reflect your actual Tapo experience.
Conventions
In this guide, the following convention is used:
| Convention | Description |
| Blue | Key information appears in blue, including management page text such as menus, items, buttons and so on. |
| Underline | Hyperlinks are in blue and underlined. You can click to redirect to a website. |
| Note: | Ignoring this type of note might result in a malfunction or damage to the device. |
More Info
- Specifications can be found on the product page at https://www.tapo.com.
- Our Technical Support and troubleshooting information can be found at https://www.tapo.com/support/.
Introduction
With the Tapo Smart Wi-Fi Dimmer Light Switch, Matter, customize lighting ambience from anywhere.
- Matter Certified – Integrate Matter-certified Tapo devices with other Matter end products into your preferred ecosystem.
- Brightness Control – Control the brightness of your lights to set the ideal ambiance for different activities.
- Fade On/Off – Slowly increase brightness or dim to off when turning lights on/off
- Voice Control – Manage your smart switch with voice commands via Amazon Alexa, Apple Siri®, or Google Assistant.
- Remote Control – Instantly turn connected devices on/off from wherever you are through the Tapo app.
- Schedule – Preset a schedule to automatically manage devices.
- Away Mode – Randomly turns devices on and off at different times to give the appearance that someone is home.
- Smarter with Sensors – Create Smart Actions triggered by Tapo smart sensors for greater automation (Tapo Smart Sensor are sold separately. When working with a Tapo Smart Sensor, the Tapo Hub is required).
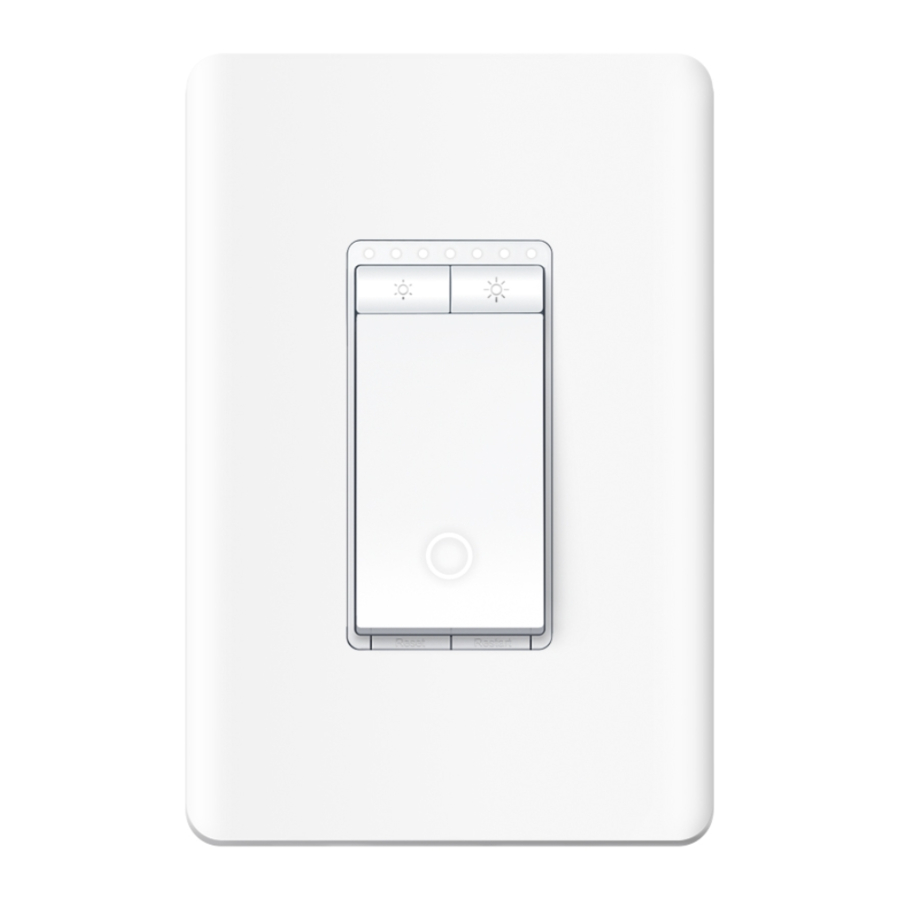
Appearance

Button Explanations
 | Decrease or increase the brightness. |
| Reset | Press and hold for about 5s to reset Wi-Fi while keeping other settings. Press and hold for about 10s to restore your switch to factory default settings. |
| Restart | Press to restart your switch. |
LED Status
| Solid amber | Starting up; disconnected from cloud. |
| Blinking amber & green | Ready for setup. |
| Blinking green | Connecting to Wi-Fi. |
| Stay green for 30s | Connected to Wi-Fi. |
| Solid red | Disconnected from Wi-Fi. |
| Blinking amber | Device resetting. |
| White | Light fixture is off. |
| Blinking green slowly | Firmware upgrading. |
Detach the Wallplate
Carefully insert a flat-bladed screw driver the opening at the bottom of the wallplate and pull forward to remove the wallplate.

 Matter Numeric Code
- For Matter initial setup.
*Images may differ from your actual product.
Note: Your can find another Matter setup code label in the package and stick it anywhere you like as needed for initial matter setup.
Wire Your Switch
Follow the steps below to wire your Smart Wi-Fi Dimmer Light Switch. If you are not familiar with basic electronical wiring, please consult an electrician.
Before You Start
- Prepare Baisc knowledge of Wiring
- Ground: Usually green or copper.
- Neutral: Usually white, not connected to the dumb switch.
- Line: Usually black and coming from the circuit breaker.
- Load: Usually black. One end is connected to the light.
Note: If you are unsure, consult a qualified electrician.
- Prepare Your Tools
Prepare a philips and slotted screwdriver, pliers, wire strippers and a voltage detector. - Check Wi-Fi Strength
Make sure your switch is in a area with strong Wi-Fi signal.
Step 1. Turn Off Power and Remove the Wallplate
Turn off the circuit breaker. Then remove the old wallplate of the wall switch and label the wires.


Risk of Electric Shocks - High Voltage - Disconnect power supply before servicing.
Step 2. Expose Your Switch Wiring
Remove the screws securing your old switch to the wall box. Gently pull the switch out and disconnect wires from the old switch.
Step 3. Identify Line and Load wires
- Turn on the circuit breaker. Use a voltage detector to identify the energized wire (Line wire).

- Turn off the circuit breaker. Label the Line and Load wires.

Step 4. Connect the Wires
Connect the wires to the smart dimmer switch as shown below.

Step 5. Install Your Smart Dimmer
Gently fold all of the wires back into the wall box. Line up the switch with the mounting holes. Secure it with screws.

Step 6. Attach the Wallplate and Turn on Power
Attach the wallplate and turn on the circuit breaker. Then the wiring is finished.

Set Up Your Switch
Follow the steps below to set up your dimmer switch.
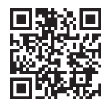
Step 1. Download Tapo App
Get the Tapo app from the App Store or Google Play, or by scanning the QR code below.


Step 2. Log In
Open the app, and log in with your TP-Link ID.
If you don't have an account, create one first.

Step 3. Add Your Switch
Tap the ![]() button in the app and select your switch. Then follow app instructions to set up your switch.
button in the app and select your switch. Then follow app instructions to set up your switch.

Set Up Your Smart Switch via Matter
Visit
https://www.tp-link.com/support/faq/3520/

- Matter setup in different ecosystems
- Multi-admin setup and videos
- Features supported in different ecosystems
- Troubleshooting & Help
Set Up via Matter
This is a Matter-certified device. You can integrate it into any Matter ecosystem you prefer for easy control.
Before You Start
- Factory reset your device before setup.
- A Matter-supported controller and smart home app of the same ecosystem are required. For optimal performance, please update them to the latest version.
- The Matter setup code on the device is only applicable for the initial ecosystem. To add it to a new ecosystem, you will need to generate a new setup code from a smart home app of an already-established ecosystem in your home.
- Take a photo of the Matter setup code for backup.
- Bluetooth will be turned off 15 minutes after the device is powered up. Restart your device to re-enter setup mode.
How to Set Up
*Setup processes may vary between ecosystems.
- Turn on Bluetooth on your phone.
- Open the smart home app, then scan the Matter QR code or enter the provided numeric setup code (usually can be found on your device).
- Follow the instructions in the app to complete setup.
Failed to Set Up
- Try to connect your phone to a stable 2.4 GHz Wi-Fi network with internet access instead of a 5 GHz network.
- Restart your device, controller or phone.
- Make sure IPv6 is enabled on your router.
Matter is still developing and the progress of each platform may differ from one another. There may also be different device performances and bugs that have no relation to the device itself. TP-Link is working hard to optimize user experience with other CSA members to provide better services.
We have professional Technical Support and R&D team. If you have any questions, feel free to contact us. Your feedback matters!
![]()
Contact us at www.tp-link.com/support for Technical Support, FAQs & more

Documents / Resources
References
Tapo Smart | Smart Devices for Smart Living
Support | Tapo
![www.apple.com]() App Store - Apple
App Store - Apple![play.google.com]() Google Play
Google PlayGeneral Questions about Matter-Enabled Devices | TP-Link
TP-Link Product Support - Wireless Networking Equipment Support
Download manual
Here you can download full pdf version of manual, it may contain additional safety instructions, warranty information, FCC rules, etc.
Download TP-Link Tapo S505D - Smart Wi-Fi Light Switch, Dimmer Manual
Advertisement
Thank you! Your question has been received!


Need Assistance?
Do you have a question about the Tapo S505D that isn't answered in the manual? Leave your question here.