Advertisement
About This Guide
This guide provides a brief introduction to the Smart Wi-Fi Light Switch and the Tapo app, as well as regulatory information.
Please note that features available in Tapo may vary by model and software version. Tapo availability may also vary by region. All images, steps, and descriptions in this guide are only examples and may not reflect your actual Tapo experience.
Conventions
In this guide, the following convention is used:
| Convention | Description |
| Blue | Key information appears in blue, including management page text such as menus, items, buttons and so on. |
| Underline | Hyperlinks are in blue and underlined. You can click to redirect to a website. |
| Note: | Ignoring this type of note might result in a malfunction or damage to the device. |
More Info
- Specifications can be found on the product page at https://www.tapo.com.
- Our Technical Support and troubleshooting information can be found at https://www.tapo.com/support/.
Introduction
Make your traditional lighting smart with the Tapo Smart Wi-Fi Light Switch. Turn your lights on and off with your voice, or control them from your phone.

Voice Control

Smarter with Sensor

Schedule & Timer

Away Mode

Easy Installation
- Voice Control – Manage your smart switch with simple voice commands via Amazon Alexa, Google Assistant, or Samsung Bixby.
- Remote Control – Instantly turn connected devices on/off from wherever you are through the Tapo app.
- Schedule – Preset a schedule to automatically manage devices.
- Auto-Off – Automatically turns off a connected device after the device is left on for a set time.
- Away Mode – Randomly turns devices on and off at different times to give the appearance that someone is home.
- Easy Installation – Interchangeable Load and Line terminals guarantee hassle-free installation
- Smarter with Sensors – Create Smart Actions triggered by Tapo smart sensors for greater automation.
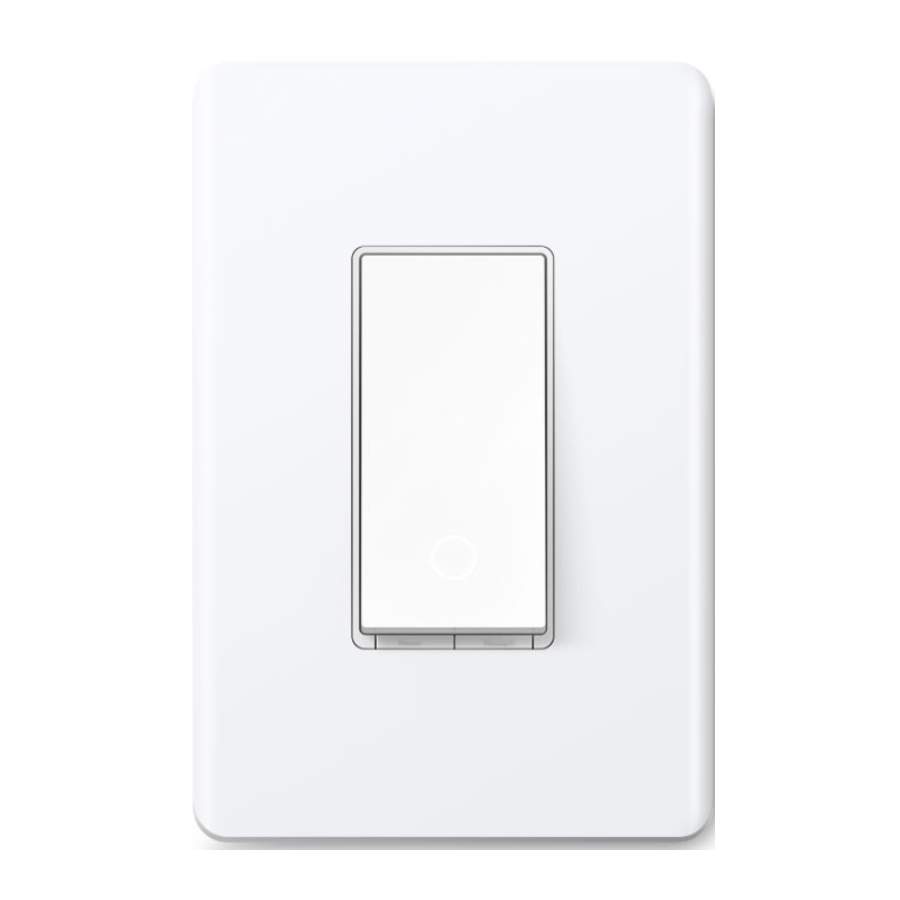
Appearance

Button Explanations
| Reset | Press and hold for about 5s to reset Wi-Fi while keeping other settings. Press and hold for about 10s to restore your switch to factory default settings. |
| Restart | Press to restart your switch. |
LED Status
| Solid amber | Starting up; disconnected from cloud. |
| Blinking amber & green | Ready for setup. |
| Blinking green | Connecting to Wi-Fi. |
| Stay green for 30s | Connected to Wi-Fi. |
| Solid red | Disconnected from Wi-Fi. |
| Blinking amber | Device resetting. |
| White | Light fixture is off. |
| Blinking green slowly | Firmware upgrading. |
Wire Your Switch
Follow the steps below to wire your Smart Wi-Fi Light Switch. If you are not familiar with basic electronical wiring, please consult an electrician.
Before You Start
- Prepare Baisc knowledge of Wiring
- Ground: Usually green or copper.
- Neutral: Usually white, not connected to the dumb switch.
- Line: Usually black and coming from the circuit breaker.
- Load: Usually black. One end is connected to the light.
Note: If you are unsure, consult a qualified electrician.
- Prepare Your Tools
Prepare a philips and slotted screwdriver, pliers, wire strippers and a voltage detector. - Check Wi-Fi Strength
Make sure your switch is in a area with strong Wi-Fi signal.
Step 1. Turn Off Power and Remove the Wallplate
Turn off the circuit breaker. Then remove the old wallplate of the wall switch and label the wires.


Risk of Electric Shocks - High Voltage - Disconnect power supply before servicing.
Step 2. Expose Your Switch Wiring
Remove the screws securing your old switch to the wall box. Gently pull the switch out and disconnect wires from the old switch.
Step 3. Label and Connect the Wires
Label the wires. Use the wire nuts to connect your smart switch to the wall box as shown below.

Note: No need to distinguish between Line and Load wires.
Step 4. Install Smart Light Switch
Gently fold all of the wires back into the wall box. Line up the switch with the mounting holes. Secure it with screws.

Step 5. Attach the Wallplate and Turn on Power
Attach the wallplate and turn on the circuit breaker. Then the wiring is finished.

Set Up Your Switch
Follow the steps below to set up your switch.
Step 1. Download Tapo App
Get the Tapo app from the App Store or Google Play, or by scanning the QR code below.


Step 2. Log In
Open the app, and log in with your TP-Link ID.
If you don't have an account, create one first.

Step 3. Add Your Switch
Tap the ![]() button in the app and select your switch. Then follow app instructions to set up your switch.
button in the app and select your switch. Then follow app instructions to set up your switch.

Main Device Controls
After setting up your device successful, you will see your switch listed on the home page. You can manage it from anywhere at any time with the Tapo app.
Home Page
This page lists all your devices you've added and you can view them directly and manage them easily. Tap your switch to enter the Status page.

Status Page
You can turn on or off your device in this page. You can also configure advanced features like Schedule, Away Mode, Timer to control your device according to your daily rountine.

Switch Settings
On Status page, tap  to enter the Device Settings page. You can change your device name and icon, set Delayed Shut Off, etc.

Schedule
Set schedules for your switch to automatically turn on/off at set times to simplify your daily routine.
Step 1: Go to Status page and swipe up. Tap  to set a schedule.

Step 2: Tap ![]() on the top right corner.
on the top right corner.

Step 3: Set the time and frequency to turn on/off your device automatically.

Done!
You can see the set schedule listed in the Schedule page.

Away Mode
Set your device to turn on and off randomly during a set time period to make the appearance that someone is at home.
Step 1: Go to Status page and swipe upforward. Tap ![]() to set Away Mode.
to set Away Mode.

Step 2: Set the time period and the repeating frequency.

Done!
Away Mode is active. Your device will be turned on and off randomly during the time period.

Timer
Set a countdown timer for your device to automatically turn on/off after the timer ends.
Step 1: Go to Status page and swipe upforward. Tap ![]() to set a countdown timer.
to set a countdown timer.

Step 2: Set the time period and whether to turn on or off the switch after the time ends.

Done!
The timer is counting down. You can also see the time counting down in the Home page.

Check Runtime
Check how long the switch has been running today, for the past 7 days, or for the past 30 days.
Go to Status page and swipe upforward. You can the runtime for today, past 7 days and past 30 days.

Device Sharing
Share your device to your family by entering their TP-Link ID.
Go to Status page and swipe upforward. Then tap Device Sharing.

Tap Share and then enter the TP-Link ID of your family member.

Smart Actions
Smart Actions automate repetitive tasks, allowing you to blaze through tedium with utmost ease. Set everything up once and never have to worry about it again. With Smart Actions, giving your home that level of intelligence is a snap. Shortcut lets you perform an action with a simple tap. Automation allows you to automate tasks to be performed at a set time. e.g. The light will light on at sunset.
Option 1: Edit based on the routine actions
- Go to the Smart Actions page and you will see the Featured Actions (Shortcut or Automation).

- Tap on a featured action. Tap EDIT to change the settings as needed and tap APPLY to save changes.


Option 2: Create your own shortcuts
- Go to Shortcuts page. Tap + on the top right to add a shortcut.

- Add an action and choose whether to delay the action.

- Name your shortcut and choose an icon and tap Done to save all the settings.


Option 3: Create your own actions
- Go to Automation page. Tap + on the top right to add a simple and smart action.

- Name the new action. Tap + to add conditions (When) like the trigger time, and tap + to add tasks (Then) like turning on the switch.

- Name your automation and set the effective time for the automation. Tap Done to save all the settings.


Device Settings
In the Device Settings page, you can edit the basic information, set delayed shut off and double tap effect, update firmware and more.
- Change Device name, icon and location In the Status page, tap
![]() to go to the Device Settings page. Then you can change the device icon, name, and its location.
to go to the Device Settings page. Then you can change the device icon, name, and its location.

- Set Delayed Shut Off When Delayed Shut Off is enabled, you can press the switch to make your light remain on for a set amount of time before going off. To turn the light off instantly, press the switch once more.


How to Reset Your Switch
There are two methods to reset your switch.
Method 1: Press the RESET button on the switch
Press and hold the RESET button for about 10 seconds until the LED blinks amber quickly.

Method 2: Remove the device in the Settings page
Go to the Settings page of your switch. Tap REMOVE to remove your switch from Tapo.


Documents / Resources
References
Download manual
Here you can download full pdf version of manual, it may contain additional safety instructions, warranty information, FCC rules, etc.
Download TP-Link Tapo S500 - Smart Wi-Fi Light Switch Manual
Advertisement
Thank you! Your question has been received!


Need Assistance?
Do you have a question about the Tapo S500 that isn't answered in the manual? Leave your question here.