TP-Link KS200 - Kasa Smart Wi-Fi Light Switch, Single Pole Manual
- User manual (22 pages)
Advertisement
About This Guide
This guide provides a brief introduction to Kasa Smart Wi-Fi Light Switch and regulatory information.
Features available in Kasa Smart may vary by model. All images, steps, and descriptions in this guide are only examples and may not reflect your actual Kasa Smart experience.
Conventions
In this guide, the following convention is used:
| Convention | Description |
| Teal | Key information appears in teal, including management page text such as menus, items, buttons and so on. |
| Underline | Hyperlinks are in teal and underlined. You can click to redirect to a website. |
More Info
- Specifications can be found on the product page at https://www.tp-link.com.
- Our Technical Support contact information can be found at the Help center of the Kasa Smart app and the Contact Technical Support page at https://www.tp-link.com/support.
Introduction

TP-Link Smart Wi-Fi Light Switch is a standard, single-pole, wall light switch that can be controlled via your iOS or Android devices. Control your home lighting or ceiling fans on your phone from anywhere, anytime with the Kasa Smart app. Turn fixtures on and off, set schedules, even group them with other Kasa Smart devices. The Kasa Smart app provides easy step-by-step installation instructions and convenient remote control from anywhere.
- Apple HomeKit Supported - Integrate your devices easily into your Apple ecosystem and control them using the Apple Home app and Siri on your iPhone, iPad, Apple Watch, HomePod, or Mac.
- Control From Anywhere - Control anything connected to your smart light switch, like lights, ceiling fans or other fixtures, from anywhere using the Kasa Smart app.
- Voice Control - With any Alexa, Siri or Google Assistant you can control any fixture connected to your Kasa Smart light switch with simple voice commands. Scan for HomeKit setup
- Grouping - Use Grouping to combine your light switch with other Kasa Smart devices for seamless control with one single tap on your smartphone.
- Away Mode - Set your smart light switch to turn connected fixtures on and off at random intervals to give the appearance you're home even while you're away.
- Easy Install - No need to understand complex wiring, just follow the step-by-step wiring process in the Kasa Smart app for a guided installation of your smart light switch.
- No Hub Required - The Kasa Smart Wi-Fi Light Switch connects to your home's secure Wi-Fi network. No need for a hub or extra equipment.
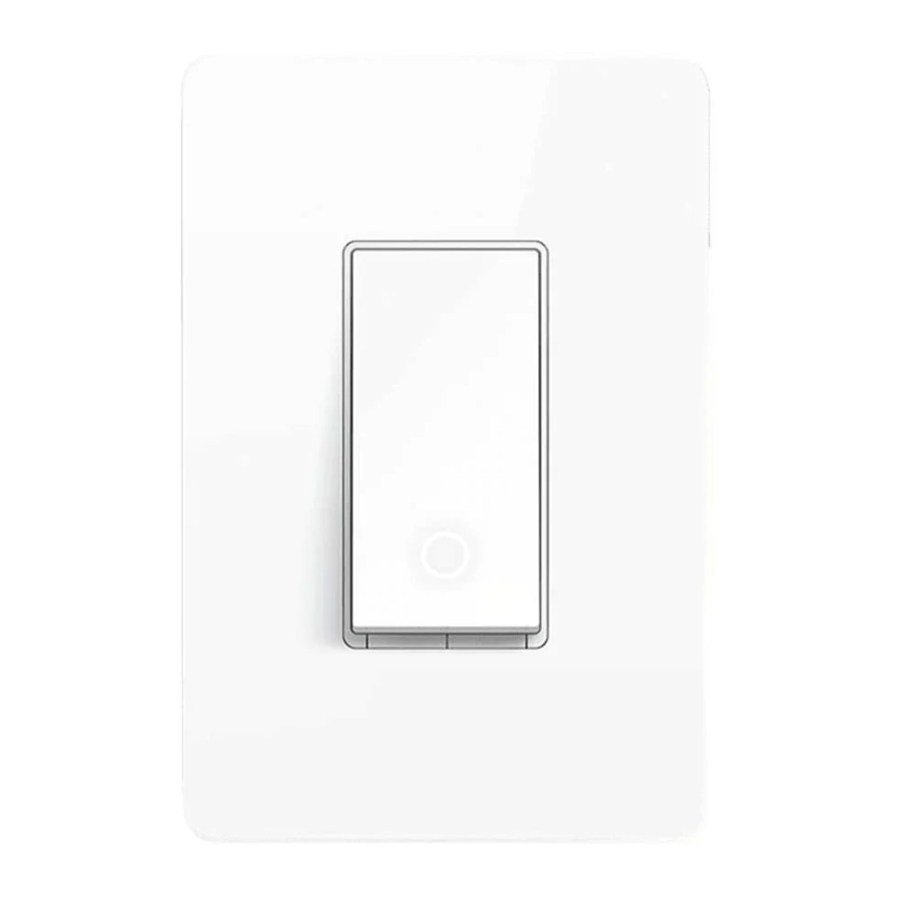
Appearance
The Smart Switch is compatible with incandescent, LED, Halogen, and compact fluorescent light bulbs. The switch also includes a white backlight LED indicator to easily locate the switch at night. See the explanation below:

Button Explanations
| Reset | Press and hold for about 5s to reset Wi-Fi while keeping other settings. Press and hold for about 10s to restore your switch to factory default settings. |
| Restart | Press to restart your switch. |
LED Status
| Solid amber | Starting up. |
| Blinking amber & green | Ready for setup; Resetting Wi-Fi. |
| Blinking green | Connecting to Wi-Fi. |
| Stay green for 30s | Connected to Wi-Fi. |
| Blinking amber | Device resetting. |
| White | Light fixture is off. |
Detach the Wallplate
Carefully insert a flat-bladed screw driver the opening at the bottom of the wallplate and pull forward to remove the wallplate.

 Homekit Numeric Code
- For Homekit setup.
*Images may differ from your actual product.
Note: Your can find another Homekit setup code label in the package and stick it anywhere you like as needed for Homekit setup
. 
Wire Your Switch
Follow the steps below to wire your Smart Wi-Fi Light Switch. If you are not familiar with basic electronical wiring, please consult an electrician.
Before You Start
- Prepare Baisc knowledge of Wiring
- Ground: Usually green or copper.
- Neutral: Usually white, not connected to the dumb switch.
- Line: Usually black and coming from the circuit breaker.
- Load: Usually black. One end is connected to the light.
Note: If you are unsure, consult a qualified electrician.
- Prepare Your Tools
Prepare a philips and slotted screwdriver, pliers, wire strippers and a voltage detector. - Check Wi-Fi Strength
Make sure your switch is in a area with strong Wi-Fi signal.
Step 1. Turn Off Power and Remove the Wallplate
Turn off the circuit breaker. Then remove the old wallplate of the wall switch and label the wires.


Risk of Electric Shocks - High Voltage - Disconnect power supply before servicing.
Step 2. Expose Your Switch Wiring
Remove the screws securing your old switch to the wall box. Gently pull the switch out and disconnect wires from the old switch.
Step 3. Label and Connect the Wires
Use the labels and wire nuts to Connect the wires to the smart switch as shown below.

Note: No need to distinguish between Line and Load wires.
Step 4. Install Your Smart Switch
Gently fold all of the wires back into the wall box. Line up the switch with the mounting holes. Secure it with screws.

Step 5. Attach the Wallplate and Turn on Power
Attach the wallplate and turn on the circuit breaker. Then the wiring is finished.

Set Up Your Switch
Follow the steps below to set up your Smart Light Switch via Kasa Smart app.
- Download and install Kasa app
Go to Google Play or the App Store or scan the QR code below to download the Kasa Smart app on your Android or iOS smartphone or tablet.
![]()
![www.apple.com]()
![play.google.com]()
- Log in or sign up with TP-Link ID
Open the app. Use your TP-Link ID to log in.
If you don't have a TP-Link ID, tap Create Account and the Kasa Smart app will guide you through the rest.

- Add Device
Tap the + button in the Kasa Smart app, select Smart Switches > Homekit Smart Switch, and then follow step-by-step app instructions to complete the installation and setup.


Add Your Switch to Home
This is a HomeKit-enabled device. You can also add it to the Home app for easy control from your iPhone or iPad. Follow the steps below to add your smart switch via the Home app.
Before you start:
- Your iPhone or iPad should be connected to a stable 2.4 GHz Wi-Fi network.
- To control this HomeKit-enabled accessory, the latest version of iOS or iPadOS is recommended.
- HomeKit will be disabled after 10 minutes since the smart switch is powered on. You can power off your device and power it back on, then try again.
Add to Home
- Open the Home app. Or if you have added the smart switch to Kasa Smart, you can also tap Add to Home in the Device Settings page.
![]()
- Scan the HomeKit QR code on the provided label. It will be added to Home automatically.

Failed to add to Home
- Press and hold the Power button for at least 10 seconds to factory reset the smart switch and restart your phone. Then try again.

- Ensure both your iPhone/iPad and the smart switch closer to the router to get a stronger Wi-Fi signal.
- Turn off the Wi-Fi on your iPhone/iPad for a few seconds, then turn it back on to clear the cache of the Home app.
- Make sure your iPhone/iPad is connected to the 2.4 GHz Wi-Fi network. Set different names for 2.4 GHz and 5 GHz networks, or temporarily turn off the router's 5 GHz Wi-Fi until your smart device is successfully added.
- Change the router's 2.4 GHz Wi-Fi channel to a fixed one, such as 1, 6, and 11. Then reboot your router.
- If you still cannot add the smart switch to Home, set it up with Kasa Smart manually. Then follow the app instructions to add your smart switch.
- If the problem persists, refer to the FAQ for detailed instructions: https://www.tp-link.com/support/faq/3390/ ;
![]()


Third Party Services
Use the Kasa Smart app to pair your Smart devices with Amazon Alexa or Google Home Assistant, and enjoy a full hands-free experience. Kasa helps manage the rest of your smart home too, working with Samsung SmartThings to trigger changes when you arrive home or leave for the day.
Launch the Kasa Smart app. Go to the Me page and tap Third Party Services. You can choose Amazon Alexa / Google Assistant / IFTTT / Samsung SmartThings for detailed instructions.

Set up Amazon Alexa
- Tap Amazon Alexa.

- Tap Connect.

- Sign in with your amazon account.

- After sign-in, tap LINK.

- Your TP-Link ID has been successfully linked with your amazon account. You can use Alexa voice commands to control your smart device.


Set up Google Assistant
- Tap Google Assistant.

- Follow instructions to connect your device to your Google Home.
Or find the FAQ at https://www.tp-link.com/en/support/faq/1534/.


Documents / Resources
References
![www.tp-link.com]() WiFi Networking Equipment for Home & Business | TP-Link
WiFi Networking Equipment for Home & Business | TP-LinkTP-Link Product Support - Wireless Networking Equipment Support
![www.apple.com]() App Store - Apple
App Store - Apple![play.google.com]() Google Play
Google PlayHow to Troubleshoot when a TP-Link HomeKit-enabled device fails to add to Apple’s Home App
How to connect your TP-Link Kasa devices to Google Home
Download manual
Here you can download full pdf version of manual, it may contain additional safety instructions, warranty information, FCC rules, etc.
Download TP-Link KS200 - Kasa Smart Wi-Fi Light Switch, Single Pole Manual
Advertisement
Thank you! Your question has been received!


Need Assistance?
Do you have a question about the KS200 that isn't answered in the manual? Leave your question here.