Advertisement
Charge the Battery
The battery comes partially charged. We recommend that you fully charge the battery before use. It will take about five and a half hours with the included charger.

Note:
- Remove the protective film from the camera before use.
- When you plug in the USB charger, the LED should blink amber quickly for 3 seconds. If not, make sure the power is running and check your connection.
- We recommend using the USB cable and charger included in the package.
- Keep the charging port firmly covered when not in use to ensure waterproof performance.
- Check the battery status in the Tapo app after setup.
Set Up the Camera
- Get the Tapo app from the App Store or Google Play.
![]()


- Press and hold
![]() on your camera for about 3 seconds to turn it on. Then follow the instructions in the Tapo app to set up your camera.
on your camera for about 3 seconds to turn it on. Then follow the instructions in the Tapo app to set up your camera.


Mount the Camera
*Get detailed mounting instructions in the Tapo app.
Option 1: Mount to metallic surfaces

The camera includes a magnet in its base. It allows magnetically attaching to metallic surfaces.

Strong Magnet. Crushing Hazard.
Option 2. Mount to the wall
- Stick the mounting template to a desired mounting place. Drill two holes according to the template.

- Insert two anchors into the holes and use the screws to affix the metal plate over the anchors.
Then attach the camera to the plate.

![]()
Strong Magnet. Crushing Hazard.


Note:
At 2 meters or higher*, we recommend using the Wall Mount Bracket (not included).

Wall Mount Bracket
(Bracket Stud: 1/4"-20UNC Threads)
*This equipment shall be installed at a height of fewer than 2 meters when mounting via option 1 or option 2.
Have a Tapo Solar Panel
The Tapo Solar Panel charges your Smart Wire-Free Security Camera continuously.

If you don't yet have a Tapo Solar Panel, charge the rechargeable battery with a standard and high-quality DC 5V/2A battery charger.
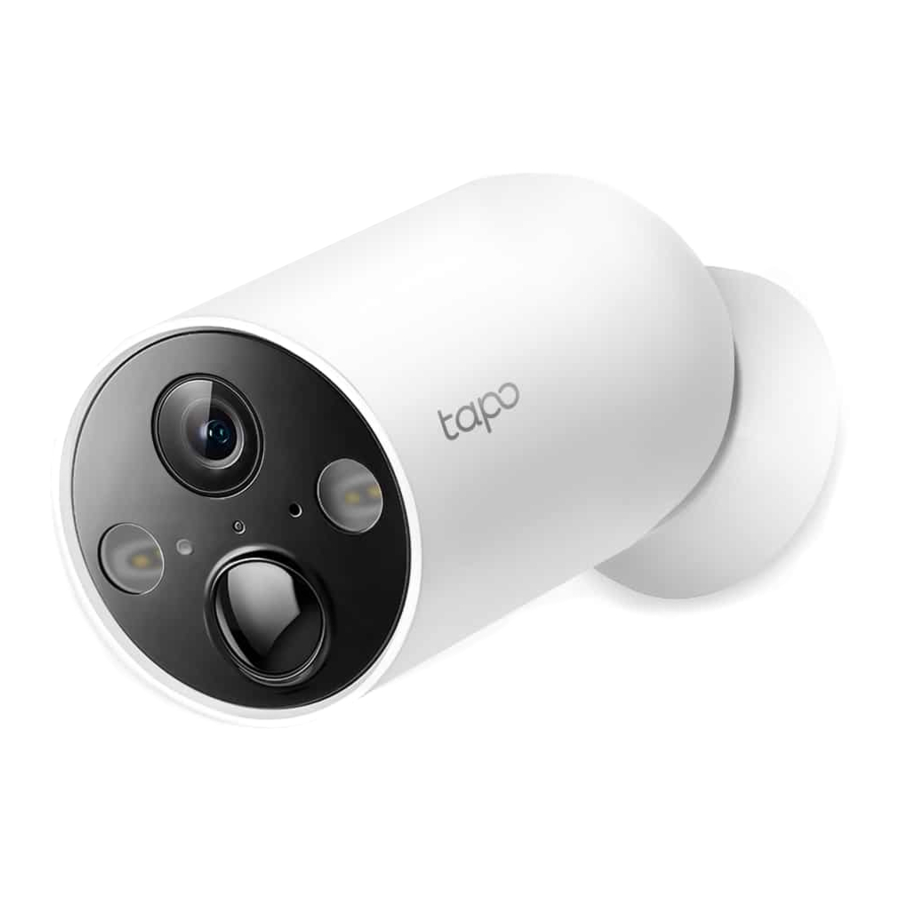
Appearance
Front

- Spotlights
- Light Sensor
- Motion Sensor
- Microphone
- Lens
- Status LED
Side

- Speaker
Slot & Button Explanation
microSD Card Slot
Open the cover. Insert a microSD card* and initialize it on the Tapo app for local recording.
*microSD card not included.
Reset
Open the cover. Use a pin to press and hold for at least 5 seconds to reset the camera to factory default settings.
![]()
Press and hold for about 3 seconds to turn on/off the camera.
USB Micro B
Open the cover for USB charging.
Status LED Indication
| Blinking amber quickly for 3s | Plugging in USB charger |
| Solid red | Starting up |
| Blinking red and green | Ready for setup |
| Blinking red slowly | Connecting to Wi-Fi |
| Solid amber | Connected to Wi-Fi |
| Solid green | Connected to the cloud |
| Blinking red quickly | Camera resetting |
| Blinking green quickly | Camera updating |

Documents / Resources
References
Download manual
Here you can download full pdf version of manual, it may contain additional safety instructions, warranty information, FCC rules, etc.
Download TP-Link tapo C425 - Smart Wire-Free Security Camera Quick Start Guide
Advertisement
Thank you! Your question has been received!


Need Assistance?
Do you have a question about the tapo C425 that isn't answered in the manual? Leave your question here.