Table of Contents
Advertisement
Advertisement
Table of Contents

Related Manuals for Suunto N3


Summary of Contents for Suunto N3
- Page 3 CUSTOMER SERVICE CONTACTS Suunto USA Phone 1 (800) 543-9124 Canada Phone 1 (800) 776-7770 Suunto Website www.suunto.com...
-
Page 4: Table Of Contents
1. GENERAL INFORMATION ...4 2. HOW TO USE YOUR SUUNTO N3 ...4 2.1 Buttons ...5 2.2 Channels ...8 2.3 Modes ...8 2.4 Signal coverage ...9 2.5 Status icons ...10 3. TIME CHANNEL ...12 3.1 Receiving the time ...12 3.2 Choosing a watch face ...13 3.3 Downloading a watch face ...14... - Page 5 8. GETTING HELP ... 36 8. TERMS AND CONDITIONS ... 37 8.1 Copyright ... 37 8.2 Trademarks ... 37 8.3 About your Suunto n3 and service ... 37 8.4 FCC COMPLIANCE ... 38 8.5 CE compliance ... 38 8.6 ISO 9001 compliance ... 38 9.
-
Page 6: General Information
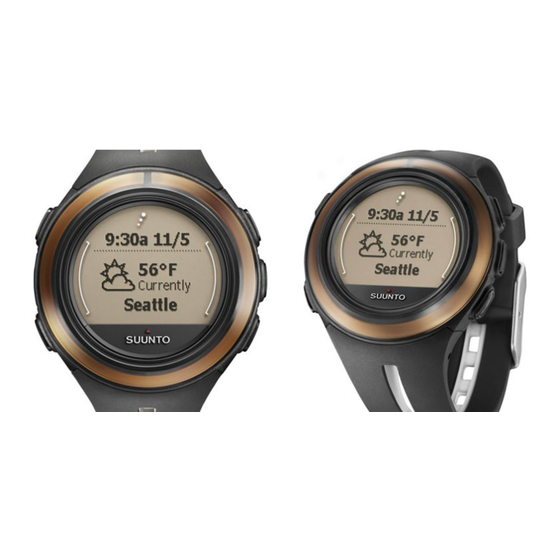
Enjoy making fashion statements with different watch faces and customizing your Suunto n3 to fit your lifestyle. To learn more about your new Suunto n3 and how to use it, follow the instructions in this guide. -
Page 7: Buttons
2.1 BUTTONS Your Suunto n3 includes five buttons each of which has several different functions. - Page 8 STARTSTOP/LIGHT Short press • Starts and stops the Chronograph in the Chrono mode. Long press • Activates the backlight in all the modes. (For personalized use of the backlight, see chapter 6. Settings.) CHANNEL Short press • Returns to the mode or channel splash screen. •...
- Page 9 selections and splash screens, it starts to scroll through the options until you release it. • In the Chrono mode, it resets the display after you have stopped the chrono time. PREVIOUS Short press • If a mode/channel splash screen is active, you can use this button to navigate to the previous splash screen.
-
Page 10: Channels
Suunto n3. When you activate the MSN Direct service, you select the channels you want to display on your Suunto n3. Each channel appears on the Suunto n3 display with an icon and the name of the channel. -
Page 11: Signal Coverage
Broadcast information—such as news stories and current temperatures—is sent to every Suunto n3 with MSN Direct, but only the information that you want to see is actually captured by your Suunto n3. Regardless of where you travel in North America, as long as you are within an MSN Direct coverage area, you should receive broadcast information. -
Page 12: Status Icons
2.5 STATUS ICONS Your Suunto n3 displays various icons. On most watch faces these icons appear in the lower right corner of the display. The following table describes each icon. Icon Description New Message: Indicates that a new message has arrived. - Page 13 This can happen before the signal confirms the home coverage area for your Suunto n3, or if you travel out of your home coverage area. • No signal is indicated by Suunto n3 has been out of your home coverage area longer than 10 minutes and cannot find a signal.
-
Page 14: Time Channel
This happens even if you have not yet activated the MSN Direct service. As long as your Suunto n3 is receiving a signal, you do not need to set the time. The time is accurate to a few thousands of a second and... -
Page 15: Choosing A Watch Face
If you are in an area where your Suunto n3 cannot receive a signal, you can set the time manually. You can also change the time display from a 12 hour clock to a 24 hour clock, and you can override the automatic time zone setting. -
Page 16: Downloading A Watch Face
•To discard the watch face, press PREVIOUS (No). Note: You can only store one downloaded watch face at a time on your Suunto n3. If you decide to keep a face, the last watch face that you downloaded is removed. -
Page 17: Timers
3.5 TIMERS Suunto n3 has three different training timers that you can use alongside the Chronograph. For example, you can use these versatile timers for countdown time measurement before the start of a competition, for work and rest intervals in circuit training or to automatically start the Chronograph after a warm-up period. - Page 18 6. On the Activate Timer display, select a suitable timer with PREVIOUS or NEXT/ LAP and press ENTER. Suunto n3 confirms your selection and returns to the Chrono mode. If you want to deactivate Timers and use the Chronograph without any countdown alarms, select and accept All Off in the menu.
-
Page 19: Alarms
3.6 ALARMS Suunto n3 has three separate alarms that you can set to remind you about specific events or to wake you up in the morning. To set and activate alarms: 1. Long press CHANNEL to go to the Time channel. Wait for the current watch face to appear. -
Page 20: Battery
Remember to turn the radio back on. • Turn your Suunto n3 off. If you are not wearing your Suunto n3, you can turn it off. Suunto n3 maintains your current information for a long time, but the Suunto n3 screen is blank and the instrument receives no additional information. -
Page 21: Charging The Battery
Battery charge remaining 4.1 CHARGING THE BATTERY If your Suunto n3 has a remaining battery charge of 30% or less, you should charge it as soon as possible. Charging the Suunto n3 takes up to 5 hours. To charge your Suunto n3: 1. - Page 22 Only replace with manufacturer-specified batteries. Recycle or dispose of used batteries properly. Note: You can also charge your Suunto n3 directly from your PC via the USB cable but first you need to install the USB software. The USB software installation package is on the CD delivered with your Suunto n3.
-
Page 23: Suunto Sports Instrument Drivers
1. The drivers are located on your PC software installation CD-ROM. Insert the CD- ROM into your computer. 2. Attach the Suunto Sports Instrument PC interface cable to the computer serial port and then plug the other end into your Suunto n3. The Add New Hardware Wizard is activated. 3. Click Next. -
Page 24: Installing Suunto Sports Instrument Drivers (Windows 2000)
ROM into your computer. 2. Attach the Suunto Sports Instrument PC interface cable to the computer serial port and then plug the other end into your Suunto n3. The Found New Hardware Wizard is activated. 3. Click Next. The Install Hardware Device Drivers window opens. - Page 25 Once the installation of the serial port is completed, check that it has been successful. Select Start - Settings - Control Panel - System - Hardware - Device Manager. Then select View - Devices by connection. The device should have been installed as Suunto USB Serial Port (COMx), attached to Suunto Sports Instrument.
-
Page 26: Uninstalling Suunto Sports Instrument Drivers
1. Select Start - Settings - Control Panel - Add/Remove Software. A window that shows the currently installed programs opens. 2. Select Suunto USB Drivers and then click Add/Remove. This will bring up the Suunto Uninstaller screen, which asks if it OK to delete the drivers. -
Page 27: Settings
6. SETTINGS You can adjust all the settings of your Suunto n3 in the Settings mode, which is divided into four categories: Time, Date, General and Units. If you are receiving a broadcast signal and the radio is turned on, you cannot set the time and date manually, those are set by the network. - Page 28 By default, the time zone is set to Set by network and it reflects the time zone that corresponds to the atomic clock that the Suunto n3 is currently set to. This means that the time zone is updated automatically as you move from place to place.
-
Page 29: Date
ENTER. The Set dual zone display opens. 2. Select a suitable time zone with NEXT/LAP or PREVIOUS and press ENTER. Suunto n3 confirms your selection and you return to the main display. 6.2 DATE Suunto n3 has a programmed calendar until the year 2049. -
Page 30: General
Watch sleep allows you to turn the display of your Suunto n3 off to save battery. This is a good option if you know you will not be using your Suunto n3 for a while, for example during the night. When you turn off your Suunto n3, the radio is also automatically turned off. - Page 31 • All buttons: Backlight is turned on with the press of any of the buttons. This is a good setting if you have to use your Suunto n3 in a dark environment. Transitions allows you to customize the channel transitions.
-
Page 32: Units
6.4 UNITS You can also adjust the units that are used for presenting information on your Suunto Time format affects the used time style. You can select either 12h with am/pm symbols or 24h (European style of presenting the time). -
Page 33: Frequently Asked Questions
This can happen before the signal confirms the home coverage area for your Suunto n3, or if you travel out of your home coverage area. - Page 34 · As long as you are in an MSN Direct coverage area, you should not have to set the time. Your Suunto n3 acquires the current local time automatically from an atomic clock. This may take a few minutes to acquire initially. If the Set Time setting displays Time Set By Network, then you are in an MSN Direct coverage area.
- Page 35 • My Suunto n3 does not show the correct time. What should I do? · When you first turn on your Suunto n3, the time reverts to 12:00 A.M. while the instrument attempts to receive the correct local time from a nearby broadcast signal.
- Page 36 · If your Suunto n3 is exactly one or more full hours away from the correct time, it is possible that your Time Zone settings are set to a specific time zone. Make sure that the time zone is set to Set by network. For details, see page 26.
- Page 37 To do so, go to www.msndirect.com and click the link to resend the configuration message. • My Suunto n3 has not received any new information in a day or more. What should I do? · The MSN Direct coverage area includes most major metropolitan areas throughout North America.
-
Page 38: Getting Help
8. GETTING HELP For additional help with your Suunto n3, please call Suunto Customer Service at 1 (800) 543-9124 (Suunto USA) or 1 (800) 776-7770 (Suunto Canada) or go to our Web site at www.suunto.com. For help with the MSN Direct service, go to the MSN Direct Web site at www.msndirect.com and click the Help link, or contact MSN Customer Support at 1-... -
Page 39: Terms And Conditions
This publication and its contents are proprietary to Suunto Oy and are intended solely for the use of its clients to obtain knowledge and key information regarding the operation of Suunto n3 products. Its contents shall not be used or distributed for any other purpose and/or otherwise communicated, disclosed or reproduced without the prior written consent of Suunto Oy. -
Page 40: Fcc Compliance
8.4 FCC COMPLIANCE Suunto n3 complies with Part 15 of the FCC limits for class B digital devices. This equipment generates, uses, and can radiate radio frequency energy and, if not installed or used in accordance with the instructions may cause harmful interference to radio communications. -
Page 41: Warranty
9. WARRANTY 9.1 LIMITS OF LIABILITY If this product should fail due to defects in materials or workmanship, Suunto Oy will, at its sole option, repair or replace it with new or rebuilt parts, free of charge, for two (2) years from the date of its purchase. -
Page 42: After Sales Service
All repairs made, not covered under the terms of this warranty, will be made at the owner’s expense. This warranty is non-transferable from the original owner. If it is not possible to contact your Suunto dealer, contact your local Suunto distributor for further information. You can locate your local Suunto distributor at...