Sharp XE-A40S Instruction Manual
Hide thumbs
Also See for XE-A40S:
- Quick start manual (2 pages) ,
- Service manual (28 pages) ,
- Instruction manual (116 pages)
Table of Contents
Advertisement
Available languages
Available languages
Quick Links
Download this manual
See also:
Service Manual
Advertisement
Chapters
Table of Contents

Related Manuals for Sharp XE-A40S


Summary of Contents for Sharp XE-A40S
- Page 1 ELECTRONIC CASH REGISTER CAJA REGISTRADORA ELECTRONICA INSTRUCTION MANUAL MODEL XE-A40S MODELO MANUAL DE INSTRUCCIONES...
- Page 2 WARNING FCC Regulations state that any unauthorized changes or modifications to this equipment not expressly approved by the manufacturer could void the user’s authority to operate this equipment. Note: This equipment has been tested and found to comply with the limits for a Class A digital device, pursuant to Part 15 of the FCC Rules.
-
Page 3: Introduction
• The register plugs into any standard wall outlet (120V AC ±10%). Other electrical devices on the same electrical circuit could cause the register to malfunction. • If the register malfunctions, call 1-800-BE-SHARP for service - do not try to repair the register yourself. -
Page 4: Table Of Contents
CONTENTS INTRODUCTION ...1 IMPORTANT ...1 PRECAUTION...1 CONTENTS...2 PARTS AND THEIR FUNCTIONS...4 1 External View ...4 2 Printer ...4 3 Mode Switch and Mode Keys ...5 4 Keyboard ...5 5 Displays ...6 6 Drawer Lock Key ...6 GETTING STARTED...7 FOR THE OPERATOR OVERVIEW OF FLOW OF DAILY SALES ENTRIES ...11 BASIC SALES ENTRY ...12 1 Basic Sales Entry Example ...12... - Page 5 FOR THE MANAGER PRIOR TO PROGRAMMING ...27 BASIC FUNCTION PROGRAMMING (For Quick Start) ...27 1 Date and Time Programming ...27 2 Tax Programming for Automatic Tax Calculation Function ...28 Tax programming using a tax rate ...28 The tax table (applicable to the add-on tax) ...29 Quantity for doughnut tax exempt (for Canadian tax system) ...31 AUXILIARY FUNCTION PROGRAMMING ...32 1 Department Programming ...32...
-
Page 6: Parts And Their Functions
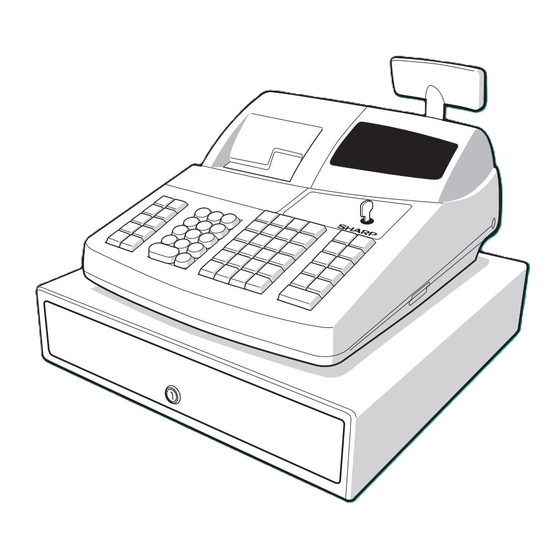
Operator display Printer cover Receipt paper Journal window Drawer lock Drawer Use only the USB cable (manufactured by SHARP) supplied with the XE-A40S for the connection with a PC. Never use other cables. Printer Take-up spool Paper roll cradle Paper chute... -
Page 7: Mode Switch And Mode Keys
Mode Switch and Mode Keys The mode switch can be operated by inserting one of the two supplied mode keys - manager (MA) and operator (OP) keys. These keys can be inserted or removed only in the “REG” or “OFF” position. VOID Manager key (MA) Operator key (OP) -
Page 8: Displays
Displays Operator display Receipt OFF indicator Repeat / Sentinel mark / Power save mark • Clerk code or Mode name The mode you are in is displayed. When a clerk is assigned, the clerk code is displayed in the REG or OP X/Z mode. -
Page 9: Getting Started
GETTING STARTED Please follow the procedure shown below. Installing the cash register Find a stable surface near an AC outlet where the cash register will not subject to water sources or direct sunlight . Unpack the cash register and make sure all accessories are included. For details of accessories, please refer to “Specifications”... - Page 10 Preparing the cash register To make the cash register ready for operation, remove the retainer and set the print head release lever in print position. Push the printer cover forward and detach it. Remove the white retainer at the position shown at the right. Please keep this retainer for future use when transferring the cash register.
- Page 11 Set a paper roll in the paper roll cradle of the journal side. Insert the end of the paper into the paper chute of the printer until it is caught by the printer auto-feed and comes out of the top of the printer. If the printer does not catch the paper, feed the paper while pressing the key.
- Page 12 • Amount entry digit limit for PO amount, RA amount, Manual tax amount The factory setting makes the maximum amount you can enter. You can program to limit the amount. • Sentinel - High amount lockout (HALO) for cash in drawer (CID) •...
-
Page 13: For The Operator
FOR THE OPERATOR OVERVIEW OF FLOW OF DAILY SALES ENTRIES Things to do before starting sales entries: • Make sure the power cord is securely connected to the AC outlet. • Turn the mode switch to OP X/Z position and check if date and time are correctly set. •... -
Page 14: Basic Sales Entry
BASIC SALES ENTRY Basic Sales Entry Example Listed below is a basic sales entry example when selling items by cash. For operation details, please refer to each section. Mode switch setting Turn the mode switch to the REG position. Clerk assignment Enter your clerk code. -
Page 15: Error Warning
Clerk assignment Prior to any item entries, clerks must enter their clerk codes into the register. However, the code entry may not be necessary when the same clerk handles consecutive transactions. ■ Sign-on (in REG, MGR, VOID mode) To display the signed-on clerk code Clerk code 1 to 40 Receipt ON/OFF function You can disable receipt printing in the REG mode to save paper using the receipt ON/OFF function. -
Page 16: Item Entries
Item Entries Single item entries Department entries For a merchandise classification, the cash register provides a maximum of 99 departments. To the departments, group attributes such as taxable status are applied to items when they are entered. • When using the department keys (for department 1 to 40) For department 1 to 20, enter a unit price and press a department key. -
Page 17: Repeat Entries
Example: Selling a dept. 12 item ($12.00) , a dept. 21 item ($5.00), a dept. 14 item (using preset price), a dept. 22 item (using preset price), and a dept. 50 item ($15.00), a dept. 41 item (using preset price), a PLU 2 item (PLU entry) and a PLU 12 item (subdept. -
Page 18: Split Pricing Entries
Key operation example Department entry PLU entry Subdepartment entry Split pricing entries This function is practical when the customer wants to purchase items normally sold in bulk. To realize this function, you must change the programmed setting. Refer to “Various Function Selection Programming 1”... -
Page 19: Single Item Cash Sale (Sics) Entry
Single item cash sale (SICS) entry • This function is useful when a sale is for only one item and is for cash. This function is applicable only to those departments that have been set for SICS or to their associated PLUs or subdepartments. •... -
Page 20: Cash Or Check Sale That Does Not Require Tender Entry
Check tendering Key operation example Cash or check sale that does not require entry Enter items and press the display the total sale amount. Key operation example Charge (credit) sale Enter items and press a charge key ( Key operation example Mixed-tender sale You can perform mixed-tendering of check and cash, cash and charge, and check and charge. -
Page 21: Tax Calculation
Tax Calculation Automatic tax When the register is programmed with a tax rate (or tax table) and the tax status of an individual department is set for taxable, it computes the automatic tax on any item that is entered directly into the department or indirectly via a related PLU. -
Page 22: Tax Status Shift
Tax status shift The machine allows you to shift the programmed tax status of each department or the PLU key by pressing the and/or keys before those keys. After each entry is completed, the programmed tax status of each key is resumed. Example: Selling the following items for cash with their programmed tax status reversed •... -
Page 23: Optional Features
OPTIONAL FEATURES Auxiliary Entries Discount and premium entries using the percent key The percent key is used to apply a manually entered or preset discount or premium percent rate to individual items or to a merchandise subtotal. In the default setting, you can manually enter a discount percent rate to both individual items and merchandise subtotal. -
Page 24: Refund Entries
Discount for merchandise subtotal Key operation example Discount for item entries Key operation example (When a discount amount of $0.75 is programmed.) Refund entries For a refund of a department item, start with entering the refund amount and press the corresponding department key (in case of department 21 to 40, press the corresponding department key, and in case of department 41 to 99, enter the department code, press and the... -
Page 25: Auxiliary Payment Treatment
Key operation example 1230 Auxiliary Payment Treatment Currency conversion The register allows payment entries in a foreign currency (only cash payment is available). Pressing the creates a subtotal in the foreign currency. When using a programmed currency conversion rate, press the tendered amount in foreign currency if not exact amount payment, and press the When making a manual entry of a currency conversion rate, after item entries, enter the conversion rate (0.0000 to 9999.9999;... -
Page 26: Received-On Account And Paid-Out Entries
Received-on account and paid-out entries When you receive on account from a customer or when you pay an amount to a vendor, use the key respectively. For the received-on-account (RA) entry, enter the amount, and press the For the paid-out (PO) entry, enter the amount and press the Cash tendering only available for RA and PO operation. -
Page 27: Correction
CORRECTION Correction of the Last Entry (direct void) If you make an incorrect entry relating to a department, PLU/subdepartment, percentage ( ) or refund, you can void this entry by pressing the Key operation example Correction of the Next-to-last or Earlier Entry (indirect void) You can void any incorrect department entry, PLU/subdepartment entry or item refund entry made during a transaction if you find it before finalizing the transaction (e.g. -
Page 28: Subtotal Void
Subtotal Void You can void an entire transaction. Once subtotal void is executed, the transaction is aborted and the register issues a receipt. This function does not work when more than 30 items have been entered. Key operation example Subtotal void Correction of Incorrect Entries not Handled by the Direct or Indirect Void Function Any errors found after the entry of a transaction has been completed or during an amount tendered entry cannot... -
Page 29: For The Manager
FOR THE MANAGER PRIOR TO PROGRAMMING Before starting sales entries, you must first program necessary items so the cash register suits your sales needs. In this manual, there are three sections, BASIC FUNCTION PROGRAMMING where required items must be programmed, AUXILIARY FUNCTION PROGRAMMING where you can program for more convenient use of keys on the keyboard, and ADVANCED PROGRAMMING where various optional programming features are provided. -
Page 30: Tax Programming For Automatic Tax Calculation Function
Time For setting the time, enter the time in 4 digits using the 24-hour format. For example, when the time is set to 2:30 AM, enter 230; and when it is set to 2:30 PM, enter 1430. Time(max. 4 digits in 24-hour format) Key operation example For display and print,12-hour format is applied by default. -
Page 31: The Tax Table (Applicable To The Add-On Tax)
Example: Programming the tax rate 4% as tax rate 2 with tax exempt as 12¢ Key operation example • If you make an incorrect entry before pressing the third it with the key. • You do not need to enter the trailing zeros of a tax rate (after the decimal point), but you do need to enter the decimal for fractions. - Page 32 max. three digits To delete a tax table, use the following sequence: The first figure to be entered depends upon whether the difference between a minimum *1 First figure: (1 or 0) breakpoint to be entered and the preceding minimum breakpoint is not less than $1.00 or more than 99¢.
-
Page 33: Quantity For Doughnut Tax Exempt (For Canadian Tax System)
• If the tax is not provided for every cent, modify the tax table by setting the tax for every cent in the following manner. When setting the tax, consider the minimum breakpoint corresponding to unprovided tax to be the same as the one corresponding to the tax provided on a large amount. -
Page 34: Auxiliary Function Programming
AUXILIARY FUNCTION PROGRAMMING Department Programming Merchandise can be classified into a maximum of 99 departments. Items sold using the department keys can later be printed on a report shown as the quantities sold and sales amounts classified by department. The data is useful for making purchasing decisions and other store operations. - Page 35 Commission group number • A commission group (0 to 2, 0: non commission) can be assigned to each department for commission for clerks. Each commission amount for each clerk is calculated based on a programmed commission rate and later printed on clerk reports. Tax status (taxable 1 through 4 / non-taxable) •...
-
Page 36: Plu (Price Look-Up) And Subdepartment Programming
PLU (Price Look-Up) and Subdepartment Programming The PLU function allows speedy key entries whereby a price is automatically called up when a code is entered. The subdepartment is a kind of “open PLU”, which requires you to enter a price after the PLU code is entered. A maximum of 1800 PLU/subdepartment settings are possible. -
Page 37: Commission Rate Programming
*: Item: Commission group number PLU/subdepartment selection Key operation example When you program the last PLU code, the programming sequence will be complete with a press of key. Commission Rate Programming Based on each clerk’s sales total of each commission group and the corresponding commission rate, the commission amounts are calculated, which is printed on clerk reports. -
Page 38: Rate For And
Compulsory entry of amount tender (not compulsory), entry digit limit (8 digits), footer printing (not printed) (Manual tax) Entry digit limit (7 digits) * Item %/Item * Subtotal %/Subtotal : Percent/discount calculation is applied to subtotals. & Rate for To program zero *Rate To program another rate *: Rate... -
Page 39: Percent Rate Limitation For % And
Percent rate limitation for • Percent entries that exceed the upper limit may be overridden in the MGR mode. • 10.00% can be entered as for fractional entry. Key operation example Function parameters for To program “0” for all items *ABCDEFGH To program for another key *: Item:... -
Page 40: Function Parameters For
Entry digit limit (For discount key only) • The entry digit limit is in effect for the REG-mode operations but can be overridden in the MGR mode. The entry digit limit is represented by the number of allowable digit for the maximum entry amount for discount key. -
Page 41: C , X , Y And A (When Using As Ca Key)
Function parameters for To program “0” for all items To program for another key *1:Item: Footer printing Amount tendered entry Entry digit limit Footer printing • This programming decides whether or not the machine should print a message at the foot of a receipt when a specified media key is used. - Page 42 Characters entered are displayed here. To program the word “SHARP” in double-size characters When you press an appropriate number key (job code number) and press the start programming with the key is pressed, you are locked in for entering double size characters.
- Page 43 Alphanumeric character code table Code Character Code á â ê î ì í ô ó û ú œ ´´ ú ´´ ó ¨ ´´ Ú ´´ Ó (space) ” & ’ (DC): Double-size character code Character Code Character Ä Ö Ü...
-
Page 44: Function Text
Department text (item label) *To program departments 21 through 40, press the department shift key. Key operation example (Programming FRUIT for dept.1) PLU text (item label) Key operation example MELON (Programming MELON to PLU1) Function text * Function no.: See “List of function texts” shown on the following page. Dept. -
Page 45: List Of Function Texts
Key operation example CARD (Programming CARD for gross charge 1) List of function texts Function Key or function Net sales total Net taxable 1 subtotal Gross tax 1 total Tax 1 total of refund entries Net tax 1 total Exempt tax 1 Net taxable 2 subtotal Gross tax 2 total Tax 2 total of refund entries... -
Page 46: Clerk Names
Function Key or function Hourly report title Daily report title Group report title Total in drawer Non add symbol Copy receipt title Group 1 Group 2 Group 3 • The items marked with “ * ” are for Canada only. •... -
Page 47: Foreign Currency Symbol
Logo print format (6 types) Text 1st line Graphic logo Text 2nd line Text 3rd line Default setting Header 3-line message To print the logo message “THANK YOU” using double sized characters and centering on the third line. Key operation example S S S THANK S S S... -
Page 48: Advanced Programming
ADVANCED PROGRAMMING Register Number and Consecutive Number Programming Register number and consecutive number are printed on every receipt and journal. When your store has two or more registers, it is practical to set separate register numbers for identification. The consecutive number is increased by one each time a receipt and/or journal is issued. For consecutive number programming, enter a number (max. -
Page 49: Function Selection For Miscellaneous Keys
*1 Enter job code using numeric keys specified in each section below. *2 Data entry details are listed on each table in each section below. An asterisk is entered for factory setting. Example: When programming for job code 5 as ABCDEFGH: 00000100. Key operation example 00000100 Function selection for miscellaneous keys... -
Page 50: Receipt Print Format
Receipt print format Job code: 7 * Item: Always enter 0. Always enter 0. Subtotal print with a press of subtotal key Merchandise subtotal print with a press of merchandise subtotal key Always enter 0. Always enter 0. Always enter 0. Number of purchases print Function selection for tax Job code: 15... - Page 51 Job code: 62 * Item: Always enter 0. Error beep activation Key touch sound availability Buffered keyboard Void mode operation availability Void mode entry data print in Z2 reports Void mode entry data print in Z1 reports Addition of hourly sales total data in void mode Job code: 66 * Item:...
- Page 52 Tax calculation system • For US tax system, select “auto-tax”. • For Canadian tax, from the table below, specify a tax system suitable for your province (if necessary contact your local tax office for correct sales tax information) and for your type of retail business. In the cash register, four kinds of tax can be set and each tax is arranged to match GST or PST as follows: Tax 1: Tax 3:...
-
Page 53: Various Function Selection Programming 2
Various Function Selection Programming 2 The cash register provides various options so you can use the register to suit your sales needs. In this section, you can program the following features (parameters within parentheses indicates default setting): • Power save mode (entering the power save mode after 30 minutes) •... -
Page 54: Logo Message Print Format
Logo message print format You can select the number of lines for your logo message, and the position to print it on receipt. For details of the logo message type, please refer to “Logo messages” on *A: Logo message type 0: Header 3-line message without graphic logo 1: Graphic logo only 2: Footer 3-line message with graphic logo... -
Page 55: Thermal Printer Density
Thermal printer density s 50 @ * By default, 50 is set. To make the print darker, set a larger number, and to make the print lighter, set a smaller number. Key operation example Language selection *Language: 0: English 2: French Key operation example When you change the language, the text such as clerk name, logo message and function text will be reset to the default settings. -
Page 56: Auto Key Programming
AUTO key programming — Automatic sequence key If you program frequently performed transactions or report sequences for the transactions and/or reports simply by pressing the Programming for ; entering a PLU 2 item (programmed unit price: 1.50) and a dept. 6 item (unit price: 1.00) Key operation example AUTO setting... -
Page 57: Sample Printouts
Sample printouts 1 Programming report 1 Mode Dept. code Dept. text Dept. unit price w/sign Dept. function Minus department Tax status Dept. group & commission group Tax status Function parametrs (F-H) Discount amt. w/sign Function parametrs (F-H) Percent rate with sign Percent limit Entry digit limit Entry digit limit... -
Page 58: Training Mode
2 Programming report 2 3 Auto key programming report TRAINING MODE The training mode is used when the operator or the manager practices register operations. When a clerk in training is selected, the machine automatically enters the training mode. To specify a clerk to be trained, refer to “Training clerk specification for training mode”... -
Page 59: Reading (X) And Resetting (Z) Of Sales Totals
READING (X) AND RESETTING (Z) OF SALES TOTALS • Use the reading function (X) when you need to take a reading of sales information entered since the last reset. You can take this reading any number of times. It does not affect the register’s memory. •... - Page 60 Mode switch position Item OPX/Z X1/Z1 Total in drawer report Individual clerk report X, Z Full clerk report X1, Z1 Hourly report X1, Z1 (full) Hourly report (by range) Daily net report • When both sales quantities and sales amounts are zero, printing is skipped. If you do not want to skip, change the programming.
-
Page 61: Daily Sales Totals
Daily Sales Totals Full sales report • Sample report *1: When you take X1 report, “X1” is printed. *2: Printed in the Z1 report only. *3: When the Canadian tax system is selected, the following is printed here. Mode title*1 Reset counter Net grand total(GT2-GT3) Grand total of plus... -
Page 62: Full Group Total Report On Department
Department report • Sample report Individual group total report on department • Sample report Full group total report on department • Sample report Mode title Report title PLU report by designated range • Sample report PLU code Item label Mode title Report title *: When you take Z1 report, “Z1”... -
Page 63: Plu Report By Associated Department
PLU report by associated department • Sample report PLU code Transaction report • Sample report Mode title Report title This report shows the same transaction data as when a full sales report is run. Total in drawer report • Sample report Individual clerk report •... -
Page 64: Periodic Consolidation
Periodic Consolidation General information The periodic reading or resetting reports are the same in format as those in the X1/Z1 report for daily sales. The mode indicator will read “X2” or “Z2”. • Sample X report (Individual group total report on department) The subsequent printouts are the same in format as those in the X/Z report for daily totals. -
Page 65: Override Entries
OVERRIDE ENTRIES Programmed limit for functions (such as for maximum amounts) can be overridden by making an entry in the MGR mode. Turn the mode switch to the MGR position. Make an override entry. In this example, the register has been programmed not to allow discounts entries over $1.00. -
Page 66: Operator Maintenance
• Never touch around the print head and the motor during printing or before they have had sufficient time to cool. Cautions in handling the recording paper (thermal paper) • Use only paper specified by SHARP. • Do not unpack the thermal paper until you are ready to use it. -
Page 67: Replacing The Paper Roll
Replacing the Paper Roll Be sure to use paper rolls specified by SHARP. The use of any other paper rolls other than those specified could cause paper jamming, resulting in register malfunction. Paper specification Paper width: 1.75 ± 0.02 in (44.5 ± 0.5 mm) Max. -
Page 68: Installing The Paper Roll
Installing the paper roll Caution: The paper cutter is mounted on the printer (receipt side). Be careful not to cut yourself. Installing the receipt paper roll: Installing the journal paper roll: When you want to manually install a new roll of paper while the machine is turned off, follow the steps shown below: Pull the print head release lever toward you (to the head-up position). -
Page 69: Removing A Paper Jam
Removing a Paper Jam Caution: The paper cutter is mounted on the printer (receipt side). Be careful not to cut yourself. Never touch the print head immediately after printing, because the head may still be hot. Cleaning the Print Head When the printed text is getting dark or faint, paper dust may be stuck to the print head. -
Page 70: Removing The Till And The Drawer
Removing the Till and the Drawer The till in the register is detachable. After closing your business for the day, remove the till from the drawer and keep the drawer open. To detach the drawer, pull it forward fully with the till removed. And remove it by lifting it up. -
Page 71: Before Calling For Service
Before Calling for Service The malfunctions shown in the left-hand column below, labelled “Fault,” do not necessarily indicate functional faults of the machine. It is therefore advisable to refer to “Checking” shown in the right-hand column before calling for service. Fault The display shows symbols that do not make sense. -
Page 72: Specifications
Specifications and appearance subject to change without notice for improvement. *1 Use only the USB cable (manufactured by SHARP) supplied with the XE-A40S for the connection with a PC. In case you need a new USB cable, order the USB cable manufactured by SHARP Co. Ltd. (Part code: QCNWG3391RCZZ) for use with the XE-A40S. - Page 73 Programming sheet for departments Dept. Unit price code Ex. 5 For details of programming, refer to Unit price Max. 6 digits Function BR (bottle return) G (group number) CM (commission group numer) D-G T4 - T1 (taxable 4 - taxable 1) SICS (single item cash sale) SIGN LMT (entry digit limit)
- Page 74 Programming sheet for PLUs/subdepartments Unit price/ Limit amount code Ex. 1 For details of programming refer to Unit price/Limit amount Max. 6 digits Enter unit price for PLUs. Enter entry limit amount for subdepartments. Function A CM (commission group number) B TYPE (PLU/subdepartment selection) Text Max.
-
Page 75: Introduccion
Otros aparatos eléctricos enchufados en el mismo circuito eléctrico pueden hacer que la registradora funcione mal. • Si la caja registradora no funciona como debiera, solicite el servicio llamando al 1-800-BE-SHARP. No intente reparar la caja registradora usted mismo. • Para desconectar por completo la alimentación eléctrica, desenchufe la clavija del tomacorriente. -
Page 76: Indice
INDICE INTRODUCCION...1 IMPORTANTE...1 PRECAUCION ...1 INDICE ... 2 PARTES Y SUS FUNCIONES ...3 PARA EMPEZAR ...6 REGISTRO BASICO DE VENTAS ...7 1 Ejemplo de registro básico de ventas ...7 2 Aviso de error ...8 3 Registros de artículos...8 Registros de un solo artículo ...8 Registros repetidos...9 Registros de multiplicación ...9 Registros de precios divididos ...9... -
Page 77: Partes Y Sus Funciones
Ventanilla del registro diario Cerradura del cajón Cajón Emplee sólo el cable USB (fabricado por SHARP) suministrado con el XE-A40S para la conexión a un ordenador personal. No emplee nunca otros cables. Impresora Carrete de toma Soporte del rollo de papel Guía de papel... -
Page 78: Selector De Modo Y Llaves De Modo
Selector de modo y llaves de modo El selector de modo funciona insertando una de las dos llaves de modo suministradas: la llave del administrador (MA) y la del operador (OP). Estas llaves pueden insertarse o sacarse sólo cuando el selector esté en la posición “REG”... - Page 79 Visualizaciones Visualizador para el operador Indicador de desactivación (OFF) de recibos Repetición/marca centinela/marca de ahorro de energía • Código de dependiente o nombre de modo Se visualiza el modo en el que ahora se encuentre. Cuando se asigna un dependiente, se visualiza el código de dependiente en el modo REG u OP X/Z.
-
Page 80: Para Empezar
PARA EMPEZAR Siga el procedimiento mostrado a continuación. 1. Inicialice la caja registradora. Para que la caja registradora pueda funcionar correctamente, deberá inicializarla antes de ponerla en funcionamiento por primera vez. Siga el procedimiento siguiente. Asegúrese de que la clavija del cable de alimentación no esté enchufada en la toma de corriente de CA. Inserte la llave de administrador (MA) en el selector de modo y gírelo a la posición PGM. -
Page 81: Registro Basico De Ventas
PARA EL OPERADOR REGISTRO BASICO DE VENTAS Ejemplo de registro básico de ventas A continuación se muestra un ejemplo de registro básico de ventas en metálico de artículos. Para los detalles de la operación, consulte cada sección respectiva. Ajuste del selector de modo Gire el selector de modo a la posición REG. -
Page 82: Aviso De Error
Función de activación/desactivación (ON/OFF) de recibo Podrá inhabilitar la impresión de recibos en el modo REG. Pulse la tecla cambia el estado de impresión de recibos de ON a OFF. Para emitir un recibo cuando la función de activación/desactivación (ON/OFF) de recibo está desactivada (OFF): Si el cliente quiere el recibo después de haber finalizado la transacción con la función de activación/desactivación (ON/OFF) de recibo desactivada (OFF), pulse la tecla... -
Page 83: Registros Repetidos
• Cuando se emplea la tecla de registro de código de sección Cuando utilice un precio unitario programado Código de sección (1 a 99) Registros de PLU/subsecciones La caja registradora ya está programada para el modo PLU y cero para el precio unitario. Para emplear registros de PLU, deberán haberse programado de antemano sus precios unitarios preajustados. -
Page 84: Registros De Venta En Metálico De Un Solo Artículo (Sics)
Registros de venta en metálico de un solo artículo (SICS) • Esta función es útil cuando se vende solamente un artículo en metálico. Esta función es aplicable sólo a las secciones que se han ajustado para SICS o a sus PLU o subsecciones asociadas. •... -
Page 85: Cálculo De Los Impuestos
Cálculo de los impuestos Impuestos automáticos Cuando se ha programado una tasa de impuestos (o tabla de impuestos) en la caja registradora y el estado de impuestos para una sección individual está ajustado a imponible, la caja calcula los impuestos automáticos para cualquier artículo que se introduzca directamente en la sección o indirectamente mediante una PLU relacionada. -
Page 86: Tratos De Pagos Auxiliares
Cálculo porcentual para el subtotal de mercancías Ejemplo de operación de teclas Cálculo porcentual para registros de artículos Ejemplo de operación de teclas § (Cuando se programa un recargo del 15% para la tecla Registros de descuento y recargo empleando la tecla de descuento La tecla de descuento se emplea para aplicar un importe de descuento o recargo manualmente introducido o preajustado a artículos individuales o a un subtotal de mercancías. -
Page 87: Registros Con Tecla De Secuencia Automática (Tecla )
En ambos casos, la vuelta se visualizará en moneda nacional y, cuando el importe recibido sea insuficiente, el déficit se mostrará en moneda nacional. • Pulse la tecla • Si se programa, se imprime un símbolo de moneda extranjera. Aplicación de la tasa de conversión preajustada Ejemplo de operación de teclas Conversión de divisas... - Page 88 Corrección del registro siguiente al último o anterior (cancelación indirecta) Podrá cancelar cualquier registro de sección incorrecto, registro de PLU/subsección o registro de devolución de artículo hechos durante una transacción, si lo encuentra antes de finalizar la transacción (por ejemplo, pulsando la tecla ).
-
Page 89: Programacion De Las Funciones Basicas (Para El Inicio Rápido)
PARA EL ADMINISTRADOR PROGRAMACION DE LAS FUNCIONES BASICAS Para programar la caja registradora, ponga la llave del administrador en el selector de modo y gírelo a la posición PGM. Programación de la fecha y de la hora Fecha Para ajustar la fecha, introduzca la fecha con 8 dígitos empleando el formato de mes-día-año (MM/DD/AAAA), y pulse entonces la tecla Ejemplo de operación de teclas 08262005... - Page 90 Para borrar una tasa de impuestos, emplee la secuencia siguiente: Ejemplo: Programación de la tasa de impuestos del 4% como tasa de impuestos 2 con exención de impuestos de 12¢ Ejemplo de operación de teclas Tabla de impuestos (aplicable al impuesto añadido) Si se encuentra en una localidad que emplea una tabla de impuestos para el cálculo de los impuestos, podrá...
-
Page 91: Programacion De Funciones Auxiliares
máx. de tres dígitos Para borrar una tabla de impuestos, emplee la secuencia siguiente: Este primer número que se introduce depende de si la diferencia entre un punto de *1 Primer número: (1 ó 0) división mínimo a introducirse y el punto de división mínimo anterior no son de menos de $1,00 ni de más de 99¢. - Page 92 *2:Elemento: Tipo Número de grupo Número de grupo de comisión Estado de impuestos 4 Estado de impuestos 3 Estado de impuestos 2 Estado de impuestos 1 SICS / Normal Signo Límite de dígitos de entrada Tipo de registros de precio unitario Tipo •...
-
Page 93: Programación De Plu (Codificación De Precios) Y Subsección
Programación de PLU (codificación de precios) y subsección La función de PLU permite realizar registros rápidos con las teclas en los que el precio se busca automáticamente al introducir un código. La subsección es un tipo de “PLU abierta”, que requiere que usted introduzca un precio detrás del código de PLU. -
Page 94: Programación De Teclas Misceláneas
Programación de teclas misceláneas & Tasa para Para programar cero *: Tasa 0,00 – 100,00 (Tasa de porcentaje) 0,0000 – 9999,9999 (Tasa de conversión de divisas) Importe para Importe de descuento (máx. seis dígitos) Límite de tasa porcentual para • Los registros porcentuales que exceden al límite superior pueden suprimirse en el modo MGR. •... - Page 95 *: Elemento: Estado de impuestos 4 Estado de impuestos 3 Estado de impuestos 2 Estado de impuestos 1 Signo +/- % de artículo/ de artículo % de subtotal/ de subtotal Límite de dígitos de entrada para la tecla de descuento Cuando se programen las teclas de porcentaje, introduzca siempre 0 para H.
-
Page 96: Programación De Texto
*1:Elemento: Impresión de pie del recibo Registro de importe recibido Límite de dígitos de entrada Impresión de pie del recibo • Esta programación decide si la registradora debe imprimir un mensaje en la parte inferior del recibo cuando se usa una de estas teclas de finalización especificada. Con respecto al método de programación del mensaje del membrete del pie de recibo, consulte la sección “Mensajes de membrete”... - Page 97 Aquí, se visualizan los caracteres introducidos. Para programar la palabra “SHARP” en caracteres de tamaño doble. Cuando pulsa una tecla del número apropiado (número de código de tarea) y pulsa la tecla texto justo después de haber comenzado la programación con la tecla...
- Page 98 Texto de sección (etiqueta de artículo) s 1 P *Para programar las secciones 21 a 40, pulse la tecla de cambio de sección. Ejemplo de operación de teclas P ¡ FRUTA (Programación de FRUTA para la sección 1) Texto de PLU (etiqueta de artículo) Texto de función * Número de función: Vea la “Lista de textos de función”...
- Page 99 Lista de textos de función Número Tecla o función de función Total neto de ventas Subtotal neto de imponible 1 Total bruto de impuestos 1 Total de impuestos 1 de registros de devoluciones Total neto de impuestos 1 Exención de impuestos 1 Subtotal neto de imponible 2 Total bruto de impuestos 2 Total de impuestos 2 de registros de devoluciones...
-
Page 100: Nombres De Dependiente
• Los ajustes iniciales son los de español (cambio del ajuste de programación para selección del idioma al español). • Los elementos marcados con “*” son sólo para Canadá. • Los elementos marcados con “**” son sólo para la visualización. •... -
Page 101: Programacion Avanzada
PROGRAMACION AVANZADA Programación de número de caja registradora y de número consecutivo El número de caja registradora y el número consecutivo se imprimen en el recibo y en el registro diario. Número de caja registradora Ajuste de números consecutivos Programación 1 de selección de diversas funciones La caja registradora ofrece varias funciones detalladas como las que se mencionan a continuación. - Page 102 Selección de función para teclas misceláneas Código de tarea: 5 * Elemento: PO en el modo REG RA en el modo REG Cancelación de subtotal en el modo REG Habilitar la cancelación de subtotal en el modo REG* Cancelación indirecta en el modo REG Cancelación directa en el modo REG Disponibilidad de la tecla de devoluciones...
-
Page 103: Otras Programaciones
Selección de función para impuestos Código de tarea: 15 * Elemento: Introduzca siempre 0. Introduzca siempre 0. Introduzca siempre 0. Introduzca siempre 0. Introduzca siempre 0. Introduzca siempre 0. Disponibilidad de borrado de los impuestos en el modo REG Disponibilidad de entrada de impuestos manuales en el modo REG Otras programaciones Código de tarea: 61... -
Page 104: Programación 2 De Selección De Diversas Funciones
Código de tarea: 66 * Elemento: Impresión de un recibo después de la transacción Impresión del importe cuando el precio unitario de PLU/subsección es cero Impresión del subtotal para conversión de déficit Introduzca siempre 0. Introduzca siempre 0. Introduzca siempre 0. Impresión del mensaje del membrete en el registro diario Impresión de pie de recibo... - Page 105 Formato de impresión del mensaje del membrete Podrá seleccionar el número de líneas del mensaje del membrete, y la posición en la que se imprime en el recibo. *A: Tipo de mensaje del membrete 0: Mensaje de 3 líneas de encabezamiento sin membrete gráfico 1: Sólo membrete gráfico 2: Mensaje de 3 líneas de pie de recibo con membrete gráfico 3: Mensaje de 6 líneas de encabezamiento...
-
Page 106: Lectura De Programas Almacenados
Especificación de dependientes de instrucción para el modo de instrucción Para los detalles sobre la instrucción de dependientes, consulte el “MODO DE INSTRUCCION” en la s 86 @ Programación de la tecla AUTO — Tecla de secuencia automática Si se programan transacciones que se realizan con frecuencia o secuencias de informes para la tecla puede llamar esas transacciones y/o informes pulsando simplemente la tecla Programación para ;... -
Page 107: Modo De Instruccion
MODO DE INSTRUCCION El modo de instrucción se utiliza cuando el operador o el administrador practica las operaciones de la caja registradora. Cuando se selecciona un dependiente que está en instrucción, la máquina se establece automáticamente en el modo de instrucción. Para especificar un dependiente que deba recibir instrucción, consulte el apartado de “Especificación de dependientes de instrucción para el modo de instrucción”... - Page 108 Posición del selector de modo Elemento OPX/Z X1/Z1 Informe del total de todos los grupos en sección Informe de PLU por margen X1, Z1 X2, Z2 designado Informe de PLU por sección asociada Informe de transacciones Informe del total en el cajón Informe de dependiente...
-
Page 109: Registros De Anulacion
REGISTROS DE ANULACION El límite programado para las funciones (tales como importes máximos) puede anularse haciendo un registro de anulación en el modo MGR. Gire el selector de modo a la posición MGR. Haga el registro de anulación. CORRECCION DESPUES DE FINALIZAR UNA TRANSACCION (Modo de cancelación) Cuando necesite cancelar los registros incorrectos que los dependientes no pueden corregir (registros incorrectos que se encuentran después de finalizar una transacción o que no pueden corregirse mediante... -
Page 110: Precauciones Al Manejar La Impresora
• No toque nunca el cabezal de impresión ni el motor durante la impresión ni antes de que se hayan enfriado. Reemplazo del rollo de papel Utilice siempre rollos de papel especificados por SHARP. Si usa otros rollos de papel que no sean los especificados, pueden originarse atascos de papel y funcionar mal la caja registradora. -
Page 111: Extracción Del Papel Atascado
Pulse la tecla para hacer avanzar el papel de registro diario hasta que la parte impresa salga del paso. Corte el papel y extraiga el carrete de toma. Corte el papel detrás de la impresora y cerca del rollo de papel. Pulse la tecla hasta que el papel que queda en la impresora salga por completo. -
Page 112: Limpieza Del Cabezal De Impresión
Vuelva a poner la palanca de liberación del cabezal de impresión a su posición original. Ponga correctamente el rollo de papel siguiendo los pasos mencionados en “Instalación del rollo de papel”. Vuelva a colocar la cubierta de la impresora. Limpieza del cabezal de impresión Cuando el texto impreso se oscurece o aparece borroso, el polvo del papel puede pegarse en el cabezal de impresión. -
Page 113: Abertura Manual Del Cajón
Abertura manual del cajón Palanca Antes de solicitar el servicio de un técnico Los casos de mal funcionamiento de la columna de la izquierda de la tabla siguiente, indicados bajo el título “Fallo”, no son necesariamente averías de la registradora. Se recomienda pues consultar la sección “Comprobación”... -
Page 114: Tabla De Mensajes De Error
Tabla de mensajes de error Cuando se visualicen los siguientes mensajes de error, pulse la tecla acuerdo con la tabla siguiente. Mensaje de error ERROR REGIS. Error de registro OPE. INCRRCTA Error de operación incorrecta COD. NO PRGMD Se ha introducido un código no definido. MEMORIALLENA La memoria está... -
Page 115: Limited Warranty
In no event shall Sharp be liable, or in any way responsible, for any damages or defects in the Product which were caused by repairs or attempted repairs performed by anyone other than an authorized servicer. - Page 116 SHARP ELECTRONICS CORPORATION Sharp Plaza, Mahwah, New Jersey 07430-2135 1-800-BE-SHARP For additional information and product registration, www.sharpusa.com please visit SHARP CORPORATION Printed in China / Impreso en China ➀ KS(TINSZ2537RCZZ)