Advertisement
Available languages
Available languages
Quick Links
Owner's Manual
®
OTARY LAW
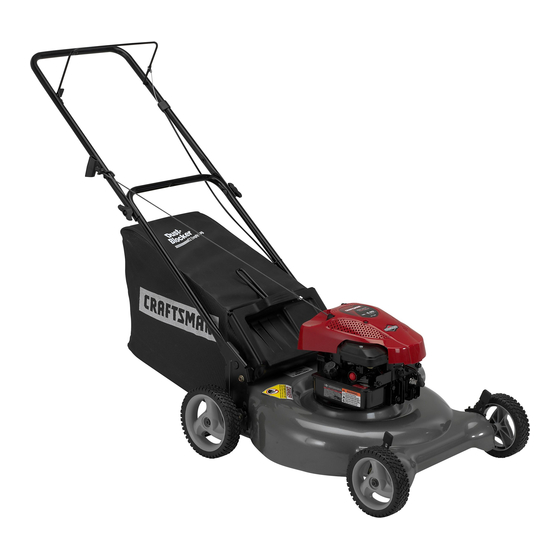
550 Series Briggs &
21" Rear-Discharge
OWER
Stratton Engine
Model No.
917.388191
. Espa_ol, p. 18
CAUTION:
Read and follow all
Safety Rules and Instructions
before operating this equipment
Sears, Roebuck and CON,Hoffman Estates, IL 60179
Visit our Craftsman website: www.searscom/craftsman
U.S.A.
Advertisement

Related Manuals for Craftsman 38819


Summary of Contents for Craftsman 38819
- Page 1 550 Series Briggs & 21" Rear-Discharge Model No. 917.388191 . Espa_ol, p. 18 CAUTION: Read and follow all Safety Rules and Instructions before operating this equipment Sears, Roebuck and CON,Hoffman Estates, IL 60179 Visit our Craftsman website: www.searscom/craftsman ® OWER Stratton Engine U.S.A.
- Page 2 FULL WARRANTY If this Craftsman Lawn Mower fails due to manufacturer workmanship within two years from the date of purchase, Parts & Repair Center or other Craftsman proves impossible)° This warranty applies for only 90 days from the date of purchase...
- Page 3 I. GENERAL OPERATION ° Read, understand, and follow all instructions on tile machine manual(s) before starting Be thorougltfy familiar with the controls and the proper use of the machine before starting. o Do not put hands or feet near or under rotating parts.
- Page 4 32°F); SAE 5W-30 (below 20 Ounces Champion RJ19LM or J19LM 35-40 ft. Ibso will be found on a decal on the rear of the lawn mower and date of purchase blade with safety devices. Check regularly. free of grass, leaves,...
- Page 5 Repair Protection Agreements Congratulations on making a smart pur- chase. Your new Craftsman® designed and manufactured for years of dependable operatiom But like all prod- ucts, it may require repair from time to time. Tllat's when having a Repair Protec-...
- Page 6 IMPORTANT: This lawn mower WITHOUT OIL OR GASOLINE in the engine. Your new lawn mower has been as- sembled at the factory with the excep- tion of those parts left unassembled shipping purposes. To ensure...
- Page 7 KNOW YOUR LAWN MOWER READTHIS OWNER'SMANUALANDALL SAFETYRULESBEFOREOPERATING YOUR LAWNMOWER, Comparethe illustrationswith your lawn mowerto familiarize yourselfwith the locationof variouscontrolsand adjustments°Savethis manualfor future reference, These symbols may appear on your lawn mower or in literature supplied with the product. [.earn and understand CAUTION...
- Page 8 LEVER FORWARD TO RAISE MOWER TO CONVERT MOWER Your lawn mower was shipped used as a mulchero o Lift rear door of the lawn mower and place the grass catcher onto the door pivot pins. while oper- • To convert...
- Page 9 1, Be surelawnmoweris level, 2. Removeoil dipstickfromoil fill spout. 3. You receivea containerof oilwith the uniL Slowlypourthe entirecontainer down the oilfill spoutinto the engine. NOTE: Initialoilfill requiresonly 18 oz. due to residualoil in enginefrom the manufacturers I00% qualitytesting. Whenchangingoil you may need20 oz. 4.
- Page 10 At this time the grass has dried, yet the newly cut area will not be exposed to direct sunlight. ° For best results, adjust the lawn mower cutting height so that the lawn mower cuts off only the top one4hird grass blades.
- Page 11 •*** Use a scraper 5 _And after each 5 hours of use to clean under deck GENERAL RECOMMENDATIONS The warranty on this lawn mower does not cover items that have been subjected operator abuse or negligence. full value from the warranty,...
-
Page 12: Lawn Mower
BLADE Disconnect spark plug wire from spark plug and place wire where come in contact with plug_ 2. Turn lawn mower on its side° Make sure air filter and carburetor Use a wood block between mower housing to prevent turning... - Page 13 ° Clean engine often to keep trash from accumulating, hotter and shortens • Keep finished of all gasoline, o We do not recommend hose to clean lawn mower unless the electrical system, carburetor are covered out. Water in engine can result in short* ened engine life..
- Page 14 ,_ WARNING: To avoid serious before performing any service adjustments: t .. Release control bar and stop engine.. Make sure the blade and alI moving parts have completely stopped. Disconnect spark plug wire from spark plug and place wire where come in contact with plug.
- Page 15 30 daysor more. LAWN MOWER When lawn mower is to be stored for a period of time, clean it thoroughly, remove all dirt, grease, leaves, etc_ Store in a clean, dry area.
-
Page 16: Troubleshooting
IMPORTANT: Never cover mower while engine and exhaust &CAUTION: Never store the lawn mower with gasoline in the tank inside a building where fumes may reach an open flame or spark. - Page 17 1o Raise cutting Replace 3_ Clean grass catcher, not venting air. 1. Raise cutting 2_ Raise rear of lawn mower or cutting blade housing in grass. higher. too full 3_ Empty grass catcher.
- Page 18 Sears, a! Centro de Repuestos y Reparaci6n, o a otro comercio donde se vendan los equipos Craftsman, a efectos de que se la reparen sin costo (o bien se la reemplacen, en caso que no sea posibfe repararla)o Siesta Segadora llega a ser utilizada con fines comerciales o arrendada, la presente garantia tendr&...
- Page 19 I. OPERAClON o Antes de empezar, debe familiarizarse completamente con los controles y el uso correcto de la maquina Para esto, debe leer y comprender todas las instrucciones que aparecen en [a maquina yen los manuales de operaciSn.. o No ponga las manos o los pies cerca o debajo de las partes rotatorias.
- Page 20 • Nunca repostar la m_.quina al interior de un local° ° Nunca guardar la m,_quina o el contenedor de gasolina donde hay una llama abierta, chispa o luz pi!oto como una caldera u otros dispositivos, o Nunca llenarcontenedores en un vehiculo, en un camiSn o caravana con un forro de pl#.stico, Cofocar siempre los contenedores en el suelo lejos de su veh[culo antes de Ilenar,...
-
Page 21: Mantenimiento
Acuerdos Congratulacioaes por su buena cornpra. Su nuevo producto Craftsman@ est,_ diseRado y fabricado para funcionar de modo fiabfe por muchos arcs. Pero como todos los productos, puede necesitar atguna reparaci6n de tanto en tanto. En este caso tenet un Acuerdo de Protecci6n para la Reparaci6n puede haceries ahorrar dinero y fastidios. - Page 22 Lea estas instrucciones y este manual comple- tamente antes de tratar de montar u operar su segadora nuevao IMPORTANTE: Este cortac_sped viene SIN ACErTE O GASOLtNA en el motorr Su segadora nueva ha sido montada en la f,_brica con la excepci6n de aquellas partes que se dejaron sin montar por razones de envi'o.
- Page 23 FAMILIARICESE CON SU SEGADORA LEA ESTE MANUAL DEL DUENO Y LAS REGLAS DE SEGURIDAD ANTES DE OPARAR SU SEGADORA_ Compare las ilustraciones con su segadora para familiarizarse con la ubicaci6n de los diversos controles y ajustes. Guarde este manual para referencia en el futuro, Estos sfmbolos pueden apareser sobre su segadora o en la t]teratura proporcionada producto.
- Page 24 La operaci6n de cuatquier segadora puede hacer que salten objetos extraRos dentro de sus ojos, 1o que puede producir da_,os graves en 6stos, Siempre use anteojos de seguridad o protecci6n para los ojos mientras opere su segadora o cuando haga ajustes o reparaclones_ Recomendamos gafas o una mascara de seguridad de visiSn amptfa de seguridad usada sobre las gafas, COMO...
- Page 25 1, Asegt_rese quelasegadora e st_nivelada,, 2, Remueva l avarilamedidora d eaceite del tubodedesarga deaceite, 3, Usted recibe unenvase deaceite conta unidad.Vierta lentamente e lenvase entero deaceite eneltuboderelteno delmotor. AVlSO: E tterrapl_n inicial d elaceite requiere solamente 1 8onzas debido alaceite residual enel motor dela prueba decalidad de 100% delfabricante, AIcambiar e l aceite puede necesitar 20onzas,...
- Page 26 Los pores en los recogedores de c_sped de tela pueden Ilenarse con mugre y poivo con el use y los recogedores recaudar&n menos cSsped. Para evitar 6ste, rocfe el recogedor con la manguera de agua regularmente y d_jelo secarse antes de usarlo. •...
- Page 27 PROGRAMA MAHTENI]MmENTO Revisar st hay Sujel_do_es Suellos Limpiadlnspecciom_r et Recogedor de Cc_s_ed * Controlar los Neum_,ticos Contro;ar las Ruedas MotricQs "" Limpiar la Segadora ... Llrnplar debaio ta Cubierla de"la T_'ansmisl6_ -* Revisar 1_ Correas y las Po_eas lmpuisadas "' R R_vis_"...
- Page 28 SEGADORA Siempre observe las reglas de seguridad cu- ando haga el mantenimiento. LLANTAS ° Mantenga las llantas sin gasolina, aceite o substancias qufmicas para control de insec- tos que pueden daP, a r la goma.. o Evite los tocones, las piedras, las grietas pro- fundas, los objetos afilados y otros petigros que pueden daP, a r alas llanta&...
-
Page 29: Para Cambiar Elaceite Delmotor
Cambie elaceite despu_s d e25horasde operaci6n o porIomenos unavezal aRo sila segadora s eutiliza menos25horasela5o. Revise elnivei d elaceite delcarter antes de arrancar e lmotor y despu6s d ecadacinco(5) horas deusocontinuado, Apriete eltapSn det aceiteenforma segura cadavezquerevise el nivet d elaceite.. PARA CAMBIAR ELACEITE DELMOTOR 1. - Page 30 _,ADVERTENCIA: Para evitar tesi6nes serias, antes de dar calquier servico o de hacer ajustes: Suelte la barra de control y pare el motor. 2. Aseg0rese que ta cuchilla y que todas las partes movibles se hayan detenido comple- tamenteo Desconecte et alambre de ta bujfa y p6n- galo en donde no pueda entrar en contacto con 6sta..
- Page 31 lnmediatamente prepare su segadora para el almacenamiento al final de cada temporada o si la unidad no se vaa usar por 30 dfas o mdts, SEGADORA Cuando se vaa guardar la segadora por cierto perfodo de tiempo, lfmpiela cuidadosamente, remueva toda Ia mugre, la grasa, las hojas, etco Gu_rdela en un #,rea limpia y seca.
- Page 32 ACEITE DEL MOTOR Drene el aceite (con el motor caliente) y c#.m- bielo con aceite de motor iimpio, (Vea "MO- TOR" en la secci6n de Mantenimento de este manuals) ClLINDRO Remueva la bujfa,, 2, Vacfe una onza (29 mt) de aceite a tray,s del agujero de la bujfa en el cilindroo 3, Tire la manilla de arranque lentamente unas cuantas veces para distribuir el aceiteo...
- Page 33 SOLUClON DE PROBLEMAS est_ dirigido a un centro de servico PROBLEMA CAUSA Falta de CucMlla desgastada, dobtada o suelta, fuerza Altura de las ruedas dispareja. 3, Vefocidad del motor lenta_ 4_ AcumulaciSn de c_sped, hojas o basura debajo de la segadora, 5,, Demasiado aceite en motor, 6_ Velocidad de recorrido demasiado r&pida.,...
- Page 34 • "\...
- Page 35 I',,. OO la.l IJ.l • ____ ,-.-,, Iz0 O_ _.00_ Zm"_ _o X __0_ __00_ _00_00 .,-, "_E _r'7 8 c_ "o II m ,,-I r- 0 _jn- *" c_ _ u" © _OOoo XXXX...
- Page 36 BRIGGS & STRATTON 4-CYCLE 48 SHORT BLOCK '1058 OPERATOR'S 524_ 635 _'_ Engine Power Rating Information The gross power rating for individual gas engine models is labeled in accordance with SAE (So- ciety of Automo-tive Engineers) code Jl1940 (Smal! Engine Power & Torque Rating Procedure), and rating performance has been obtained and corrected in accordance with SAE J1995 (Revision 2002-5)..
- Page 37 BRIGGS & STRATTON 4-CYCLE ENGINE MODEL NUMBER 10T802-1244-B1 356 ENGINE GASKET SET 842 O 1095 VALVE GASKET SET 868 _j...
- Page 38 BRIGGS & STRATTON 4-CYCLE ENGINE MODEL NUMBER 10TB02-1244-B1 !63 O e33 @ !218 lg0A ! 3 3__._ 334 _'[ _t...
- Page 39 BRIGGS & STRATTON 4-CYCLE ! 1036 EMISSIONS LABEL ENGINE MODEL _69_ 12tl 1210 689 ¢"_ 597 _ NUMBER 10TS02-1244-B1...
- Page 40 BRIGGS & STRATTON 4-CYCLE KEY PART DESCRIPTION 699650 Cylinder Assembly 399269 Kit-Bushing/Seal (Magneto Side) 299819s Seat-Oil (Magneto Side) 698691 Sump-Engine 790169 Head-Cylinder 698747 Gasket-Cylinder 791781 Breather Assembly 695890 Gasket-Breather 691666 Screw (Breather Assembly Tube-Breather 691245 692218 Gasket-Crankcase 691640 Screw (Cylinder Head) 691680 Plug-Oil Drain 796217...
- Page 41 BRIGGS & STRATTON 4-CYCLE PART DESCRIPTION 691837 Screen-Carburetor 795478 Diaphragm-Carburetor 690272 Washer (Governor Crank) 691236 Cup-Flywheel 692299 Plate-Pawl Friction 281505s PawI-Ratchet 691251 (Governor Control Lever) 692040 Dipstick 691876 Seal- Dipstick Tube 691320 Tube-Dipstick 692189 Grommet 691417 Screw (Air Cleaner) 698369 Filter-Air Cleaner Foam 698472 Cleaner-Air...
- Page 42 SERVICE NOTES...
- Page 43 SERVICE NOTES...
-
Page 44: Need More Help
NEED MORE HELP? You'll find the answer and more on managemyhome.com - Find this and at[ your other product - Get answers from our team of home experts, - Get a personalized maintenance - Find information and toots to help with manage home brought to you by SBarg...