Table of Contents
Advertisement
Advertisement
Table of Contents

Related Manuals for Samsung MC17T8000CS


Summary of Contents for Samsung MC17T8000CS
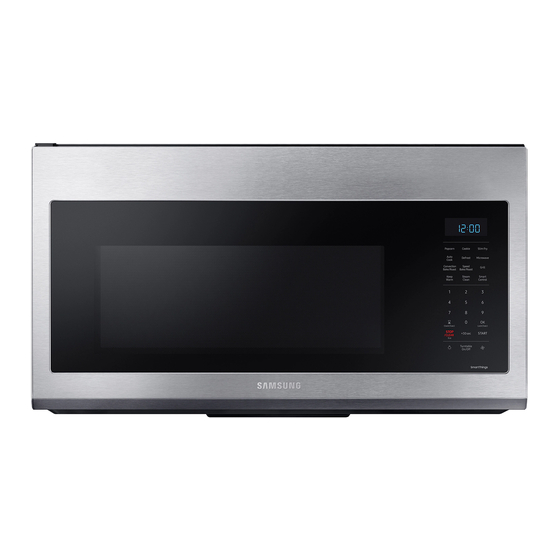
- Page 1 Microwave Oven User manual MC17T8000C*...
-
Page 2: Table Of Contents
Contents Important safety instructions What You Need To Know About Safety Instructions Precautions To Avoid Possible Exposure To Excessive Microwave Energy Important Safety Symbols And Precautions State Of California Proposition 65 Warning Grounding Instructions Use Of Extension Cords Critical Installation Warnings Installation Cautions Critical Usage Warnings Usage Cautions... - Page 3 Cookware guide Recommended cooking utensils Limited use items Not recommended Testing utensils Cooking guide Cooking techniques Recommended cooking utensils Guide for cooking eggs in your microwave Guide for cooking vegetables in your microwave Cleaning and maintaining your microwave oven Cleaning the exterior Cleaning under your microwave oven Cleaning the control panel Cleaning the door and door seals...
-
Page 4: Important Safety Instructions
Important safety instructions Congratulations on your new Samsung microwave oven. This manual contains important information on the installation, use and care of your appliance. Please take time to read this manual to take full advantage of your microwave oven’s many benefits and features. -
Page 5: Important Safety Symbols And Precautions
IMPORTANT SAFETY SYMBOLS AND PRECAUTIONS What the icons and signs in this user manual mean: WARNING Hazards or unsafe practices that may result in severe personal injury or death. CAUTION Hazards or unsafe practices that may result in minor personal injury or property damage. NOTE To reduce the risk of fire, explosion, electric shock, or personal injury when using your microwave oven, follow these basic safety precautions. - Page 6 Important safety instructions 1. FCC Notice FCC STATEMENT: This equipment generates and uses ISM frequency energy and if not installed and used properly, that is in strict accordance with the manufacturer’s instructions, may cause interference to radio and television reception. It has been type tested and found to comply with limits for ISM Equipment pursuant to part 18 of FCC Rules, which are designed to part 18 of FCC Rules, which are designed to provide residential installation.
- Page 7 To ensure compliance, operations at closer than this distance is not recommended. WARNING Any changes or modifications to this unit not expressly approved by the party responsible for compliance could void the user’s authority to operate the equipment. 2. IC Notice The term “IC”...
- Page 8 Important safety instructions When using any electrical appliance, basic safety precautions should be followed, including the following: WARNING To reduce risk of burns, electric shock, fire, personal injury or exposure to excessive microwave energy: 1. Read all safety instructions before using the appliance. 2.
- Page 9 16. When cleaning surfaces of the door and oven that come together when the door closes, use only mild, nonabrasive soaps, or detergents applied with a sponge or soft cloth. Unplug the plug before cleaning. 17. To reduce the risk of fire in the oven cavity: a.
-
Page 10: Grounding Instructions
Important safety instructions CAUTION 1. Clean Ventilating Hoods Frequently - Grease should not be allowed to accumulate on the hood of the filter. 2. When flaming foods under the hood, turn the fan on. 3. Use care when cleaning the vent-hood filter. Corrosive cleaning agents, such as lye- based oven cleaner, may damage the filter. -
Page 11: Use Of Extension Cords
USE OF EXTENSION CORDS A short power-supply cord is provided to reduce the risk of your becoming entangled in or tripping over a longer cord. Longer cord sets or extension cords are available and you can use them if you exercise care. If you use a long cord or extension cord: 1. -
Page 12: Critical Installation Warnings
Important safety instructions CRITICAL INSTALLATION WARNINGS This appliance must be installed by a qualified technician or service company. Failing to have a qualified technician install the oven may result in electric shock, • fire, an explosion, problems with the product, or injury. Unpack the oven, remove all packaging material and examine the oven for any damage such as dents on the interior or exterior of the oven, broken door latches, cracks in the door, or a door that is not lined up correctly. -
Page 13: Installation Cautions
Do not install this appliance in a humid, oily, or dusty location, or in a location exposed to direct sunlight or water (rain drops). • This may result in electric shock or fire. Plug the power plug into the wall socket firmly. Do not use a damaged power plug, damaged power cord, or loose wall socket. -
Page 14: Critical Usage Warnings
Important safety instructions CRITICAL USAGE WARNINGS If the microwave appliance is flooded, please contact your nearest service center. Failing to do so may result in electric shock or fire. Read and follow the specific “Precautions to Avoid Possible Exposure to Excessive Microwave Energy”, found in the beginning of this Safety Information Section. - Page 15 If any foreign substance such as water enters the microwave, unplug it, and then contact your nearest service center. • Failing to do so may result in electric shock or fire. Do not touch the power plug with wet hands. •...
-
Page 16: Usage Cautions
Important safety instructions USAGE CAUTIONS If the surface of the microwave is cracked, turn it off. • Failing to do so may result in electric shock. Dishes and containers can become hot. Handle with care. Hot foods and steam can cause burns. Carefully remove container coverings, directing steam away from your hands and face. - Page 17 Do not stand on top of the microwave or place objects (such as laundry, oven covers, lighted candles, lighted cigarettes, dishes, chemicals, metal objects, etc.) on the appliance. • Items, such as a cloth, may get caught in the door. •...
-
Page 18: Critical Cleaning Instructions
Important safety instructions CRITICAL CLEANING INSTRUCTIONS Do not clean the appliance by spraying water directly onto it. Do not use benzene, thinner, or alcohol to clean the appliance. • This may result in discoloration, deformation, damage, electric shock, or fire. Before cleaning or performing maintenance, unplug the appliance from the wall socket and remove food waste from the door and cooking compartment. -
Page 19: Setting Up Your New Microwave Oven
(Top & Wall) NOTE If you need an accessory marked with an * (asterisk), please contact the Samsung Call Center using the phone number listed on the last page of this manual or visit our on-line parts web site at www.samsungparts.com. -
Page 20: Setting Up Your Microwave Oven
Setting up your new microwave oven Setting up your microwave oven 1. Open the door by pulling the handle on the right side of the door. 2. Wipe the inside of the oven with a damp cloth. damp cloth 3. Install the pre-assembled ring into the indentation at the center of the microwave oven. -
Page 21: Checking The Control Panel
Checking the control panel 01 Popcorn Button 02 Cookie Button 03 Slim Fry Button 04 Auto Cook Button 05 Defrost Button 06 Microwave Button 07 Convection Bake/Roast Button 08 Speed Bake/Roast Button 09 Grill Button 10 Keep Warm Button 11 Steam Clean Button 12 Smart Control Button 13 Number Pad 14 Kitchen Timer/Clock Setting Button... -
Page 22: Clock Settings
Setting up your new microwave oven Clock Settings Your microwave oven is equipped with a built-in clock. Set the clock when first installing your microwave oven or after a power failure. The time is displayed whenever the microwave oven is not being used. 1. -
Page 23: Eco Mode
Eco mode Eco Mode reduces standby power usage. When you touch the STOP/CLEAR Eco button once, the display will go out and the microwave shifts to a mode which minimizes power usage. To cancel the Eco Mode, touch any other button. Smart Control To use the microwave oven’s Smart Control, you must download the SmartThings app to a mobile device. -
Page 24: Voice Control
To use the microwave oven’s Voice Control function, you need Bixby / Amazon Alexa App / Google Assistant App on your mobile device. • Bixby : Start conversation with Bixby on SAMSUNG mobile by saying “Hi Bixby” or by pressing the side key. - Page 25 (Change Cook 1 hour Time) • Amazon Alexa & Google Assistant : Samsung smart home appliances are supported by SmartThings skill in Alexa & action in Google Assistant. Installation Guide Here’s how to link SmartThings account into Amazon Alexa or Google Assistant.
- Page 26 Setting up your new microwave oven Function “Alexa” “Ok Google” • Set the microwave to Microwave • Set the microwave to Grill • Set the microwave to Convection bake • Set the microwave to Convection roast • Set the microwave to Keep warm •...
- Page 27 Function “Alexa” “Ok Google” • Turn off the microwave • Turn off the microwave Turn Off/Stop • Stop the microwave • Stop the microwave Pause • Pause the microwave • Pause the microwave • Resume the microwave Resume • Resume the microwave •...
-
Page 28: Auto Connectivity
Auto Connectivity function lets you quickly connect the hood via Wi-Fi with a compatible Samsung cooktop after the hood and cooktop have been paired. To turn the function on, press the Auto Connectivity button in SmartThings App. To disconnect the hood and cooktop, press the Auto Connectivity button again. -
Page 29: My Settings
My settings You can customize your new microwave oven to suit your preferences. To customize: 1. Touch the 0 button for 3 seconds. Touch the number pad to select a function you want to customize (Refer to the table below.) and then touch OK button. - Page 30 Setting up your new microwave oven NOTE • If you change your mind while adjusting a setting, touch the STOP/CLEAR Eco button to cancel, and then adjust the setting again. • If there is a power interruption, you will need to reset ‘Demo Mode’ and ‘Filter Remind’ options.
-
Page 31: Using Your Microwave Oven
Using your microwave oven Kitchen Timer Your microwave has a built-in timer function - the Kitchen Timer. Use the Kitchen Timer for timing up to 99 minutes, 99 seconds. 1. Touch the button. 2. Use the number pad to set the time you want the timer to run. -
Page 32: Cooktop Lamp (High/Low/Off)
Using your microwave oven Cooktop Lamp (High/Low/Off) Touch the button to turn the cooktop lamp on or off. Touch the button once for high, twice for low, and three times to turn the cooktop lamp off. On the display Hi, Lo, OFF will appear instead of High, Low, Off. -
Page 33: 30Sec Button
+30sec button This feature offers a convenient way to increase cooking time. +30sec feature is only for manual cooking mode. 1. In standby mode, touching +30sec button will add 30 seconds of microwave mode at 100 % power. (Power level can not be changed in this way.) 2. -
Page 34: Popcorn
Using your microwave oven Popcorn You can cook popcorn easily using the Popcorn button. You do not need to set either the cooking time or the power level. 1. Put a bag of unpopped popcorn on the tray. 2. Touch the Popcorn button. 3. -
Page 35: Cookie
Cookie You can cook cookies evenly using the Cookie button. A high speed fan circulates hot air inside the oven to heat food evenly. For best results, it is recommended to preheat and to grease the ceramic enamel plate and use it on the low rack. The ceramic enamel plate will shorten cooking time and the low rack helps heated air to move around the food. -
Page 36: Slim Fry
Using your microwave oven Slim Fry The Slim Fry menu contains pre-set cooking programs for 9 different items. You do not need to set the cooking times or the power level. 1. Place the food on the tray or the rack. (See Accessory Combination Guide on page 33) 2. -
Page 37: Example For Slim Fry Operation
Example for Slim Fry operation To set SF-4. Frozen Chicken Nuggets with 2 servings for example, follow the instructions below. Touch Display shows Time counting down English 37... - Page 38 Using your microwave oven Cook Accessory Food Amount Directions Type Place frozen hash brown 1 2 servings : 4ea Frozen patties on greased ceramic Hash Brown enamel tray. Put tray on the 2 4 servings : 8ea Patties center of glass tray. 2 servings : 8 oz, Place frozen french fries on 227 g...
-
Page 39: Auto Cook
Auto Cook The Auto Cook menu contains pre-set cooking programs for 71 different items. You do not need to set the cooking times or the power level. 1. Place the food on the tray or the rack. (See Accessory Combination Guide on page 33) 2. -
Page 40: Example For Auto Cook Operation
Using your microwave oven Example for Auto Cook operation To set A-23. Frozen Waffles with 3 servings for example, follow the instructions below. Touch Display shows Time counting down English... - Page 41 Cook Accessory Category Food Amount Directions type 2 Slices Put the pizza on a (3 - 4 oz, microwave-safe plate 85 - 113 g/ with wide end of slices each) towards the outside Reheat Pizza edge of the plate. Do Slices 4 Slices not let slices overlap.
- Page 42 Using your microwave oven Cook Accessory Category Food Amount Directions type 1 serving : 8 oz, 227 g Use only refrigerated food. 2 servings : Pour into a deep ceramic 16 oz, 454 g Reheat Soup, plate or bowl. Cover with lid 3 servings : broth or vented plastic wrap.
- Page 43 Cook Accessory Category Food Amount Directions type 1 serving : Wash and clean broccoli 1/2 cup and prepare florets. Put into a microwave-safe 2 2 servings : 1 cup ceramic or glass bowl and add 1/2 to 2 oz Broccoli 3 servings : 1.5 (15 - 60 ml) of water cups...
- Page 44 Using your microwave oven Cook Accessory Category Food Amount Directions type 1 serving : Wash and clean frozen 1/2 cup broccoli florets. Put into a microwave-safe ceramic 2 2 servings : 1 cup or glass bowl and add 1/2 Broccoli to 2 oz (15 - 60 ml) of 3 servings : 1.5 water (1/2 oz or 15 ml per...
- Page 45 Cook Accessory Category Food Amount Directions type Pierce each potato several 2 ea (8 - 10 oz, times with a fork. Place on 227 - 283 g/each) the turntable in a spoke- Baked Potato like fashion. After cooking, 4 ea (8 - 10 oz, let the potatoes stand for 227 - 283 g/each) 3 - 5 minutes.
- Page 46 Using your microwave oven Cook Accessory Category Food Amount Directions type Frozen Place pizza on rack. pizza, - 6 inches Place the low rack on individual 6 ceramic enamel tray. inch Frozen Place pizza on rack. Pizza, - 12 inches Place the low rack on regular, 12 ceramic enamel tray.
- Page 47 Cook Accessory Category Food Amount Directions type Remove wrapping and cut 1 stick : 4 oz, butter in half vertically. 113 g Place butter in dish, cover Melt Butter with wax paper. Stir well 2 sticks : 8 oz, after finishing and let 227 g stand 1 - 2 minutes.
- Page 48 Using your microwave oven Cook Accessory Category Food Amount Directions type 2 ea Place chicken breast on (6 oz, 170 g/each) high rack. Place the rack on Chicken Breast ceramic enamel tray. When 4 ea the oven beeps, flip chicken (6 oz, 170 g/each) and re-start the oven.
- Page 49 Cook Accessory Category Food Amount Directions type Place beef on low rack. 1 2 lbs, 907 g Place the rack on ceramic Roast Beef enamel tray. When the oven beeps, flip beef and re-start 2 3 lbs, 1361 g the oven. 2 servings : Place beef in microwave 0.5 lb, 227 g...
-
Page 50: Defrost
Using your microwave oven Defrost Remove all packaging material before defrosting. Place meat, poultry, fish, bread, etc. on a turntable (glass tray). General defrosting instructions: 1. Place the food on the turntable. 2. Touch the Defrost button. 3. To select the number that corresponds to the food you want to defrost, touch the number pad. - Page 51 For specific instructions for different kinds of food, see the table below. Cook Time Food Amount Directions (Min) Shield the edges with aluminium foil. Flip the meat when the oven beeps. This program is suitable for lamb, pork, steaks, chops, and ground 0.1 - 6.0 lbs Meat 10 - 30...
-
Page 52: Microwave
Using your microwave oven Microwave Microwave mode can operate with One-stage cooking mode and Multi-stage cooking mode (maximum of 2 stages). You can also change power level (10-100) if needed. 1. Touch the Microwave button. (You can skip this step and start at the next step.) 2. -
Page 53: Convection Bake/Roast
Convection Bake/Roast The Convection Bake/Roast mode uses dry heat to cook and brown food. A high speed fan circulates hot air inside the oven to heat food quickly and evenly. When you cook using convection, you would generally use the low rack. 1. -
Page 54: Speed Bake/Roast
Using your microwave oven NOTE • If the oven reaches the temperature setting, ‘Beep’ sound will occur in both preheat and cooking mode. • To maintain a constant temperature, keep the oven door closed while the food is cooking. Open as infrequently as possible. •... -
Page 55: Cookware For Cooking With Speed Bake/Roast
NOTE • This mode combines microwave energy with hot air. This combination reduces the cooking time while giving the food a brown and crispy surface. • The vent fan operates at low speed while the oven operates in Speed Bake/Roast mode. Cookware for cooking with speed bake/roast Use only cookware that is specially manufactured for microwave ovens. -
Page 56: Speed Bake/Roast Cooking Guide
Using your microwave oven Speed Bake/Roast Cooking Guide Use the cooking mode, power levels, and times in this table as guides for speed cooking. NOTE Always use oven gloves when taking the food out of the microwave oven. Type Food Amount Mode Time (Min) -
Page 57: Grill
Type Food Amount Mode Time (Min) Directions Place the chicken nuggets on Chicken 5 - 10 ea Speed Roast 30 % 5 - 10 the ceramic enamel tray, then Nuggets place the tray on the high rack. Place the chicken wings on the Snack, Chicken 10 - 20 ea... -
Page 58: Keep Warm
Using your microwave oven Keep Warm You can keep cooked food warm in your microwave oven for up to 99 minutes and 99 seconds. 1. Touch the Keep Warm button. 2. Enter the time by touching the number pad. If you don’t set the cook time, your oven will maintain the Keep Warm function for 99 minutes. -
Page 59: Steam Clean
Steam Clean The steam provided by the steam clean system will soak the cavity surface. After using the steam clean function, you can easily clean the cavity of the oven. 1. Open the door. 2. Carefully pour about 2fl.oz. of water into a wide plate. -
Page 60: Cookware Guide
Cookware guide To cook food in your microwave oven, microwaves must be able to penetrate the food without being reflected or absorbed by the dish. It is important to choose the correct cookware, therefore look for cookware that is marked microwave-safe. -
Page 61: Testing Utensils
Testing utensils If you are not sure whether a dish is microwave-safe or not, you can perform this test: 1. Fill a 1 cup glass measuring cup with water and put it inside your oven, next to the dish you want to test. 2. -
Page 62: Cooking Guide
Cooking guide Microwave energy actually penetrates food and is attracted to and absorbed by the water, fat, and sugar molecules in the food. The microwaves cause the molecules in the food to move rapidly. The rapid movement of these molecules creates friction and the resulting heat cooks the food. -
Page 63: Recommended Cooking Utensils
Recommended cooking utensils • Dense foods, such as potatoes, take longer to heat than lighter foods. Food with a delicate texture should be heated at a low power level to prevent it from becoming tough. • Altitude and the type of cookware you are using can affect cooking time. When trying a new recipe, use the minimum cooking time and check the food occasionally to prevent overcooking. -
Page 64: Guide For Cooking Vegetables In Your Microwave
Cooking guide Guide for cooking vegetables in your microwave • Vegetables should be washed just before cooking. Often, no extra water is needed. If you are cooking dense vegetables such as cubed potatoes, carrots, or green beans, add about ¼ cup water. •... -
Page 65: Cleaning And Maintaining Your Microwave Oven
Cleaning and maintaining your microwave oven Keeping your microwave oven clean improves its performance, wards off unnecessary repairs, and lengthens its life. Cleaning the exterior It’s best to clean spills on the outside of your microwave oven as they occur. Use a soft cloth and warm, soapy water. -
Page 66: Cleaning The Interior
Cleaning and maintaining your microwave oven Cleaning the interior CAUTION To avoid injury, ensure that the microwave oven has cooled down before cleaning it. CAUTION Remove the glass tray from the oven when cleaning the oven or tray. To prevent the tray from breaking, handle it with care and do not put it in water immediately after cooking. -
Page 67: Replacing The Cooktop/Night Light
Replacing the cooktop/night light When replacing the cooktop/night light, make sure that you are wearing gloves to avoid injury from the heat of the bulb. 1. Unplug the oven or turn off the power at the main power supply. 2. Remove the screw from the light cover and lower the cover. -
Page 68: Cleaning The Grease Filter
Cleaning and maintaining your microwave oven Cleaning the grease filter Your microwave oven has two metal reusable grease filters. The grease filters should be removed and cleaned at least once every four months or as required. NOTE Your microwave oven has a filter reminder function. See page 30 for details. WARNING To avoid risk of personal injury or property damage, do not operate the oven hood without the filters in place. -
Page 69: Replacing The Charcoal Filter
If your oven is vented to the inside, the charcoal filter should be replaced every 6 to 12 months and more often if necessary. The charcoal filter cannot be cleaned. To order a new charcoal filter, contact the Parts Department at 1-800-627-4368 or your Samsung dealer. You can also order online at www.samsungparts.com 1. -
Page 70: Troubleshooting
Check points If you encounter a problem with your oven, first check the table below and try the recommendations. If a problem persists, or if an information code keeps appearing on the display, contact a local Samsung service center. Problem Cause... - Page 71 Problem Cause Action There is no power Power is not supplied. Make sure power is supplied. to the oven. Confirm the microwave is plugged in. Check your fuses or circuit breakers. There is a popping Cooking food in a sealed container Do not cook food in sealed sound during or using a container with a a tight...
- Page 72 Troubleshooting Problem Cause Action The thaw function The oven may not work if too much To test the oven, put one cup of does not work. food is being thawed or improper water in a microwave-safe container, cookware is being used. put the container in the oven, and then run the microwave for 1-2 minutes to check whether the water...
- Page 73 Problem Cause Action The brightness Brightness changes depending on Power output changes during inside the oven power output changes according to cooking are not malfunctions. This is varies. function. not an oven malfunction. Cooking is finished, To ventilate the oven, the cooling This is not an oven malfunction.
- Page 74 Troubleshooting Problem Cause Action Oven The oven does not The door is open. Close the door and try again. heat. Smoke comes out During initial operation, smoke may This is not a malfunction. After you during preheating. come from the heating elements run the oven 2-3 times, it should when you first use the oven.
-
Page 75: Information Codes
C-F0 communications failure. The oven has failed to Unplug the power cord of the oven, sense the opening or C-A1 and contact a local SAMSUNG Customer closing of the damper for Care Center. 1 minute. Only occurs when C-F1 EEPROM Read or Write is not working. -
Page 76: Appendix
Appendix Specifications Model MC17T8000C* Oven Cavity 1.7 cu ft Controls 10 power levels, including Defrost Timer 99 minutes, 99 seconds Power Source 120 VAC, 60 Hz Power Consumption 1700 Watt Microwave / 1750 Watt Heater Microwave Power Output 950 Watts Cook Top Light LED lamp ( 2 EA ) Oven Light... -
Page 77: Warranty
If the product is located in an area where service by a SAMSUNG authorized servicer is not available, you may be responsible for a trip charge or required to bring the product to a SAMSUNG authorized service center for service. - Page 78 • Broken or lost tray, guide roller, coupler, filter, or wire rack Parts that SAMSUNG has determined can be replaced by the user may be sent to the customer for installation. In SAMSUNG’s discretion, an authorized servicer can be dispatched to perform such installation.
- Page 79 PROFITS, FAILURE TO REALIZE SAVINGS OR OTHER BENEFITS REGARDLESS OF THE LEGAL THEORY ON WHICH THE CLAIM IS BASED, AND EVEN IF SAMSUNG HAS BEEN ADVISED OF THE POSSIBILITY OF SUCH DAMAGES. Some states do not allow exclusion or limitation of incidental or consequential damages, so the above limitations or exclusions may not apply to you.
- Page 80 * Requires reader to be installed on your smartphone Scan this with your smartphone Please be advised that the Samsung warranty does NOT cover service calls to explain product operation, correct improper installation, or perform normal cleaning or maintenance. QUESTIONS OR COMMENTS?