Table of Contents
Advertisement
Quick Links
Operation Manual
You must read the Usage and Safety Precautions before use.
©2023 ZOOM CORPORATION
Copying or reprinting this manual in part or in whole without permission is prohibited.
Product names, registered trademarks and company names in this document are the property of their respective companies. All trademarks and
registered trademarks in this document are for identification purposes only and are not intended to infringe on the copyrights of their respective owners.
Proper display is not possible on grayscale devices.
Advertisement
Table of Contents

Related Manuals for Zoom MULTISTOMP MS-50G+


Summary of Contents for Zoom MULTISTOMP MS-50G+
- Page 1 Operation Manual You must read the Usage and Safety Precautions before use. ©2023 ZOOM CORPORATION Copying or reprinting this manual in part or in whole without permission is prohibited. Product names, registered trademarks and company names in this document are the property of their respective companies. All trademarks and registered trademarks in this document are for identification purposes only and are not intended to infringe on the copyrights of their respective owners.
-
Page 2: Notes About This Operation Manual
Notes about this Operation Manual You might need this manual in the future. Always keep it in a place where you can access it easily. The contents of this document and the specifications of the product could be changed without notice. •... -
Page 3: Terms Used In This Manual
Terms used in this manual Patch memory Patch memories store effects along with their on/off states and parameter setting values, allowing easy recall. Effects are saved and recalled in units of patch memories. Up to 6 effects can be added to a patch memory, and up to 100 patch memories can be stored. -
Page 4: Table Of Contents
Contents Notes about this Operation Manual........................2 Terms used in this manual............................3 MS-50G+ overview............................... 6 Signal flow..................................6 Patch memory structure............................7 Functions of parts............................... 8 Top....................................8 Back....................................9 Overview of operation screens..........................10 Home Screen................................10 LIBRARY Screen................................11 MENU Screen................................12 Making connections.............................. - Page 5 Adjusting the overall output level.......................... 55 Setting the AUTO SAVE function..........................56 Setting the sound on the LIBRARY Screen......................57 Setting the type of batteries used..........................58 Adjusting the backlight brightness......................... 59 Adjusting the display contrast..........................60 Setting the ECO mode.............................. 61 Managing the firmware............................62 Checking the firmware version..........................
-
Page 6: Ms-50G+ Overview
MS-50G+ overview Signal flow ❶ Patch memory The input guitar sound passes through effects in order. (→ Adjusting effect parameters) ❷ Tuner Use this to tune the connected guitar. (→ Using the tuner) ❸ Master volume This adjusts the overall volume. This setting is retained even when the patch memory is changed. (→ Adjusting the overall output level) ❹... -
Page 7: Patch Memory Structure
Patch memory structure Patch memories These store the effects used, their order, on/off states and parameter settings. Effects are saved and recalled in units of patch memories. Up to 100 of these can be stored. Up to 6 effects can be combined freely in the MS-50G+. -
Page 8: Functions Of Parts
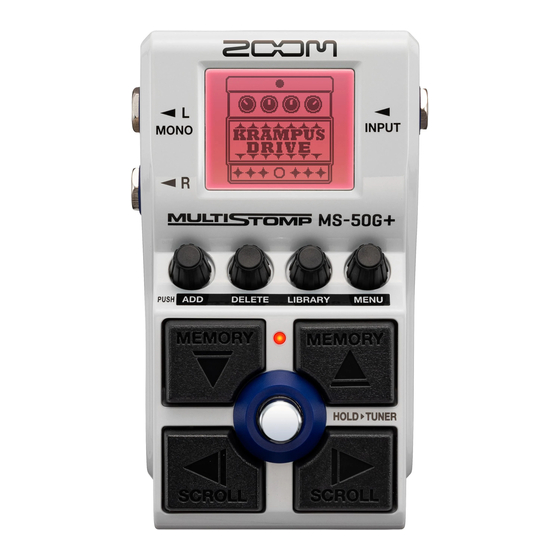
Functions of parts ❶ Display This shows information, including the names of the selected effect along with its parameter values. ❷ Output jacks Connect an amp or another effect here. Use MONO for mono connections. ❸ Parameter knobs Use these to adjust effect parameters and make various settings. ❹... -
Page 9: Back
Back ❶ USB (Type-C) port Connect this to a computer, iPhone or iPad. This supports operation on USB bus power. ❷ DC 9V AC adapter connector Connect a dedicated AC adapter (ZOOM AD-16) here. -
Page 10: Overview Of Operation Screens
Overview of operation screens The MS-50G+ is operated by using its buttons and knobs while looking at screens on the display. This section explains those screens. Home Screen This appears when the power is turned on. Effects in the selected patch memory are shown. The patch memory can be edited and its effects turned on and off. -
Page 11: Library Screen
LIBRARY Screen Effects in patch memories can be changed. ❶ Selected effect The selected effect is shown larger in the middle. The backlight color changes according to the category of the selected effect. ❷ Effect list Effects in the same category are ordered vertically. Use to select effects in the same category. -
Page 12: Menu Screen
MENU Screen Various MS-50G+ settings can be made. ❶ Selected setting item The selected setting item is shown larger in the middle. ❷ Setting items Setting items are shown with icons. Turn to select them. ❸ This reopens the Home Screen. - Page 13 Turn to show the icon for the desired setting item. Please see the linked reference sections for details about each setting. Change the tempo. (→ Change the effect order. (→ Changing the tempo) Changing the order of effects) Change the patch memory name. (→ Restore the patch memory to its original settings.
- Page 14 Press This opens the selected setting screen. (This example is when “AUTO SAVE” is selected.) Turn to select a setting. The selected setting is highlighted. Press This confirms the setting. HINT When a setting screen is open, press to return to the Home Screen MENU Screen.
-
Page 15: Making Connections
❶ Guitar ❷ Guitar amp ❸ AC adapter (ZOOM AD-16) ❹ Computer (Mac/Windows), iPhone/iPad or portable battery Connect with a USB cable (Type-C). Update the firmware, use Handy Guitar Lab for MS-50G+ or provide power with a portable battery. The Handy Guitar Lab for MS-50G+ iOS/iPadOS app can be used to manage patch memories and to edit... -
Page 16: Turning The Power On/Off
Turning the power on/off Turning the power on Minimize the volume of the amp. NOTE To prevent noise and malfunction, connect a guitar amp before turning the power on. Supplying power ■ Using batteries Open the cover on the bottom and install batteries into the battery compartment. NOTE •... -
Page 17: Turning The Power Off
■ Using an AC adapter Use a ZOOM AD-16 AC adapter, which is specified for this unit. When the AC adapter is connected, the MS-50G+ will power on. Connect a cable to the INPUT jack. When using batteries for power, connecting a cable to the INPUT jack will turn on the power. -
Page 18: Adjusting Effects
Adjusting effects Patch memories can be edited, including replacing effects and adjusting parameters. Saving changes • When the AUTO SAVE function is on, changes to patch memories will be saved automatically. (The default setting is ON.) (→ Setting the AUTO SAVE function) •... - Page 19 to select the effect you want to turn on/off. One effect in the patch memory is shown on the display. Press to turn the effect on/off. The On/Off indicator lights when the effect is on. When the effect is off, the On/Off indicator is unlit and the effect icon will appear faded on the display. HINT Some effects assign special functions to the footswitch.
-
Page 20: Switching Effects
Switching effects Effects in a patch memory can be replaced with other effects as desired. on the Home Screen to select the patch memory with an effect that you want to replace (→ Switching patch memories). to select the patch you want to replace. Press This opens the LIBRARY Screen... - Page 21 Press This replaces the selected effect and reopens the Home Screen. NOTE • If an effect has been deleted using the Handy Guitar Lab for MS-50G+ app, will appear and it will be disabled. • Only one effect in the PREAMP category, one LINE SELECTOR and one BPM module each can be selected for a patch memory.
-
Page 22: Adjusting Effect Parameters
Adjusting effect parameters The individual effects used in patch memories can be adjusted. on the Home Screen to select a patch memory with an effect that you want to change (→ Switching patch memories). to select the effect with parameters that you want to adjust. Turn This opens the Parameter Adjustment Screen of the selected effect. - Page 23 Turn to adjust an effect parameter. Press to return to the original screen. When parameters are on multiple pages, will appear at the bottom of the screen. to show the parameters to be adjusted. HINT Set Time, Rate and other effect parameters to musical notes to sync them to the tempo. (→ Tapping to change the tempo.)
-
Page 24: Adding Effects
Adding effects Effects can be added to patch memories. Up to 6 effects can be combined freely on the MS-50G+. on the Home Screen to select the patch memory where you want to add an effect (→ Switching patch memories). to select the position where you want to add an effect. - Page 25 Turn to select whether to add on the left or the right, and press that shows all the effects. Select the effect to add. (→ This opens the LIBRARY Screen Switching effects) To cancel adding an effect, turn on the ADD EFFECT Screen and select “CANCEL”. Then, press NOTE is pressed when 6 effects have already been added to the patch memory, the following message will appear and adding the effect will fail.
-
Page 26: Deleting Effects
Deleting effects Effects in patch memories can be deleted. on the Home Screen to select the patch memory with the effect that you want to delete (→ Switching patch memories). to select the effect to delete. Press This opens the DELETE EFFECT Screen. Turn to select “EXECUTE”, and press This will delete the selected effect from the patch memory. - Page 27 To cancel effect deletion, turn to select “CANCEL”, and press HINT If the only effect in the patch memory is deleted, the SELECT EFFECT Screen will open. Press select an effect. (→ Switching effects)
-
Page 28: Changing The Order Of Effects
Changing the order of effects Effects in a patch memory can be reordered as desired. on the Home Screen to select a patch memory with effects that you want to reorder (→ Switching patch memories). Press to select an effect to reorder. Press to open the MENU... - Page 29 Turn to move the effect to the desired position. Press This confirms reordering and reopens the Home Screen.
-
Page 30: Tapping To Change The Tempo
Tapping to change the tempo. The BPM, which is used for the tempo synchronization of delay time, for example, can be set separately for each patch memory. on the Home Screen to select the patch memory for which you want to change the tempo (→... - Page 31 If a BPM module is added to a patch memory, that module can then be used to change the tempo of the patch memory. HINT • The tempo setting range is 40–250 ♩ (bpm). • Turn to show the Tempo Adjustment Screen where the tempo can be set numerically. Press to return to the original screen.
-
Page 32: Changing The Tempo
Changing the tempo The tempo can be changed from the MENU. on the Home Screen to select the patch memory for which you want to change the tempo (→ Switching patch memories). Press to open the MENU Screen. Turn to select “BPM”, and press This opens the BPM Screen. - Page 33 Press Home Screen will reopen. HINT The tempo adjusted here is linked to the tempo adjusted in the BPM module of the patch memory and will be used by all its effects.
-
Page 34: Switching Patch Memories
Switching patch memories The MS-50G+ manages effects in patch memories. A patch memory can have up to 6 effects and save their on/off states and parameter settings. on the Home Screen to select a patch memory. When a patch memory is selected, information about it will be shown briefly. ❶... -
Page 35: Using The Preselect Function
Using the preselect function The MS-50G+ has a preselect function. When PRESELECT is ON, when are used to switch patch memories, the change will not occur immediately. Pressing afterward will finalize the patch memory change. This makes it possible to switch directly to a patch memory that is not near the current one during live performance. - Page 36 Turn to switch it ON/OFF. Setting Explanation This turns on the PRESELECT function. This turns off the PRESELECT function. Press This confirms the setting. Press Home Screen will reopen.
-
Page 37: Selecting Patch Memories When Preselect Is On
Selecting patch memories when PRESELECT is ON on the Home Screen to show the next patch memory to select. Example: Selecting patch memory 008 while performing with 001 The On/Off indicator will blink. Press to confirm the selection. An effect in the selected patch memory will be shown. -
Page 38: Managing Patch Memories
Managing patch memories Changing patch memory names on the Home Screen to select the patch memory with the name that you want to change (→ Switching patch memories). Press to open the MENU Screen. Turn to select “PATCH NAME”, and press This opens the PATCH NAME Screen. - Page 39 Turn to move the cursor. Turn to insert a character. • Press to delete the character before the cursor. • Press and hold to delete all the characters. Press This confirms the name and reopens the Home Screen. HINT The characters and symbols that can be used are as follows. ! % &...
-
Page 40: Copying And Saving Patch Memories
Copying and saving patch memories The AUTO SAVE function is ON by default. When it is OFF, changes, including adjustments to effects, as well as volume settings, will not be saved automatically. Save changes manually in this case. Patch memories can also be saved (copied) to other locations. HINT “Setting the AUTO SAVE function”... - Page 41 If AUTO SAVE is OFF, (→ Setting the AUTO SAVE function), “SAVE PATCH” will appear instead of “COPY PATCH”. In this case, select “SAVE PATCH”. Turn to select the patch memory where it will be copied or saved, and press Patch memories labeled “Empty”...
-
Page 42: Erasing Patch Memories
Erasing patch memories Unnecessary patch memories can be deleted. on the Home Screen to select the patch memory that you want to delete (→ Switching patch memories). Press to open the MENU Screen. Turn to select “ERASE PATCH”, and press This opens the ERASE PATCH Screen. - Page 43 Turn to select “EXECUTE”, and press Deleted patch memories will have their contents cleared and be shown as “Empty”. To cancel deletion, turn to select “CANCEL”, and press...
-
Page 44: Creating Patch Memories
Creating patch memories New patch memories can be created. Press to open the MENU Screen. Turn to select “NEW PATCH”, and press This opens the NEW PATCH Screen. Turn to select where to create the patch, and press Patch memories labeled “Empty” contain no effects. - Page 45 Press This creates a new patch memory and opens the SELECT EFFECT Screen. Follow the instructions in “Switching effects” to assign effects and edit the patch memory. To cancel creation, turn to select “CANCEL”, and press NOTE Up to 100 patch memories can be saved. The NEW PATCH Screen will not be shown if there are no empty patch memories.
-
Page 46: Restoring Patch Memories To Original Settings
Restoring patch memories to original settings After a patch memory is changed, it can be restored to the state it was in immediately after selection or the factory default state. Press to open the MENU Screen. Turn to select “REVERT PATCH”, and press This opens the REVERT PATCH Screen. - Page 47 Press This restores the patch memory to the state selected in step 4, and reopens the Home Screen. To cancel this operation, turn to select “CANCEL”, and press...
-
Page 48: Using The Tuner
Using the tuner Activating the tuner Enable the tuner to use the MS-50G+ to tune a guitar. NOTE The tuner cannot be used when the selected effect has a special function assigned, for example, effects that are on only while the footswitch is being pressed. Press and hold This activates the tuner and opens the Tuner Screen. -
Page 49: Changing Tuner Settings
Changing tuner settings The standard pitch used by the tuner and the tuner type can be changed. Flat tuning is also possible. Setting the output method Turn to set the output method. Setting Explanation BYPASS The guitar sound is output with effects bypassed. MUTE The guitar sound is not output. - Page 50 Changing the standard pitch of the tuner Turn to change the standard pitch. HINT The setting range is 430–450 Hz for middle A.
- Page 51 Setting the tuner type Turn to select the tuner type. Setting Explanation CHROMATIC The pitch detuning is shown according to the nearest note (in semitones). Other tuner types The nearest string number is shown according to the selected type, and the amount of detuning from its pitch is shown.
- Page 52 Using flat tunings All strings can be tuned flat from ordinary tuning by 1 (♭1), 2 (♭2) or 3 (♭3) semitones. Turn to change the flat tuning. NOTE Flat tuning cannot be used when the tuner type is CHROMATIC.
-
Page 53: Operating The Ms-50G+ From An Iphone/Ipad
Operating the MS-50G+ from an iPhone/iPad The MS-50G+ can be controlled from an iPhone/iPad using the iOS/iPadOS Handy Guitar Lab for MS-50G+ app. NOTE The Handy Guitar Lab for MS-50G+ app must be installed on the iPhone/iPad beforehand. The Handy Guitar Lab for MS-50G+ app can be downloaded from the App Store. - Page 54 NOTE • Use a USB (Type-C) cable that supports data transfer. The following screen will appear when the MS-50G+ is connected. The following screen will appear if a cable that does not support data transfer has been used. Replace the cable with one that supports data transfer.
-
Page 55: Making Unit Settings
Making unit settings Adjusting the overall output level The volume of the MS-50G+ output sound can be adjusted. Reduce the volume if the output sound becomes distorted. Select “OUTPUT VOLUME” on the MENU Screen. Turn to adjust the volume. The setting value is shown on the display. Press This confirms the setting. -
Page 56: Setting The Auto Save Function
Setting the AUTO SAVE function When the AUTO SAVE function is ON, patch memories will be saved automatically when their contents are changed. Select “AUTO SAVE” on the MENU Screen. Turn to switch it ON/OFF. Setting Explanation This turns on the AUTO SAVE function. This turns off... -
Page 57: Setting The Sound On The Library Screen
Setting the sound on the LIBRARY Screen The sound that can be checked on the LIBRARY Screen can be changed. Select “LIBRARY SOUND” on the MENU Screen. Turn to switch the setting. Setting Explanation SINGLE EFFECT SOUND This enables checking the sound of just the selected effect. PATCH MEMORY SOUND This enables checking the sound of the entire patch memory. -
Page 58: Setting The Type Of Batteries Used
Setting the type of batteries used Set the type of battery used correctly so that the amount of remaining battery charge can be shown accurately. Select “BATTERY TYPE” on the MENU Screen. Turn to set the type of battery used. Setting Explanation ALKALINE... -
Page 59: Adjusting The Backlight Brightness
Adjusting the backlight brightness The brightness of the backlight can be adjusted. Select “NORMAL” to extend battery life. Select “BACKLIGHT” on the MENU Screen. Turn to adjust the backlight brightness. Setting Explanation NORMAL This is regular brightness. BRIGHT This makes the backlight brighter. Press This confirms the setting. -
Page 60: Adjusting The Display Contrast
Adjusting the display contrast The display contrast can be adjusted. Select “CONTRAST” on the MENU Screen. Turn to adjust the display contrast. The setting value is shown on the display. Press This confirms the setting. Press Home Screen will reopen. -
Page 61: Setting The Eco Mode
Setting the ECO mode This function can be used to turn the power off automatically if unused for 10 hours. Select “ECO MODE” on the MENU Screen. Turn to switch it ON/OFF. Setting Explanation The power will automatically turn off if unused for 10 hours. This disables ECO mode. -
Page 62: Managing The Firmware
This shows the firmware and preset versions. ❶ MS-50G+ firmware version ❷ Preset version ❸ BOOT version Press Home Screen will reopen. Updating The MS-50G+ firmware can be updated to the latest version. The latest firmware can be downloaded from the ZOOM website (zoomcorp.com). -
Page 63: Restoring Factory Default Settings
Restoring factory default settings The factory default settings can be restored. Select “FACTORY RESET” on the MENU Screen. Turn to select “YES”. Press Resetting will be executed, restoring default settings. NOTE Resetting will overwrite all settings, including patch memories, to their factory defaults. Be certain before using this function. -
Page 64: Checking Ms-50G+ Operation Procedures
Checking MS-50G+ operation procedures A QR code for help related to the MS-50G+ can be shown on its display. Select “HELP” on the MENU Screen. Use a smartphone or tablet, for example, to read the QR code shown on the HELP Screen. zoomcorp.com/help/ms-50gplus Press Home Screen... -
Page 65: Appendix
Setting the output method) There is a lot of noise • Confirm that an instrument cable is not the cause. • Use a genuine ZOOM AC adapter. (→ Making connections) Batteries lose their charge quickly Making the following settings could increase the battery operation time. -
Page 66: Specifications
Input S/N 122 dB Noise floor (residual noise) –100 dBu Power AC adapter: 9V DC 500mA center negative (ZOOM AD-16) 2 AA batteries (alkaline, lithium or rechargeable NiMH batteries) Estimated operation times • These values are Alkaline batteries: about 7 hours using batteries approximate. - Page 67 ZOOM CORPORATION 4-4-3 Kanda-surugadai, Chiyoda-ku, Tokyo 101-0062 Japan zoomcorp.com Z2I-4967-01...