
Related Manuals for DeLonghi PRIMADONNA SOUL ECAM61 3 Series


Summary of Contents for DeLonghi PRIMADONNA SOUL ECAM61 3 Series
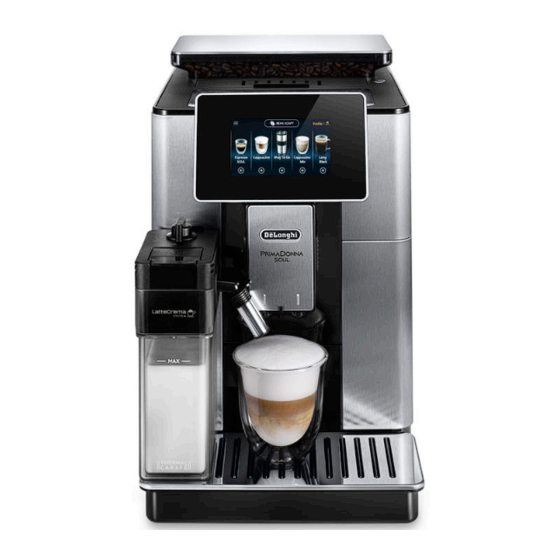
- Page 1 ECAM61X.3Y - 61X.5Y - 61X.7Y BEAN TO CUP ESPRESSO AND CAPPUCCINO MACHINE Instructions for Use Instructions videos available at: http://PrimadonnaSoul.delonghi.com...
- Page 3 page 4 Espresso Coffee Cappuccino Macchiato Espresso Decalcificante per macchine da caffè Descaler for coffee machines Détartrant pour machines à café Entkalker für Kaffeemaschinen De’Longhi Appliances s.r.l. Via L. Seitz, 47 31100 Treviso - ITALY Tel. +39 0422 4131 5413218631/04.15 D10*...
-
Page 4: Table Of Contents
CONTENTS 10.4 Customising the beverages ......14 10.5 Cleaning the milk container after use ..14 1. INTRODUCTION ..........5 11. MUG TO GO (ECAM61X.7Y ONLY) ....14 1.1 Letters in brackets .........5 11.1 Cleaning the travel mug after use ....15 1.2 Troubleshooting and repairs ......5 1.3 Download the App! ........5 12. -
Page 5: Introduction
1. INTRODUCTION 2. DESCRIPTION Thank you for choosing this bean to cup espresso and cappuc- 2.1 Description of the appliance (page 2 - A) cino machine. A1. Cup shelf Take a few minutes to read this Instruction for Use. This will A2. -
Page 6: Description Of The Milk Container" (Page 3 - D)
C4. Water softener lter (*certain models only) Then follow the instructions which appear on the appliance C5. Cleaning brush display (B5): C6. Power cord C7. Descaling spout (keep the spout safely after each use) Accessories with certain models only: C8. Co ee pot (*certain models only) C9. -
Page 7: Turning The Machine On U
3. Press "Next"; also heats the internal 4. Enable the Wi-Fi connection and remote control (via the circuits by circulating hot Delonghi Co ee Link App); water. 5. The appliance PIN, needed to connect by App, is displayed on the screen;... -
Page 8: Adjust Mill
In the settings menu (B6), the symbol indicating the connection • Press "Default" to reset the default values of the co ee mill status alternates with the other symbols (e.g. descaling, etc.) (indicated by a star). Symbol on homepage Meaning 6.5 Co ee temperature To change the temperature of the water used to make the cof- The appliance is connected... -
Page 9: General
4. Press "←" to save the new selection and go back to the 4. Empty the grounds container (A25) and drip tray (A24) ( g. homepage (B). 11), then press "Next"; 6.9 General 1. Press the settings menu (B6); 2. Select "General"; Here you can enable or disable the following functions with a simple touch: "Beep": when enabled, the appliance beeps whenever an... -
Page 10: Making Coffeeu
7. MAKING COFFEEU Quantity 7.1 Making co ee using co ee beans Important! Aroma Do not use green, caramelised or candied co ee beans as they 2. After setting the parameters, press "Start". The appliance could stick to the co ee mill starts making the co ee and the image of the selected and make it unusable. -
Page 11: Bean Adapt Technology & Espresso Soul
4. Select the co ee quanti- • warm the cups with hot water using the hot water function (see section “13. Delivering hot water u”); ty and press "Start". The • increase the co ee temperature (section “6.5 Co ee appliance starts making temperature”). -
Page 12: Cleaning The Co Ee Pot
4. Place the co ee pot (C8) under the spouts ( g. 18). Press "OK"; as the operation proceeds and a description of each indi- 5. The appliance proceeds with delivery and the image of the vidual phase (grinding, brewing co ee); selected beverage appears on the display (B5), together Please note: with a progress bar which gradually lls as the operation... -
Page 13: Your Milk-Based Beverage At A Touch
• The quality of the froth will vary depending on: • type of milk or vegetable beverage; • brand used; • ingredients and nutritional value. 10.2 Adjusting the amount of froth Turn the froth adjustment dial (D3) ( g. 26) to adjust the amount of froth on the milk delivered while making cappuccinos and milk-based... -
Page 14: Customising The Beverages
3. Turn the froth adjust- 10.4 Customising the beverages ment dial (D3) to "Clean" To deliver a customised milk-based beverage, proceed as ( g. 28). Hot water and follows: 1. Press steam delivered (B3)at the bottom of the image correspond- from the milk spout ing to the desired beverage. -
Page 15: Cleaning The Travel Mug After Use
4. Select up to 2 ingredients in the required order of delivery, 4. Clean the inside of the container with mild/neutral wash- then press "Next"; ing-up liquid and rinse with hot drinking water at 40°C. 5. Select the preferences for the selected ingredients, then Do not use abrasive materials as these could damage the press "Next";... -
Page 16: Delivering Hot Water U
• You can also customise the beverages by connecting with or "Cancel" to retain the previous parameters. the DeLonghi Co ee Link App. 4. Press "OK" to go back to the homepage . • Press "Cancel" to exit programming at any moment. The The appliance is now ready to be used again. -
Page 17: Selecting Your Personal Profile U
• You can rename your personal pro le by connecting with To clean (with the machine on): the DeLonghi Co ee Link App; 1. Remove the drip tray • To customise the pro le icon, see section “6.7 Edit pro le”. -
Page 18: Cleaning The Drip Tray And Drip Tray Grille
16.6 Cleaning the water tank when you make the next co ees, the grounds container will ll up more than expected and clog the machine. Clean the water tank (A20) regularly, about once a month and whenever you replace the water softener lter (C7). 16.4 Cleaning the drip tray and drip tray grille 1. -
Page 19: Cleaning The Pre-Ground Co Ee Funnel
5. Reassemble the spouts, then attach them to the central 4. Press the two coloured release buttons inwards and at the outlet. Make sure the word "INSERT" is at the top and is same time pull the infuser outwards ( g. 42); visible when the spouts have been inserted;... -
Page 20: Descaling U
Please note: washing by hand Washing in a dishwasher guarantees the perfect hygiene of all the milk container components. When washing by hand, wash all components of the milk container thoroughly withhot water Insert and immerse them in a basin of hot water for 30 minutes before proceeding as described in point (6). -
Page 21: Setting Water Hardness U
Important! Danger of guarantee that the descaler solution has been complete- ly eliminated from the machine's internal circuits. Before scalding starting rinsing, remember to empty the drip tray. Hot water containing acid ows out of the spouts. Take 18. SETTING WATER HARDNESS U care to avoid contact with The descaling alarm is displayed after a period of time estab- splashes of this solution. -
Page 22: Installing The Lter
19.1 Installing the lter 11. Position an empty container with a minimum capacity of 0.5 litres under the descaling spout ( g. 8) and press "OK" 1. Press the settings menu (B6); to activate the lter; 2. Select "Water lter"; 12. -
Page 23: Tips For Energy Saving
Beans container capacity: 500g 20.1 Tips for Energy Saving Frequency: 2400 - 2500 MHz • To reduce energy consumption, after delivering one or more beverages, remove the milk container (D) or accessories. Maximum transmission power 20 mW • Set auto-o to 15 minutes (see section “6.8 Auto-o ”); De'Longhi reserves the right to modify the technical speci cation •... - Page 24 DISPLAYED MESSAGE POSSIBLE CAUSE REMEDY Empty grounds container The grounds container (A25) is full. Clean as described in section “16.3 Cleaning the co ee grounds container” Insert grounds container and The grounds container (A25) and/or drip Insert the drip tray complete with grounds tray (A24) is not correctly in place or is container and press as far as it will go.
- Page 25 DISPLAYED MESSAGE POSSIBLE CAUSE REMEDY Insert descaling spout The descaling spout (C7) is not correctly in Insert the spout and push as far as it will go place or is missing. ( g. 7). The appliance emits a beep (if the beep function is enabled).
- Page 26 DISPLAYED MESSAGE POSSIBLE CAUSE REMEDY Ground too ne. Adjust mill The grinding is too ne and the co ee is Press "OK" and adjust the co ee mill (see “6.4 Adjust mill”). using the dedicated function in delivered too slowly or not at all. machine settings.
- Page 27 DISPLAYED MESSAGE POSSIBLE CAUSE REMEDY Water circuit empty. Press OK to The water circuit is empty Press "OK" to ll the circuit. Delivery stops au- tomatically. It is normal for there to be water start lling process in the drip tray (A24) after lling. If the problem persists, make sure the water tank (A20) is fully inserted.
-
Page 28: Troubleshooting U
22. TROUBLESHOOTING U Below is a list of some of the possible malfunctions. If the problem cannot be resolved as described, contact customer services. PROBLEM POSSIBLE CAUSE REMEDY The appliance does not come on The power cord connector (C6) is not in- Insert the connector as far as it will go in serted correctly. - Page 29 PROBLEM POSSIBLE CAUSE REMEDY The co ee delivered is watery We suggest you access Bean Adapt Technology in the Co ee Link App to adjust this parameter to an appropriate setting for the co ee beans used. On the other hand, please also check the following: The pre-ground co ee funnel (A3) is Open the door (A2), extract the funnel clogged.
- Page 32 De’Longhi Appliances via Seitz, 47 31100 Treviso, Italy www.delonghi.com...