Table of Contents
Advertisement
Quick Links
Advertisement
Table of Contents
Troubleshooting

Related Manuals for DeLonghi PrimaDonna Elite ECAM65.75 Series


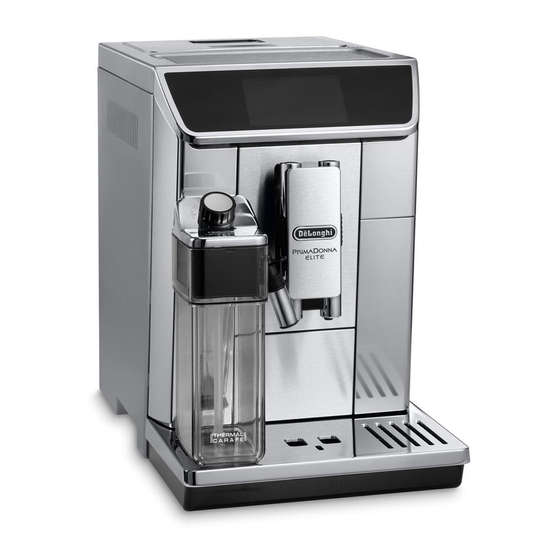
Summary of Contents for DeLonghi PrimaDonna Elite ECAM65.75 Series
- Page 1 ECAM65X.75 BEAN TO CUP ESPRESSO AND CAPPUCCINO MACHINE Instruction for use...
- Page 2 page 6 00:00 AROMA SELECT BEVERAGE PROFILE 1 QUANTITY LATTE ESPRESSO COFFEE CAPPUCCINO MACCHIATO...
- Page 5 CLEAN...
-
Page 6: Table Of Contents
CONTENTS 9.5 Making cofee using cofee beans ....14 9.6 Making cofee using pre-ground cofee ..14 1. FUNDAMENTAL SAFETY WARNINGS .....7 10. MAKING CAPPUCCINOS AND MILK-BASED 2. SAFETY WARNINGS ........8 COFFEES ..........15 2.1 Symbols used in these instructions ....8 10.1 Filling and attaching the milk container ..15 2.2 Designated use ..........8 10.2 Adjusting the amount of froth .....15 2.3 Instruction for Use .........8... -
Page 7: Fundamental Safety Warnings
1. FUNDAMENTAL SAFETY WARNINGS • The appliance is not intended for use by persons (including children) with reduced physical, sensory or mental capabilities, or lack of experience and knowledge, unless they have been given supervision or instruction concerning use of the appliance by a person responsible for their safety. -
Page 8: Safety Warnings
2. SAFETY WARNINGS Any other use is considered improper and thus dangerous. The manufacturer is not liable for damage deriving from improper 2.1 Symbols used in these instructions use of the appliance. Important warnings are identiied by these symbols. It is vital to respect these warnings. -
Page 9: Description
(page 2 - C ) C1. “Total Hardness Test” indicator paper Please note: C2. Pre-ground cofee measure Check compatible devices on “PrimaDonnaElite. delonghi.com”. C3. Descaler C4. Water softener ilter (certain models only) 4. DESCRIPTION C5. Cleaning brush 4.1 Description of the appliance C6. -
Page 10: Connecting The Appliance
tween the surfaces of the appliance and the side and rear 5. “WATER CIRCUIT EMPTY PRESS OK TO START FILLING PRO- walls and at least 15 cm above the cofee maker. CESS” appears on the display; • Water penetrating the cofee maker could cause damage. 6. -
Page 11: Menu Settings
• The message “TURNING OFF UNDERWAY PLEASE WAIT” 8.3 Water ilter appears on the display, then (if envisaged) the appliance For instructions on how to install the ilter (C4), see section “19. performs a rinse cycle and goes of (standby). Water softener ilter”. -
Page 12: Auto-Of (Standby)
8.10 Cofee temperature 2. Press < (B10) or > (B8) until “ AUTO-START” appears on To modify the temperature of the water used to make the cofee, the display (B); proceed as follows: 3. Select the function by pressing ” ”. -
Page 13: Background
4. Press “ ESC” to go back to the homepage. 3. Press “ “ and then “ OK” to restore the original pa- rameters (or “ ESC” to leave the parameters unaltered); 4. Press “ OK” to go back to the settings menu and “ 8.15 Background You can choose the display background from the following 4 al- ESC”... -
Page 14: Adjusting The Cofee Mill
9.3 Adjusting the cofee mill 6. Preparation begins. An image of the selected drink appears on the display (B) together with a progress bar which grad- The cofee mill is set by default to prepare cofee correctly and ually ills as preparation progresses. should not require regulating initially. -
Page 15: Making Cappuccinos And Milk-Based Coffees
6. Preparation begins. An image of the selected drink appears on the display, together with a progress bar which gradual- 10.2 Adjusting the amount of froth ly ills as preparation progresses. Turn the froth adjustment dial (D1) to adjust the amount of froth Important! Making LONG cofee on the milk delivered while making cappuccinos and milk-based Halfway through preparation, the message “ADD PRE-GROUND... -
Page 16: Cleaning The Milk Container After Every Use
• Preparation of each cappuccino or milk-based cofee can Choose CHOCOLATE from the homepage, then proceed as be customised (see sections “14. Customising the drinks” follows: and “15. Memorising your personal proile”). 1. Lift the carafe lid (E1) (ig. 23); •... -
Page 17: Delivering Hot Water
1. Make sure the hot water/steam spout (C6) is attached cor- Please note! rectly to the hot water/steam connection nozzle (A9); • If the hot chocolate powder used does not contain thicken- 2. Fill a container with the liquid to be heated or frothed and er, adjusting the density will have no efect. -
Page 18: Customising The Drinks
• You can rename your personal proile by connecting with the DeLonghi Cofee Link App. CUSTOMISING THE DRINKS The aroma (when required) and quantity of the drinks can be 16. CLEANING customised. -
Page 19: Cleaning The Drip Tray
appliance cannot be used to make cofee until you have cleaned 16.5 Cleaning the inside of the cofee machine the grounds container (A10). Even if not full, the empty grounds Danger of electric shock! container message is displayed 72 hours after the irst cofee has Before cleaning internal parts, the machine must be turned of been prepared. -
Page 20: Cleaning The Infuser
Please note! If the infuser is diicult to insert, before insertion, adapt it to the 16.9 Cleaning the infuser right size by pressing the two levers shown in ig. 40. The infuser (A19) must be cleaned at least once a month. 8. -
Page 21: Cleaning The Hot Water/Steam Connection Nozzle
• You should use De’Longhi descaler only. Using unsuitable descaler and/or performing descaling incorrectly may re- sult in faults not covered by the manufacturer’s guarantee. Descale the appliance when “DESCALING NEEDED PRESS OK TO START (~40min) ”: appears on the display (B). To descale the appliance immediately, press “... -
Page 22: Setting Water Hardness
7. “PLACE 2l CONTAINER UNDER SPOUTS PRESS OK TO START 17. Hot water is delivered from the hot water/steam spout and DESCALING”: Place an empty container with a minimum “RINSING UNDERWAY” is displayed; capacity of 2 litres under the hot water/steam spout (C6) 18. -
Page 23: Water Softener Filter
3. To change the level selected, press the symbol itself until 7. Extract the tank (A16) from the appliance and ill with the required level is displayed (Level 1 = soft water; Level 4 water. = very hard water); 8. “IMMERSE FILTER IN THE 4. -
Page 24: Displayed Messages
19.3 Removing the ilter 20. TECHNICAL DATA Replace the ilter (C4) when “REPLACE WATER SOFTENER FILTER, Voltage: 220-240 V~ 50/60 Hz max. 10 A Power: 1450 W PRESS OK TO START ” appears on the display (B). To re- Pressure: 1,5 MPa (15 bar) place the ilter immediately, press “... - Page 25 EMPTY GROUNDS CONTAINER The grounds container (A10) is full. Empty the grounds container and drip tray (A14), clean and replace. Important: when removing the drip tray, the grounds container MUST be emptied, even if it contains few groun- ds. If this is not done, when you make the next cofees, the grounds container may ill up more than expected and clog the machine.
- Page 26 GROUND TOO FINE. ADJUST The grinding is too ine and the cofee is delive- Repeat cofee delivery and turn the grin- ding adjustment dial (A5) (ig. 13) one click MILL 1 CLICK WHILE IN red too slowly or not at all. clockwise towards “7”...
- Page 27 PRESS OK TO START FILLING The water circuit is empty Press “ OK” to deliver water from the spout PROCESS (C6) until it lows out normally. If the problem persists, make sure the water tank (A16) is fully inserted. PRESS OK TO START CLEANING The milk container has been inserted with To proceed with the CLEAN function press “...
- Page 28 REPLACE WATER SOFTENER FIL- The water softener ilter (C4) is exhausted. Press “ OK” to replace or remove the ilter, TER PRESS OK TO START or “ ESC” to carry out the procedure later. Follow the instructions in section “19. Water softener ilter”.
-
Page 29: Troubleshooting
TROUBLESHOOTING Below is a list of some of the possible malfunctions. If the problem cannot be resolved as described, contact Customer Services. PROBLEM POSSIBLE CAUSE SOLUTION The cofee is not hot. The cups were not preheated. Warm the cups by rinsing them with hot water (Please note: you can use the hot water function). - Page 30 The milk contains large bubbles and The milk is not cold enough or is not Use skimmed or semi-skimmed milk at refrige- squirts out of the milk spout (D5) or semi-skimmed. rator temperature (about 5° C). If the result is there is little froth not as you wished, try changing brand of milk.
-
Page 31: Electrical Requirements (Uk Only)
24. ELECTRICAL REQUIREMENTS (UK ONLY) Before using this appliance ensure that the voltage indicated on the product corresponds with the main voltage in your home, if you are in any doubt about your supply contact your local electricity company. The lexible mains lead is supplied connected to a B.S. 1363 fused plug having a fuse of 13 amp capacity. Should this plug not it the socket outlets in your home, it should be cut of and replaced with a suitable plug, following the procedure outlined below.