Advertisement
INTRODUCTION
[Read this user manual carefully before first use. Keep this manual for further guidance in case]
Please read the user manual carefully before using the product and take safety protection measures to avoid malfunctions caused by accidental operation. If the product is given to another person, please make sure to also include this user manual.
The product provides a free 2-year warranty by default. To extend the warranty to 3 years, please activated the warranty card in time! If you have any questions, please contact sales@ibuture.com.
WARNING
Personal Safety
- Store it indoors in a dry place and out of the reach of children.
- This product is suitable for children 10 years old and above. Users with reduced physical functions, sensory or intellectual abilities, or lack of experience and knowledge are advised to use the product safely supervision or guidance and to be aware of the hazards involved.
- Please pay attention to safety when children or pets near the vacuum cleaner.
- Children should not clean or use the product without supervision.
- Use only manufacturer's recommended attachments as described in this manual; misuse or use of any accessory or attachment other than those recommended may present a risk of personal injury.
- Take extra care when cleaning stairs.
- Keep the appliance and accessories away from the hot surface.
- Do not block the appliances' openings or hinder airflow, keep openings free of any objects including dust, lint, clothing, fingers (and all parts of the body).
Electrical Safety
- Only use batteries and chargers supplied by the manufacturer.
- Never modify the charger in any way.
- Do not pull the cord to disconnect it from a socket, grasp the plug and pull to disconnect it.
- Keep the charger cord away from hot surfaces and sharp edges.
- The supply cord cannot be replaced. If the cord is damaged the charger should be discarded and replaced.
- Do not handle the charger or the appliance with wet hands.
- Do not store, or charge the appliance outdoors.
- The charger must be removed from the socket before removing the battery, cleaning, or maintaining the appliance.
Battery Safety
- This appliance includes Li-ion batteries, do not incinerate batteries or expose them to high temperatures, as they may explode.
- Liquid ejected from the battery may cause irritation or burns.
- In an emergency contact professional help immediately.
- Leaks from the battery cells can occur under extreme conditions. Do not touch any liquid that leaks from the battery. If the liquid gets on the skin, wash immediately with soap and water. If the liquid gets into the eyes, flush them immediately with clean water for a minimum of 10 minutes and seek medical attention. Wear gloves to handle the battery and dispose of it immediately in accordance with local regulations.
- When the battery pack is not in use, keep it away from paper clips, coins, keys, nails, screws, or other small metal objects that could make a connection from one terminal to another.
- When you dispose of the appliance remove the battery and dispose of the battery safely in accordance with local regulations.
CONTENT OF PACKAGE
Please check and confirm the accessories and parts according to the following sheet before using. If any parts are missing or damaged, please contact customer service in time.
| Part Name | Quantity |
| Main Body | 1 |
| Battery Pack | 1 |
| Charger | 1 |
| Telescopic Aluminum Alloy Tube | 1 |
| Electric Brush Head | 1 |
| Hard And Soft Bristle Integrated Brush (Installed) | 1 |
| Crevice Nozzle | 1 |
| Soft Bristle Brush | 1 |
| Filter Cleaning Brush Tool | 1 |
| Hepa Filter | 2 |
| Air Filter (Installed) | 1 |
| Screws (Used to install wall mount stand) | 4 |
| Wall Mount Stand | 1 |
| User Manual | 1 |
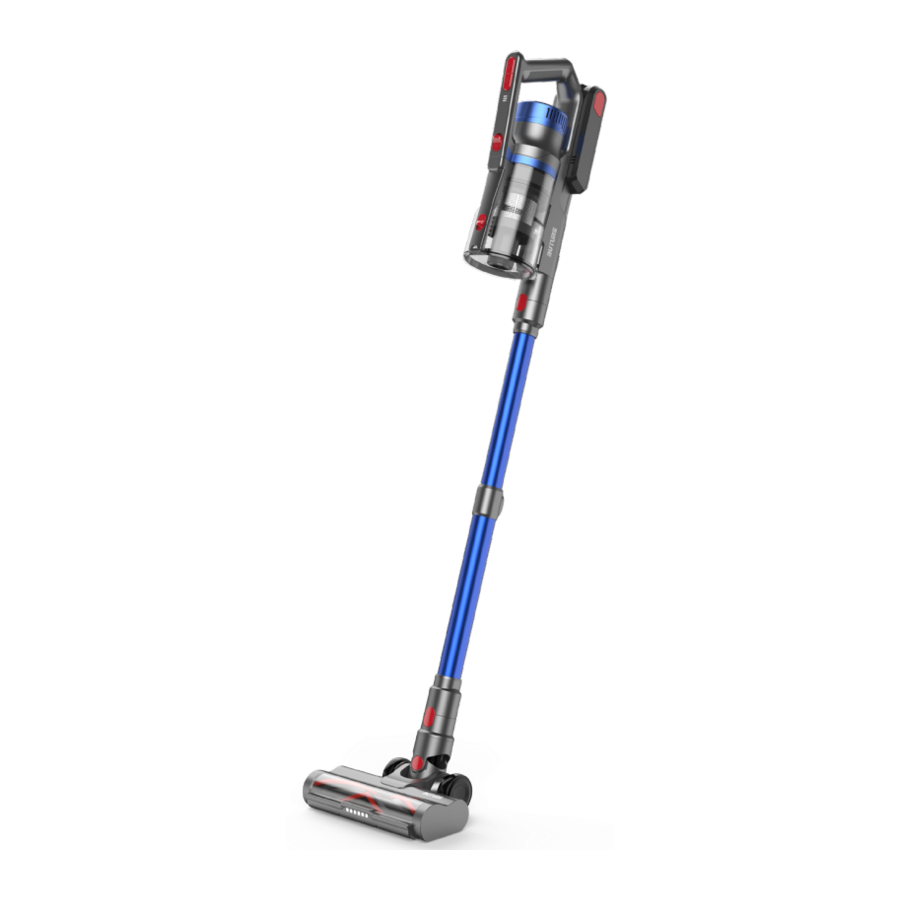
KNOW YOUR PRODUCT

| Number | Name | Introduction |
| 1 | ON/OFF Button | Turn on/off the vacuum cleaner |
| 2 | Suction Adjustment Button | To change suction power |
| 3 | LED Indicators | The color of the indicator light represents the suction level: Lowest level (white) - Mid level (light blue) - Highest level (blue) The number of indicator lights represents the battery power |
| 4 | Dust Cup Release Button | To separate the dust cup from the main body |
| 5 | Dust Cup | / |
| 6 | Dust Cup Cover Release Button | To release dust cup cover |
| 7 | Tube Release Button | To separate the telescopic tube from the main body |
| 8 | Telescopic Tube | Could be adjusted the length according to different needs |
| 9 | Floor Brush Release Button | To separate the floor brush from the telescopic tube |
| 10 | Electric Brush Head | / |
| 11 | Handle Unit | / |
| 12 | Battery Release Button | To separate the battery from the handle |
| 13 | Battery | / |
| 14 | Length Adjustment Button | Press down to adjust the length of telescopic tube |
| 15 | Crevice Nozzle | Remove dust in hard-to-reach area, such as window gaps, bottom of beds, sofa crevice, drawers, etc. |
| 16 | Soft Bristle Brush | Clean the surfaces of soft materials, such as sofas, beds, curtains, fabrics, etc. |
| 17 | Small Cleaning Brush | Sweep away the dust on brushes and dust cup |
| 18 | Wall Mount Stand | Installed on the wall for easy storage of the vacuum cleaner |
| 19 | Hard And Soft Bristle Integrated Brush (Installed) | Used on hard or soft surfaces, such as wood floors, cement floors, carpets, and sofas |
| 20 | Charger | Battery charging adapter |
CHARGING
 Turn off the power before charging.
Only charge with the original charger to avoid damage to the vacuum cleaner. Please confirm the vacuum is fully charged before using.
To ensure the normal operation of the product, charge the battery for more than 5 hours before first use.
- Two charging ways:
- The battery is installed on the vacuum cleaner. Plug the power adapter to charge.

- The battery could be charged separately without installing it in the vacuum cleaner. Plug the power adapter to charge.
![]()
- The battery is installed on the vacuum cleaner. Plug the power adapter to charge.
- While charging, the three LED Indicators keep flashing until the battery is fully charged.
- When the battery is fully charged, the three LED Indicators will turn off after about 15 seconds.


Attention:
When the ON/OFF Button is pressed, the vacuum cleaner does not run and just one of the three LED indicators is flashing, the battery needs to be charged.
ASSEMBLING
- Install the Dust Cup
Align the buckle and press down. A click can be heard when installed in place.

- Install the Battery
Insert the battery pack into the notch under the handle of the vacuum cleaner. A click can be heard when installed in place.
![]()
- Connect the Telescopic Tube
Insert the telescopic tube into the main body and make sure it is secure.
Press the release button, the telescopic tube can be removed.

- Connect Clean Heads
- To clean sofas and beds, the clean head can be assembled directly with the main body without the telescopic tube.

- To clean floors, stairs and high places, it's suggested to connect with telescopic tube.

- To clean sofas and beds, the clean head can be assembled directly with the main body without the telescopic tube.


The electric floor brush contains moving parts! To avoid personal injury, do not touch the rolling brush when the vacuum cleaner is running. Touching the rotating brush may cause cuts, injuries, or other injuries. Turn off the vacuum cleaner during maintenance. Pay attention to the safety of children nearby when using.
USING
Do not let the rubbish exceed the "MAX" capacity of the dust cup.
Keep the suction nozzle unobstructed and avoid blockage.
Otherwise, the motor will overheat or be damaged, causing danger.
- Choose a brush head according to your needs.

- Aim the clean head at the object to be cleaned. Before turning it on, check whether there are sharp objects stuck on the roller brush to avoid scratching the floor.
![]()
- Press the ON/OFF button to activate the vacuum cleaner at the lowest mode.
![]()
- Press the suction adjustment button to change the suction mode according to clean needs.
- Press the speed control button to adjust to medium speed, the LED indicator lights light blue.
- Press the speed control button to high speed, the LED indicator lights blue.
- Press the speed control button to come back to the low speed, the LED indicator lights white.

- Adjust the length of the tube according to different needs.
- Press the button behind the tube and pull out the tube at the same time to extend the tube.
- Press the button and pull the tube back to shorten the tube.

- After cleaning, press the ON/OFF button to turn off the vacuum cleaner.


CLEANING
- Empty the Dust Cup
To maintain good suction power, please empty the dust cup and clean the filter after each use.- Do not use the vacuum cleaner without a filter installed.
- After stopping the vacuum, place the vacuum cleaner above the trash can and press the release button on the dust cup to open the dust cup lid, dump out the trash.
![]()
- After cleaning up, close the dust cup lid. A click will be heard when it is completely closed.
- Clean up HEPA Filters and Metal Filters
Tips: Please clean the filter in time, the use of a clean filter can make the vacuum cleaner maintain the best suction effect. Or contact the after-sales service by e-mail to purchase a new filter.

- Check the filter frequently
When there is hair fiber winding on the metal filter, and there is obvious dust on the surface of the HEPA filter, please clean it up in time.
If the HEPA filter is full of dust, the dust will enter the motor, and the motor will be blocked, heated, losing the suction power. - Disassembly of dust cup
Push the dust cup release button to remove the dust cup. Take off the HEPA filter first, then remove the metal filter in a clockwise direction.

Clean the HEPA filter, gently tap or brush off the dust with the small cleaning brush.
Wash the HEPA filter and the metal filter with warm water.
Dry the filters in a ventilated area for 24 hours.
Tips:
Do not wash with dirty water.
Do not leave the metal filter and HEPA filter in a damp place.
Do not speed up the drying of the filter by exposing it to the sun or using a hairdryer, as this may damage the filter and shorten its service life.
![]()
HEPA filters and filters must be used after drying. Using the wet filter may cause product damage or other personal injury and property damage.

- Installation of dust cup
Place the clean and thoroughly dried HEPA filter and the metal filter back into the dust cup.
Screw the metal filter counter-clockwise into the dust cup.
 Note:
Note:
The function of the air filter element is to allow the device to dissipate heat and dredge the air more effectively during operation, without frequent cleaning. If necessary, press the air filter release button to remove the air filter.


 Note:
Note:- Clean up Electric Brush Head
Tips: After using for a period of time, the ground brush may be wrapped with threads, hair, fibers, and other debris, which will directly affect the cleaning effect. Please clean up in time.
- Make sure the vacuum cleaner is turned off. Press the brush release button to remove the floor brush and flip the brush to reveal the roller brush.
- Flicking the roller brush release button to the "unlock" position. Remove the small cover on the right sight of the floor brush.
![]()
- Remove the roller brush and remove the debris wrapping on the roller brush. Use the small cleaning brush to sweep away the trash on the roller.

- After cleaning, install the roller brush into the floor brush.
First put the left side of the roller brush into the left connector.
Then press the right side of the roller brush into place.
Finally, install the small cover. When installed in place, you can hear a click.
![]()


- Clean up the Blocked Extension Tube
- Press the tube release button to detach the tube from the electric floor brush.

- Remove blocked adhered to the two inlets inside of the tube, such as debris and pet hair.
- Press the tube release button to detach the tube from the electric floor brush.

Note : There are wires installed inside the extension tube to power the electric floor brush. Do not use sharp tools to clean the extension tube.
MAINTENANCE
- The filter can be cleaned with warm water. After cleaning, it must be thoroughly dried before use. Do not immerse the main unit in water or any liquid.
- Clean the vacuum cleaner casing only with a soft, slightly damp cloth.
- Do not allow any liquid substances to enter the vacuum cleaner.
- Do not use any corrosive chemicals or abrasives.
- It is recommended to change the HEPA filter every 2 months (depending on use) to ensure optimum performance. Do not use the HEPA filter or metal filter when it is damaged or worn out.
TROUBLESHOOTING
If there is any problem during use, please check the following troubleshooting table.
If the problem can't be solved, please contact the after-sales email: sales@ibuture.com.
Turn off the vacuum cleaner before maintenance. Otherwise it may cause electric shock or other personal injury.
Blockage Protection:
When the vacuum cleaner is blocked, it will automatically stop working, then the three indicator lights will light up 5 times at the same time.
Please clean the dust cup, filter, telescopic tube and floor brush thoroughly and promptly.
| Problems | Possible Causes | Solutions |
Vacuum can not work |
|
|
Suction power becomes weak |
|
|
Insufficient running time after charging |
|
|
LED indicator is not light |
|
|
Electric floor brush roller does not rotate |
|
|
Vacuum cleaner leaks dust |
|
|
The vacuum cleaner stops automatically |
|
|
WARRANTY
If there is any problem or malfunction during use, please send your question and order number to our email.
We will provide you a good after-sales service within 24 hours.
E-mail: sales@ibuture.com

Documents / ResourcesDownload manual
Here you can download full pdf version of manual, it may contain additional safety instructions, warranty information, FCC rules, etc.
Advertisement
Thank you! Your question has been received!


Need Assistance?
Do you have a question about the JR500 that isn't answered in the manual? Leave your question here.