Advertisement
Advertisement
Table of Contents

Related Manuals for BUTURE VC10


Summary of Contents for BUTURE VC10
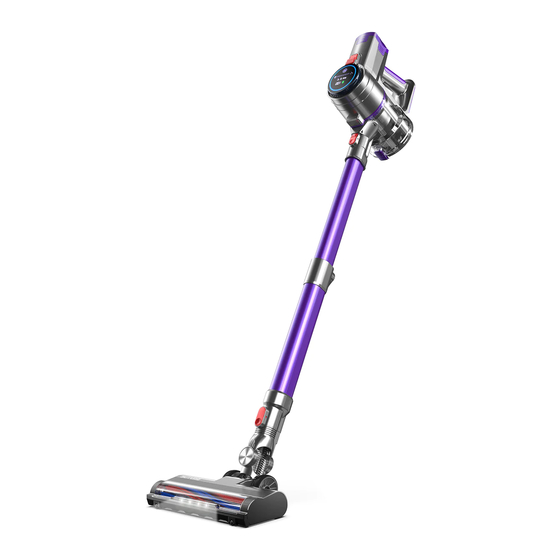
- Page 1 USER MANUAL VC10 Cordless Vacuum Cleaner tech-support@ibuture.com...
-
Page 2: Package Content
If you have any questions, email to tech-support@ibuture.com 2.PACKAGE CONTENT Please check and confirm the accessories and parts according to the following sheet before using. Part Name Quantity Main Body Battery Pack Adjustable Extension Tube Motorized Brush Head Soft Rolling Brush (Installed) Carbon Fiber Rolling Brush Long Crevice Nozzle 2 in 1 Upholstery Brush... -
Page 3: Know Your Product
If you have any questions, email to tech-support@ibuture.com 3.KNOW YOUR PRODUCT 3.1 Product Details Battery indicator Suction adjustment button Battery pack Charging spot Dust cup release button Switch button Suction adjustment button Digital display screen Dust cup Dust empty Telescopic tube release button release button Adjustable extension tube Length adjustment button... - Page 4 If you have any questions, email to tech-support@ibuture.com 3.2 Digital Display Screen Tube & dust cup blocking Indicator Remaining battery power Over-temperature protection indicator Brush blocking indicator Suction decrease Suction increase indicator indicator Suction adjustment button Suction level indicator...
- Page 5 If you have any questions, email to tech-support@ibuture.com 3.3 Accessories Function Introduction ① 2 in 1 Upholstery Brush ② Long crevice nozzle Easy to snap-on design,can help you remove Remove dust on the hard-to-reach areas like dust and hair on the carpet. windows, bed feet, gaps between sofa, etc.
- Page 6 If you have any questions, email to tech-support@ibuture.com 4.PRODUCT ASSEMBLING DIAGRAM 4.1 Install desired cleaning accessory You can choose to directly install the cleaning accessories or after connecting the extension tube according to the cleaning needs. • Directly install the cleaning accessories Ka da Ka da Ka da...
- Page 7 If you have any questions, email to tech-support@ibuture.com 4.2 Wall-Mounted Plate Assembling Diagram WARNING • Please make sure there is no gas, water, or electrical cables and wires behind the mounting area. • To avoid the dock dropping down, please make sure it must be installed firmly. •...
-
Page 8: How To Use
If you have any questions, email to tech-support@ibuture.com 5.HOW TO USE 5.1 Charging •When using a new battery or using it for the first time after long-term storage, please fully charge the battery first. •When storing and not using the vacuum cleaner for a long time, please ensure that it is charged and discharged at least once every three months. - Page 9 If you have any questions, email to tech-support@ibuture.com • Battery power indicator: Status Battery level indicator 0%~99%,“ ” three blue lights flash in a cycle Charging 100%,“ ” three blue lights always on 100%~67%,“ ” Three blue lights always on Using 66%~34%,“...
- Page 10 Oil and water stains on your finger may affect screen swiping. 5.3 Machine protection and error code indication Motor in VC10 cordless vacuum cleaner has built-in Blocking protection, and battery has built-in over-temperature protection, overcurrent & overvoltage protection. • Blocking protection When the brush head, tube or dust cup is blocked, the blocking protection for motor will work.
- Page 11 If you have any questions, email to tech-support@ibuture.com • Over-temperature protection Battery temperature will rise under continuous high suction power mode. If you charge the battery when its temperature is to high, the over-temperature protection will work. On the screen the over-temperature protection indicator will light up, and the battery will intelligently reduce the charging input power to prevent overheating.
-
Page 12: Maintenance
If you have any questions, email to tech-support@ibuture.com 6.MAINTENANCE Please clean it regularly to prolong the lifespan of your vacuum cleaner. 6.1 Main body (non-washable parts) cleaning • Turn off the power before cleaning the body. • Please use a neutral detergent, wipe the body with half-wet cloth. •... - Page 13 If you have any questions, email to tech-support@ibuture.com 6.2.2 Clean the dust cup and HEPA filter • Press the dust cup release button to separate the dust cup and the main body. • Hold the lower part of the dust cup with one hand and the upper part of the dust cup with the other hand,...
- Page 14 If you have any questions, email to tech-support@ibuture.com 6.2.3 Install the filter and the dust cup Install the filter and the dust cup in correct direction, make the buckles in right place and twist to fix it. 6.3 Brush Roller Cleaning Note: After long periods of use, the bristle may be jammed by hair or similar build-up.
- Page 15 If you have any questions, email to tech-support@ibuture.com • Remove the debris wrapped around the roller with mini cleaning brush,then flush with water. • Gently push the brush roller into the motored brush,until securely in place. (Please make sure the brush roller is completely dry before using.)
-
Page 16: Specification
(3)The motorized brush head or is (3)Clean the motorized brush head tangled by hair or other debris Use the charger provided by BUTURE Incompatible adaptor (1)Brush roller are blocked with hair, (1)Clean the brush roller pebbles or other debris... -
Page 17: Warranty
9.WARRANTY 9.1 The 2-Year Limited Warranty • Our BUTURE machine has a 2-year warranty against original defects in material and workmanship, when used for private household purposes in accordance with the BUTURE Instruction Manual. • This warranty provides, at no extra cost to you, all labor and parts necessary to ensure your machine is in proper operating condition during the warranty period.