Table of Contents
Advertisement
Quick Links
Safety • Set-Up • Operation • Adjustments • Maintenance • Troubleshooting • Warranty
OPERATOR'S MANUAL
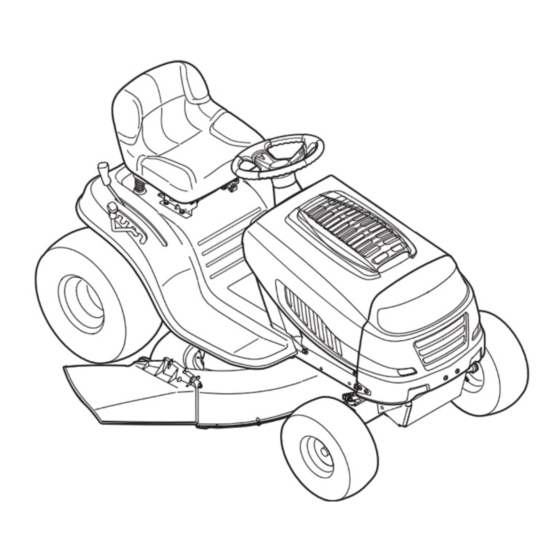
Hydrostatic Lawn Tractor — Model 790
IMPORTANT:
READ SAFETY RULES AND INSTRUCTIONS
CAREFULLY BEFORE OPERATING EQUIPMENT.
769-04750
MTD Products Ltd., P. O. Box 1386, KITCHENER, ONT. N2G 4J1
PRINTED IN U.S.A.
1/8/09
Advertisement
Table of Contents

Related Manuals for MTD 13AN791G506


Summary of Contents for MTD 13AN791G506
- Page 1 Safety • Set-Up • Operation • Adjustments • Maintenance • Troubleshooting • Warranty OPERATOR’S MANUAL Hydrostatic Lawn Tractor — Model 790 IMPORTANT: READ SAFETY RULES AND INSTRUCTIONS CAREFULLY BEFORE OPERATING EQUIPMENT. 769-04750 MTD Products Ltd., P. O. Box 1386, KITCHENER, ONT. N2G 4J1 PRINTED IN U.S.A. 1/8/09...
-
Page 2: Table Of Contents
This Operator’s Manual is an important part of your new equipment. It will help you assemble, prepare and maintain the unit for best performance. Please read and understand what it says. Table of Contents Slope Gauge............3 Maintaining Your Lawn Tractor ......20 Safe Operation Practices ........ -
Page 3: Slope Gauge
Use this page as a guide to determine slopes where you may not operate safely. Do not operate your lawn mower on such slopes. Slope Gauge WARNING Do not mow on inclines with a slope in excess of 15 degrees (a rise of approximately 2-1/2 feet every 10 feet). -
Page 4: Safe Operation Practices
WARNING: Engine Exhaust, some of its constituents, and certain vehicle components contain or emit chemicals known to State of California to cause cancer and birth defects or other reproductive harm. DANGER: This machine was built to be operated according to the rules for safe operation in this manual. As with any type of power equipment, carelessness or error on the part of the operator can result in serious injury. - Page 5 Slope Operation a. Keep children out of the mowing area and in watchful care of a responsible adult other than the operator. Slopes are a major factor related to loss of control and tip-over b. Be alert and turn machine off if a child enters the area. accidents which can result in severe injury or death.
- Page 6 e. Extinguish all cigarettes, cigars, pipes and other frequently check components and replace immediately with sources of ignition. original equipment manufacturer’s (O.E.M.) parts only, listed in this manual. “Use of parts which do not meet the original f. Never fuel machine indoors. equipment specifications may lead to improper performance g.
- Page 7 This page depicts and describes safety symbols that may appear on this product. Read, understand, and follow all instructions on the machine before attempting to assemble and operate. Symbol Description Safe READ THE OPERATOR’S MANUAL(S) Read, understand, and follow all instructions in the manual(s) before attempting Symbols to assemble and operate DANGER—...
-
Page 8: Setting Up Your Lawn Tractor
The gasoline tank is located under the hood and has a Characteristics and features discussed and/or illustrated capacity of 1-1/2 gallons. Do not overfill. in this manual may not be applicable to all models. MTD WARNING: Use extreme care when LLC reserves the right to change product specifications, handling gasoline. - Page 9 Setting Up Your Lawn Tractor WARNING Figure 3-2 Figure 3-4 4. While holding the scoop in place, use a 3/8” socket Make sure the riding wrench (or box wrench) to carefully tighten the scoop mower’s engine is onto the hood. Do NOT overtighten. off, remove the igni- Attaching The Seat tion key, and set the...
- Page 10 Setting Up Your Lawn Tractor Figure 3-6 Figure 3-5 WARNING Knob Adjustment Seat 1. Position the shoulder screws (found on the base of Before operating this the seat) inside the slot openings in the seat pivot bracket. Figure 3-6. machine, make sure the seat is engaged in 2.
- Page 11 Setting Up Your Lawn Tractor Figure 3-8 Identifying the Mulch Plug (if so equipped) On tractor models so equipped, a mulch plug can either Figure 3-9 be found within the cutting deck’s discharge opening or WARNING packed separately with your unit. NOTE: Refer to Mulching in the Operation section of this manual for more detailed information.
-
Page 12: Operating Your Lawn Tractor
Know Your Lawn Tractor Operating Your Lawn Tractor NOTE: Any reference in this manual to the RIGHT or LEFT side of the tractor is observed from operator’s position. For shipping reasons, seats are either fastened to the tractor seat’s pivot bracket with a plastic tie, or mounted backward to the pivot bracket. - Page 13 Throttle Control Lever The throttle control lever is located on the right side of the tractor’s dash panel. This lever controls the speed of the engine and, on some models, when pushed all the way forward, the choke control also. When set in a given position, the throttle will maintain a uniform engine speed.
- Page 14 Contact an authorized MTD service dealer. interlock system is • The safety interlock system prevents the engine Brake Pedal malfunctioning.
- Page 15 Reverse Caution Mode (If Equipped) WARNING: Use extreme caution while operating the tractor in the REVERSE CAUTION MODE. Always look down and behind before and while backing. Do not operate the tractor when children or others are around. Stop the tractor Operating immediately if someone enters the area.
- Page 16 IMPORTANT: Do NOT hold the key in the START WARNING position for longer than ten seconds at a time. Doing so may cause damage to your engine’s electric starter. AVOID SERIOUS INJURY OR 6. After the engine starts, deactivate the choke control DEATH and place the throttle control in the FAST position.
- Page 17 Mowing 3. Shut engine off and remove the key. Doing so will minimize the possibility of having your lawn WARNING: To help avoid blade contact ‘‘browned’’ by hot exhaust from your tractor’s running or a thrown object injury, keep bystand- engine.
- Page 18 Characteristics and features discussed and/or illustrated in this manual may not be applicable to all models. MTD LLC reserves the right to change product specifications, designs and equipment without notice and without incurring obligation.
-
Page 19: Adjusting Your Lawn Tractor
WARNING: Never attempt to make any adjustments while the engine is running, except where specified in the operator’s manual. Leveling the Deck Adjusting NOTE: Check the tractor’s tire pressure before perform- ing any deck leveling adjustments. Refer to Tires on page Your Lawn 24 for information regarding tire pressure. -
Page 20: Maintaining Your Lawn Tractor
Lubrication WARNING: Before lubricating, repairing, or inspecting, always disengage PTO, move shift lever into neutral position, set parking brake, stop engine and remove key to prevent unintended starting. Maintaining Engine Lubricate the engine with motor oil as instructed in the Your Lawn Engine Owner Manual packed with your unit. - Page 21 Deck Wash System™ (If equipped) Your tractor’s deck may be equipped with a water port on its surface as part of its deck wash system. Use the Deck Wash System™ (sold separately) to rinse grass clippings from the deck’s underside and prevent the buildup of cor- rosive chemicals.
- Page 22 6. Repeat the above steps on the tractor’s right side. NOTE: The deck support rod on the right side of the tractor is secured using hair pin clip as opposed to a cotter pin, which you might had noticed was used on the left side.
- Page 23 IMPORTANT: Never jump your tractor’s dead battery with the battery of a running vehicle. 1. Connect end of one jumper cable to the positive terminal of the good battery, then the other end to the positive terminal of the dead battery. 2.
- Page 24 IMPORTANT: Use a torque wrench to tighten the blade Idler pulleys spindle hex flange nut to between 70 foot-pounds and 90 foot-pounds. Changing the Deck Belt WARNING: Be sure to shut the engine off, remove ignition key, disconnect Maintaining the spark plug wire(s) and ground against the engine to prevent unin- Your Lawn tended starting before removing the...
- Page 25 Changing the Lower Deck Belt (46” Decks) NOTE: Several components must be removed in order to change the tractor’s lower deck belt. See an authorized Service Dealer to have your lower drive belt replaced or phone Customer Support as instructed on page 2 for informa- tion on ordering a Service Manual.
- Page 26 Maintenance Schedule Before Every 10 Every 25 Every 50 Every 100 Prior to Each Use Hours Hours Hours Hours Storing Clean Hood Louvers Maintaining Check Engine Oil Level Your Tractor Check Air Filter for Dirty, Loose or Damaged Parts Clean and Re-oil Air Filter’s Foam Precleaner Replace Air Filter Element Change Engine Oil &...
-
Page 27: Off-Season Storage/Attachments
Clean and lubricate the tractor as instructed in Section 6: Follow the instructions in the Service, Storage & MAINTAINING YOUR LAWN TRACTOR on page 19 of Specifications section of the Engine Operator/Owner this manual before storing for an extended period. Manual for proper engine care prior to storing your tractor. -
Page 28: Trouble Shooting
Problem Cause Remedy Engine fails to start 1. PTO engaged. 1. Place PTO knob (or lever) in disengaged (OFF) position. 2. Connect wire(s) to spark plug(s). 2. Spark plug wire(s) disconnected. 3. Fill tank with clean, fresh gasoline. 3. Fuel tank empty or stale fuel. Trouble 4. -
Page 29: Warranty
Damage resulting from the installation or use of any part, accessory or attachment not approved by MTD for use with the product(s) covered by this manual will void your warranty as to any resulting damage. -
Page 30: Replacement Parts
Replacement Parts NOTE: Download a complete Parts Manual free of charge from the website listed on page 2 of this manual. Be sure to have your model number and serial number ready. These can be found on the model plate located under the seat. Refer to page 2 for more information regarding locating your model and serial numbers. - Page 31 NOTES: For parts and/or accessories refer to customer support on page 2. Adressez-vous au «Service après-vente» à la page 2 pour ce qui concerne les pièces et/ou accessoires.
- Page 32 NOTES: For parts and/or accessories refer to customer support on page 2. Adressez-vous au «Service après-vente» à la page 2 pour ce qui concerne les pièces et/ou accessoires.