Table of Contents
Advertisement
Available languages
Available languages
Quick Links
Advertisement
Chapters
Table of Contents

Related Manuals for Midland C1222.25


Summary of Contents for Midland C1222.25
- Page 1 › MANUALE D’USO › INSTRUCTION GUIDE › BEDIENUNGSANLEITUNG...
-
Page 2: Table Of Contents
Priorità ........................................................6 Come abbinare un altro dispositivo Midland BTNEXT PRO ......................................6 Conference......................................................8 Talk 2 All - Abbinamento a dispositivi non Midland..........................................9 Utilizzo della funzionalita’ Radio FM ..............................................12 Utilizzo dell’ingresso audio a filo ................................................13 Utilizzo di un ricetrasmettitore PMR446 con cavo ..........................................13 Configurazioni speciali ................................................... -
Page 3: Principali Caratteristiche
3 grandi tasti posti sul frontale del dispositivo. Midland BTNEXT PRO TWIN Midland BT NEXT PRO si può fissare al casco in due modi: tramite basetta adesiva o tramite › 2 dispositivi di comunicazione Midland BTNEXT PRO l’aggancio a morsetto. -
Page 4: Ricarica Delle Batterie
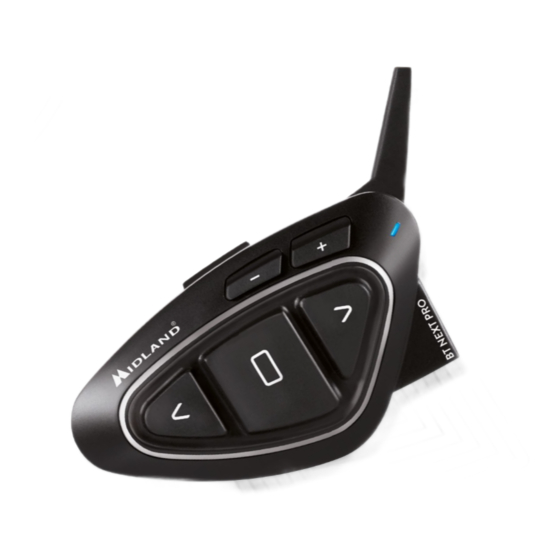
Descrizione Midland BTNEXT PRO Connessioni a filo: Il dispositivo Midland BTNEXT PRO è dotato di 5 pulsanti, tutti nella parte frontale. › Per sorgente audio stereo tipo iPod/MP3 player (cavo opzionale) I tre pulsanti principali sono pulsanti multifunzione: pulsante Avanti (a sinistra), pulsante Attenzione: Midland BTNEXT PRO è... - Page 5 Il microfono può essere fissato al casco in due modi, in base alla tipologia di microfono Descrizione sistema di fissaggio al casco scelta.: Il Midland BTNext PRO è fornito con due sistemi di fissaggio al casco, uno tramite base Microfono a braccetto con biadesivo e l’altro con aggancio a morsetto.
-
Page 6: Modalità Operative
(cosa che potrebbe succedere, specialmente se si utilizzano i guanti). Modalità operative Midland BTNEXT PRO ha tre modalità di funzionamento distinte: Intercom, Telefono e Radio FM. In base alla modalità attiva in un dato momento, le funzioni del Midland BTNEXT PRO www.midlandeurope.com... -
Page 7: Come Abbinare Un Altro Dispositivo Midland Btnext Pro
Se invece i dispositivi non fanno parte della stessa confezione o avete pulsante Centrale. Un annuncio vocale vi indicherà in quale modalità state entrando. La acquistato un altro Midland BTNEXT PRO in un secondo momento (per esempio per il sequenza con cui è possibile scorrere le 3 modalità è la seguente: passeggero), dovete prima eseguire la procedura di abbinamento. - Page 8 2 toni audio a conferma della disattivazione. Un Midland BT NEXT PRO può essere abbinato ad un massimo di 5 dispositivi, per un totale di 6 unità abbinate (3 dispositivi Midland + 2 Talk2All + voi).
- Page 9 Pilota 2 Attivazione vocale (VOX): 1. Attivate la modalità “Setup” (Spegnete il Midland BTNEXT PRO, Tenere premuto il pul- La funzionalità VOX per l’attivazione vocale dell’Intercom è attiva di default e può avve- sante “Centrale” fino a che la luce non rimane di colore rosso fisso) nire solo verso il dispositivo abbinato tramite il tasto “Centrale”.
-
Page 10: Conference
Attenzione: in modalità “Conference” anche la funzione “Talk2All-Universal Intercom”, per La comunicazione in “Conference” può essere molto interessante ma obbliga che tutti e parlare con dispositivi non Midland non è disponibile. quattro i dispositivi siano sempre presenti e tutti con l’intercom aperto! Per prima cosa è... -
Page 11: Talk 2 All - Abbinamento A Dispositivi Non Midland
Attivazione modalità Audio Privato: tenete premuto il tasto “Vol –“ per 3 sec., sentirete Si possono abbinare al massimo 2 dispositivi Intercom non Midland, uno sul tasto Avanti l’annuncio vocale “Private”. e l’altro sul pulsante Indietro. - Page 12 , dipende dal modello del dispositivo non Midland). Attenzione: in questa configurazione il dispositivo non Midland non potrà utilizzare il te- lefono (essendo già stato abbinato il Midland BTNEXT PRO al posto del telefono stesso). E’ possibile abbinare anche un dispositivo Midland in modalità “Talk2ALL-Universal Intercom”...
- Page 13 è stato completato con successo. corretta comprensione della comunicazione Intercom. É possibile modificare questa confi- 5. Il Midland BTNEXT PRO uscirà dalla modalità setup (luce rossa fissa) e passerà auto- gurazione tramite il software per PC BT Updater.
- Page 14 E’ infatti possibile utilizzare i pulsanti presenti sul tercom senza nessun audio aperto. Il passeggero non può controllare la musica ma può interrompere la condivisione pre- Midland BTNEXT PRO per gestire le seguenti funzioni: Play, Stop/Pause, Avanti ed In- dietro. mendo brevemente il tasto “Centrale”.
-
Page 15: Utilizzo Della Funzionalita' Radio Fm
Il GPS può essere abbinato tramite il pulsante “Volume+” oppure “Volume-“. 4. Il Midland BTNEXT PRO uscirà dalla modalità setup (luce rossa fissa) e passerà auto- maticamente allo stato di funzionalità normale (luce blu lampeggiante). Ora il GPS è... -
Page 16: Utilizzo Dell'ingresso Audio A Filo
Disattivazione: connessione è aperta, mentre un doppio tono audio quando è chiusa. › Attivate la modalità “Setup (Spegnete il Midland BTNEXT PRO Tenere premuto il pul- sante “Centrale” fino a che la luce non rimane di colore rosso fisso). Ingresso audio in background ›... -
Page 17: Configurazioni Speciali
Fate doppio click sul tasto “Centrale” per uscire dalla modalità Set-Up. 5. Premete brevemente il pulsante “Indietro”, la luce Blu lampeggerà diverse volte in Da questo momento il Midland BTNEXT PRO non avrà più nessun dispositivo Bluetooth base alla configurazione della sensibilità in quel momento attiva: in memoria e potrete procedere ad una nuova sessione di accoppiamento (pairing). -
Page 18: Configurazione E Aggiornamento Firmware
Configurazione e aggiornamento firmware recchio. Queste ultime, se non espressamente approvate dal produttore, annullano la Midland BTNEXT PRO può essere configurato e aggiornato tramite connessione USB possibilità di utilizzo dell’apparecchio ed invalidano la garanzia. al vostro PC, per migliorare la compatibilità con i dispositivi Bluetooth, quali telefoni e Per ulteriori informazioni, fate riferimento al nostro sito web: www.midlandeurope.com... - Page 19 www.midlandeurope.com...
- Page 20 Technical specifications of Midland Midland BTNEXT PRO ......................................21 Charging batteries ....................................................22 Unit and fixing system description ..............................................22 Switching ON and OFF your Midland BTNEXT PRO ........................................24 How to pair two Midland BTNEXT PRO units ..........................................25 Set up of the AGC system .................................................. 26 Conference mode with one Bluetooth device on “VOL-”...
- Page 21 › 2 Slide-in mounting kit with two stereo speakers on the front of the unit. Midland BTNEXT PRO is fixed on the helmet using the adhesive › 2 microphones with boom and 2 wired microphones plate or the screw mounting clamp.
- Page 22 › For stereo audio input like iPod/MP3 player (with optional cable) On the bottom of the unit you can find the Charger jack that enables to recharge the Attention: Midland BTNEXT PRO is designed to withstand rain and water. However, if it is unit using a standard microUSB power supply raining, always verify that the rubber cap protecting the recharging sockets is fully fitted.
- Page 23 Description of the Slide-in mounting kit Fixing the microphone The Midland BTNext PRO can be fixed onto the helmet, installing the slide-in mounting Boom Microphone kit in two different ways: By either using the plate with bi-adhesive strip, or the screw plate.
- Page 24 Just use the two short screw to fix the rubber plate on the slide-in mount and tighten the screw plate again. Lock Unlock Switching ON and OFF your Midland BTNEXT PRO Switching the unit on: Press and hold “Middle” button for approximately 3 seconds until the BLUE indicator lights.
- Page 25 The BTNEXT PRO can operate in three main “mode”: Intercom, Phone and FM Radio. The 3 multi function buttons can have different functionality depending on which mode To pair the Midland BTNEXT PRO to another Midland BTNEXT PRO unit, you must first the unit is at that moment.
- Page 26 40 seconds. If needed you can close the intercom manually without waiting The Midland BTNEXT PRO has three main buttons (Forward, Middle and Rear). It is up to 40 seconds (just press the middle button). you which button to use to pair and activate the intercom, you are totally free to choose the If needed, you can disable the VOX feature simply by pressing the Backward button for button you like more.
- Page 27 5. When successfully paired, each unit will have the Blue light on for one second and then go back to the setup mode (Red light always on). 6. Now the unit is ready for another pairing procedure, and you can pair another Midland BTNEXT PRO unit following the same procedure, but using a different button.
- Page 28 Conference mode with one Bluetooth device on “VOL-” The first and the last unit must not be paired together (the chain must stay open). The unit number 1 can talk to the last unit (number 4) only “through” the unit number When the conference mode is active the Bluetooth device connected on VOL- is still 2 and number 3.
- Page 29 Red and Blu LED light will start flashing fast, then (while you still keep the button unit must be done as a phone. The other intercom (not Midland brand) will be able to be paired pressed) the Red and Blu LED lights will change to slow flashing. Now you can to a phone only if two phones are supported.
- Page 30 How to pair the Midland BTNEXT PRO to a Phone To pair the Midland BTNEXT PRO to a Phone, you must first enter the setup mode: 1. Turn off the unit When a device is paired to the “Vol +” or “Vol –“ buttons the “Phone” mode is activated.
- Page 31 After pairing your phone to the Midland BTNEXT PRO unit you must switch to the “Pho- Phone on Vol-: Briefly press“Backward”button. If your mobile phone supports voice calls, ne”...
- Page 32 How to pair the Midland BTNEXT PRO to a GPS If you are listening to A2DP music from the VOL- and you move from “Phone” mode In general it is possible to pair the Midland BTNEXT PRO to all the GPS for motorbike that www.midlandeurope.com...
- Page 33 › Press and hold down the “Middle” button about 7 sec., until the Red light is on perma- › Double click on the “Middle” button to exit the “Setup” mode and use the Midland BT- nently. NEXT PRO ›...
- Page 34 Wired audio input “Intercom” mode (a voice announcement will confirm the status). Your Midland BTNEXT PRO can be connected to a wired audio source, like an iPod (or The unit will remember the last setting used, that mean you need any other MP3 Player).
- Page 35 RED. one flash (VOX disabled). › Double click on the “Middle” button to exit the “Setup” mode and use the Midland BTNEXT PRO Attention! If you disable the VOX feature, you will be able to answer incoming phone calls only by pressing the “Forward”...
- Page 36 European CE Notice Certification and Safety Approval Information It is possible to configure and update the firmware of your Midland BTNEXT PRO using the USB connection to your PC. On the Midland web site www.midlandeurope.com in This product is CE marked according to the RTTE Directive 99/5/EC...
- Page 37 www.midlandeurope.com...
- Page 38 Ein-/Ausschalten des Midland BTNEXT PRO ..........................................37 Betriebsarten ......................................................37 Max. Reichweite ....................................................37 Koppeln (Pairen) von Zwei Midland BTNEXT PRO- Geräten ....................................... 37 Konferenz ......................................................40 Talk2 All – Koppeln mit einem Fremdhersteller-Gerät ........................................41 Koppeln von Bluetooth Geräten mit dem Midland BTNEXT PRO ....................................41 Hintergrund“-Funktion ..................................................42...
-
Page 39: Hauptmerkmale
Dual Core Gegensprechanlage › 1 Klapphelmmikrofon und 1 Integralhelmmikrofon Midland BTNEXT PRO ist ein Gegensprechsystem mit 2 Bluetooth Chipsätzen für Konferen- › 1 Platte mit Klebestreifen, um das Gerät am Helm zu befestigen › 1 Platte mit Schraube, um das Gerät an den Helm zu klemmen zkommunikation und echte Stereo Audioübertragung im Hintergrund. -
Page 40: Aufladen Des Akkus
› Für Stereo-Tonquellen wie iPod/MP3-Player (mit optionalem Kabel) Kabelanschlüsse Achtung: Das Midland BTNEXT PRO ist regen- und wasserfest konzipiert. Stellen Sie aber dennoch sicher, dass bei Regen die Gummischutzkappen die Anschlüsse vollständig abdecken. Auf der Unterseite des Gerätes finden Sie die Ladebuchse, welche kompatibel zu Stan- dard Micro USB Netzteilen ist. - Page 41 Gerätes nicht zu weit zu erhöhen. Sie müssen weiterhin den Verkehr um Sie herum wahrnehmen können. Slide-In Halterungssatz Das Midland BTNEXT PRO kann am Helm befestigt werden, indem man die Slide-In Mikrofonbefestigung Halterung auf zwei verschiedene Weisen anbaut: entweder mittels des Klebestreifens oder mittels der Schraubenplatte.
- Page 42 Schritt 2: Befestigen Sie die Klemmhalterung an der Slide-In Halterung mittels der 2 Schrauben. Das Midland BTNEXT PRO anbauen und abbauen Schritt 3: Schieben Sie die Halterung zwischen Helmschale und Polsterung und ziehen Das BTNEXT PRO kann problemlos am Helm befestigt werden, indem es nach unten die beiden Schrauben fest an.
-
Page 43: Ein-/Ausschalten Des Midland Btnext Pro
Ein-/Ausschalten des MIDLAND BTNEXT PRO nur verfügbar, wenn das Gerät vorher mit einem anderen BT-Gerät oder einem Handy gekoppelt wurde. Einschalten des Geräts: Wenn Sie wissen möchten, in welchem Modus sich das Gerät gerade befindet, drücken Sie einfach gleichzeitig die Tasten „Lautstärke +“ und „Lautstärke –“ für 3 Sekunden. - Page 44 Um die VOX-Funktion erneut zu aktivieren, drücken Sie einfach die gleiche Das Midland BTNEXT PRO hat drei Haupttasten (Vorwärts, Mittel und Zurück). Sie Taste. Die Sprachansage weist darauf hin, dass die VOX-Funktion nun aktiviert wurde. Diese können frei entscheiden, welchen Kommunikationspartner Sie mit welcher Taste kop- Einstellung bleibt auch nach dem Ausschalten des Gerätes erhalten.
- Page 45 Kopplung des Midland BTNEXT PRO mit einem anderen Midland BTNEXT PRO Wenn Sie eine Gegensprech-Verbindung mit einer anderen Person herstellen möchten, Um zwei Midland BTNEXT PRO miteinander zu koppeln, müssen diese zuerst in den die sich bereits in einem Gespräch befindet (oder telefoniert), hören Sie zwei „Besetzt“- Setupmodus gebracht werden: Signaltöne.
-
Page 46: Konferenz
Konferenzmodus An: Wenn Sie sich im Intercom-Modus ohne offene Verbindung befinden, halten Sie die Vorwärts-Taste für 7 Sekunden gedrückt. Die Sprachansage “Conference” zeigt an, dass die Konferenz aktiviert wurde. Nach der Aktivierung werden Geräte, welche über Vol+ gekoppelt wurden, getrennt. Das Pairing über die mittlere Taste und Universal Interom sind nicht verfügbar. - Page 47 “Public” oder “Private” hören, welche den aktuell gewählten Modus anzeigt. Gegensprechanlagen von Fremdherstellern zu koppeln. Sie können bis zu 2 nicht-Midland Geräte verbinden: eines auf der „Vorwärts“- und eines Achtung: Eingehende Anrufe sind immer Privat, selbst wenn Sie Public gewählt haben.
-
Page 48: Hintergrund"-Funktion
Gerät ab, das die geringere Reichweite hat. Das BTNEXT Hintergrund hörbar (selbst Stereosignale). Auf diese Weise wird die Intercomkom- PRO ist mit Geräten der vorigen Midland BT-Produktlinie (BT Next, BTX1 und BTX2) munikation nicht durch Fahranweisungen des Navigationsgerätes o.ä. unter- nur kompatibel, wenn sie auf eine Firmware-Version von 2014 oder neuer aktualisiert brochen. - Page 49 › Halten Sie jetzt die „Lautstärke +“ Taste länger gedrückt (3 Sek.), die blaue und die Falls Sie den Anruf nicht annehmen wollen, können Sie das Mobiltelefon klingeln rote LED blinken. Nach einigen Sekunden sehen Sie im Display des Telefons „Midland lassen oder halten Sie die „Vorwärts“-Taste für 3 Sekunden gedrückt (Sie werden einen Bestätigungston hören).
- Page 50 Telefon über Vol-: Drücken Sie kurz auf die „Zurück”-Taste. Wenn Ihr Telefon die Spra- cheingabe unterstützt, werden Sie aufgefordert, den Namen des gewünschten Kontaktes zu sagen Priorität: Anrufe haben eine hohe Priorität, was bedeutet: Wenn ein Anruf ankommt, wird jede andere Verbindung vorübergehend deaktiviert.
-
Page 51: Kopplung Mit Einem Gps Navigator
Das GPS Navigationsgerät kann entweder über „Volume +“ oder „Volume –“ gekoppelt betriebsbereit (die blaue LED blinkt). werden. Nun können Sie mit Ihrem Midland BT NEXT PRO die Fahranweisungen Ihres Naviga- Volume + Taste (unterstützt A2DP Audio und HFP Mono) Mit Vol+ gekoppelte Geräte tionsgerätes hören. - Page 52 Beachten Sie bitte, dass es nicht möglich ist, eine kabelgebundene Tonquelle als Mode umschalten. Hintergrund für UKW-Radio einzustellen. Kabelgebundener Audioeingang Sie können Ihr Midland BTNEXT PRO mit einer kabelgebundenen Tonquelle wie zum C – UKW RADIO MODE Modus Weiter-Taste Mittlere Taste Zurück-Taste...
-
Page 53: Setup Und Spezielle Konfiguration
Bremslicht Auf die Werkseinstellungen zurücksetzen Auf der Rückseite des Montagesatzes Ihres BTNEXT PRO Manchmal kann es notwendig sein, zu den Werkseinstellungen zurückzukehren, um befindet sich ein extrem helles LED-Bremslicht. Wenn Sie eine alle Änderungen oder Setupeinstellungen zurückzusetzen und ein „sauberes“ Gerät zu Vollbremsung ausführen, leuchtet dieses Bremslicht auf, um erhalten. -
Page 54: Setup Und Firmware-Aktualisierung
Die Firmware Ihres BTNEXT PRO kann mittels einer USB-Verbindung mit Ihrem PC 5x Aufblinken = sehr hohe Empfindlichkeit konfiguriert und aktualisiert werden. Auf der Website von Midland 4. Nun leuchtet rote LED erneut ständig auf („Setup-Modus“) und die Änderungen www.midlandeurope.com oder unter www.btupdater.de finden Sie auf der BTNEXT werden bestätigt. -
Page 55: Gewährleistung
Gewährleistung Gewährleistungsfrist beträgt 24 Monate ab Kauf-/Lieferdatum (bei Teilen mit beschränk- ter Lebensdauer wie, Akkus, Ladegeräte, Headsets, mikrofone und Antennen 6 Monate). Für allen Informationen über die Garantie der Artikel, besuchen Sie bitte unsere www.mi- dlandeurope.com Europäische CE Erklärung und Sicherheitshinweise Hiermit erklärt Cte International Srl, dass das Produkt die grundlegenden Anforderungen und anderen relevanten Bestimmungen der Richtlinie 1999/5/EC erfüllt (ab dem 13.06.2017, erfüllt es die Auflagen der Richtlinie 2014/53/UE). - Page 56 • INFORMAZIONE AGLI UTENTI: i sensi dell’art. 13 del decreto legislativo 25 luglio • Alle Artikel, die auf der Verpackung oder der Gebrauchanweisung dieses Symbol tragen, dürfen nicht in den normalen Mülltonnen entsorgt werden, sondern müssen an gesonder- 2005, n.151 “Attuazione delle Direttive 2002/95/CE, 2002/96/CE e 2003/108/CE, ten Sammelstellen abgegeben werden.
- Page 57 Prodotto o importato da: CTE INTERNATIONAL srl Via. R.Sevardi 7 42124 Reggio Emilia - Italia. Prima dell’uso leggere attentamente le istruzioni. Produced or imported by: CTE INTERNATIONAL srl Via. R.Sevardi 7 42124 Reggio Emilia - Italy. Read the instructions carefully before installation and use. Vertrieb durch: ALAN ELECTRONICS GmbH Daimlerstraße 1K - D-63303 Dreieich Deutschland.
- Page 58 www.midlandeurope.com...