Midland BTNEXT PRO Instruction Manual
Hide thumbs
Also See for BTNEXT PRO:
- User manual ,
- Instruction manual (116 pages) ,
- Instruction manual (58 pages)
Table of Contents
Advertisement
Available languages
Available languages
Advertisement
Table of Contents

Related Manuals for Midland BTNEXT PRO


Summary of Contents for Midland BTNEXT PRO
- Page 1 › MANUALE D’USO › INSTRUCTION GUIDE...
-
Page 2: Table Of Contents
Descrizione dispositivo e sistema di fissaggio ............................................3 Distanza ........................................................5 Modalità operative ....................................................5 Priorità ........................................................6 Come abbinare un altro dispositivo Midland BTNEXT PRO ......................................6 Conference......................................................8 Talk 2 All - Abbinamento a dispositivi non Midland..........................................9 Utilizzo della funzionalita’ Radio FM ..............................................12 Utilizzo dell’ingresso audio a filo ................................................ -
Page 3: Principali Caratteristiche
3 grandi tasti posti sul frontale del dispositivo. Midland BTNEXT PRO TWIN Midland BT NEXT PRO si può fissare al casco in due modi: tramite basetta adesiva o tramite › 2 dispositivi di comunicazione Midland BTNEXT PRO l’aggancio a morsetto. -
Page 4: Ricarica Delle Batterie
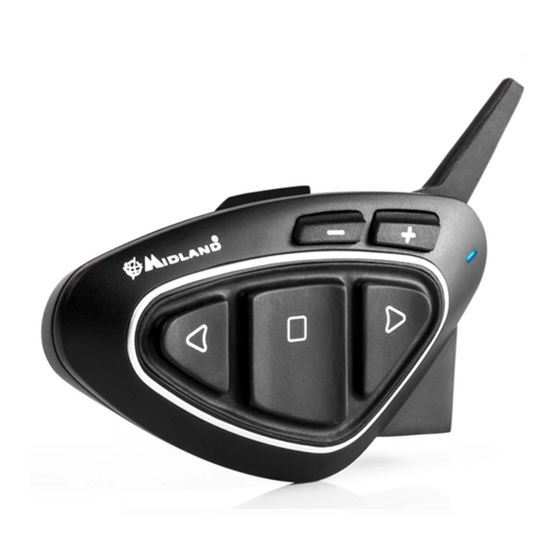
Descrizione Midland BTNEXT PRO Connessioni a filo: Il dispositivo Midland BTNEXT PRO è dotato di 5 pulsanti, tutti nella parte frontale. › Per sorgente audio stereo tipo iPod/MP3 player (cavo opzionale) I tre pulsanti principali sono pulsanti multifunzione: pulsante Avanti (a sinistra), pulsante Attenzione: Midland BTNEXT PRO è... - Page 5 Il microfono può essere fissato al casco in due modi, in base alla tipologia di microfono Descrizione sistema di fissaggio al casco scelta.: Il Midland BTNext PRO è fornito con due sistemi di fissaggio al casco, uno tramite base Microfono a braccetto con biadesivo e l’altro con aggancio a morsetto.
- Page 6 (cosa che potrebbe succedere, specialmente se si utilizzano i guanti). Modalità operative Midland BTNEXT PRO ha tre modalità di funzionamento distinte: Intercom, Telefono e Radio FM. In base alla modalità attiva in un dato momento, le funzioni del Midland BTNEXT PRO www.midlandeurope.com...
-
Page 7: Distanza
Se invece i dispositivi non fanno parte della stessa confezione o avete pulsante Centrale. Un annuncio vocale vi indicherà in quale modalità state entrando. La acquistato un altro Midland BTNEXT PRO in un secondo momento (per esempio per il sequenza con cui è possibile scorrere le 3 modalità è la seguente: passeggero), dovete prima eseguire la procedura di abbinamento. - Page 8 2 toni audio a conferma della disattivazione. Un Midland BT NEXT PRO può essere abbinato ad un massimo di 5 dispositivi, per un totale di 6 unità abbinate (3 dispositivi Midland + 2 Talk2All + voi).
- Page 9 Pilota 2 Attivazione vocale (VOX): 1. Attivate la modalità “Setup” (Spegnete il Midland BTNEXT PRO, Tenere premuto il pul- La funzionalità VOX per l’attivazione vocale dell’Intercom è attiva di default e può avve- sante “Centrale” fino a che la luce non rimane di colore rosso fisso) nire solo verso il dispositivo abbinato tramite il tasto “Centrale”.
- Page 10 Vol - . VOL-. Il vostro BTNext PRO può funzionare sia in modalità classica, con la comunicazione “uno Attenzione: in modalità “Conference” anche la funzione “Talk2All-Universal Intercom”, per ad uno”, oppure in modalità “conference” dove tutti parlano contemporaneamente.
- Page 11 Attivazione modalità Audio Privato: tenete premuto il tasto “Vol –“ per 3 sec., sentirete Si possono abbinare al massimo 2 dispositivi Intercom non Midland, uno sul tasto Avanti l’annuncio vocale “Private”. e l’altro sul pulsante Indietro.
-
Page 12: Priorità
, dipende dal modello del dispositivo non Midland). Attenzione: in questa configurazione il dispositivo non Midland non potrà utilizzare il te- lefono (essendo già stato abbinato il Midland BTNEXT PRO al posto del telefono stesso). E’ possibile abbinare anche un dispositivo Midland in modalità “Talk2ALL-Universal Intercom”... - Page 13 è stato completato con successo. corretta comprensione della comunicazione Intercom. É possibile modificare questa confi- 5. Il Midland BTNEXT PRO uscirà dalla modalità setup (luce rossa fissa) e passerà auto- gurazione tramite il software per PC BT Updater.
- Page 14 E’ infatti possibile utilizzare i pulsanti presenti sul Midland BTNEXT PRO per gestire le seguenti funzioni: Play, Stop/Pause, Avanti ed In- vamente il tasto “Indietro”. Mentre la condivsione della musica è attiva non è possibile mantenere la comunicazione Intercom attiva.
- Page 15 Il GPS può essere abbinato tramite il pulsante “Volume+” oppure “Volume-“. 4. Il Midland BTNEXT PRO uscirà dalla modalità setup (luce rossa fissa) e passerà auto- maticamente allo stato di funzionalità normale (luce blu lampeggiante). Ora il GPS è...
- Page 16 Utilizzo dell’ingresso audio a filo la vostra selezione. Il dispositivo rimane nell’ultimo stato selezionato e per BTNEXT PRO ha un ingresso audio per collegare una sorgente audio a filo, per esempio accendere di nuovo la luce di emergenza dovete premere contemporanea- un iPod o un qualsiasi MP3 player.
- Page 17 Fate doppio click sul tasto “Centrale” per uscire dalla modalità Set-Up. 5. Premete brevemente il pulsante “Indietro”, la luce Blu lampeggerà diverse volte in Da questo momento il Midland BTNEXT PRO non avrà più nessun dispositivo Bluetooth base alla configurazione della sensibilità in quel momento attiva: in memoria e potrete procedere ad una nuova sessione di accoppiamento (pairing).
- Page 18 Agli utenti non è permesso effettuare variazioni o modifiche di qualsiasi tipo all’appa- recchio. Queste ultime, se non espressamente approvate dal produttore, annullano la Midland BTNEXT PRO può essere configurato e aggiornato tramite connessione USB possibilità di utilizzo dell’apparecchio ed invalidano la garanzia.
- Page 19 www.midlandeurope.com...
-
Page 20: Conference
Technical specifications of Midland Midland BTNEXT PRO ......................................21 Charging batteries ....................................................22 Unit and fixing system description ..............................................22 Switching ON and OFF your Midland BTNEXT PRO ........................................24 How to pair two Midland BTNEXT PRO units ..........................................25 Set up of the AGC system .................................................. 26 Conference mode with one Bluetooth device on “VOL-”... -
Page 21: Main Features
› 2 Slide-in mounting kit with two stereo speakers the front of the unit. Midland BTNEXT PRO is fixed on the helmet using the adhesive plate › 2 microphones with boom and 2 wired microphones or the screw mounting clamp. -
Page 22: Charging Batteries
BTNEXT PRO description Fixing the stereo speakers The BTNEXT PRO has five buttons on the front; the main three big button are multi functions buttons: the Forward (on the left), the middle button and the Backward (on The two stereo speakers have a Velcro/adhesive strip that aids their fixing into your hel- the right), the two squared buttons are the Volume + and Volume -. - Page 23 By either using the plate with bi-adhesive strip, or the screw plate. These methods allow you to safely “fix” the BTNext PRO unit onto your helmet Place the section with the Velcro/adhesive strip between the padding and the rigid cover and to remove it at any time in order to recharge or store it.
- Page 24 Fitting and removing your Midland BTNEXT PRO The BTNEXT PRO can be easily fitted onto the helmet by sliding it downwards on the sliding mounting kit. BTNEXT PRO is maintained in position thanks to the fixing clip located on the upper section (A).
- Page 25 To pair the Midland BTNEXT PRO to another Midland BTNEXT PRO unit The 3 multi function buttons can have different functionality depending on which mode To pair the Midland BTNEXT PRO to another Midland BTNEXT PRO unit, you must first the unit is at that moment.
- Page 26 40 seconds. If needed you can close the intercom manually without waiting The Midland BTNEXT PRO has three main buttons (Forward, Middle and Rear). It is up to 40 seconds (just press the middle button). you which button to use to pair and activate the intercom, you are totally free to choose the If needed, you can disable the VOX feature simply by pressing the Backward button for button you like more.
- Page 27 VOL-, up to 8 people (4 couples). You can decide To use the intercom feature, be sure that all the units are turned on and correctly paired to use the BTNext Pro in “one to one” communication up to 6 people (“classic” Intercom together.
- Page 28 The first and the last unit must not be paired together (the chain must stay open). without “brake” the Conference connection chain. The unit number 1 can talk to the last unit (number 4) only “through” the unit number 2 and number 3. That means to have the conference with four people, all the unit must The audio from the VOL- button connection can be “Private”...
- Page 29 How to pair an Intercom device on the “VOL-” button: › On the BTNext Pro go in “Setup mode”, press the “VOL-” button for 3 sec. The Blue and Red Led lights will start flashing › On the other device, follow the procedure to pair as an Universal Intercom How to open the Conference for the “VOL-”...
- Page 30 How to pair the Midland BTNEXT PRO to a Phone To pair the Midland BTNEXT PRO to a Phone, you must first enter the setup mode: 1. Turn off the unit When a device is paired to the “Vol +” or “Vol –“ buttons the “Phone” mode is activated.
- Page 31 After pairing your phone to the Midland BTNEXT PRO unit you must switch to the “Pho- Phone on Vol-: Briefly press“Backward”button. If your mobile phone supports voice calls, ne”...
- Page 32 How to pair the Midland BTNEXT PRO to a GPS when another audio communication comes in. In general it is possible to pair the Midland BTNEXT PRO to all the GPS for motorbike that To chanage the priority behaviour you can use the ”BT UPDATER” Pc Software or the support Bluetooth headset connection.
- Page 33 › Double click on the “Middle” button to exit the “Setup” mode and use the Midland BT- › Now press firmly (3 sec) the “Vol +” or “Vol -” button, the Blue and Red light will flash.
- Page 34 Wired audio input “Intercom” mode (a voice announcement will confirm the status). Your Midland BTNEXT PRO can be connected to a wired audio source, like an iPod (or The unit will remember the last setting used, that mean you need any other MP3 Player).
- Page 35 Setting mode by double clicking the “Middle” button. Once the red light manently. turns off, the blue led starts blinking. Now you can use your Midland BTNEXT PRO › Then simultaneously press and hold down all the three buttons “Forward”-“Midd- Disabling the VOX feature (Intercom and telephone) le”-“Backward”...
- Page 36 European CE Notice Certification and Safety Approval Information It is possible to configure and update the firmware of your Midland BTNEXT PRO using the USB connection to your PC. On the Midland web site www.midlandeurope.com in This product is CE marked according to the RTTE Directive 99/5/EC...
- Page 37 www.midlandeurope.com...
- Page 38 www.midlandeurope.com...
- Page 39 RTTE CTE INTERNATIONAL Srl verklaart dat het product overeenstemt met de voorschriften en andere bepal- I / RSM ingen van de richtlijn 1999/5/EC (uit 13/06/2017, richtlijn 2014/53/UE). De conformiteitsverklaring is Cte International Srl dichiara che il prodotto è conforme ai requisiti essenziali e alle disposizioni della Direttiva voorhanden op de website http://www.midlandeurope.com/it/pagina/10090-certifications 1999/5/CE (dal 13/06/2017 alla Direttiva 2014/53/UE).
- Page 40 CTE International patvirtina, kad šis modelis atitinka visus esminius Direktyvos 1999/5/EC bei su ja susijusių dokumentų reikalavinus (IŠ 13.06.2017, Direktyva 2014/53 / UE). Atitikties deklaracija yra pateikiama http://www.midlandeurope.com/it/pagina/10090-certifications internetinėje svetainėje CTE INTERNATIONAL Srl deklarē, ka produkts atbilst pamatprasībām un citiem ar to saistītajiem Direktīvas 1999/5/EK noteikumiem (NO 13.06.2017, Direktīvu 2014/53 / UE).
- Page 41 F / LUX / CH I / RSM Important: l’appareil doit être utilisé à une Importante: O equipamento tem de ser Importante: L’apparato deve essere distance supérieure à 5cm du corps. usado a uma distância do corpo superior utilizzato ad una distanza superiore a 5 a 5cm.
- Page 42 • INFORMAZIONE AGLI UTENTI: i sensi dell’art. 13 del decreto legislativo 25 luglio • Alle Artikel, die auf der Verpackung oder der Gebrauchanweisung dieses Symbol tragen, dürfen nicht in den normalen Mülltonnen entsorgt werden, sondern müssen an gesonder- 2005, n.151 “Attuazione delle Direttive 2002/95/CE, 2002/96/CE e 2003/108/CE, ten Sammelstellen abgegeben werden.
- Page 43 Prodotto o importato da: CTE INTERNATIONAL srl Via. R.Sevardi 7 42124 Reggio Emilia - Italia. Prima dell’uso leggere attentamente le istruzioni. Produced or imported by: CTE INTERNATIONAL srl Via. R.Sevardi 7 42124 Reggio Emilia - Italy. Read the instructions carefully before installation and use. Vertrieb durch: ALAN ELECTRONICS GmbH Daimlerstraße 1K - D-63303 Dreieich Deutschland.
- Page 44 www.midlandeurope.com...