Table of Contents
Advertisement
Quick Links
Advertisement
Table of Contents

Related Manuals for Midea MPPD30C


Summary of Contents for Midea MPPD30C
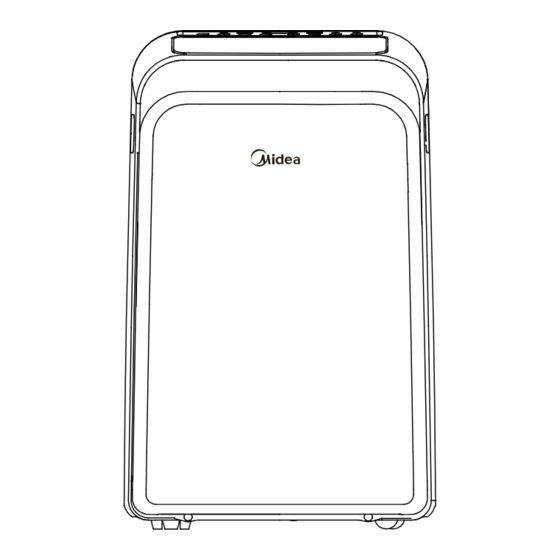
- Page 1 PORTABLE AIR CONDITIONER(Local Air Conditioner) Owner’s Manual Installation Manual MPPD25C IMPORTANT NOTE: MPPD30C Read this manual carefully before installing MPPD33C or operating your new air conditioning MPPD35C unit. Make sure to save this manual for future reference.
-
Page 2: Table Of Contents
Table of Contents Safety Precautions Safety Precautions ........................Installation Instructions Preparation..........................Design Notice..........................Ambient Temperature Range For Unit Operating................ Exhaust Hose Installation......................Choosing The Right Location...................... Energy Rating Information ......................Tools Needed..........................Accessories..........................Window Installation Kit....................... Installation..........................Operating Instructions Control Panel Features....................... -
Page 3: Safety Precautions
Safety Precautions Read Safety Precautions Before Operation and Installation To prevent death or injury to the user or other people and property damage, the following instructions must be followed. Incorrect operation due to ignoring of instructions may cause death, harm or damage. CAUTION WARNING This symbol indicates the possibility of... - Page 4 In a thunderstorm, the power must be cut off to avoid damage to the machine due to lightning. • Your air conditioner should be used in such a way that it is protected from moisture. • e.g. condensation, splashed water, etc. Do not place or store your air conditioner where it can fall or be pulled into water or any other liquid.
- Page 5 • Do not use hazardous chemicals to clean or come into contact with the unit. Do not use the unit in the presence of inflammable substances or vapour such as alcohol, insecticides, petrol,etc. • Always transport your air conditioner in a vertical position and stand on a stable, level surface during use.
- Page 6 For R290(Not applicable for North America) amount of refrigerant (kg) Min. room area(m²) amount of refrigerant (kg) Min. room area(m²) ≥ ≥ < 0.0836 and 0.1045 < 0.2090 and 0.2299 ≥ ≥ 0.1045 and 0.1254 < < 0.2299 and 0.2508 ≥...
- Page 7 Caution: Risk of fire/ flammable materials (Required for R32/R290 units only) Explanation of symbols displayed on the unit(For the unit adopts R32/R290 Refrigerant only): This symbol shows that this appliance used a flammable refrigerant. If the refrigerant WARNING is leaked and exposed to an external ignition source, there is a risk of fire. CAUTION This symbol shows that the operation manual should be read carefully.
- Page 8 The area shall be checked with an appropriate refrigerant detector prior to and during work, to ensure the technician is aware of potentially flammable atmospheres. Ensure that the leak detection equipment being used is suitable for use with flammable refrigerants, i.e. non-sparking, adequately sealed or intrinsically safe.
- Page 9 being worked upon prior to any removal of sealed covers, etc. If it is absolutely necessary to have an electrical supply to equipment during servicing, then a permanently operating form of leak detection shall be located at the most critical point to warn of a potentially hazardous situation. 2)Particular attention shall be paid to the following to ensure that by working on electrical components, the casing is not altered in such a way that the level of protection is affected.
- Page 10 oxygen shall not be used for this task. Flushing shall be achieved by breaking the vacuum in the system with OFN and continuing to fill until the working pressure is achieved, then venting to atmosphere, and finally pulling down to a vacuum. This process shall be repeated until no refrigerant is within the system. When the final OFN charge is used, the system shall be vented down to atmospheric pressure to enable work to take place.
-
Page 11: Installation Instructions
recovery occurs. The recovery equipment shall be in good working order with a set of instructions concerning the equipment that is at hand and shall be suitable for the recovery of flammable refrigerants. In addition, a set of calibrated weighing scales shall be available and in good working order. Hoses shall be complete with leak-free disconnect couplings and in good condition. -
Page 12: Ambient Temperature Range For Unit Operating
Ambient Temperature Range For Unit Operating MODE Temperature Range MODE Temperature Range Cool 17-35°C (62-95°F) Heat(pump heat mode) 5-30°C (41-86°F) ≥ 13-35°C (55-95°F) Heat(electrical heat mode) 30°C (86°F) Exhaust Hose Installation The exhaust hose and adaptor must be installed or removed in accordance with the usage mode. For COOL,HEAT(heat pump type) or AUTO mode must be installed exhaust hose. -
Page 13: Tools Needed
What should I look for first when purchasing a portable air conditioner? The right air conditioner helps you cool a room efficiently. An undersized unit won't cool adequately while one that's too large will not remove enough humidity, leaving the air feeling damp. To find the proper air conditioner, determine the square footage of the room you want to cool by multiplying the room length by its width. -
Page 14: Window Installation Kit
Other Regions Qty. Qty. Shape Shape Name of Accessories Name of Accessories Unit Adaptor 1 pc Security Bracket and 2 Screws 1 set(*) Exhaust Hose 1 pc Drain Hose 1 pc Window Slider Adaptor 1 pc(*) Power Cord Buckle 1 pc Window Slider A 1 pc(*) Bolt... - Page 15 Step Two: Install the Exhaust hose assembly to Hook Hole Seat the unit Insert unit adaptor of the Exhaust hose assembly into the lower groove of the air outlet of the unit while the hook of the adaptor is aligned with the hole seat of the air outlet and slide down the Make sure the adaptor Lower groove...
-
Page 16: Installation
Installation NOTE: Once the Exhaust Hose assembly and Adjustable Window Slider are prepared, choose from one of the following two installation methods. Type 1: Hung Window or Sliding Window Installation(For some models) Foam seal B Foam seal B (Adhesive type-shorter) (Adhesive type-shorter) Foam seal A (Adhesive type) - Page 17 M ODEL A M ODEL B 5. Insert the window slider adaptor into the hole of the window slider. Type 2: Wall Installation(For some models) 1. Cut a 125mm (4.9inch) hole into the wall for the Wall Exhaust Adaptor B. 2.
-
Page 18: Operating Instructions
Operating Instructions Control Panel Features NOTE: The following control panels are for explanation purpose only. The control panel of the unit you purchased may be slightly different according to the models. Your machine may not contain some indicators or buttons. The actual shape shall prevail. Press 3s CONSTANT FAN(Press 3s) CONSTANT FAN(Press 3s) -
Page 19: Operation Instructions
and the LED DISPLAY shows 'OF' for 3 seconds, ION/Fresh feature(on some models) press SWING and UP(+) buttons at the same Press FAN button for 3 seconds to initiate ION/FRESH time to turn on Wireless function and the LED feature and the ION/FRESH light illumiantes(if applicable), DISPLAY shows 'On' for 3 seconds. -
Page 20: Other Features
Note: For some models, the fan speed can not be initiate the Auto-off stop program, the TIMER OFF adjusted under HEAT mode. indicator light illuminates. Press the UP or down button to select the desired time. Press the TIMER button again within 5 seconds, the Auto-on start DRY operation program is initiated. - Page 21 AIR FLOW DIRECTION ADJUSTMENT that there are no kinks that will stop the warter flowing. The louver can be adjusted automatically. Adjust the Place the end of the hose into the drain and make sure air flow direction automatically: the end of the hose is down to let the water flow ·...
-
Page 22: Maintenance
Maintenance Safety Precautions · Always unplug the unit before cleaning or servicing. · DO NOT use flammable liquids or chemicals to clean the unit. · DO NOT wash the unit under running water. Doing so causes electrical danger. · DO NOT operate the machine if the power supply was damaged during cleaning. A damaged power cord must be replaced with a new cord from the manufacturer. -
Page 23: Troubleshooting Tips
Troubleshooting Tips Problem Possible Causes Solution The Water Collection Tray is full. Turn off the P1 Protection Code unit, drain the water from the Water Collection Tray and restart the unit. Unit does not turn on when pressing In COOL mode: room ON/OFF button temperature is lower than Reset the temperature... - Page 24 The design and specifications are subject to change without prior notice for product improvement. Consult with the sales agency or manufacturer for details. Any updates to the manual will be uploaded to the service website, please check for the latest version. CP001UI-PDTY 16120600001270 20201020...