Table of Contents
Advertisement
Quick Links
ASSEMBLY & OPERATING INSTRUCTIONS
Model: 720-0744B
FOR PROPANE GAS USE ONLY
FOR OUTDOOR USE ONLY
Version No.
19000364A1
This instructions manual contains important information necessary for the proper assembly and safe use of the appliance.
Read and follow all warnings and instructions before assembling and using the appliance
Follow all warnings and instructions when using the appliance
Keep this manual for future reference
Nexgrill Industries, INC.
5270 Edison Ave. Chino, CA 91710
www.nexgrill.com
Advertisement
Table of Contents

Related Manuals for Nexgrill 720-0744B


Summary of Contents for Nexgrill 720-0744B
- Page 1 ASSEMBLY & OPERATING INSTRUCTIONS Model: 720-0744B FOR PROPANE GAS USE ONLY FOR OUTDOOR USE ONLY Version No. 19000364A1 This instructions manual contains important information necessary for the proper assembly and safe use of the appliance. Read and follow all warnings and instructions before assembling and using the appliance...
-
Page 2: Table Of Contents
Table of Contents Safety Instruction ..... 2-6 Operating Instruction ....Exploded View. -
Page 3: Safety Instruction
Safety Instruction continued WARNING CAUTION: Beware of Flashback CAUTION: Spiders and small insects occasionally Do not try lighting this appliance without reading the spin webs or make nest in the grill “LIGHTING INSTRUCTIONS” section of this manual. burner tubes during transit and warehousing. - Page 4 Safety Instruction continued LP-Gas Supply System PROPER PLACEMENT AND CLEARANCE OF If the information is not followed exactly, a fire resulting in death or GRILL serious injury could occur. A 20lb tank of approximately 12 inches in diameter by 18-1/4 inches •Never use your gas grill in a garage, porch, shed, high is the maximum size LP gas tank to use.
- Page 5 Safety Instruction continued SAFETY PRACTICES TO AVOID PERSONAL WARNING INJURY Your grill will get very hot. Never lean over the cooking area while using your grill. Do not touch When properly cared for, your grill will provide safe, cooking surfaces, grill housing, lid or any other grill reliable service for many years.
- Page 6 Safety Instruction continued Do not use the grill to cook excessively fatty meats or Do not heat unopened food containers. A build-up of other products which promote flare – ups. pressure may cause the containers to burst. Do not operate the grill under unprotected combustible Use a covered hand when opening the grill lid.
-
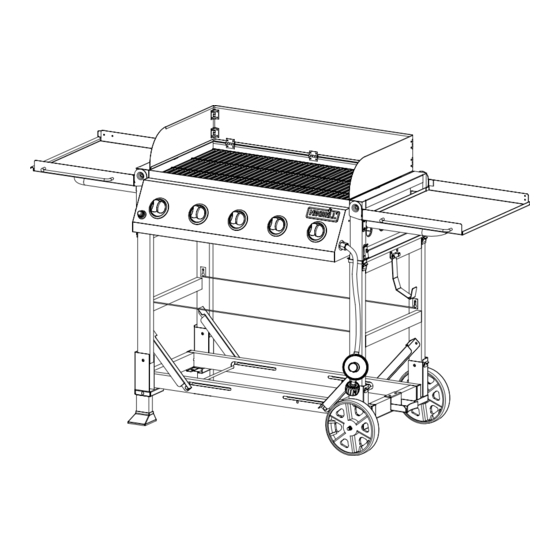
Page 7: Exploded View
Model 720-0744B Parts diagram Exploded View... -
Page 8: Part List
Part List Quanti Part # Part (Description) Quantity Part # Part (Description) Side shelf, left Firebox support, right Side shelf handle Rubber stopper Side shelf buffer Greasy cup holder Side shelf support Greasy cup Wind shield Main manifold Cooking grid LP regulator Flame tamer Cart leg assembly, left... -
Page 9: Package Content List
Package Content List A. Firebox --------1pc. B. Cart assembly-----1pc. C. Gas tank Support---1pc. D. Gas Tank Barrier Bar -----2pcs. E. Wheel----2pcs F. Wheel Axle- ------1pc. G. Side shelf support-------2pcs. H. Insert Glides-----2pcs I. Rubber stopper--------2pcs J. Greasy cup holder-----------2pcs. K. Greasy cup----------2pcs. L. -
Page 10: Assembly Instruction
Assembly Instruction UNPACKING 8. Attach the Insert Glides (H) using six 1/4" * 15 mm CAUTION: Obtain the aid of an assistant when handling screws (AA) and lock washer (EE), 3 for each foot. large or heavy grill components. Tighten the six screws, Showed as below figure. 1. - Page 11 Assembly Instruction 10. Unfold the cart and secure the legs by locking the 12. With the help of an assistant, align the grill legs in place. To attach the two Gas tank barrier bars body to the cart as shown below, then lock the four (D) , there are four stage screws pre-attached on the latches, securing the grill to the cart.
- Page 12 Assembly Instruction continued 14. Unfold left & right side shelf and wind shield 17. To install the battery, turn the ignition button cap and place the tabs of the side wind shields into counterclockwise and remove it. Insert the battery into the small openings securing the windshield.
-
Page 13: Gas Hook -Up
Gas Hook - Up NEVER CONNECT AN UNREGULATED GAS SUPPLY 2. Check tank valve to assure it has proper external LINE TO THE APPLIANCE. USE THE male threads (type 1 connection per ANSIZ21.58) REGULATOR/HOSE ASSEMBLY SUPPLIED. This is a liquid propane configured grill. Do not attempt to use a natural gas supply unless the grill has been reconfigured for natural gas use. -
Page 14: Installer Final Check List
Installer Final Check List Specified clearance maintained 24”(61cm) from PROPANE CYLINDER CAUTIONS combustibles. a) Do Not store a spare LP-gas cylinder under or All internal packaging removed. near this appliance. Knobs turn freely. b) NEVER fill the cylinder beyond 80 percent full. Burners are tight and sitting properly on orifices. -
Page 15: Leak Testing
Leak Testing continued CAUTIONS Place dust cap on cylinder valve outlet when the cylinder is not in use. Only install the type of dust cap on the cylinder valve outlet that is provided with the cylinder valve. Other types of caps or plugs may result in leakage of propane. The gas must be turned off at the supply cylinder when the unit is not in use. - Page 16 Operating Instruction USING THE GRILL NOTE: This grill is designed to grill efficiently without the use of lava rocks or briquettes of any kind. Heat is Grilling requires high heat for searing and proper radiated by the flame tamers positioned above each browning.
- Page 17 Grill Lighting Instruction continued FLAME CHARACTERISTICS Check for proper burner flame characteristics. Burner flames should be blue and stable with no yellow tips, excessive noise, or lifting. If any of these conditions exist call our customer service line. If the flame is yellow, it indicates insufficient air. If the flame is noisy and tends to lift away from the burner, it indicates to much air.
-
Page 18: Trouble Shooting
Trouble Shooting SPIDER AND INSECT WARNING COOKING TEMPERATURES High setting-Use this setting for fast warm-up, for searing Checking and cleaning burner/ venturi tubes for steaks and chops, and grilling. insects and insect nests. A clogged tube can lead to a fire beneath the grill. - Page 19 Trouble Shooting continued PROBLEM SOLUTION When attempting to light my grill, it will not light • Make sure you have a spark while you are trying to light immediately. the burner (if no spark) • Ensure that the wire is connected to the electrode assembly.
-
Page 20: Ordering Parts
To obtain replacement parts, contact the dealer from grill dealer before making the conversion. which products was purchased. If dealer service is not available, contact: Nexgrill Industries, Inc. Different orifices must be installed when converting customer service 1-800-913-8999 in US & 1-800-648- from one type of gas to another. -
Page 21: Grill Recipe Suggestion
Grill Recipe Suggestion BBQ the chops brushing with the BBQ SALMON TANGY SEAFOOD KABOBS marinade occasionally. Serve with 1 lb. Large shrimp, shelled & 2 large salmon steaks mixed salad, dressed with deveined 2 tbs. Oil vinaigrette flavored with fresh dill. ¾... - Page 22 Grill Recipe Suggestion continued Preheat grill. Combine cheese, Pound flank steak to ¼ inch In blender, process 1/3 c. water, condensed soup, milk, BBQ sauce, thickness or flatten chicken breasts. onion, soy sauce, 2 tsp. oil and the oregano, salt and pepper in a large Mix oil, lime juice and seasonings next 8 ingredients until smooth.
- Page 23 Grill Recipe Suggestion continued CHICKEN TANDOORI STYLE Marinade ribs for 3 hours. Use TURKEY marinade for basting by adding 8 large chicken thighs or 12 lb. turkey drumsticks beer to it. Place pan under the ribs Beer basting sauce: and baste frequently. To cook ribs 1 c.
-
Page 24: Limited Warranty
Limited Warranty 720-0744B) 5270 Edison Avenue., Chino, CA 91710 1-800-913-8999 in US 1-800-648-5864 in Canada...