Table of Contents
Advertisement
ASSEMBLY
& OPERATING
INSTRUCTIONS
Charcoal - Gas Combo Grill
• Parts
• Assembly
• Safety Rules
• Use and Care
Version No. 19000370A0
WARNING"
his Owner's rnanual carefully and be
sure your gas grill is properly assembled,
installed and maintained. Failure to follow these
instructions could result in serious injury and/or
property damage. This gas grill is intended for
outdoor use only and is not intended to be
installed in or on recreational vehicles or boats.
• Troubleshooting
Note to Consumer
Leave this Owner's Manual in a convenient
place for future reference.
Customer Service Helpline:
For parts ordering, call:
1-800-913-8999 in USA and 1-800-648-5864 in
Canada
Note to Installer
Leave this Owner's Manual with the customer
after delivery and/or installation.
MFG No.: 720-0718B
Please make sure the cylinder valve
connection device shall properly and safely
mate with the connection device attached to
the inlet of the pressure regulator.
Nexgrill Industries, INC.
5270 Edison Ave. Chino, CA 91710
www.nexgrill.com
Advertisement
Table of Contents

Related Manuals for Nexgrill 720-0718B


Summary of Contents for Nexgrill 720-0718B
- Page 1 1-800-913-8999 in USA and 1-800-648-5864 in installed in or on recreational vehicles or boats. Canada Note to Installer MFG No.: 720-0718B Leave this Owner's Manual with the customer after delivery and/or installation. Please make sure the cylinder valve connection device shall properly and safely mate with the connection device attached to the inlet of the pressure regulator.
- Page 2 Failure to comply with these instructions result in serious bodily injury. One-Year Full Warranty on Nexgrill Grill If this grill fails due to a defecting material or WARNING workmanship within one year from the date of 1.
- Page 3 Atankofapproximately 12inches in diameter by 18- • Have your LP gas tank filled by a reputable 1/2inches highis themaximum sizeLPgastankto propane gas dealer and visually inspected and re- use.You mustuseanOPDgastankwhich offers qualified at each filling. an Overfill Prevention Device. • Do not store a spare LP gas tank under or This safety feature prevents the tank from being •...
- Page 4 WARNING A strong gas smell, or the hissing sound of gas indicates a serious problem with your gas grill or the LP gas tank. Failure to immediately follow the steps listed below could result in a fire or explosion that could cause serious bodily injury, death, or property damage.
-
Page 6: Table Of Contents
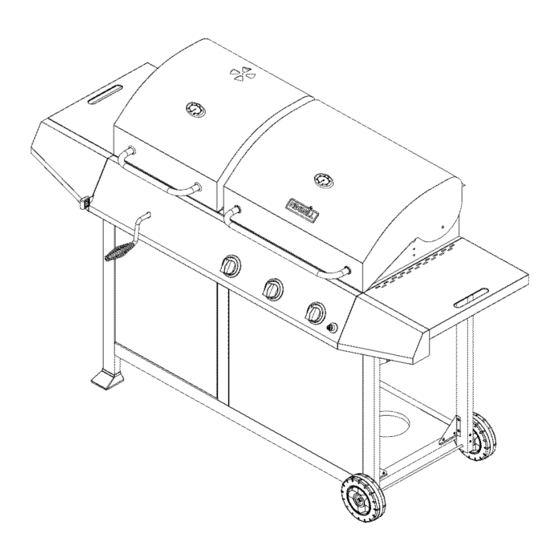
4. Part Description Canada 5. Quantity of parts needed To make sure you obtain the correct replacement parts for your Nexgrill gas grill, please refer to the part numbers on this page. Important: Keep this Use & Care Guide for... -
Page 7: Cart Brace
A. Firebox ..1pc. B. Cart Leg, Front Left ..1pc. C. Cart Leg, Back Left ..1pc. D. Cart Brace, Left ..1pc. E. Cart Leg, Front Right ..1pc. F. Cart Leg, Back Right ..1pc. G. Cart Brace, Right ..1pc. H. -
Page 8: Flame Tamer
S. Crank Handle---lpc T. Cart Beam, Back ..1pc. U. Gas Tank Barrier Bar A--1pc. b'b." V. Gas Tank Barrier Bar B --1pc. W. Gas Tank Barrier Bar C --1pc. X. Side Shelf, left ..1 pc. Y. Side Shelf, right ..1pc. Z. - Page 9 Pack Description Required for assembly (pcs) 5/32-in. x 10-mm Round Head Screw 5/32-in. Lock Washer 1/4-in. x 15-mm Round Head Screw 1/4-in. Lock Washer Allen Key 1/4-in. Antiskid Nut 1/4-in. Flat Washer 1/4-in. x 61-mm Round Head Screw 1/4-in. Hexagonal Nut l/4-in.x 12-mm Round Head Screw _!i-!
- Page 10 Screws and washers UNPACKING shown here are CAUTION: Obtain the aid of an assistant when handling behind of D large or heavy grill components. 1. Once the top of shipping box is open, obtain the aid of an assistant. 2. Remove all packing materials from around grill exterior. 3.
- Page 11 3. Triangle Bracket Assembly Fig.5 a). Use 4 AA Round Head Screws and 4 BB Lock Washers to connect one Triangle Bracket (M) to Cart Leg, Back Right (F) and Bottom Panel (J). Use same hardware quantities to connect one Triangle Bracket (N) to Cart Leg, Front Right (E) and Bottom Panel (J).
- Page 12 6. Gas Tank Barrier Bar Assembly Fig.9 a). Use 2 AA Round Head Screws and 2 BB Lock Washers to secure Gas Tank Barrier Bar A (U) to Front Trim Panel (Q) and to Bottom Panel (J). See Fig. 9. b).
- Page 13 b). Use 4 CC Round Head Screws and 4 DD Lock Washers Fig.14 to securely attach Firebox to Cart Brace, Left (D) and Cart Brace, Right (G). See Fig. 14. c). Insert Crank Handle (S) through hole in Firebox control panel and screw it into threaded socket for raising Charcoal Tray.
- Page 14 12. Installing Cooking Components Fig. 19 IMPORTANT: Before cooking on your grill the first time, wash cooking grids and cooking rack with warm, soapy water. Rinse and dry thoroughly. Season with cooking oil regularly. After cooking is completed, turn grill to HIGH setting for 3 to 5 minutes to burn off excess grease or food residue.
-
Page 15: Control Knob
Checking for LP gas leaks Never test for leaks with a flame. Prior to first use, at Grill Lighting Instructions for Main Burners the beginning of each season, or every time your LP 1. Do not smoke while lighting grill or checking gas gas tank is changed, you must check for gas leaks. - Page 16 • Put out any flame with a proper fire extinguisher. To make sure you obtain the correct replacement parts • Open grill lid. for your Nexgrill gas grill, please refer to the part • Once the grill has cooled down, clean the burner numbers on this page.
- Page 17 Cleaning Exterior Stainless Steel Surfaces To ensure a proper working unit the following proper care and maintenance is suggested. Weathering and extreme heat can cause exterior stainless steel surfaces to turn tan in color. Machine Cleaning Cooking Grids oils used in manufacturing process of stainless steel We suggest you wash your cooking grids in a mild soap can also cause this tanning color.
- Page 18 3. Inspect each burner for damage (cracks or holes) Regardless of which burner cleaning procedure you and if such damage is found, order and install a new use, we recommend you also complete the following burner. After installation check to ensure that gas steps to help prolong burner life.
- Page 19 Dispose of cold ashes by wrapping them in a heavy-duty aluminum foil and placing in a noncombustible container. Make sure that WARNING there are no other combustible materials in or near the container. Do not burn more than 51bs of charcoal in this unit at If you must dispose of ashes in less time then it one time.
-
Page 20: Temperature Gauge
Cooking Temperatures 1. Open grill lid, as well as damper vents on side of grill. High setting: Only use this setting for fast 2. Raise the hinged section of Charcoal Grid to add warm-up,searing steaks or chops and for burning charcoal to the Charcoal Tray. - Page 21 Warning: To ensure that it is safe to eat, food must be cooked to the minimum internal temperatures listed in the table below. Food Temperature Beef, veal and lamb (pieces and whole cuts) - medium-rare 63 ° C (145 ° F) Beef, veal and lamb...