Table of Contents
Advertisement
Available languages
Available languages
Quick Links
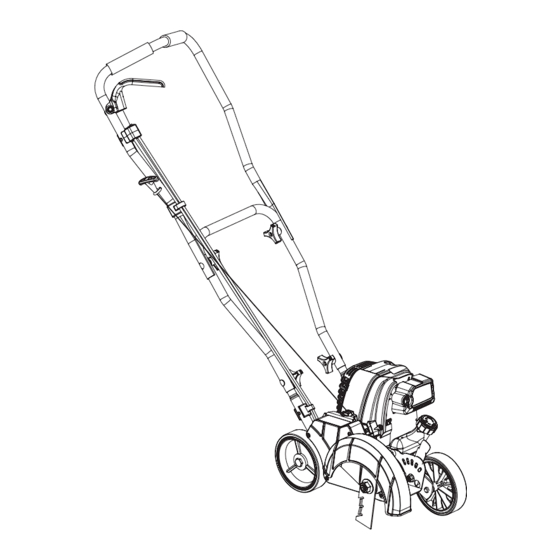
Operator's Manual
4-Cycle
Lawn Edger
Model No. 316.773800
CAUTION: Before using this
product, read this manual and
follow all safety rules and
operating instructions.
Sears Brands Management Corporation, Hoffman Estates, IL 60179 U.S.A.
P/N 769-06327 P00
®
Visit our website: www.craftsman.com
• SAFETY
• ASSEMBLY
• OPERATION
• MAINTENANCE
• PARTS LIST
• ESPAÑOL, P. 13
09/10
Advertisement
Table of Contents

Related Manuals for Craftsman 316.773800


Summary of Contents for Craftsman 316.773800
- Page 1 Operator’s Manual ® 4-Cycle Lawn Edger Model No. 316.773800 • SAFETY • ASSEMBLY • OPERATION • MAINTENANCE • PARTS LIST • ESPAÑOL, P. 13 CAUTION: Before using this product, read this manual and follow all safety rules and operating instructions.
-
Page 2: Table Of Contents
RULES FOR SAFE OPERATION CALIFORNIA PROPOSITION 65 WARNING The purpose of safety symbols is to attract your attention to possible dangers. The safety symbols, and their explanations, deserve your careful attention and understanding. The safety warnings do not by themselves eliminate any danger. WARNING The instructions or warnings they give are not substitutes for proper accident prevention measures. - Page 3 RULES FOR SAFE OPERATION • If striking or becomes entangled with a foreign object, stop the engine WHILE OPERATING immediately and check for damage. Do not operate before repairing damage. • Wear safety glasses or goggles that are marked as meeting ANSI Z87.1-1989 Do not operate the unit with loose or damaged parts.
-
Page 4: Warranty
FOR 2 YEARS from the date of purchase, this product is warranted against any defects in material or workmanship. Defective product will receive free repair or free replacement if repair is unavailable. For warranty coverage details to obtain repair or replacement, visit the web site: www.craftsman.com This warranty covers ONLY defects in material and workmanship. Warranty coverage does NOT include: •... -
Page 5: Oil And Fuel Information
ASSEMBLY INSTRUCTIONS OIL AND FUEL INFORMATION Check oil before each use and Align the holes on the upper Upper Shaft shaft with the holes toward change as needed. Refer to the upper end of the middle Checking the Oil Level. shaft (Fig. -
Page 6: Starting/Stopping Instructions
STARTING/STOPPING INSTRUCTIONS STARTING/STOPPING INSTRUCTIONS IF USING THE OPTIONAL PLUG-IN POWER START OR POWER BIT WARNING: Operate this unit only in a well-ventilated outdoor area. START ACCESSORY Carbon monoxide exhaust fumes can be lethal in a confined area. HOW TO START THE UNIT USING THE PLUG-IN POWER START OR WARNING: Avoid accidental starting. -
Page 7: Maintenance And Repair Instructions
OPERATING INSTRUCTIONS MAINTENANCE AND REPAIR INSTRUCTIONS TIPS FOR BEST EDGING RESULTS CHECKING THE OIL LEVEL • After starting the engine, keep The importance of checking and maintaining the proper oil level in the Blade Edge the unit tilted back so the blade crankcase cannot be overemphasized. - Page 8 MAINTENANCE AND REPAIR INSTRUCTIONS AIR FILTER MAINTENANCE ROCKER ARM CLEARANCE Air Filter Cover Knob Air Filter This requires disassembly of the engine. If unsure or unqualified to perform this, Cleaning the Air Filter take the unit to a Sears or other qualified service dealer. Clean and re-oil the air filter per NOTE: Inspect the valve to rocker arm clearance with a feeler gauge per...
-
Page 9: Cleaning And Storage
Maintenance Schedule. please contact your local Craftsman retailer or call 1-800-4-MY-HOME® for Stop the engine and allow it to cool. Remove the six (6) screws on the back more information and purchasing. -
Page 10: Troubleshooting Chart
TROUBLESHOOTING PROBLEM SOLUTION ENGINE WILL NOT START Empty fuel tank Fill fuel tank with fuel Primer bulb wasn't pressed enough Press primer bulb fully and slowly 10 times Old fuel Drain gas tank and add fresh fuel Fouled spark plug Replace or clean the spark plug Cold weather start lever is in closed position Move cold weather start lever to open position... -
Page 11: Specifications
REPAIR PROTECTION AGREEMENTS Congratulations on making a smart purchase. Your new Craftsman® product is designed and manufactured for years of dependable operation. But like all products, it may require repair from time to time. That’s when having a Repair Protection Agreement can save you money and aggravation. - Page 12 NOTES...
- Page 13 • FUNCIONAMIENTO • MANTENIMIENTO • LISTADO DE PIEZAS PRECAUCION: Lea el manual del operador y siga todas las advertencias e instrucciones de seguridad. Sears Brands Management Corporation, Hoffman Estates, IL 60179 U.S.A. Visite nuestro sitio web: www.craftsman.com P/N 769-06327 P00 09/10...
- Page 14 NORMAS PARA UNA OPERACION SEGURA Toda la información, las ilustraciones y las especificaciones contenidas en este PROPOSICIÓN 65 DE CALIFORNIA manual se basan en la información más reciente disponible en el momento de impresión del manual. Nos reservamos el derecho de hacer cambios en ADVERTENCIA cualquier momento sin aviso previo.
- Page 15 NORMAS PARA UNA OPERACION SEGURA • Si golpea o se enreda con un objeto extraño, pare el motor inmediatamente y CUANDO ESTÉ OPERANDO verifique si ha habido algún daño. No lo opere antes de reparar el daño. No • Use gafas protectoras que cumplan con la norma Z87.1–1989 de ANSI y opere la unidad con piezas sueltas o dañadas.
- Page 16 Para conocer los detalles sobre la cobertura de la garantía para que sea reparado o reemplazado, visite el sitio web: www.craftsman.com Esta garantía cubre SOLAMENTE defectos en el material o mano de obra. La cobertura de la garantía NO incluye: •...
- Page 17 INSTRUCCIONES DE ENSAMBLE INFORMACION DEL ACEITE Y DEL COMBUSTIBLE Alinee los agujeros del eje Verifique el aceite antes de cada Eje superior superior con los agujeros que uso y cámbielo cuando sea están en el extremo superior necesario según se indica en la del eje central (Fig.
- Page 18 INSTRUCCIONES DE ARRANQUE Y APAGADO INSTRUCCIONES DE ARRANQUE Y APAGADO ADVERTENCIA: SI ESTÁ USANDO EL OPCIONAL ARRANCADOR DE POTENCIA Use esta unidad sólo en un área exterior bien ELECTRICO O EL ACCESORIO ARRANCADOR DE POTENCIA ventilada. Los gases de escape de monóxido de carbono pueden PARA TALADRO ACCESORIOS ser letales en un área cerrada.
- Page 19 INSTRUCCIONES DE OPERACION INSTRUCCIONES DE MANTENIMIENTO Y REPARACIÓN REEMPLAZO DE LA CUCHILLA CÓMO AJUSTAR LA Orificio del Apretar PROFUNDIDAD DE CORTE DEL husillo Palanca de Coloque la llave tipo “Allen” RECORTADOR DE BORDES ajuste de de 5/16” en el orificio del profundidad Aparte ligeramente la husillo (Fig.
- Page 20 INSTRUCCIONES DE MANTENIMIENTO Y REPARACIÓN CAMBIO DEL ACEITE Cambie el aceite per Programa de mantenimiento. Cambie el aceite mientras el motor aún está caliente. El aceite fluirá con libertad y llevará más impurezas. Retire el tapón de aceite. Vierta el aceite fuera del orificio de llenado de aceite en un recipiente inclinando la Fig.
- Page 21 INSTRUCCIONES DE MANTENIMIENTO Y REPARACIÓN HUELGO DEL BRAZO OSCILANTE CAMBIO DE LA BUJIA DE ENCENDIDO Esto requiere desarmar el motor. Si usted no está seguro o no se considera Use una bujía de encendido Champion ® #RDZ4H. La separación correcta calificado para realizar esto, lleve la unidad a Sears o a otro centro de es de 0,635 mm (0,025 pulgadas).
- Page 22 Si decide arrancar la unidad utilizando uno de estos sistemas de arranque o tiene alguna pregunta, comuníquese con el distribuidor Craftsman de su localidad o llame al 1-800-4-MY-HOME® para más información, así como la forma de comprarlo. También puede ir a www.craftsman.com.
- Page 23 RESOLUCION DE PROBLEMAS PROBLEMA SOLUCIÓN EL MOTOR NO ARRANCA El tanque de combustible está vacío Llene el tanque de combustible con el combustible La bombilla de cebado no fue oprimida lo suficiente Oprima la bombilla de cebado total de 10 veces El combustible es viejo o está...
- Page 24 CONVENIO DE PROTECCIÓN DE REPARACIÓN Felicidades por haber realizado una compra inteligente. Su nuevo producto Craftsman® está diseñado y fabricado para ofrecerle años de funcionamiento confiable. Pero como todos los productos, es posible que sea necesario repararlo de vez en cuando. Ahí es cuando tener un Convenio de Protección de Reparación puede ahorrarle dinero y problemas.
- Page 25 NOTES...
- Page 26 NOTES...
- Page 27 NOTES...
- Page 28 NOTES...
-
Page 29: Parts List
PARTS LIST REPLACEMENT PARTS - MODEL 316.773800 4-CYCLE LAWN EDGER Item Part No. Description Item Part No. Description 753-06134 Engine Cover Assembly (includes 2 & 3) 753-05366 Carburetor Gasket 753-04595 Cover Screw 753-06258 Carburetor w/Primer 753-05377 Starter Screw 791-181751 O-Ring... - Page 30 PARTS LIST REPLACEMENT PARTS - MODEL 316.773800 4-CYCLE LAWN EDGER 49 48...
- Page 31 PARTS LIST REPLACEMENT PARTS - MODEL 316.773800 4-CYCLE LAWN EDGER Item Part No. Description Item Part No. Description 753-06542 Upper Handle 753-06559 Screw 753-06543 Middle Handle 753-05540 Idler Pulley Assembly 753-06544 Handle Extension 753-05541 Shoulder Screw 791-182677 Handle Knob 753-05560...
- Page 32 Get it fixed, at your home or ours! Your Home For troubleshooting, product manuals and expert advice: www.managemylife.com For repair – in your home – of all major brand appliances, lawn and garden equipment, or heating and cooling systems, no matter who made it, no matter who sold it! For the replacement parts, accessories and owner’s manuals that you need to do-it-yourself.